
This guide summarizes the steps for rebuilding (reinstalling) a VPS from the client portal.
Overview #
- “Rebuild” = Reinstalls the VPS using the selected OS template.
- When executed, all data on the disk is deleted (cannot be restored).
Important: When you execute a rebuild, existing data on the server will be lost. If you have necessary data, be sure to back it up beforehand.
Pre-requisites (Important) #
Backup #
- If you have necessary data, be sure to back it up before rebuilding.
- If you do not have a backup option, contact support first.
Information Required for Rebuild #
- The OS you want to reinstall (e.g.: Ubuntu / Debian / Rocky / Alma / OpenSense, etc.)
- The login password to be configured after rebuild (root password)
Operating Steps #
1. Open the management screen for the target VPS #
- Log in to the client portal.
- From “Services” in the left menu, open the target VPS (e.g.: NVPS663) and display the “Server Details” screen.
2. Open “Rebuild” from “More” #
- Click “More” in the top right of the screen.
- From the displayed menu, click “Rebuild”.
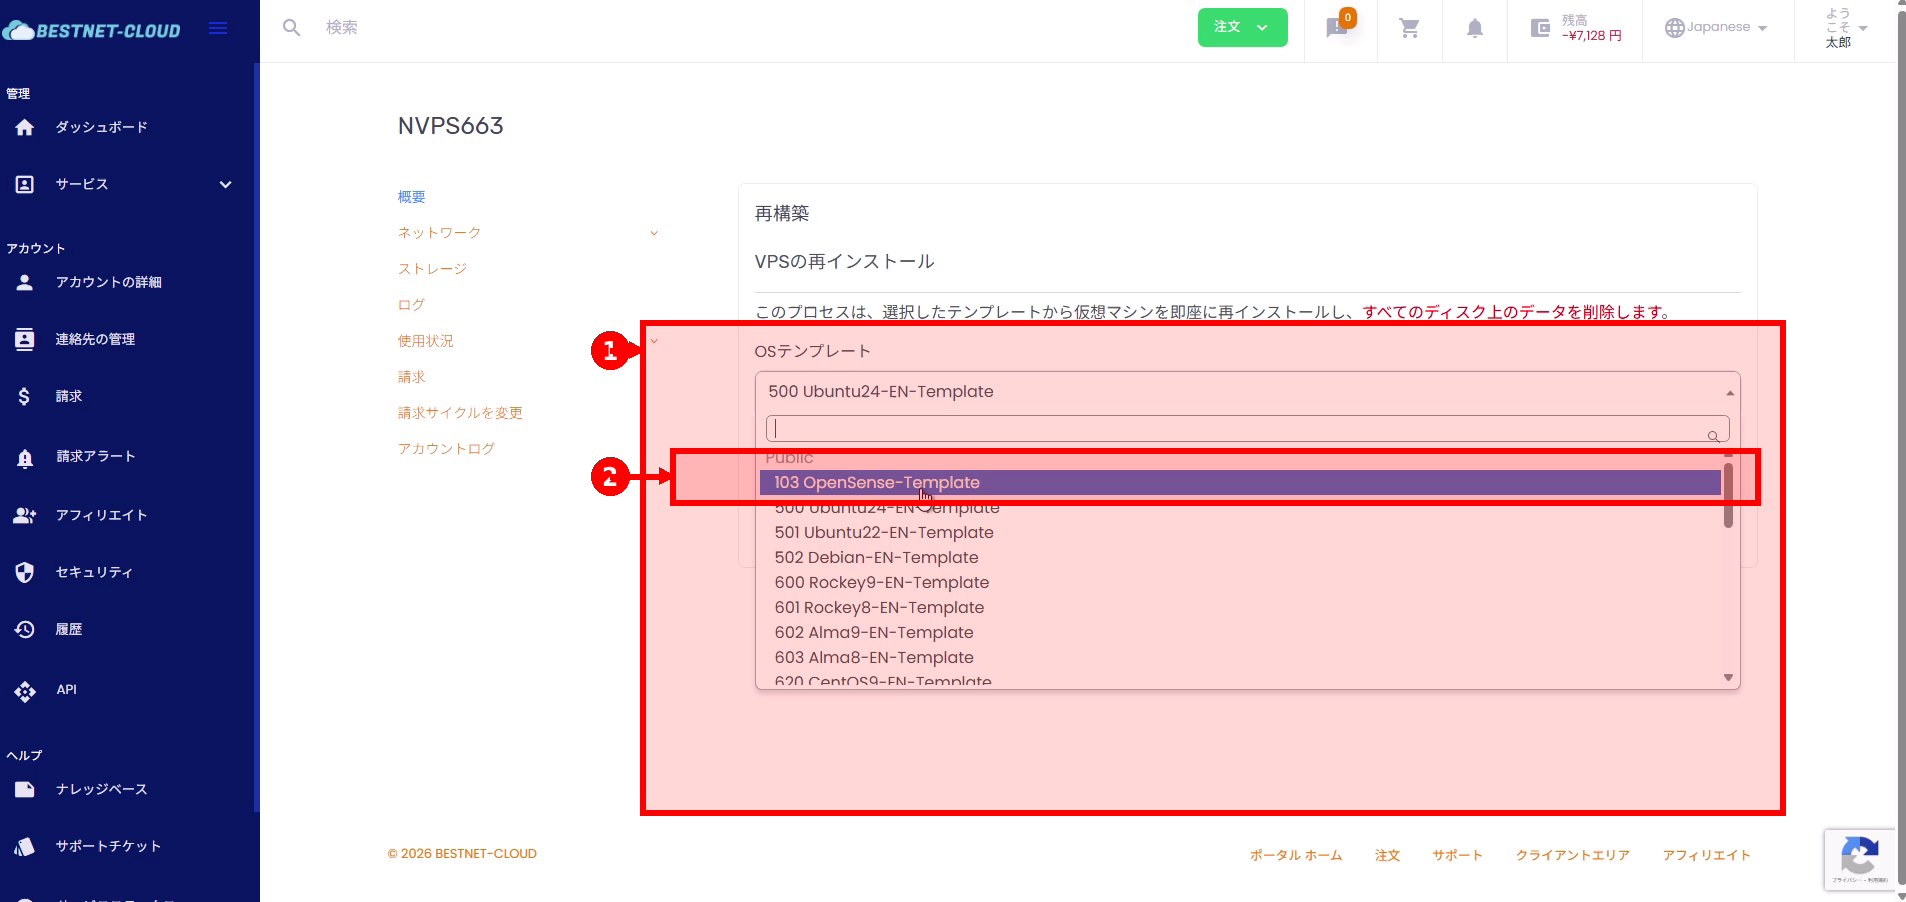
3. Select an OS template #
- On the “Rebuild” page, open the “OS Template” dropdown.
- Select the OS template you want to reinstall.
4. Set password (root) #
- Enter the password to be used after rebuild in the “Password” field.
- If necessary, toggle the visibility on/off using the eye icon on the right to confirm.
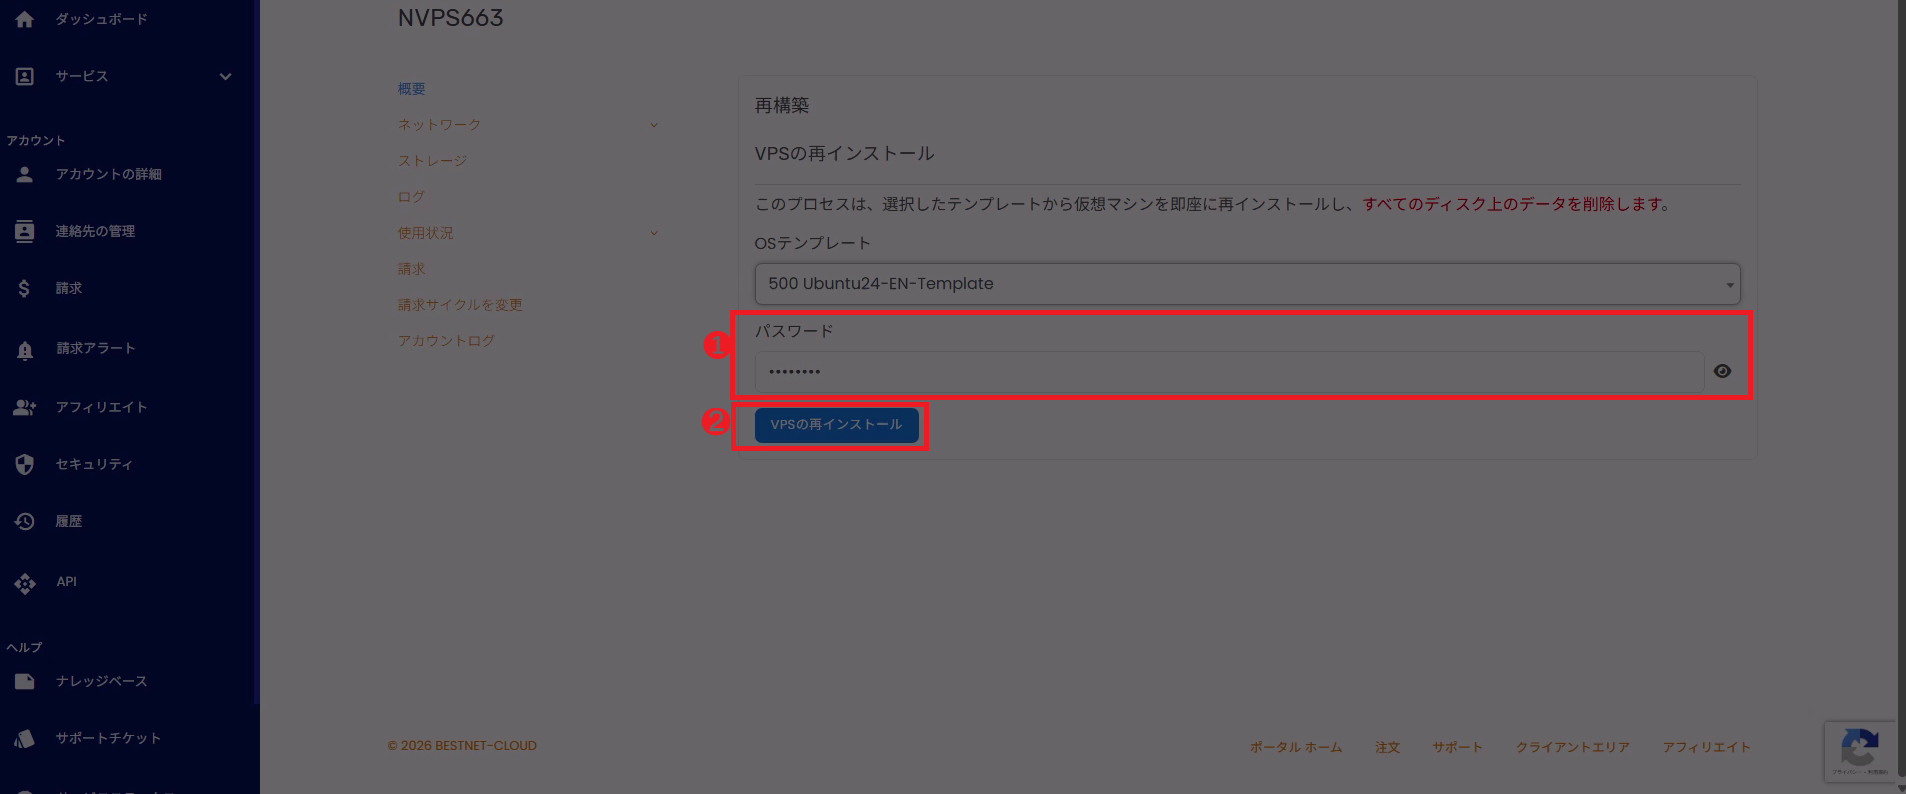
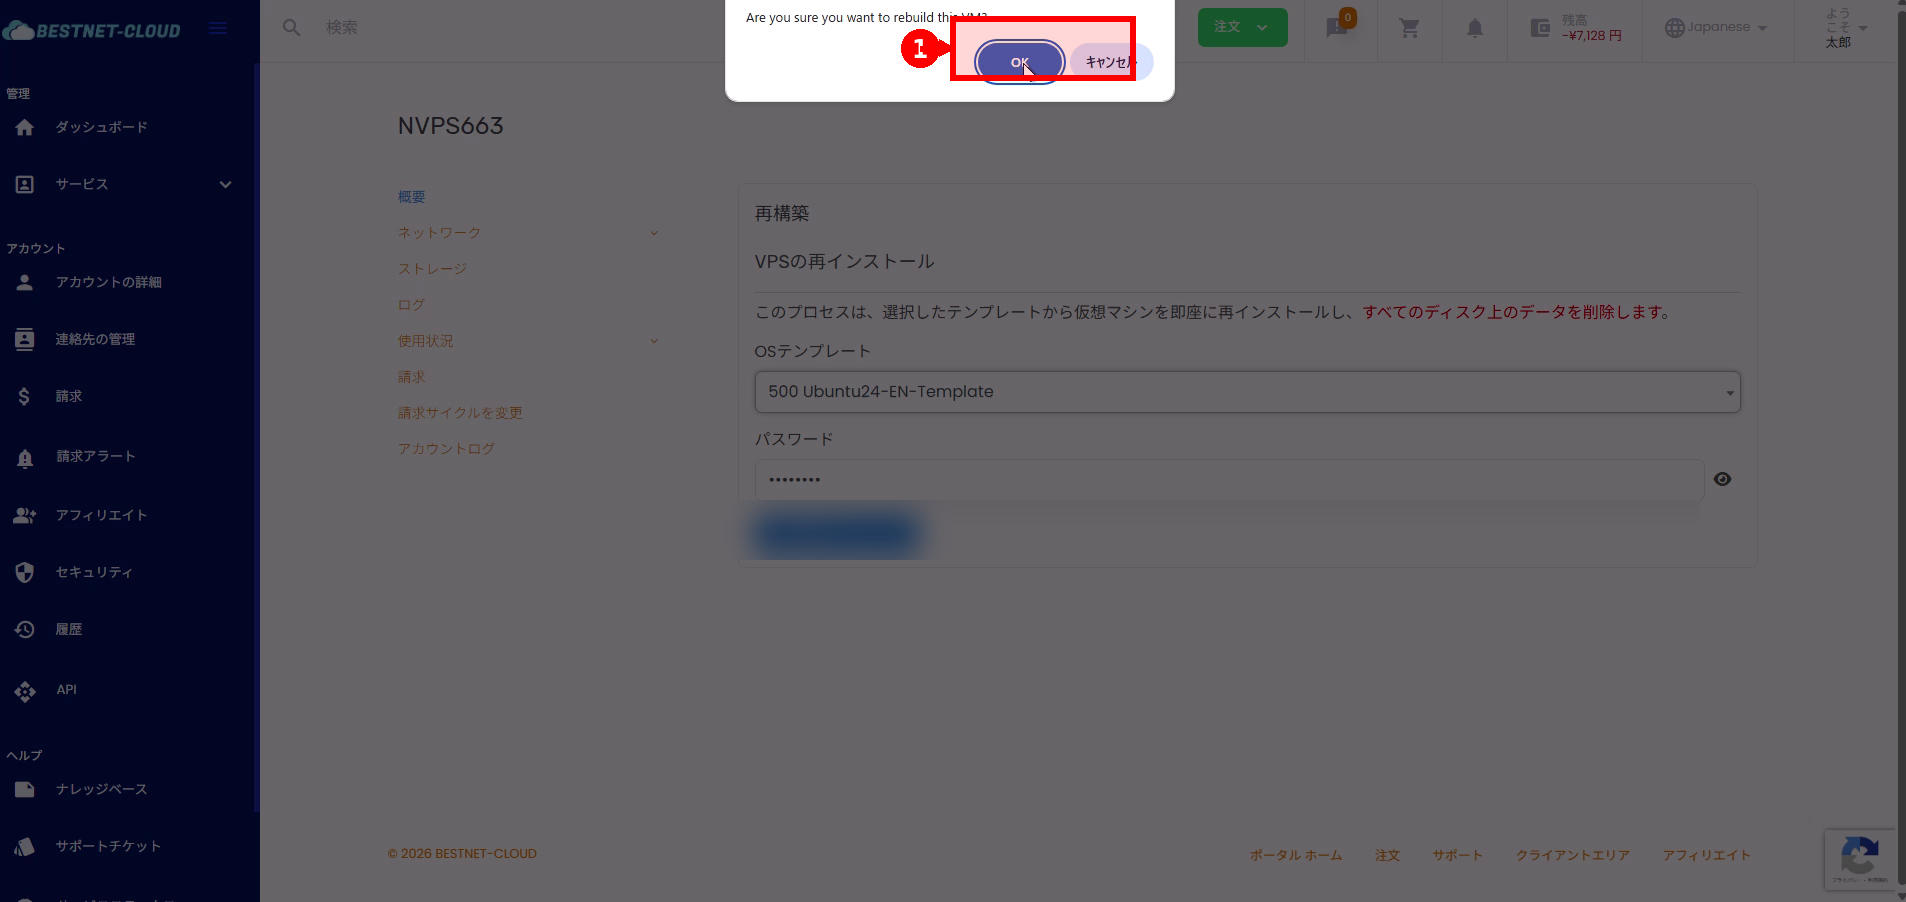
5. Execute “VPS Reinstall” and confirm by pressing “OK” #
- Click “VPS Reinstall”.
- When a confirmation dialog appears, confirm the content and click “OK”.
Caution: From this point onwards, disk initialization will take place. Be very careful not to execute this by mistake.
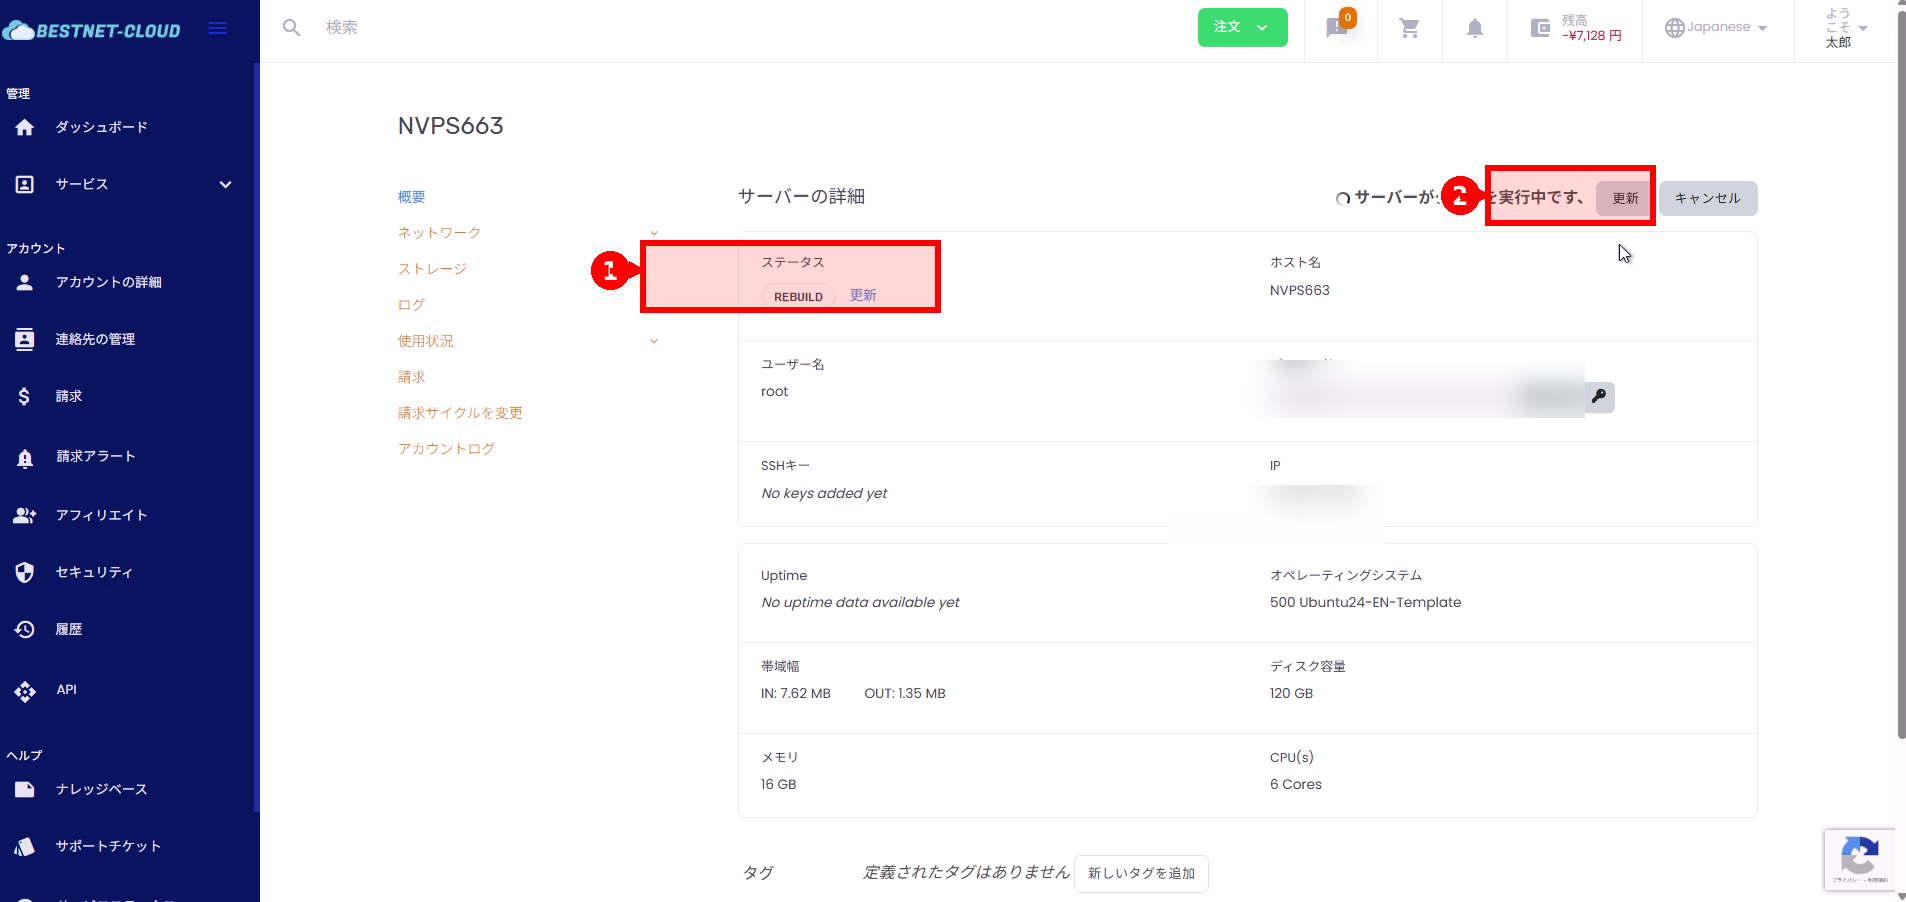
6. Confirm the rebuild progress #
- When you return to “Server Details”, “REBUILD” will be displayed in the status.
- While “Server is executing a task” is displayed in the top right of the screen, the process is in progress.
- If necessary, press “Refresh” to reload the status.
7. Confirm completion (login verification) #
- When the rebuild is complete, the status display returns to normal, and information such as Uptime is displayed.
- Verify that you can log in via SSH etc. to the displayed IP address (username:
root, password: the one set in step 4). - After logging in, verify that the OS template is as expected by checking the OS version, etc.
Frequently Asked Questions / Troubleshooting #
Rebuild does not finish for a long time #
- First, press “Refresh” to update the screen display.
- If there is no change for a long time after that (e.g.: tens of minutes or more), contact support via a support ticket with the VPS name (e.g.: NVPS663) and the situation (REBUILD remaining, etc.).
- “Cancel” may cause the process to be interrupted. Before executing, confirm the impact and consult with support if you are unsure.
Cannot log in after rebuild #
- Double-check the password you entered for typos (uppercase/lowercase, symbols).
- Verify that SSH (port 22) is permitted in security groups/firewall, etc.
- Depending on the OS template, the initial login method may differ. If the template specifications are unclear, please contact support for confirmation.


