
Overview #
This procedure describes how to switch the nameserver for your target domain from the BESTNET client portal to an external DNS server (external DNS hosting).
When you change nameservers, the DNS record reference destination (authoritative DNS) switches to the external DNS side. After the switch, DNS records configured on our side will no longer be referenced, so please prepare zones (DNS records) on the external DNS side beforehand before proceeding.
Complete zone creation and register necessary records on the external DNS side.
Set custom nameservers in the client portal.
After saving settings, verify the NS and record switch status from external sources.
Important (Read First: How to Prevent Accidents) #
- Nameserver switching = completely switching the reference destination. If external DNS configuration is incomplete at the time of switching, web, email, and various authentications will be immediately affected.
- Common migration oversights include email (MX / SPF / DKIM / DMARC), authentication TXT records (Google / Microsoft / various SaaS), SSL renewal TXT (_acme-challenge), CAA, and SRV.
- Before performing the switch, note down your current DNS settings (on our side / other services) and create equivalent records on the external DNS side.
- For domains with DNSSEC enabled, DS record updates / deletions may be necessary during the switch (see details below).
Disclaimer and Support Information #
- This procedure summarizes common operational examples. Depending on your domain configuration and external service usage (email, various SaaS, SSL auto-renewal, etc.), required DNS records and migration procedures may differ.
- We are not responsible for indirect or consequential damages (business loss, downtime, email delivery failures, etc.) resulting from following this procedure.
- If you have unclear points / if it is difficult to determine the scope of impact / if DNSSEC is enabled / if you are switching email as well, please open a support ticket from the BESTNET client portal before proceeding.
Preparation #
- Hostname(s) of nameserver(s) (typically 2 or more) provided by the external DNS service
- Zone creation and record configuration for the target domain on the external DNS side must be complete
Pre-Switch Checklist (Recommended: Complete Before Switching) #
- Zone created on external DNS side (root zone like
example.com) - Current DNS records noted down (A / AAAA / CNAME / MX / TXT / CAA / SRV / NS delegation, etc.)
- Necessary records created on external DNS side (especially MX / SPF / DKIM / DMARC, various authentication TXT,
_acme-challenge) - TTL reduction completed in advance if possible (to minimize impact on switch day)
※TTL reduction should be done first on the “current authoritative DNS side,” and may take time to propagate. - DNSSEC presence confirmed (if enabled, refer to “DNSSEC Precautions”)
- Double-check spelling of nameserver hostnames provided by external DNS (copy-paste recommended)
Operation Steps (Client Portal) #
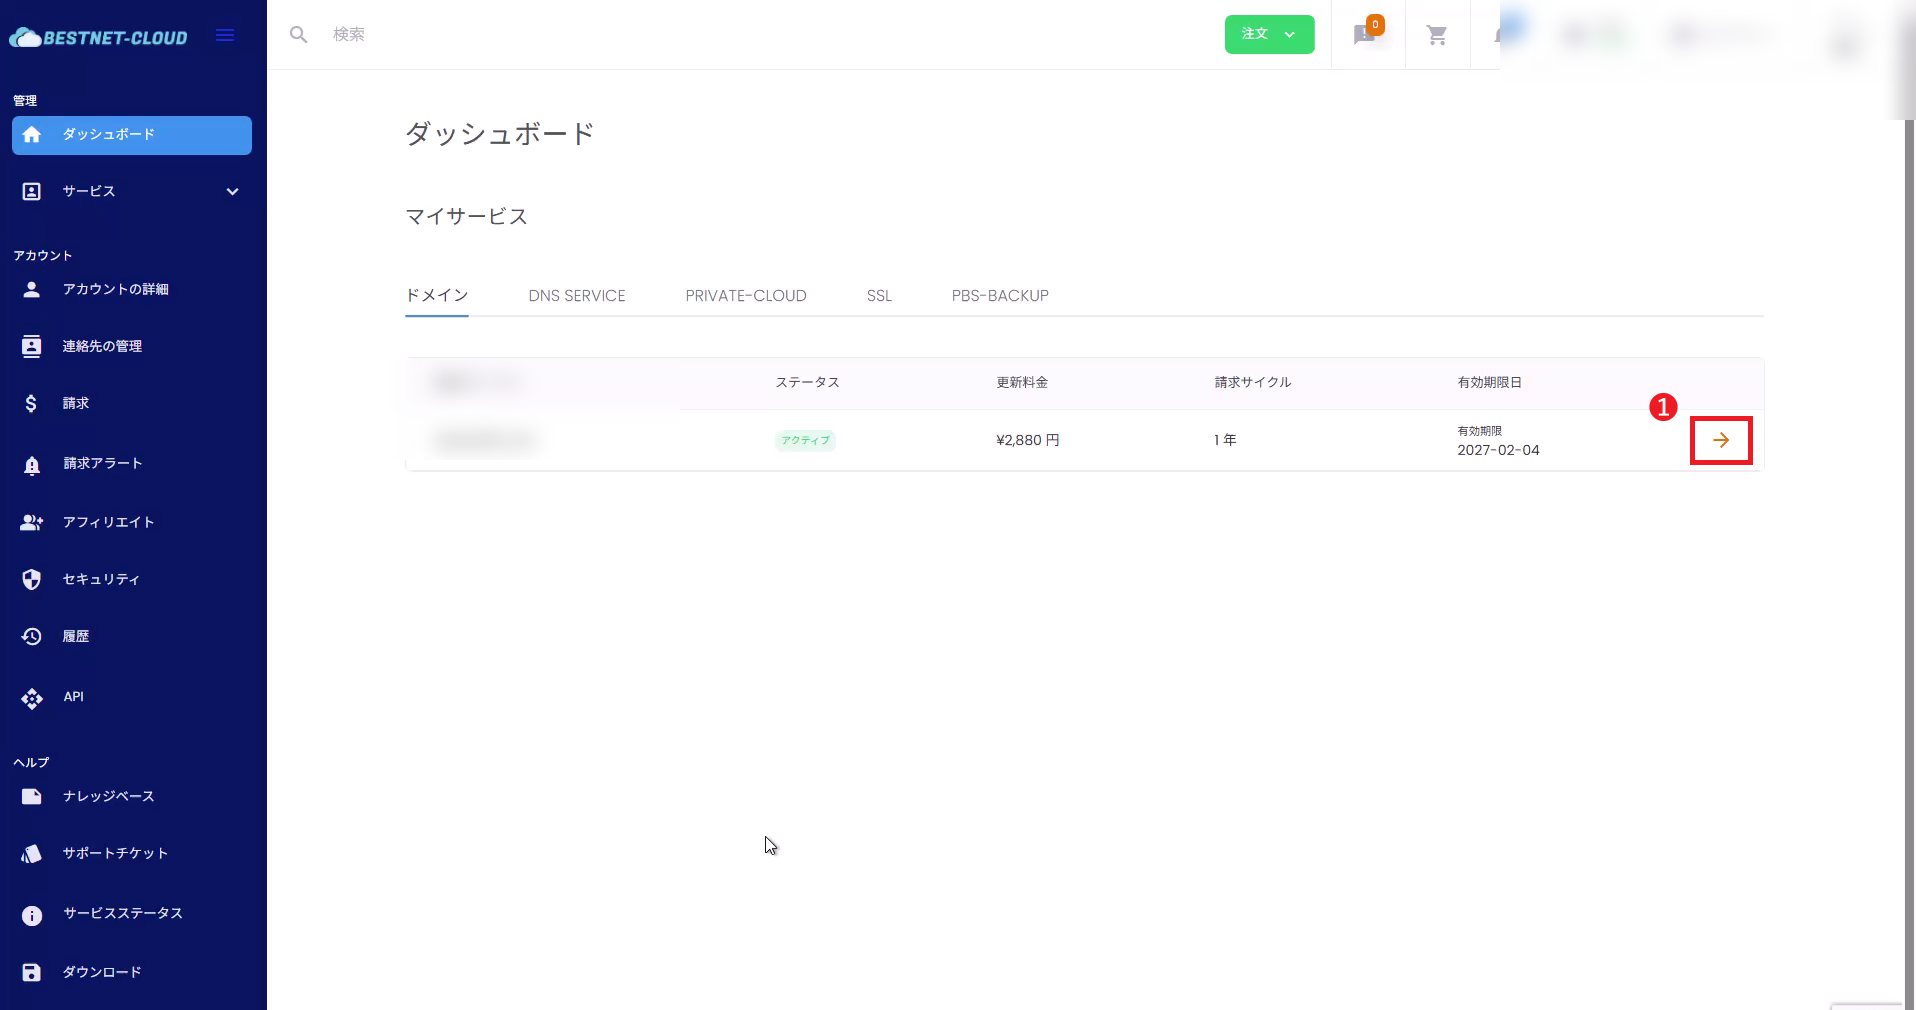
1Open the target domain details screen #
- Log in to the client portal.
- From the dashboard domain list, click the right-end icon (→) on the target domain row to open the details screen.
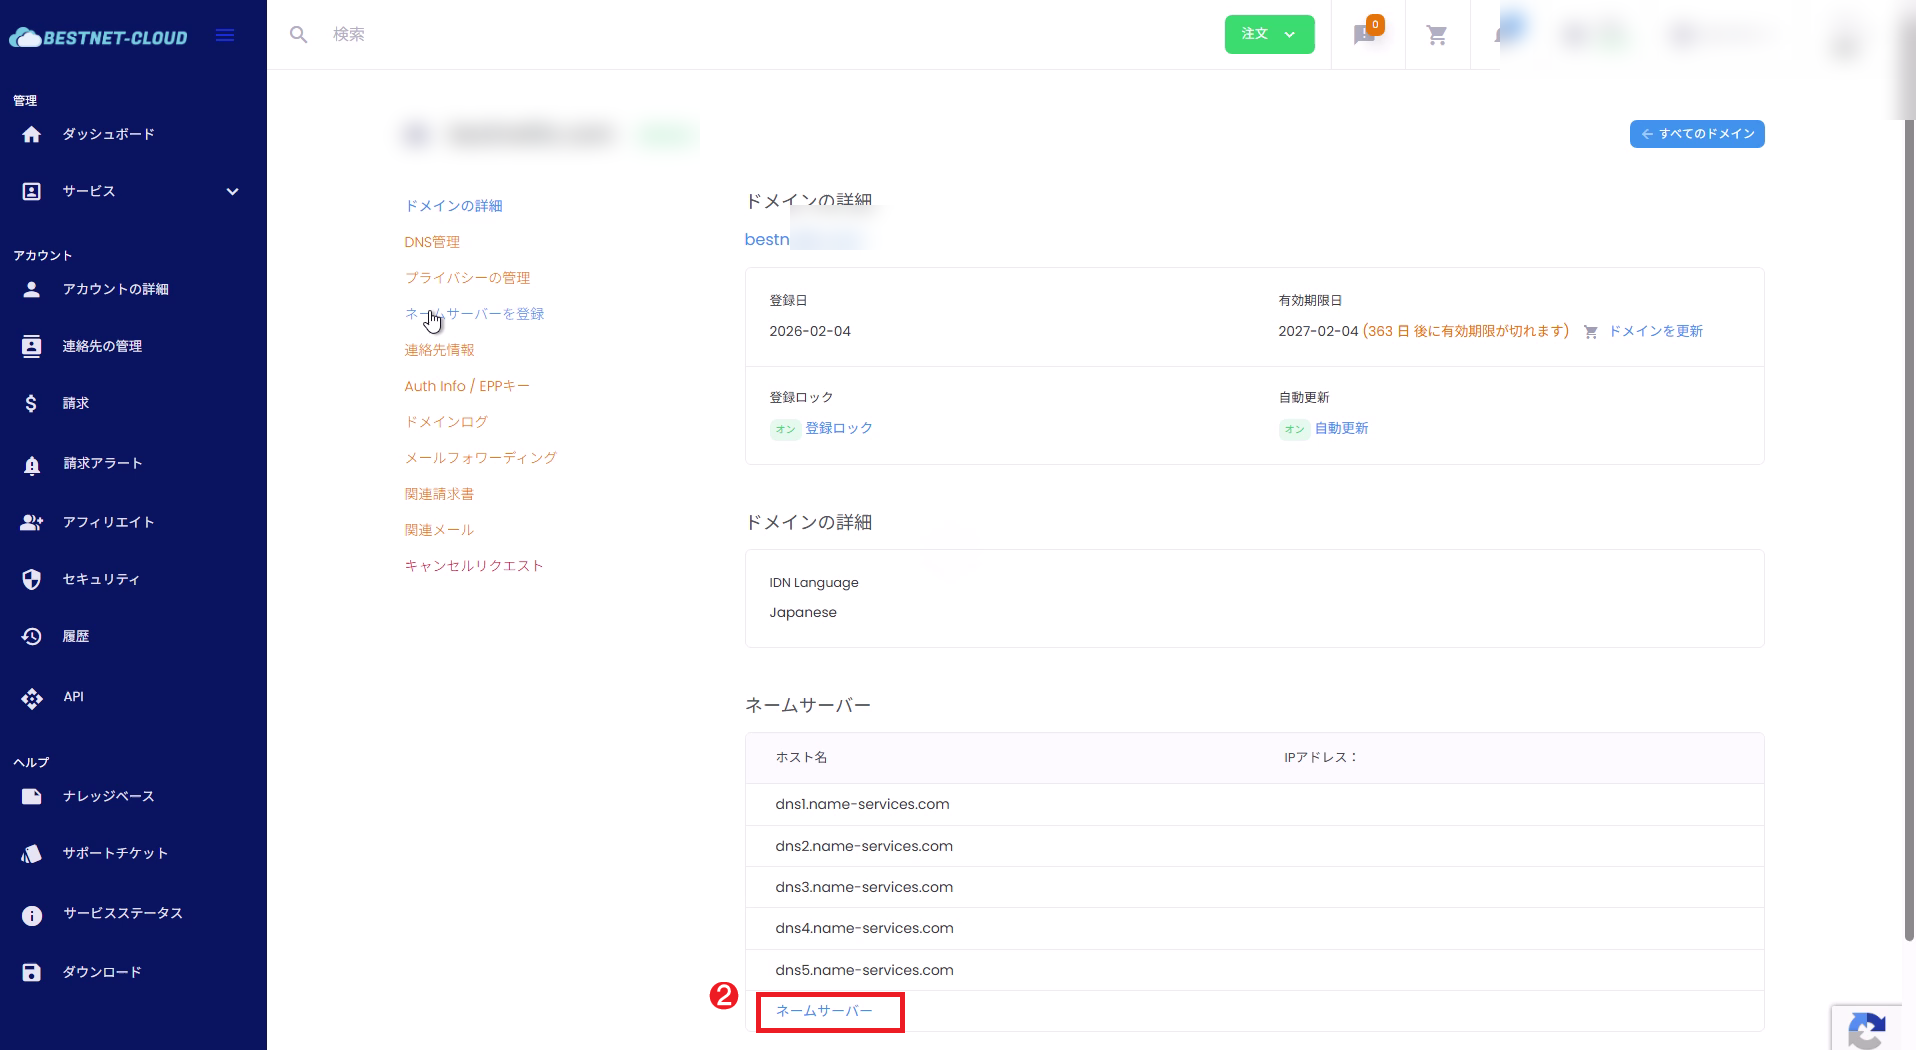
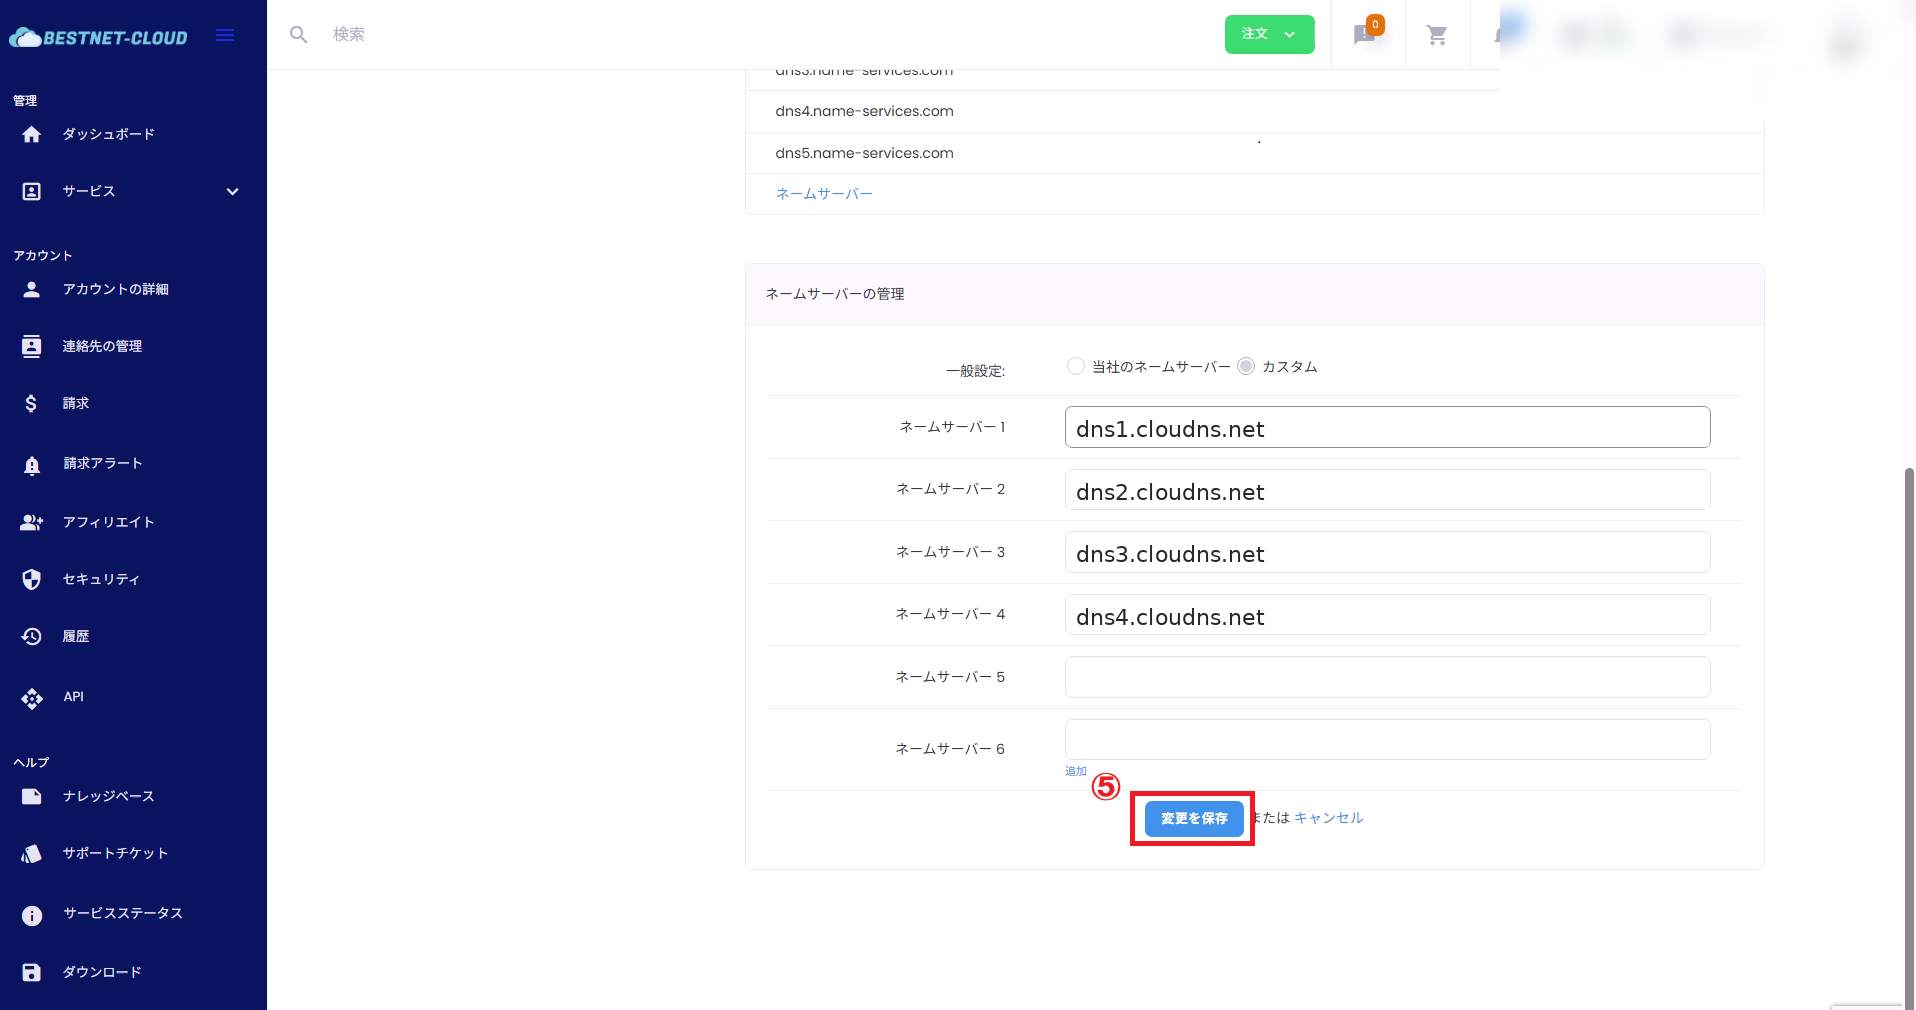
2Navigate to the “Nameserver Management” section #
- Scroll down on the domain details screen and click the link (Nameserver) at the bottom of the Nameserver section.
- Navigate to the Nameserver Management section on the page.
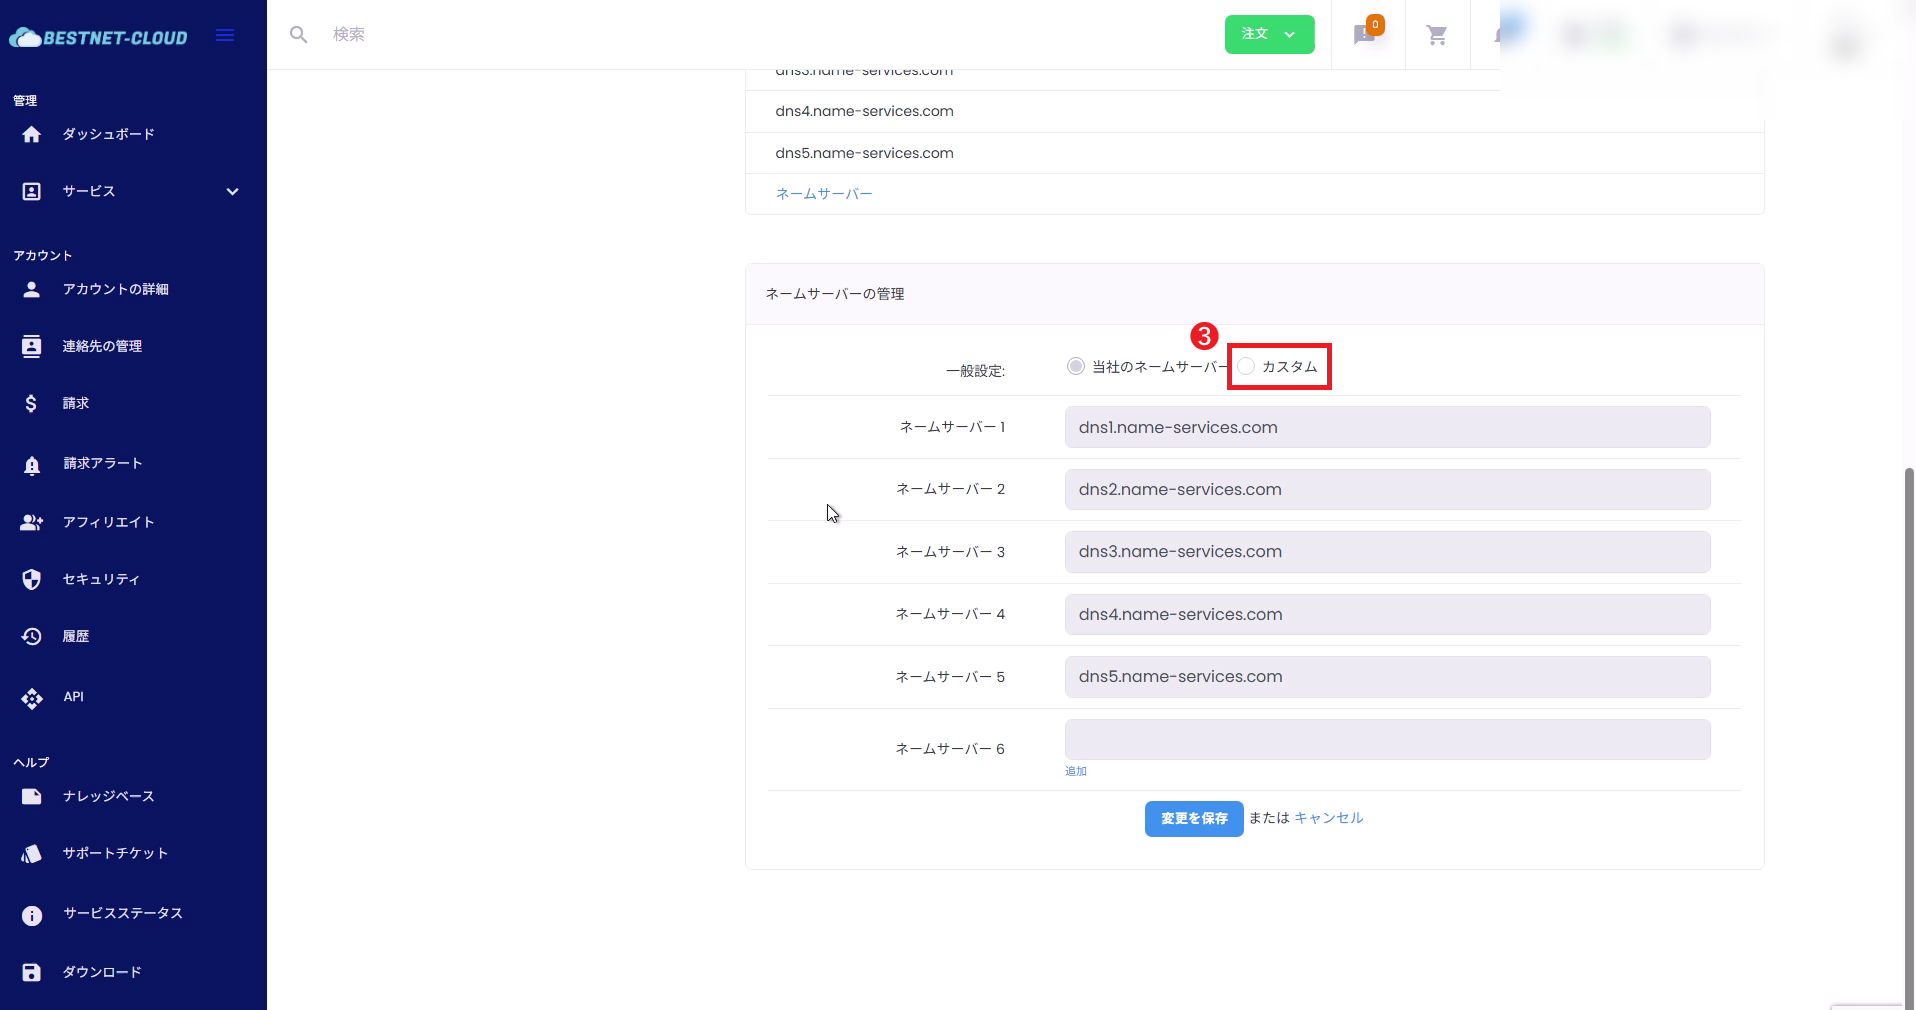
3Select “Custom” #
- In the Nameserver Management section, select Custom.
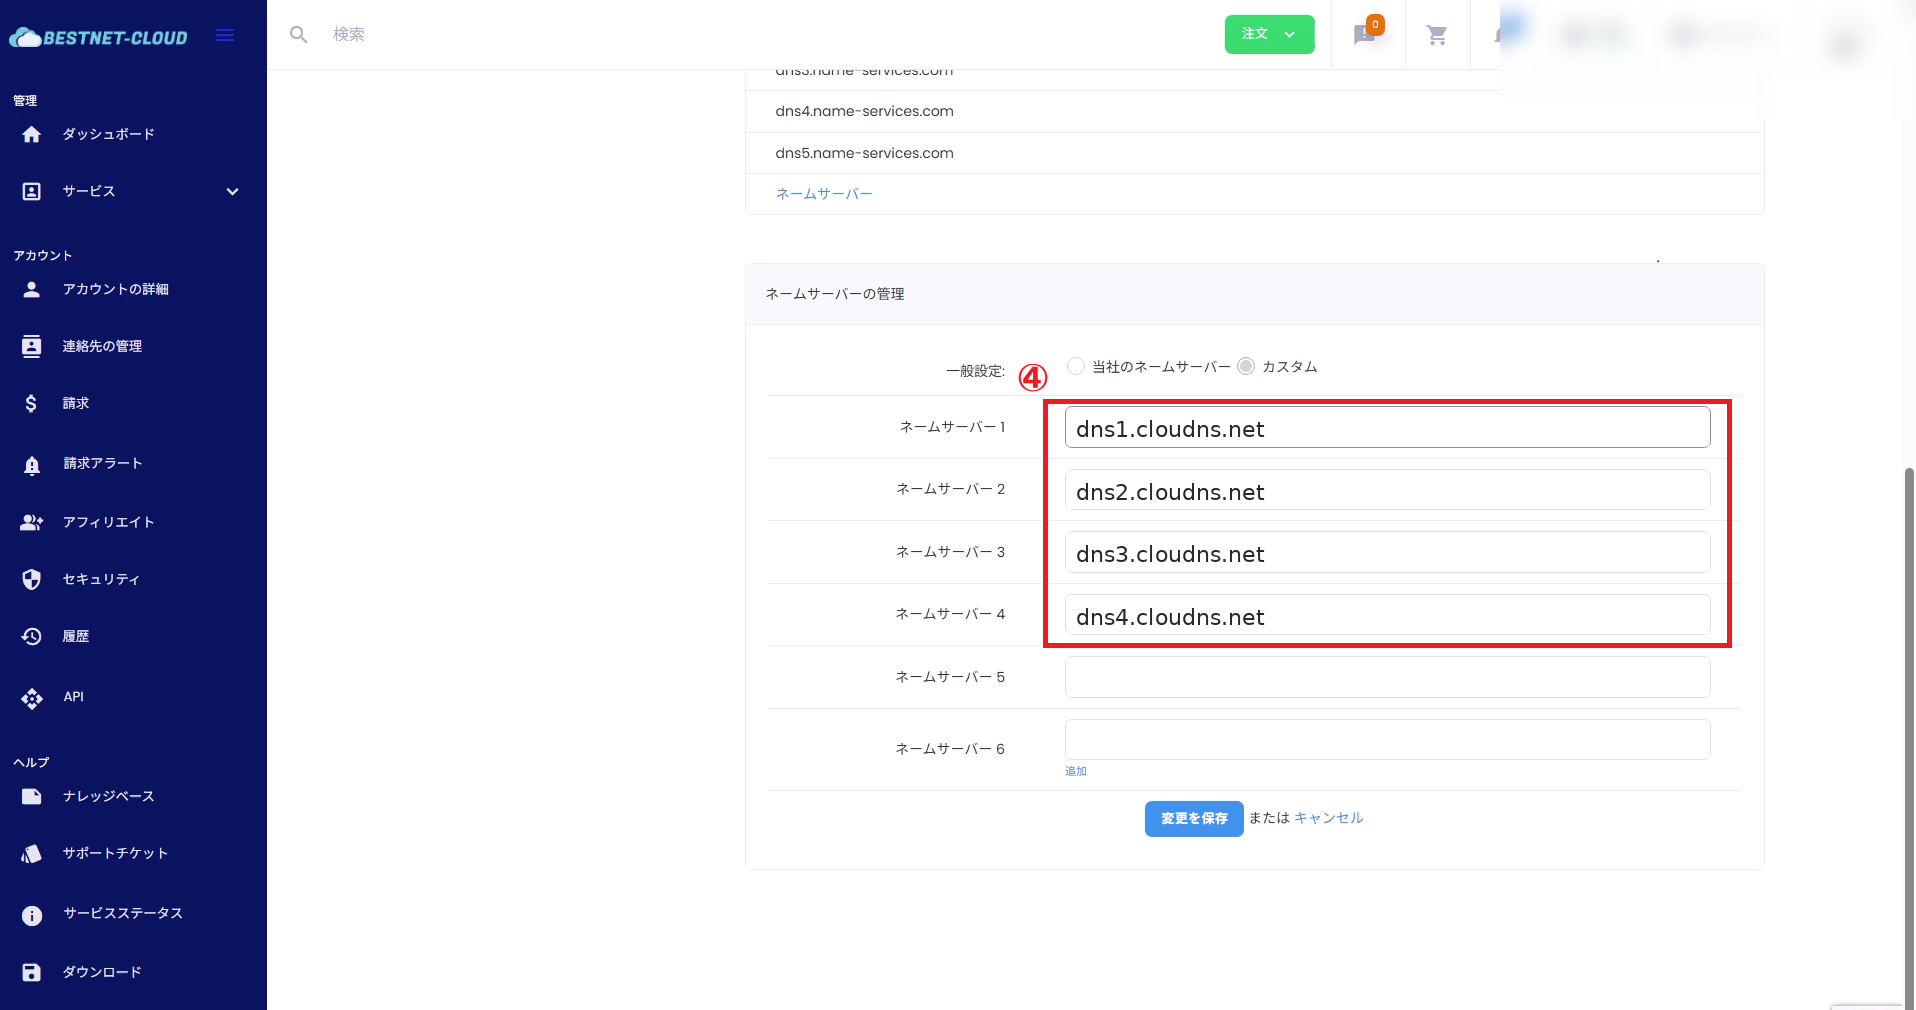
4Enter external DNS server (nameserver) #
- Enter the nameservers provided by the external DNS service (typically 2 or more).
- Enter in hostname format (e.g.,
dns1.example.net).
- Basically, enter hostname only (not IP addresses).
- Some external DNS providers provide 3 or more nameservers. Enter all that are provided.
- Even if the notation includes a trailing dot (
.), it may not be necessary depending on the input field specification (follow the provider’s instructions and this screen’s specifications).
- Nameserver 1: dns1.cloudns.net
- Nameserver 2: dns2.cloudns.net
- (As needed) Nameserver 3 and beyond
5Save changes #
- Click Save Changes.
- When the completion message is displayed, the operation is complete.
DNSSEC Precautions (If Applicable) #
- If DNSSEC is enabled on the target domain, DS record inconsistencies may occur after nameserver switching, which can cause name resolution failures.
- To continue DNSSEC, it may be necessary to update DS information to match the external DNS side’s DNSKEY.
- If determining this is difficult, please open a support ticket from the BESTNET client portal before proceeding.
Verification Method #
- Reload the same page and verify that the nameserver list matches the values you entered.
- DNS switching may take time to propagate. Also verify that records on the external DNS side are correctly configured.
External Verification Examples (Recommended)
dig NS example.comdig +trace example.comdig A example.comdig A www.example.comdig MX example.comPrecautions (Common Pitfalls) #
The update will fail. Enter the correct hostname provided by the external DNS service.
Once you switch nameservers, the external DNS side’s zones (DNS records) will be referenced thereafter. Always complete external DNS configuration before switching.
With configurations like ns1.yourdomain, separate nameserver registration (glue records) may be required.
If you use email, always verify that MX / SPF / DKIM / DMARC are all present on the external DNS side.
When You Need Help (Open a Support Ticket) #
If you have questions or encounter unresolved issues after switching, please open a support ticket from the BESTNET client portal.
Including the following will make verification smoother.
- Target domain name
- External DNS service name (e.g., Cloudflare / Route53, etc.)
- Configured nameserver values (copy-paste)
- External verification results (e.g., results of
dig NS example.com/dig +trace example.com) - Symptoms occurring (web not visible / email not delivered, etc.) and time of occurrence


