
Private Network Configuration Guide
This guide explains how to order a private network (Private IP / Subnet) through the client portal and assign private IPs to servers in BESTNET-CLOUD and BESTNET-VPS.
Overview #
This guide explains how to order a private network (Private IP / Subnet) through the client portal and assign private IPs to servers in BESTNET-CLOUD and BESTNET-VPS.
Prerequisites #
- You must be logged into the client portal
- Before using a private network (Private IP / Subnet), you must first “order” the Private-IP product
Ordering a Private Network (Private IP) #
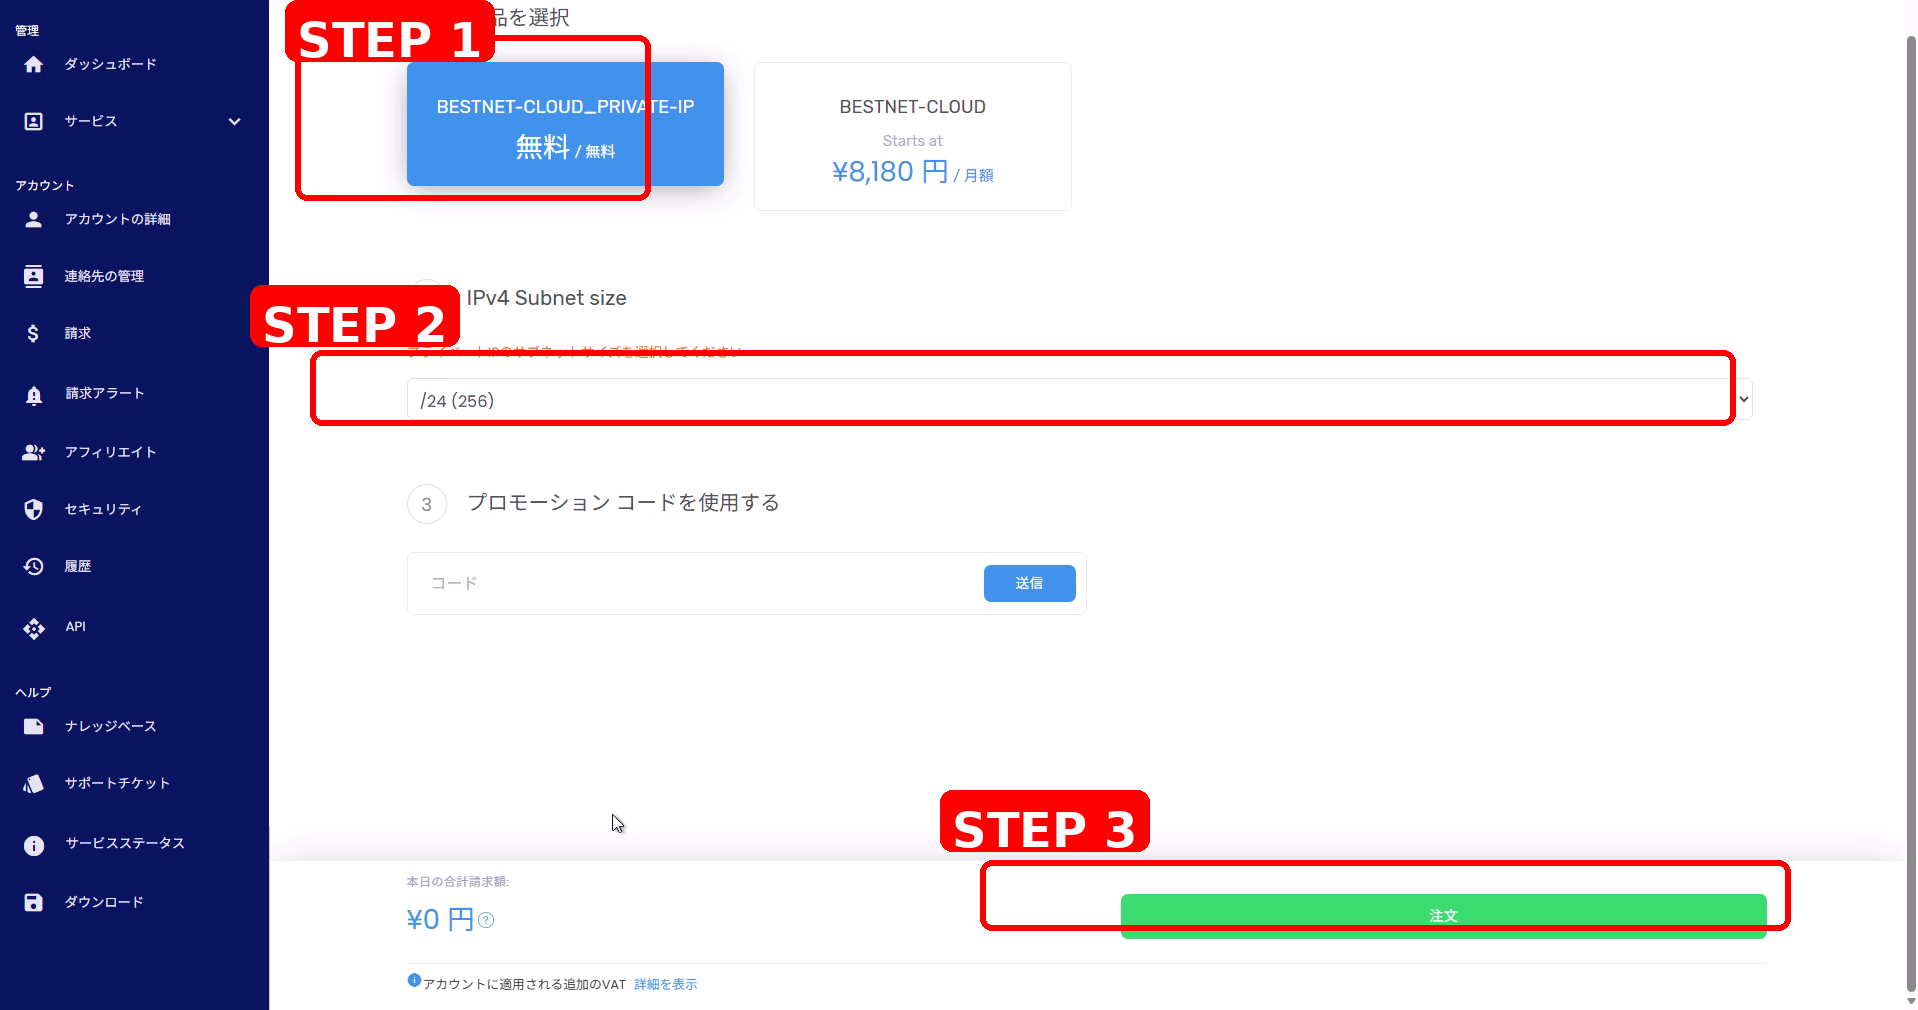
1BESTNET-CLOUD: Order a Private IP (Subnet) #
- Open the order screen from “Order” at the top of the screen.
- Select BESTNET-CLOUD_PRIVATE-IP from the product list.
- Select the required size (e.g., /24) in IPv4 Subnet size.
- Click Order at the bottom of the screen.
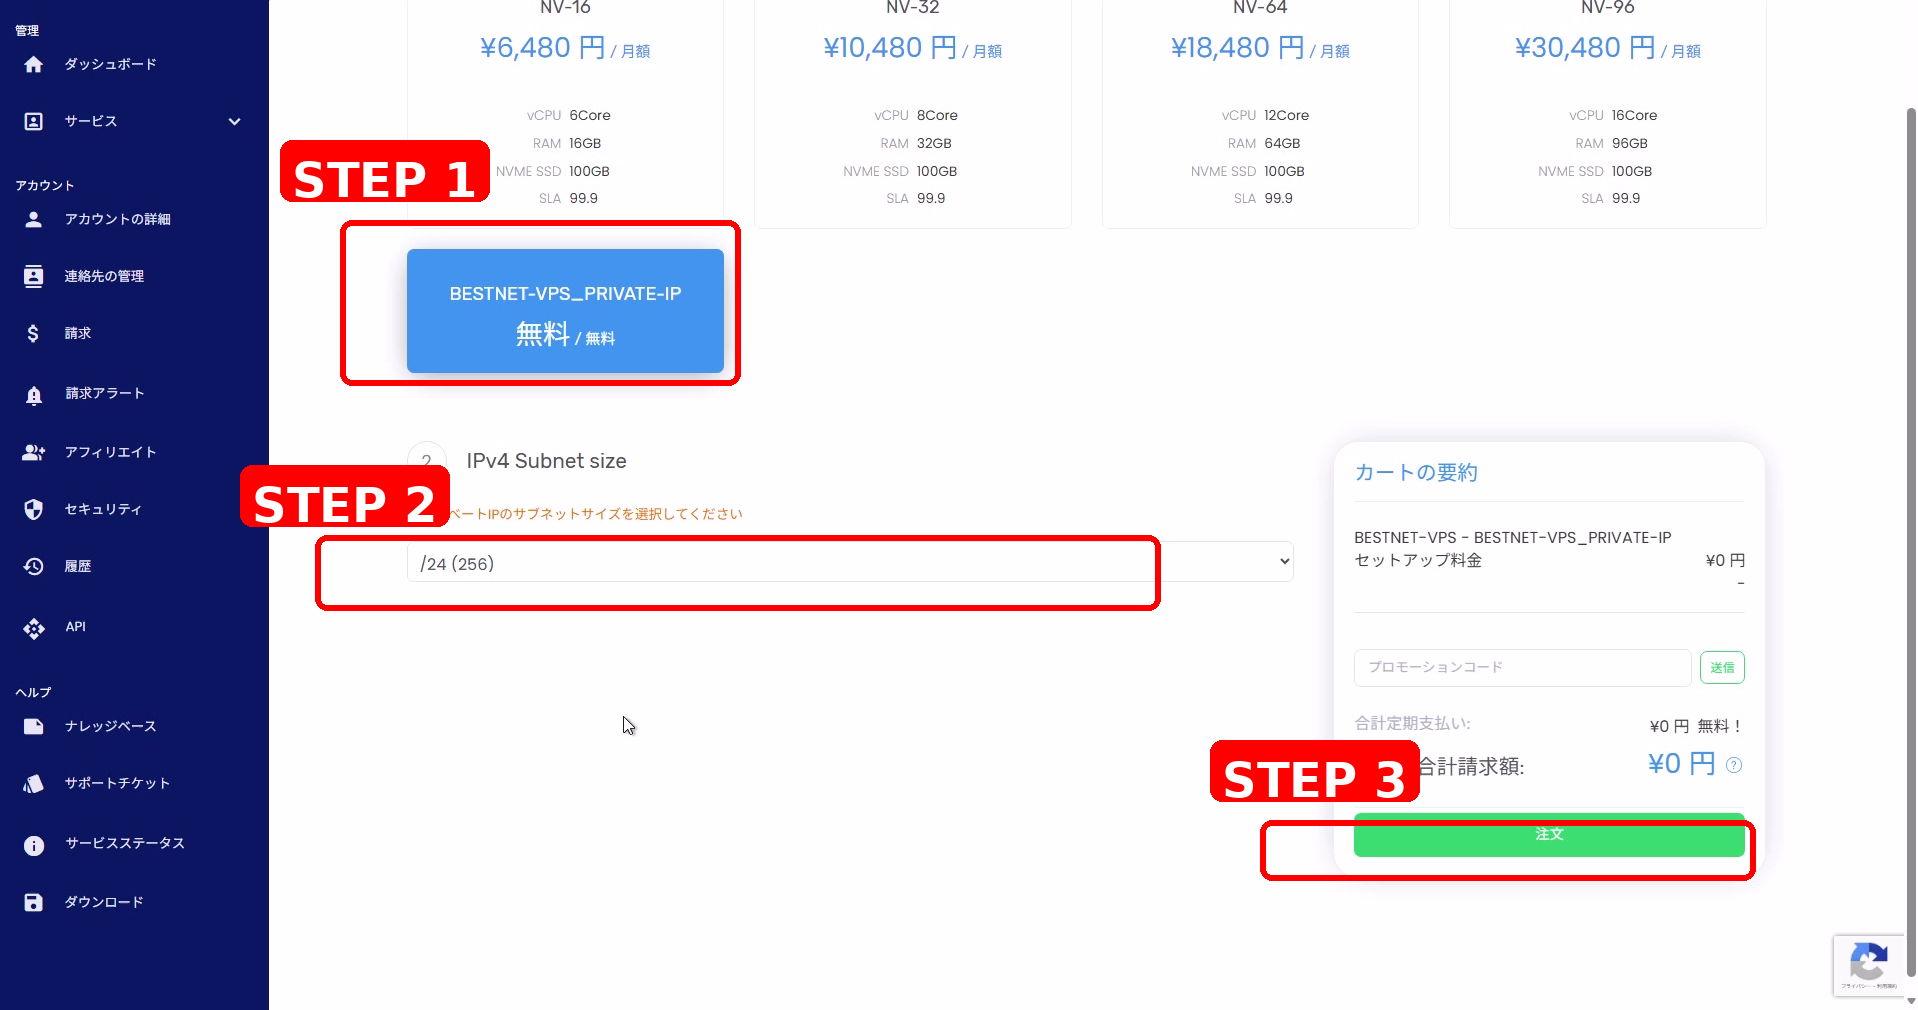
2BESTNET-VPS: Order a Private IP (Subnet) #
- Open the order screen from “Order” at the top of the screen.
- Select BESTNET-VPS_PRIVATE-IP from the product list.
- Select the required size (e.g., /24) in IPv4 Subnet size.
- Click Order on the right side (or bottom) of the screen.
Assigning Private IPs to Existing Servers #
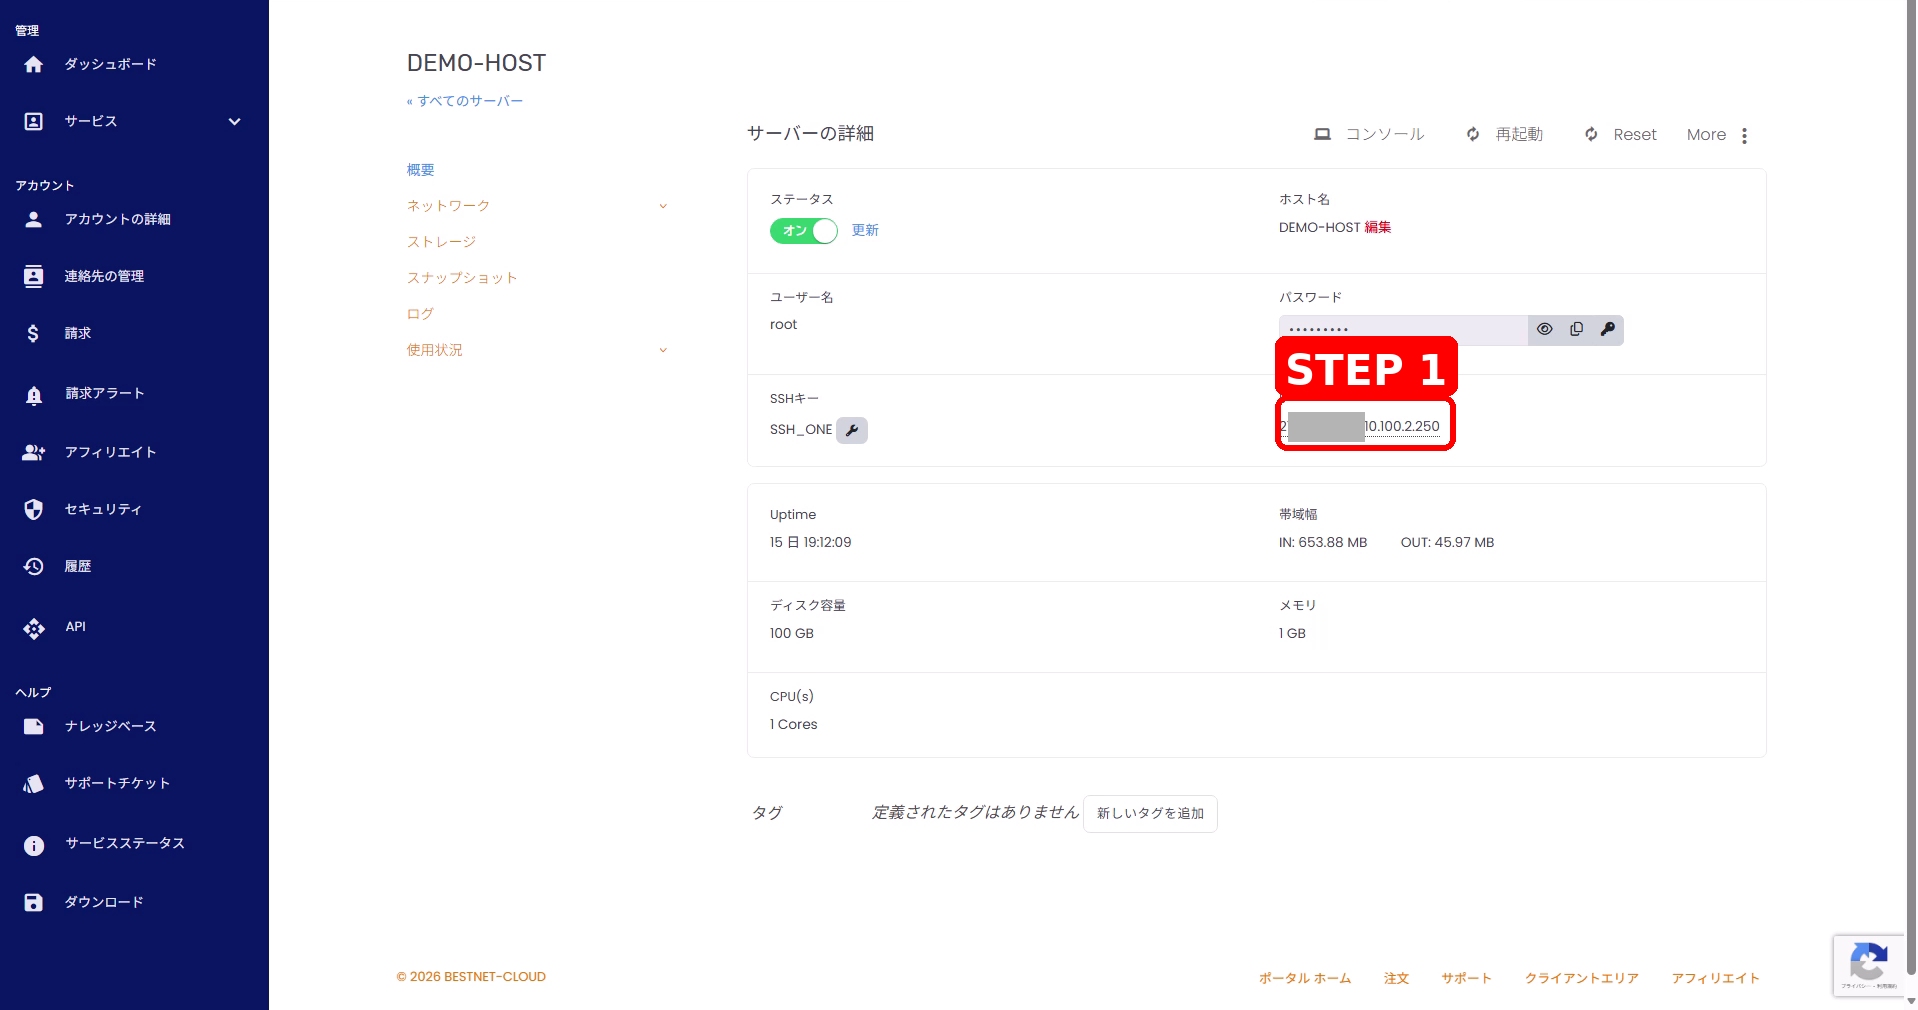
3BESTNET-CLOUD: Assign Private IP to an Existing Server #
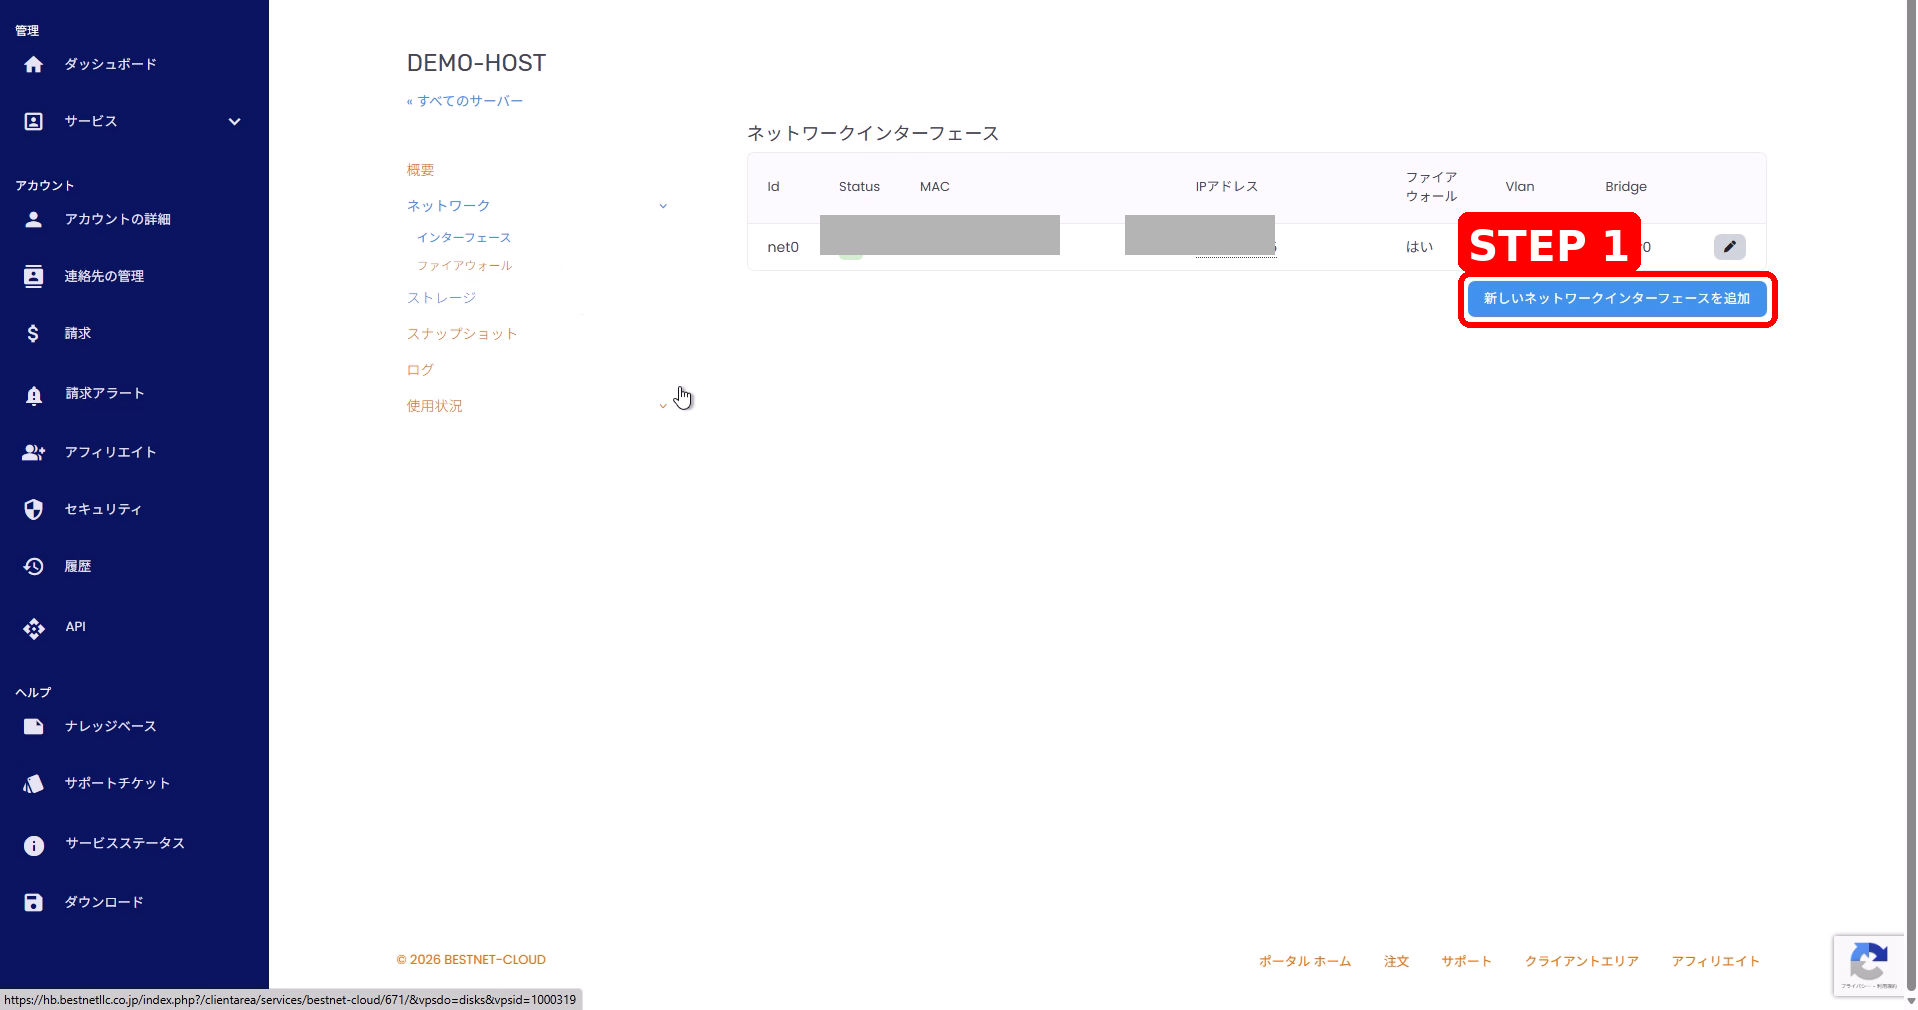
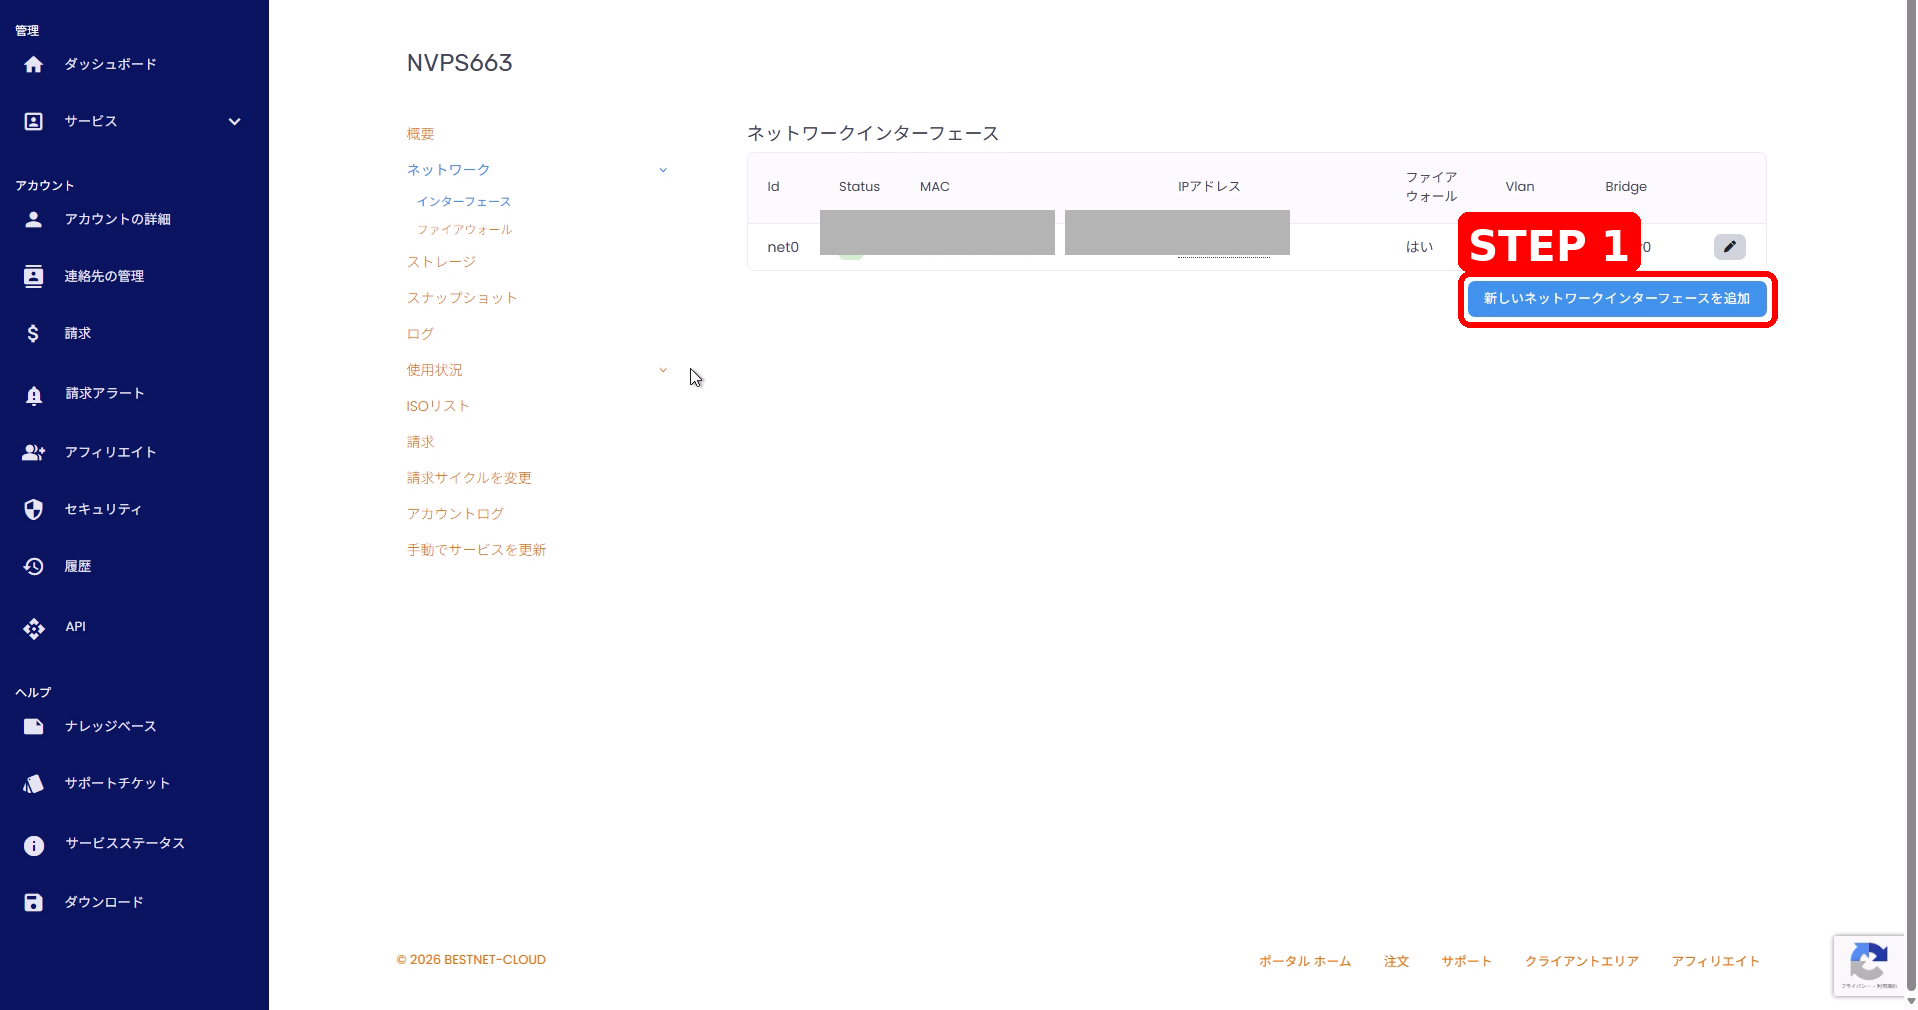
- Open the target server and open Network > Interfaces from the left menu.
- Click Add New Network Interface.
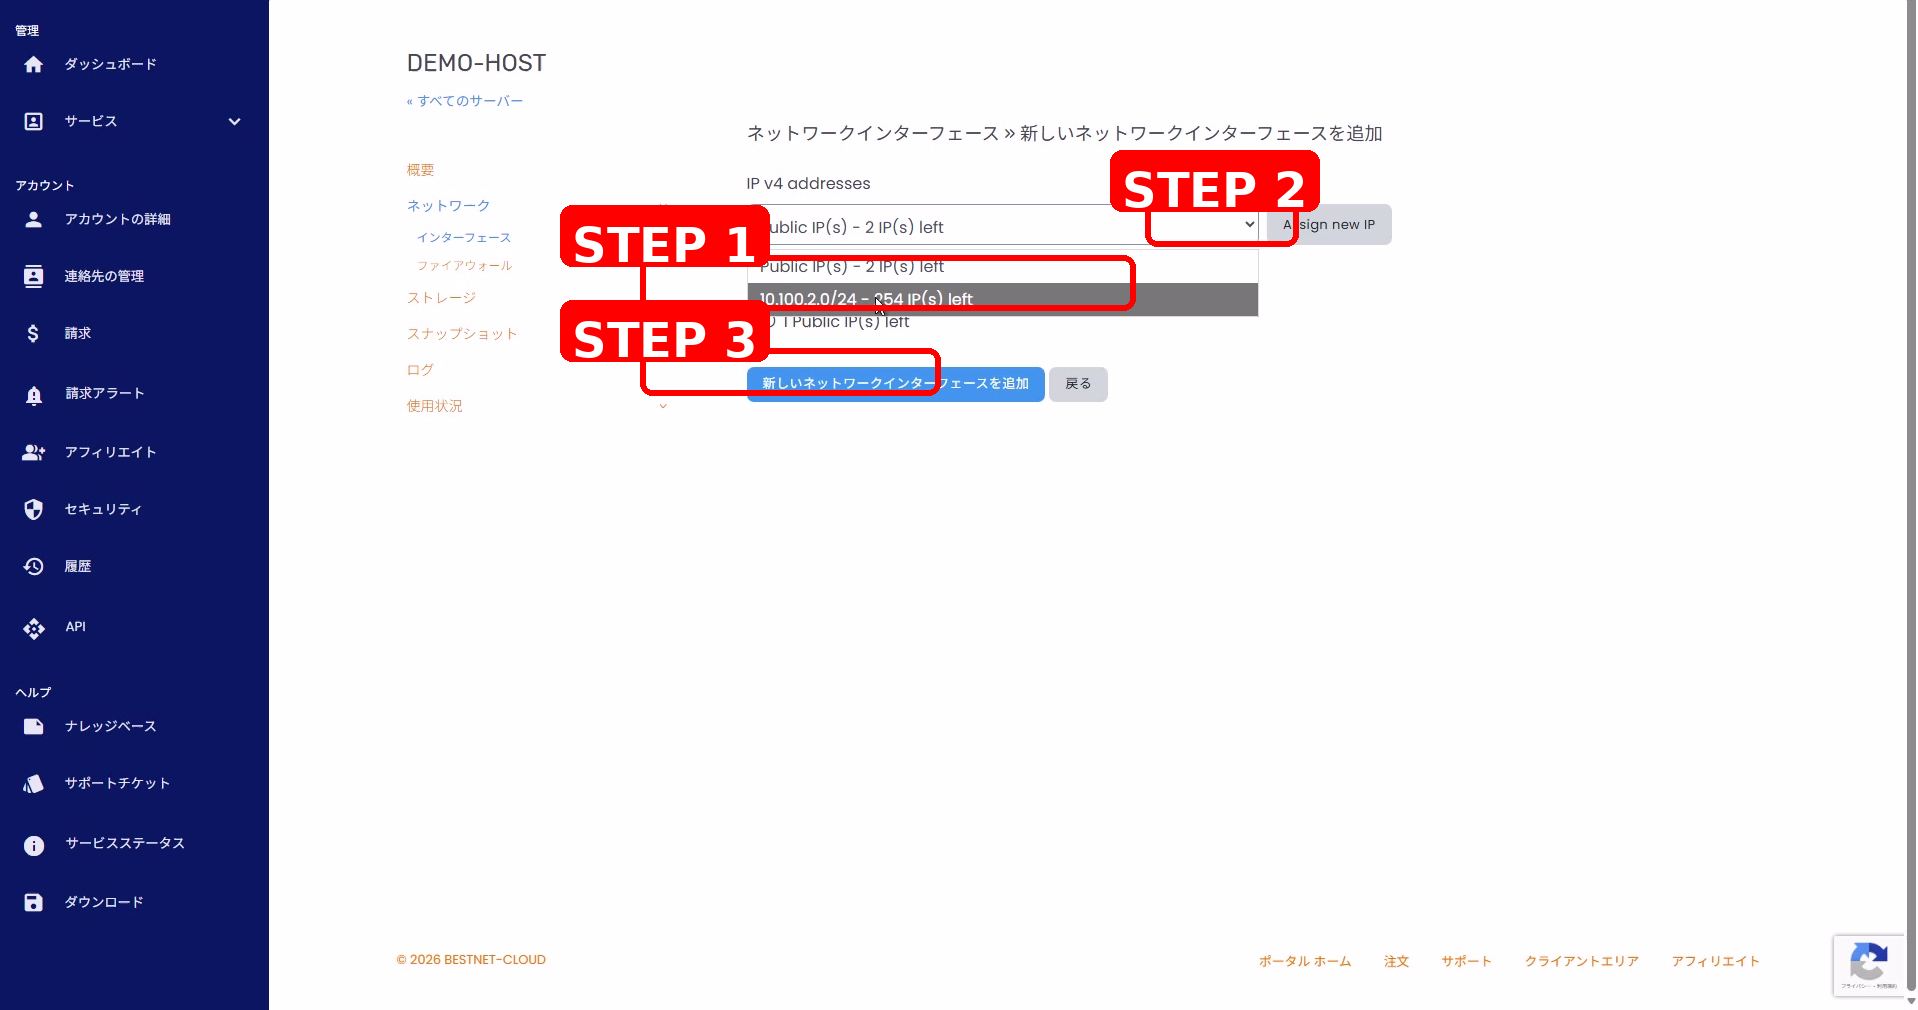
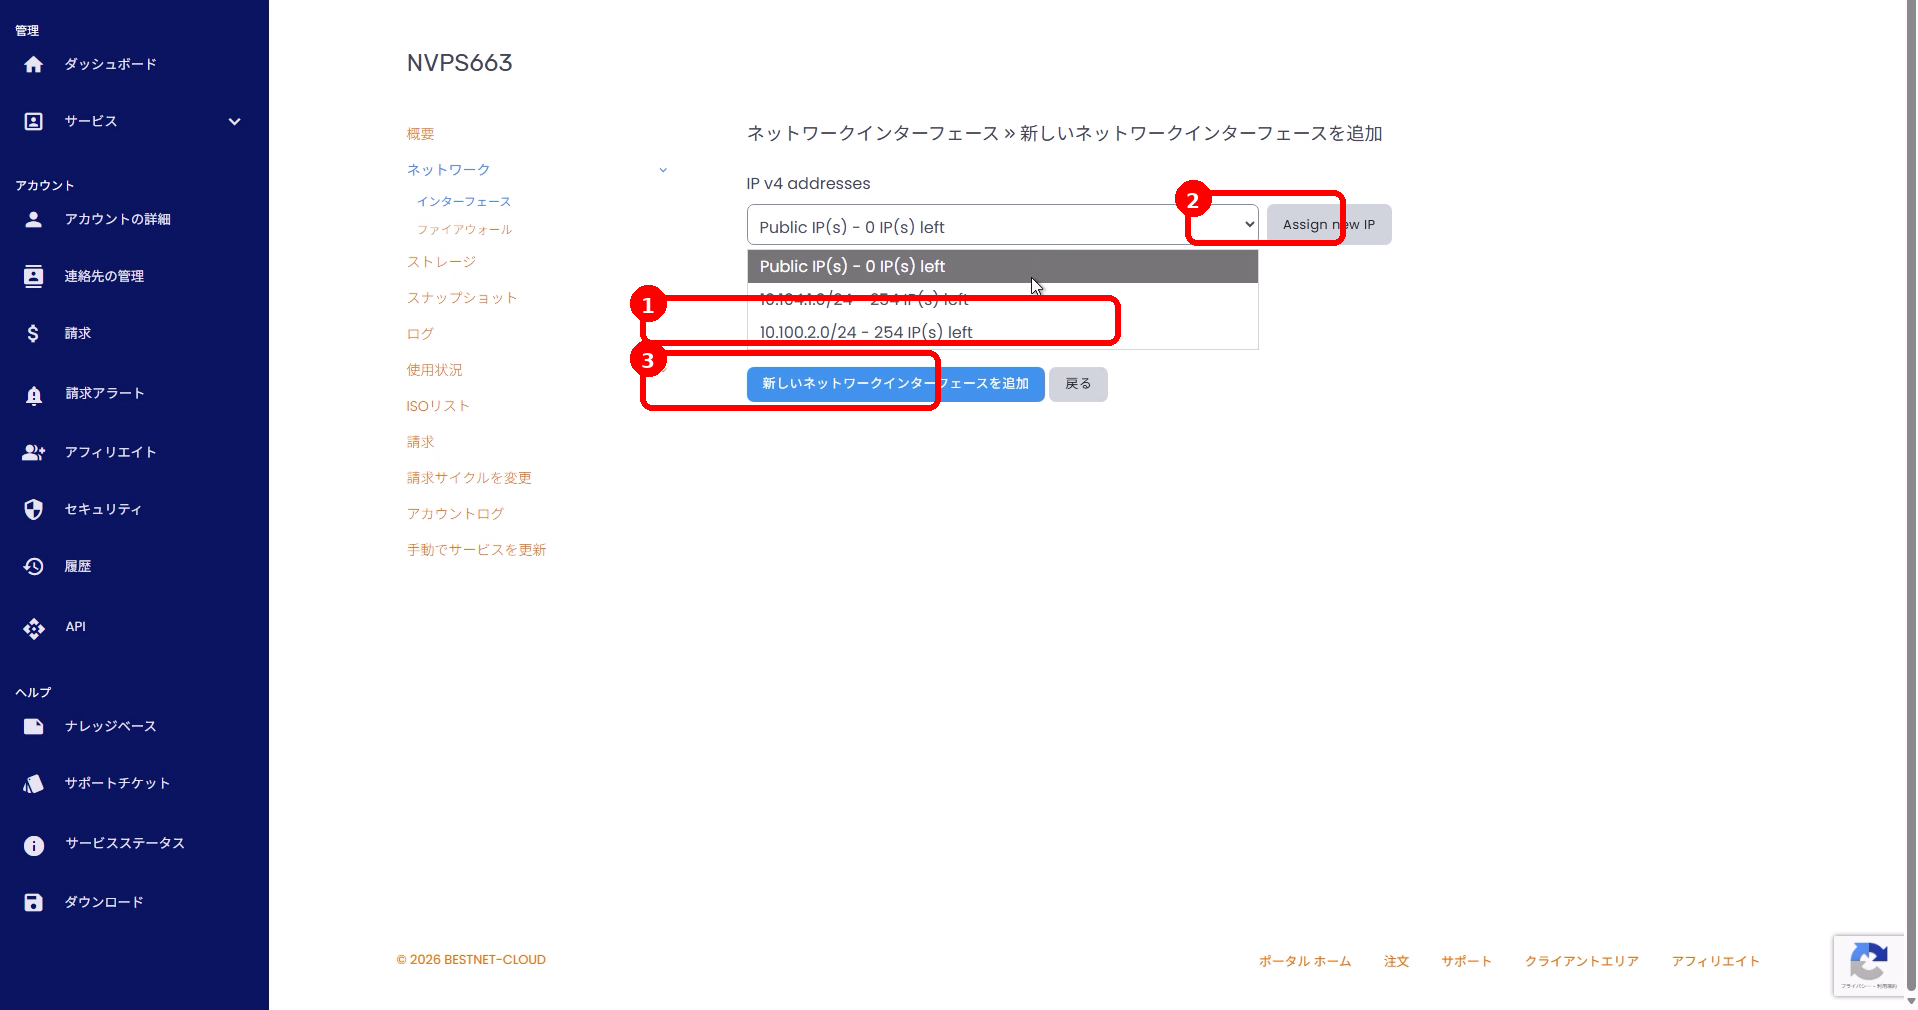
- From the IPv4 addresses dropdown, select the private subnet you want to assign (e.g., 10.100.2.0/24).
- Click Assign new IP to reserve an IP.
- Click Add New Network Interface to apply the changes.
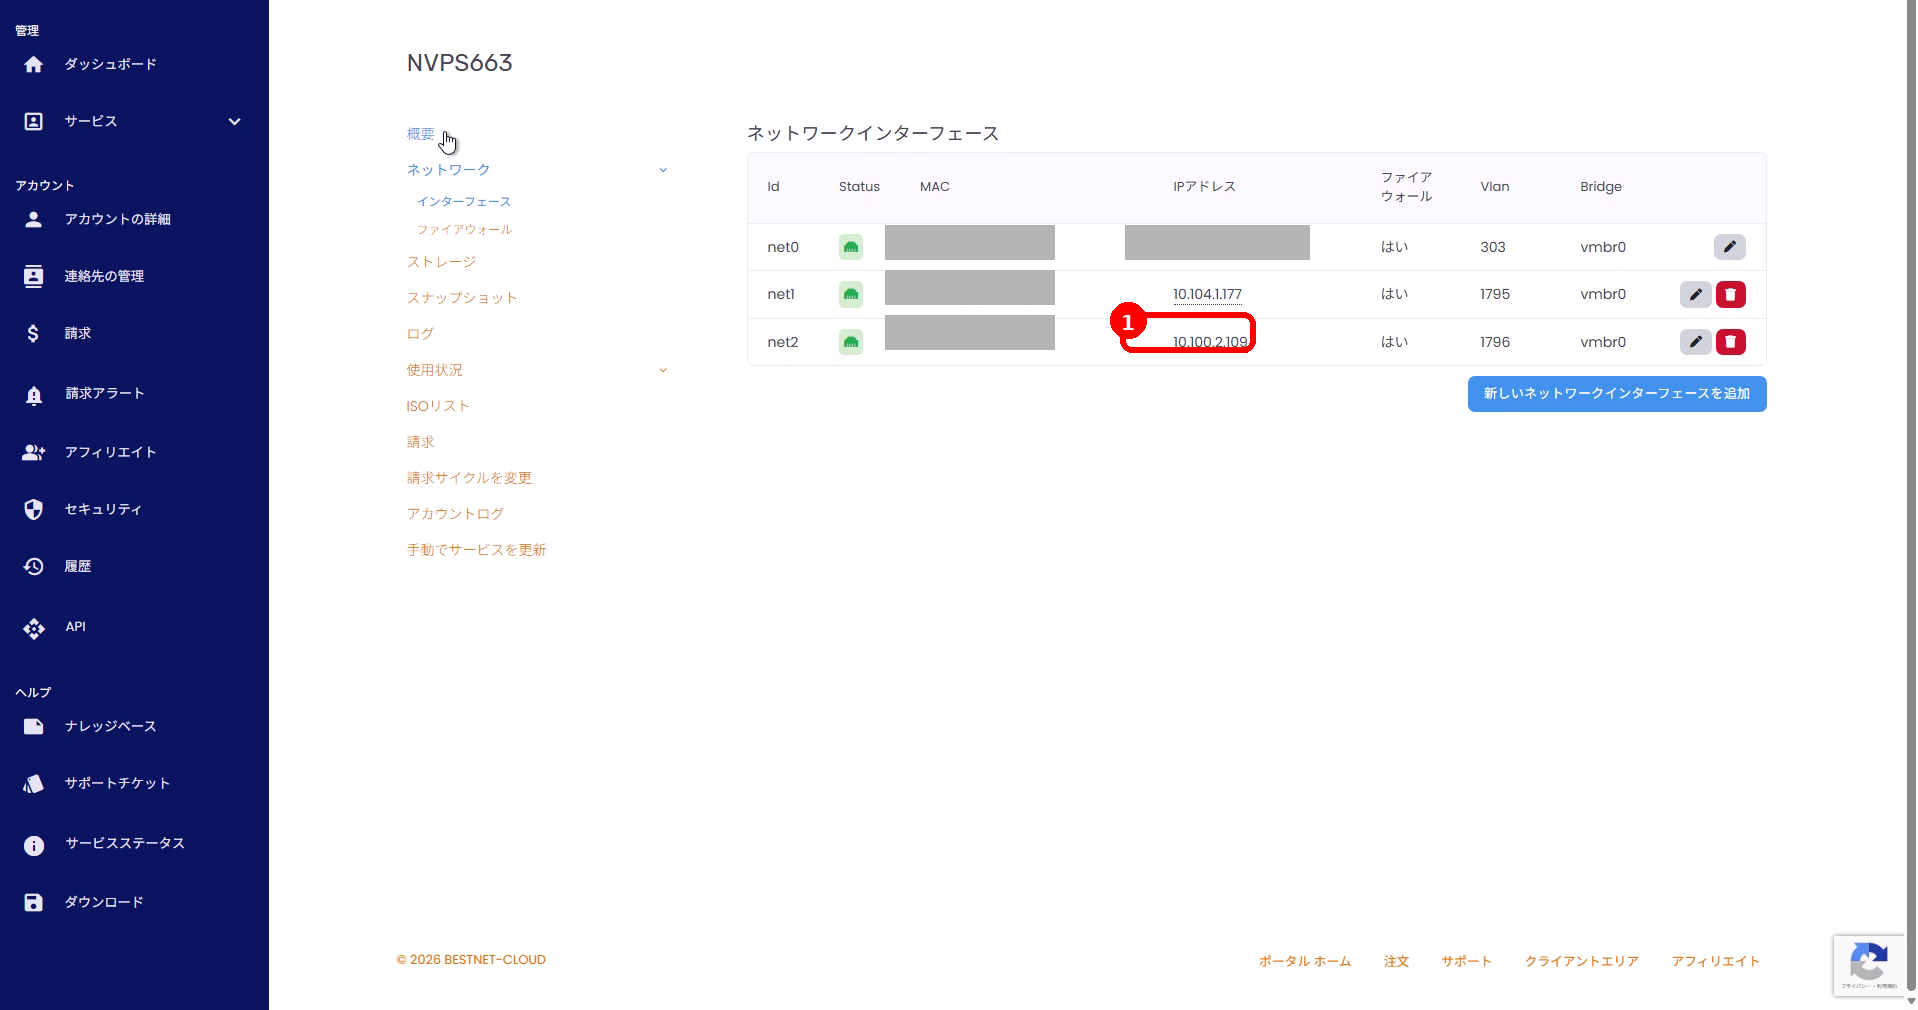
- Verify that the private IP has been added in the IP field of the server details screen.
4BESTNET-VPS: Assign Private IP to an Existing Server #
- Open the target VPS and open Network > Interfaces from the left menu.
- Click Add New Network Interface.
- From the IPv4 addresses dropdown, select the private subnet you want to assign.
- Click Assign new IP to reserve an IP.
- Click Add New Network Interface to apply the changes.
- Verify that the private IP has been added in the interfaces list.
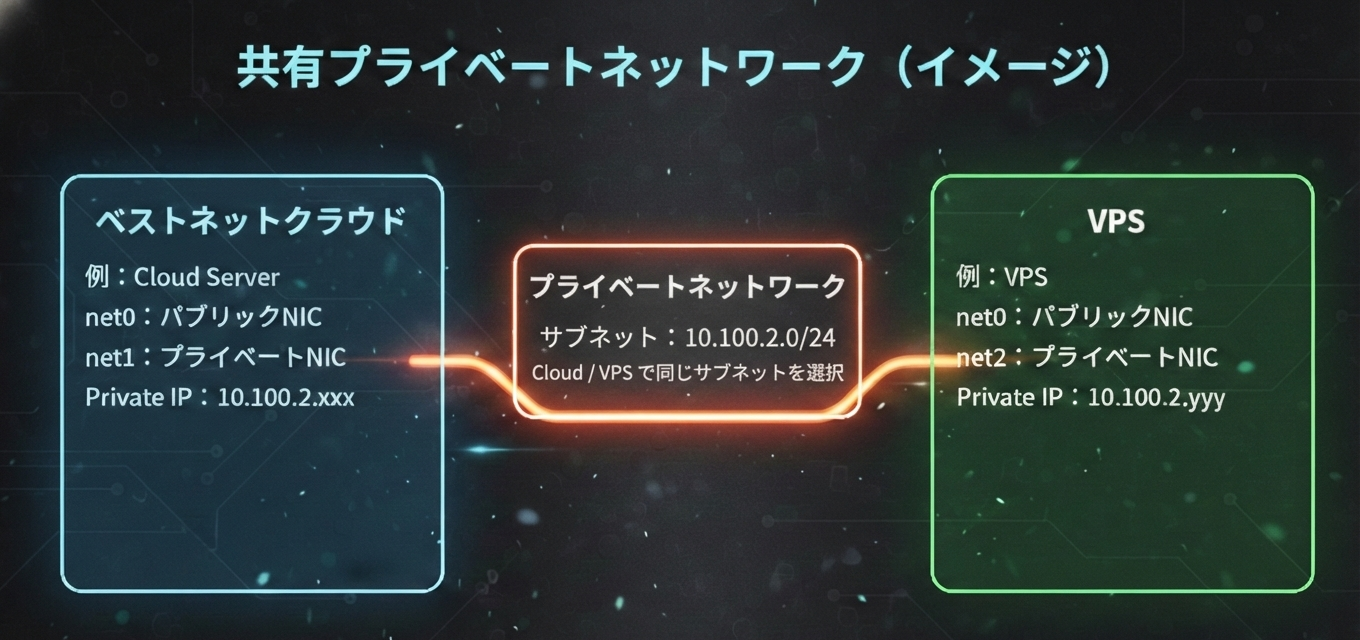
Using a Common Private Network Between BESTNET-CLOUD and BESTNET-VPS #
To use a common private network, select the same private subnet (e.g., 10.100.2.0/24) on both the BESTNET-CLOUD side and BESTNET-VPS side and add interfaces.
Configuration Points
Cloud Side
- Open Network > Interfaces
- Select the same subnet such as
10.100.2.0/24
VPS Side
- Open Network > Interfaces
- Select the same subnet such as
10.100.2.0/24
Adding a New Server with a Private IP (Conceptual Approach) #
- From the BESTNET-CLOUD instances list, create a server using Add New Server.
- After server creation, follow the same procedure as “Assigning Private IPs to Existing Servers” to assign a private subnet.
The approach to joining a private network is the same whether for existing or newly created servers. Select the subnet you want to use and add it to the network interface.


