
Firewall Configuration Guide
This procedure guide provides instructions for adding, editing, and deleting firewall rules for VPS / servers from the client portal, and for configuring default policies (Input / Output Policy) and log collection settings as needed.
Important
Outbound communication may require approval. For details, please see here.
Overview #
- Rules: Add, edit, and delete allow / deny rules
- Options: Configure default policies (Input / Output Policy), log levels, and more
- Logs: View and download firewall logs
Prerequisites #
- You are logged in to the client portal
- You can select the target service (VPS / server)
- You understand the communications you want to allow (e.g., HTTPS
443, SSH22, etc.), and if necessary, you have identified the source IP addresses (static global IP, etc.) that should be allowed
Operation Procedure #
1Open the Firewall screen #
- From the left menu Services, open the target VPS / server.
- In the server details menu, expand Network and click Firewall.
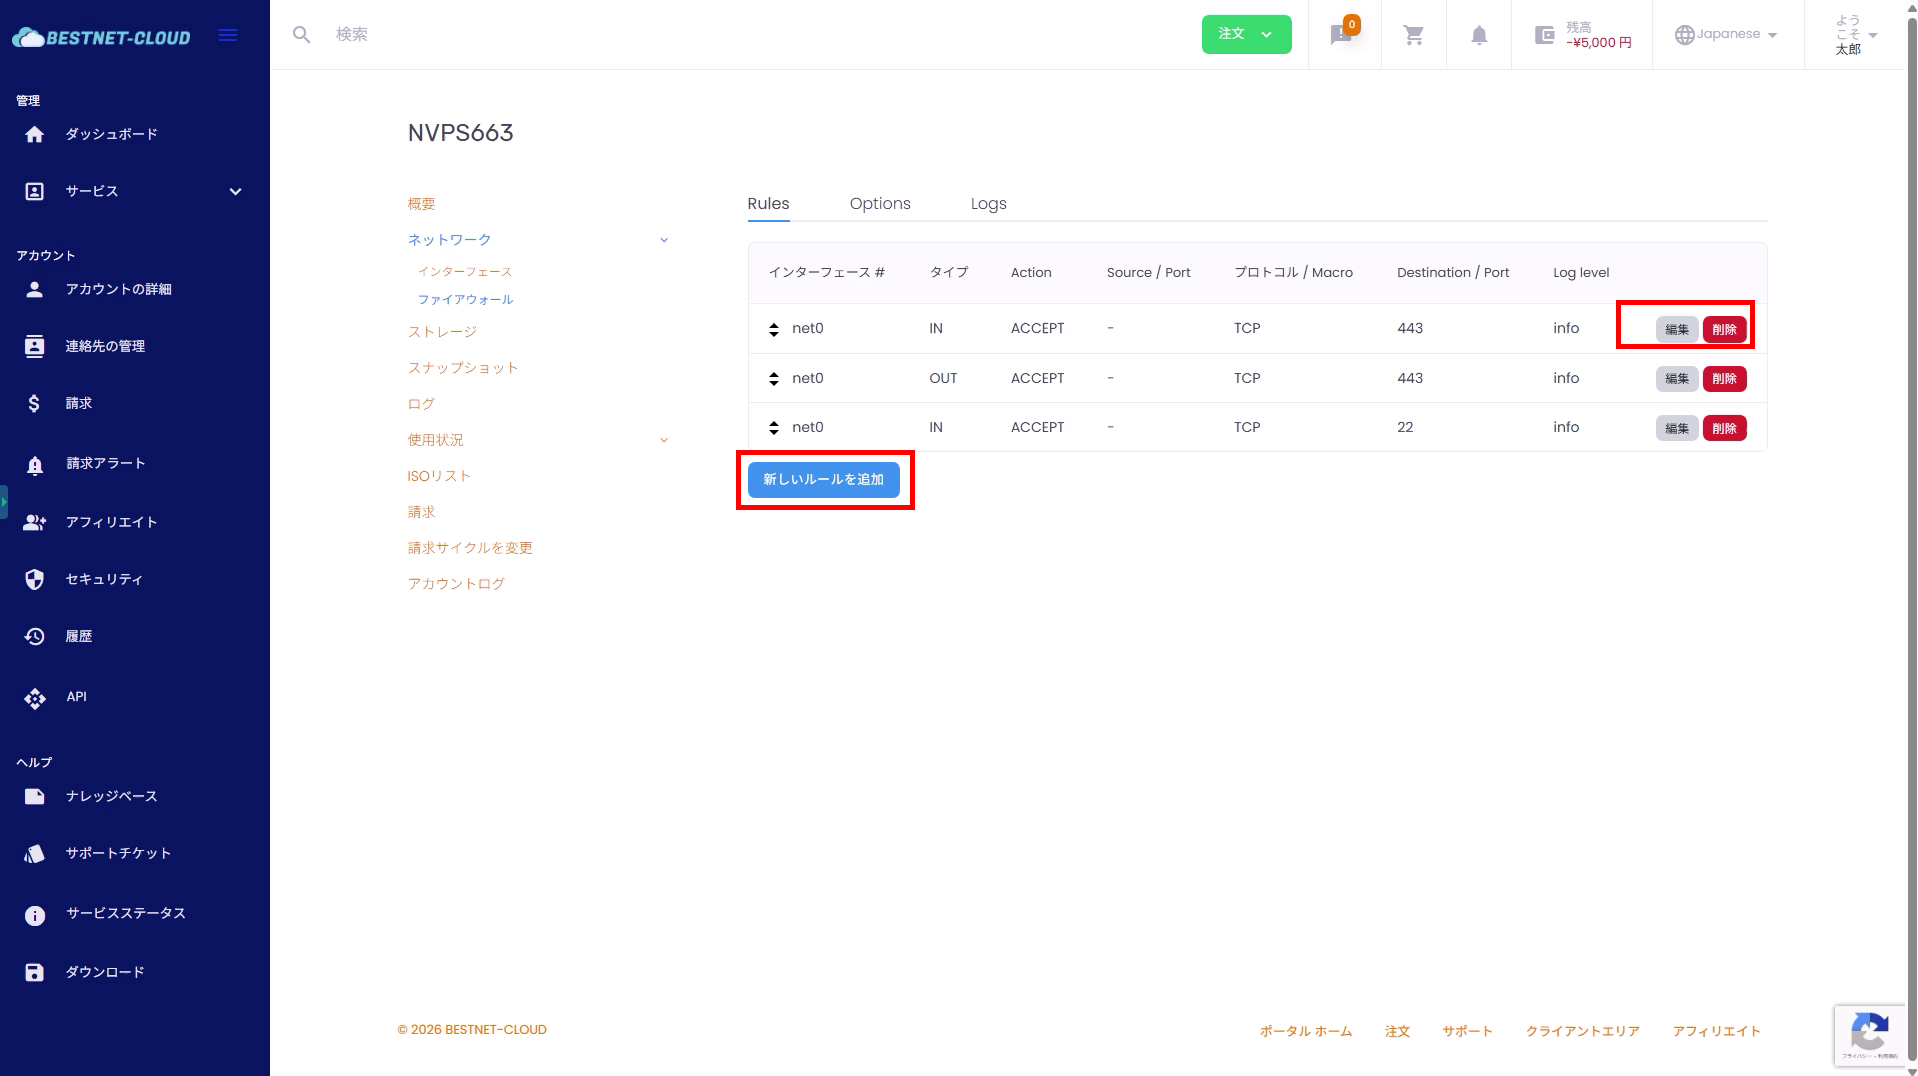
2Rules list view #
In the Rules tab, IN / OUT rules are displayed for each interface (e.g., net0).
- Type: IN (inbound) / OUT (outbound)
- Action: ACCEPT (allow) / DROP (deny)
- Source / Port: Source IP / source port
- Destination / Port: Destination IP / destination port
- Protocol / Macro: TCP / UDP / ICMP, etc., or Macro (predefined set)
- Log level: Log level per rule
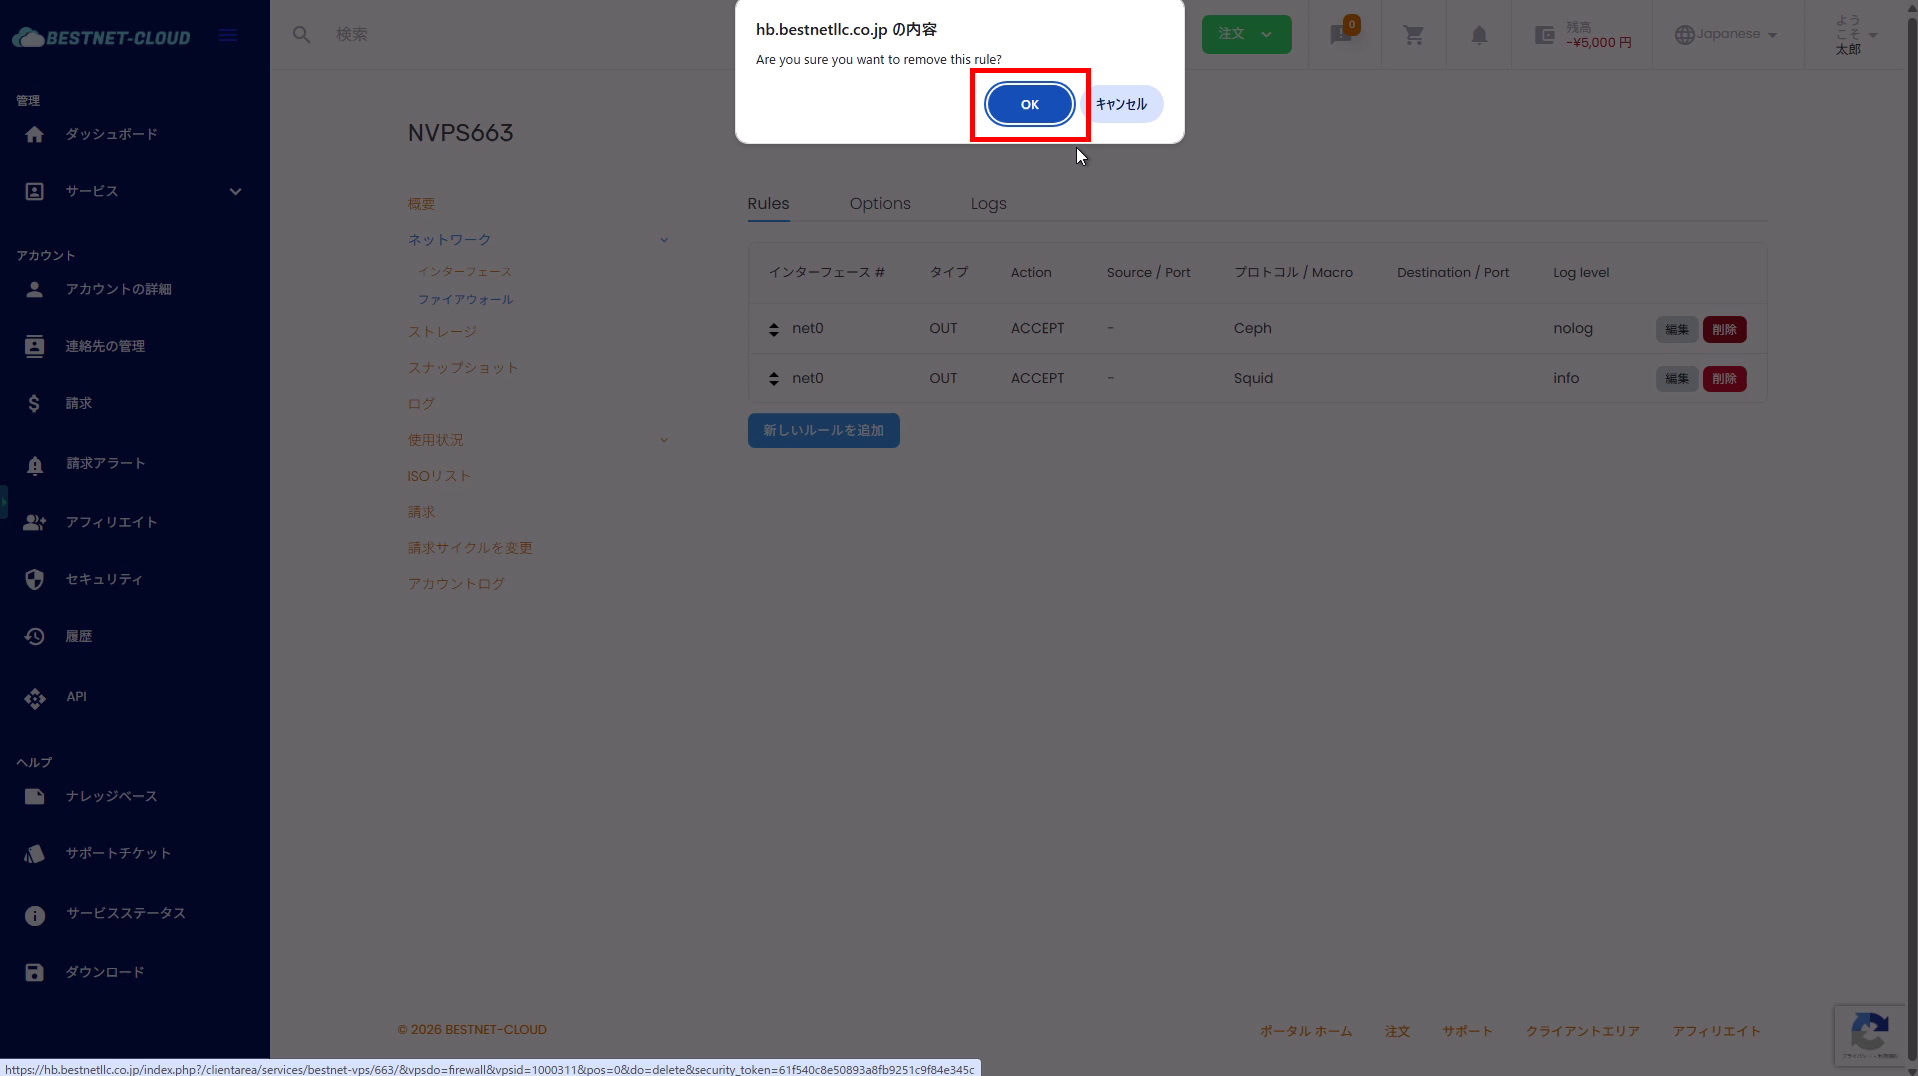
3Delete a rule #
- In the Rules tab, click Delete on the rule row you want to delete.
- A confirmation dialog will appear. Click OK if there are no issues.
Note
The rule may not disappear immediately after deletion, and a notification such as “Pending deletion” may appear in the top right. Wait a moment and refresh the page before confirming the change takes effect.
4Add a rule #
- In the Rules tab, click Add new rule.
- In the “Add new rule” dialog (modal), enter the required information.
- After entering the information, click Submit.
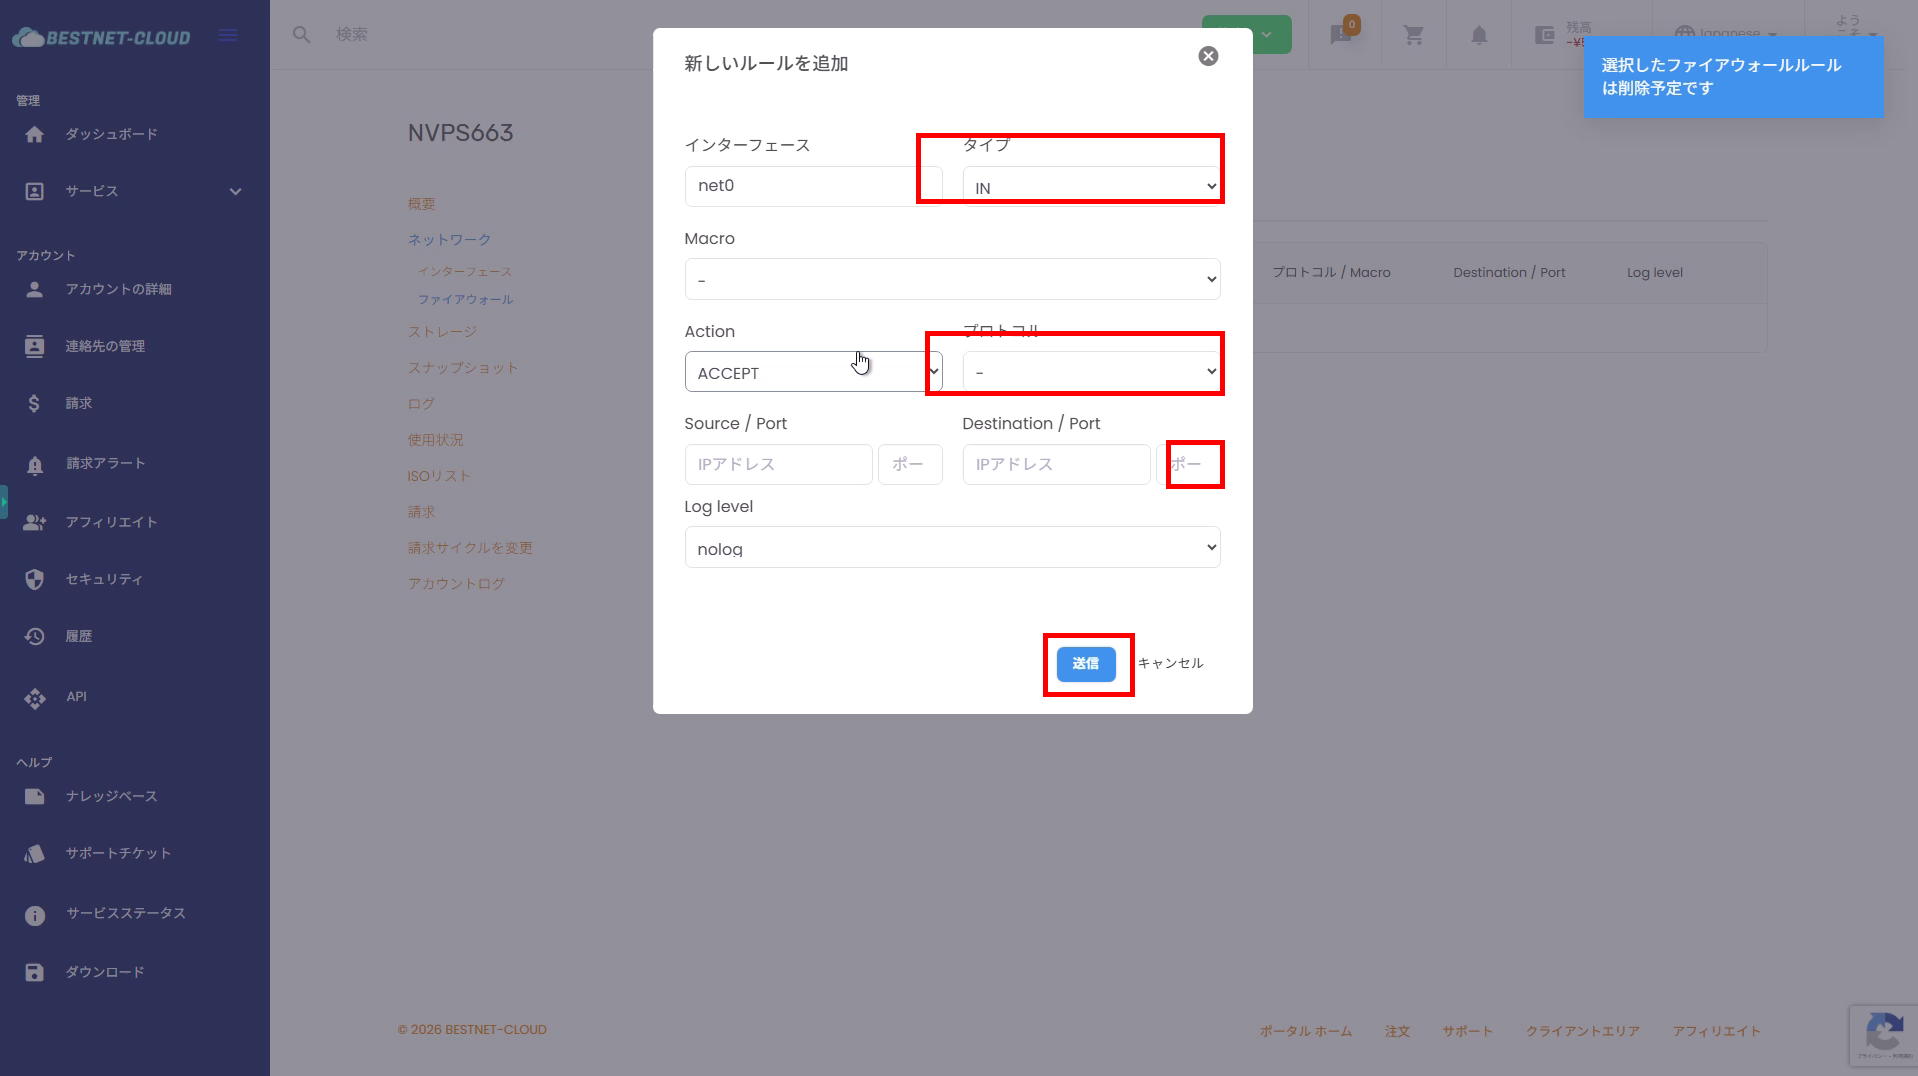
Input fields in the add screen #
- Interface: Normally
net0(select the target if multiple interfaces exist depending on the environment) - Type: IN (inbound) / OUT (outbound)
- Macro: Select if using a predefined template (set to “-” if not needed)
- Action: ACCEPT (allow) / DROP (deny)
- Protocol: TCP / UDP / ICMP, etc. (be careful when using Macro)
- Source / Port: Source IP / source port (specify only when necessary)
- Destination / Port: Destination IP / destination port (typically specify the destination port)
- Log level:
nolog/info/notice, etc.
4.1Add example: Allow SSH (TCP 22) and limit the source IP #
Fully opening SSH makes it an easy target for attacks. If you have a static IP, we recommend specifying the Source / Port (source IP).
- Edit the SSH rule in Rules (or add a new one).
- Enter the source IP in Source / Port (e.g.,
1.1.1.1/32). - Click Submit.
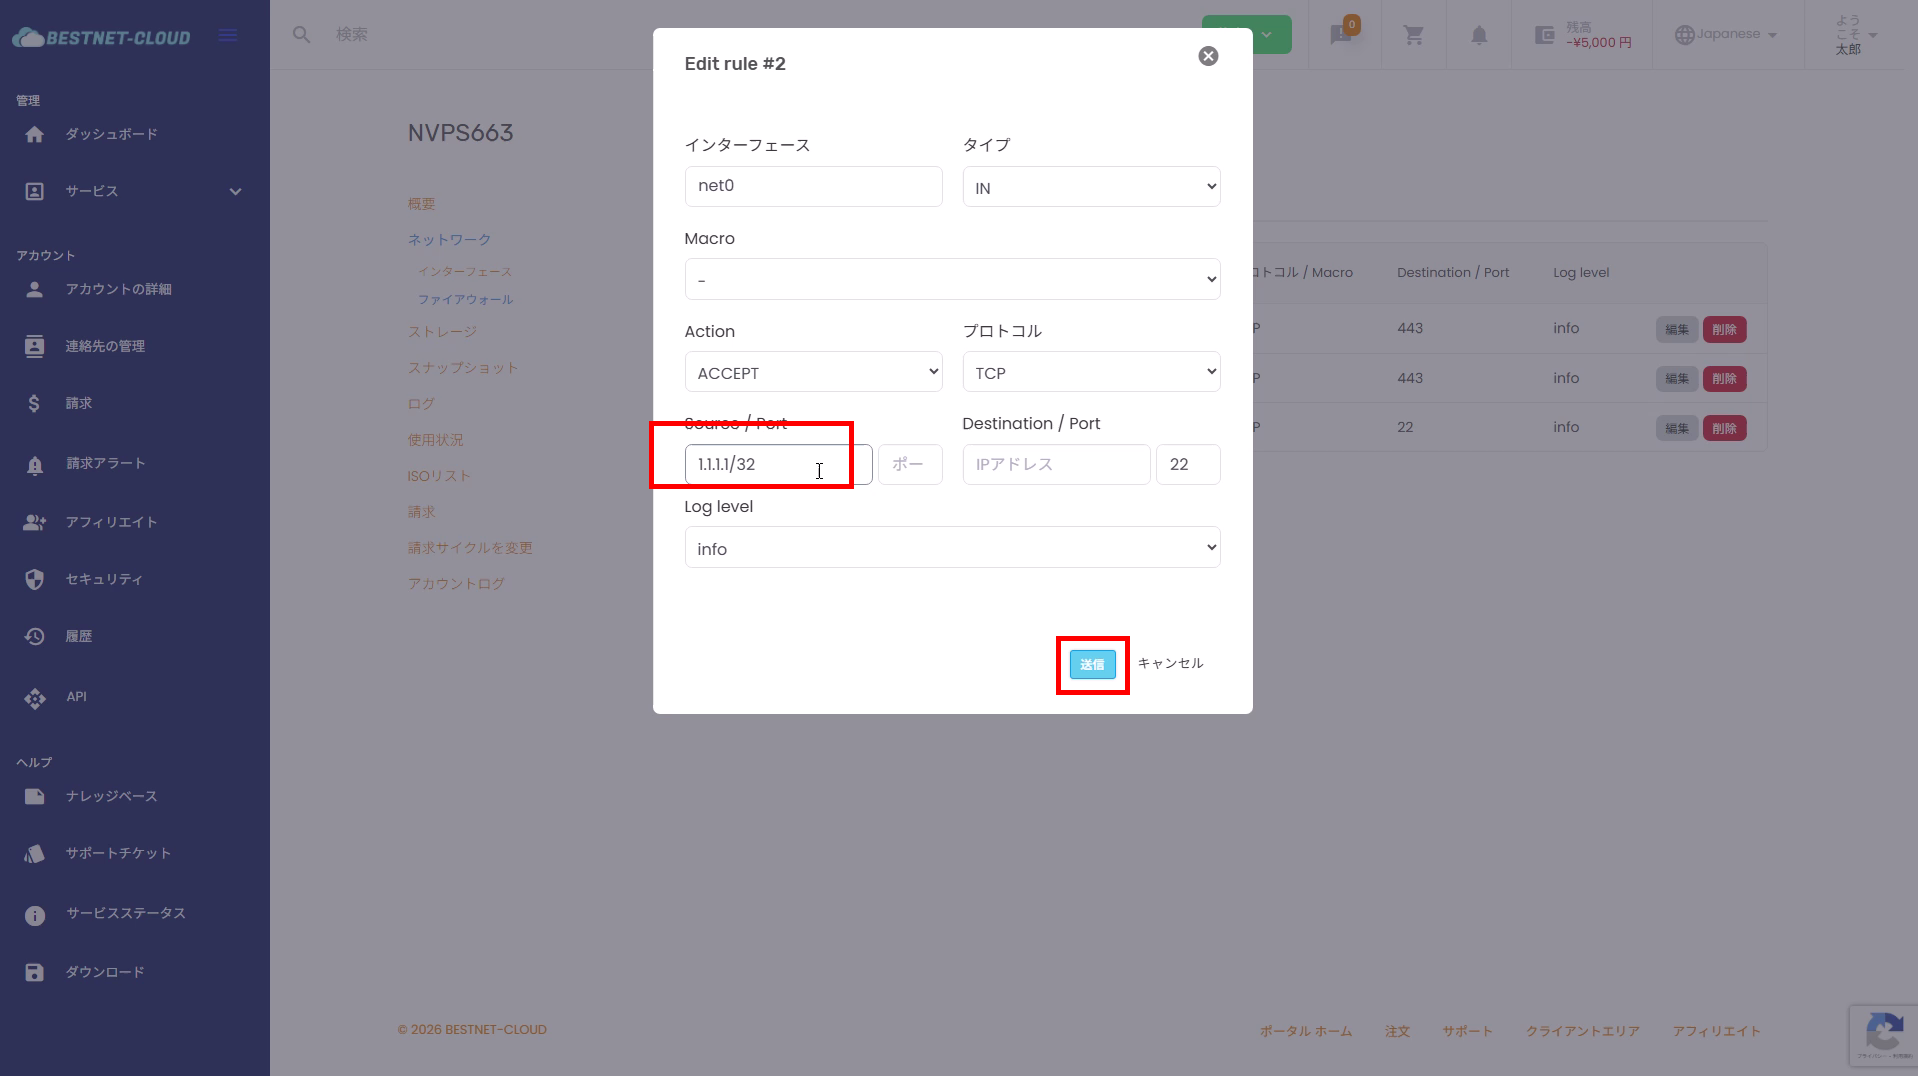
/32) to narrow the range of SSH access.4.2IP address input format #
In Source / Port (source IP) and Destination / Port (destination IP), you can enter the following formats depending on your operational needs.
- Single IP:
203.0.113.10or203.0.113.10/32 - CIDR:
192.168.1.0/24 - IP range:
192.168.30.10-192.168.30.20 - Multiple specifications (comma-separated):
192.168.1.0/24,192.168.2.0/24
192.168.1.0/24,192.168.2.0/24).
5Edit a rule #
- In the Rules tab, click Edit on the target rule.
- Modify the necessary items and click Submit.
Tip
If there are multiple rules, to avoid unintended communication blocking, we recommend taking a screenshot of the current settings before making changes.
6Options Set the default policy #
In the Options tab, you can configure how communications that do not match rules are handled (Input / Output Policy).
- Input Policy: Default for inbound (e.g., DROP)
- Output Policy: Default for outbound (e.g., ACCEPT)
- Log Level (IN / OUT): Log level by direction (behavior may differ depending on the environment)
- Open the Options tab.
- Change Input Policy / Output Policy as needed.
- Click Save changes.

Note
When setting Input Policy to DROP, prepare ACCEPT rules for necessary inbound communications (e.g., SSH / HTTPS, etc.) first.
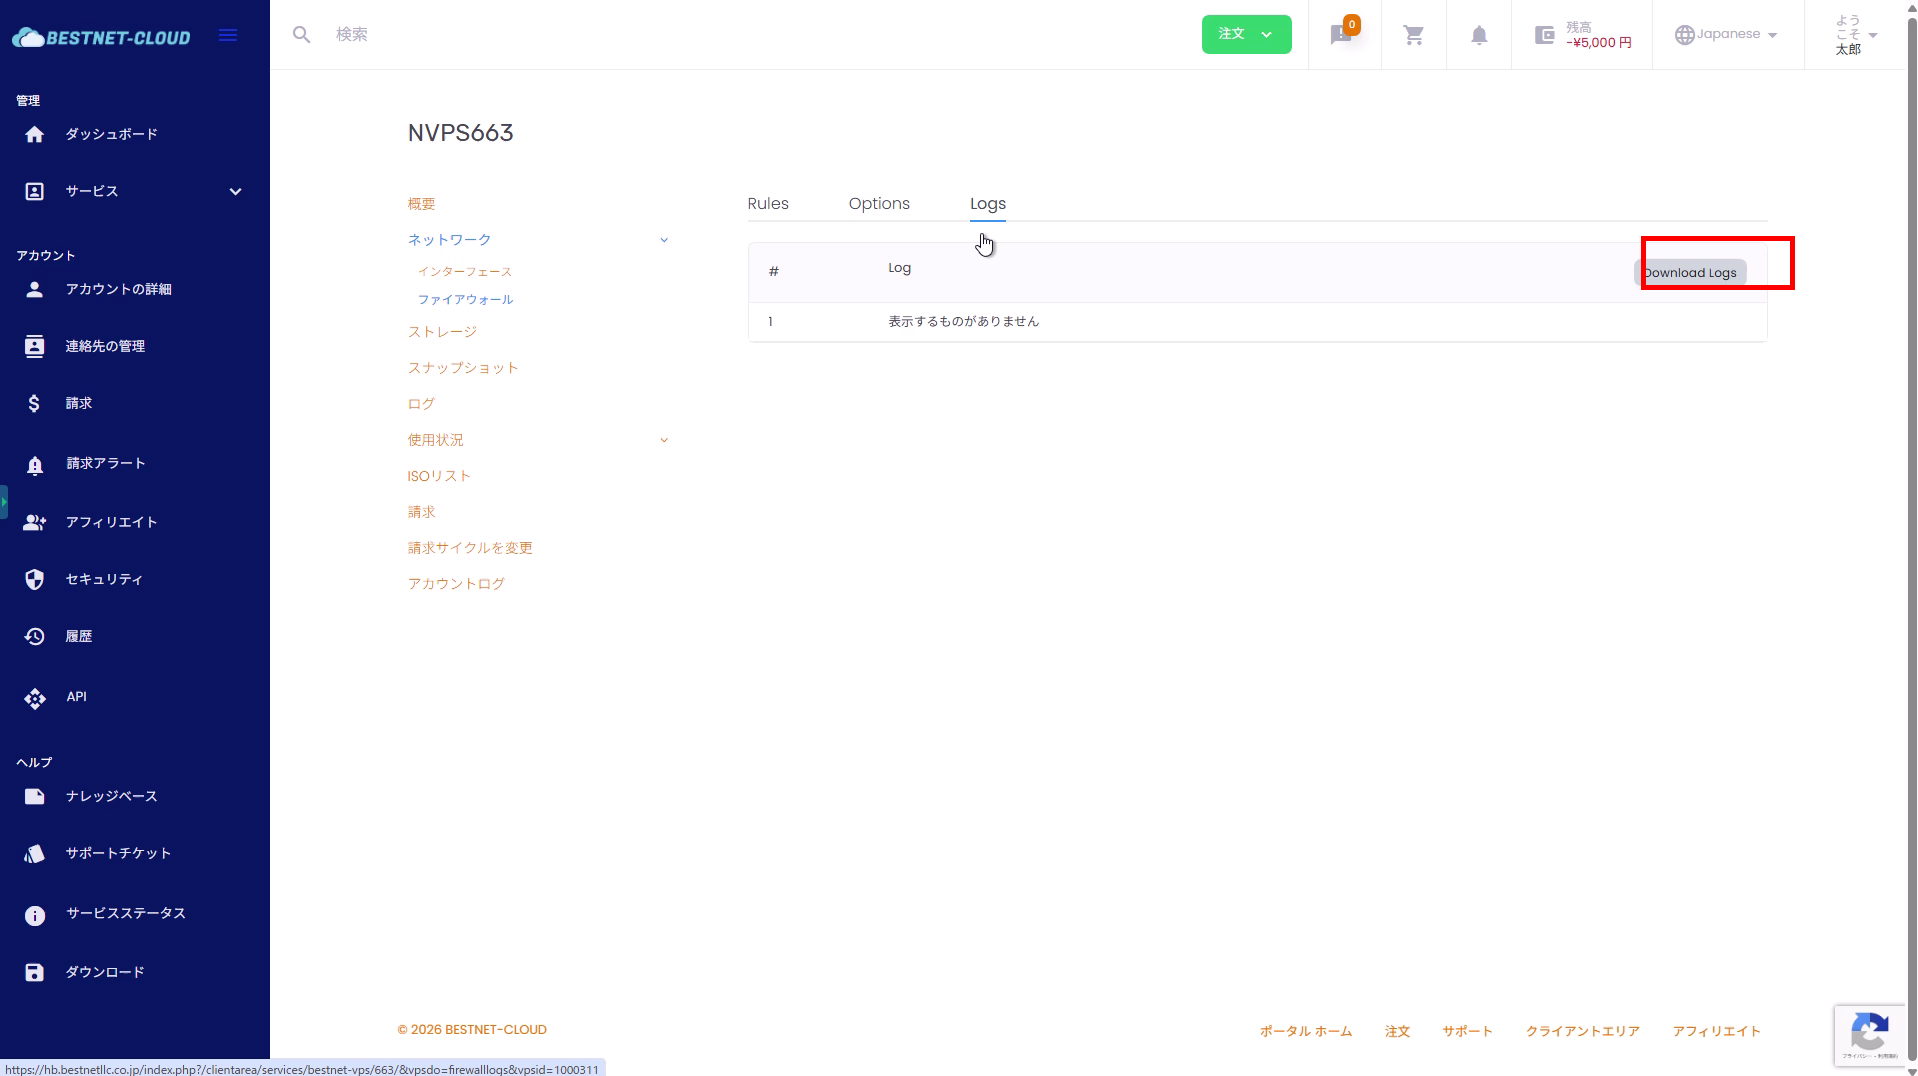
7Logs View and download logs #
- Open the Logs tab.
- If logs do not appear, review the rule’s Log level or Options log settings.
- Download logs from Download Logs if necessary.
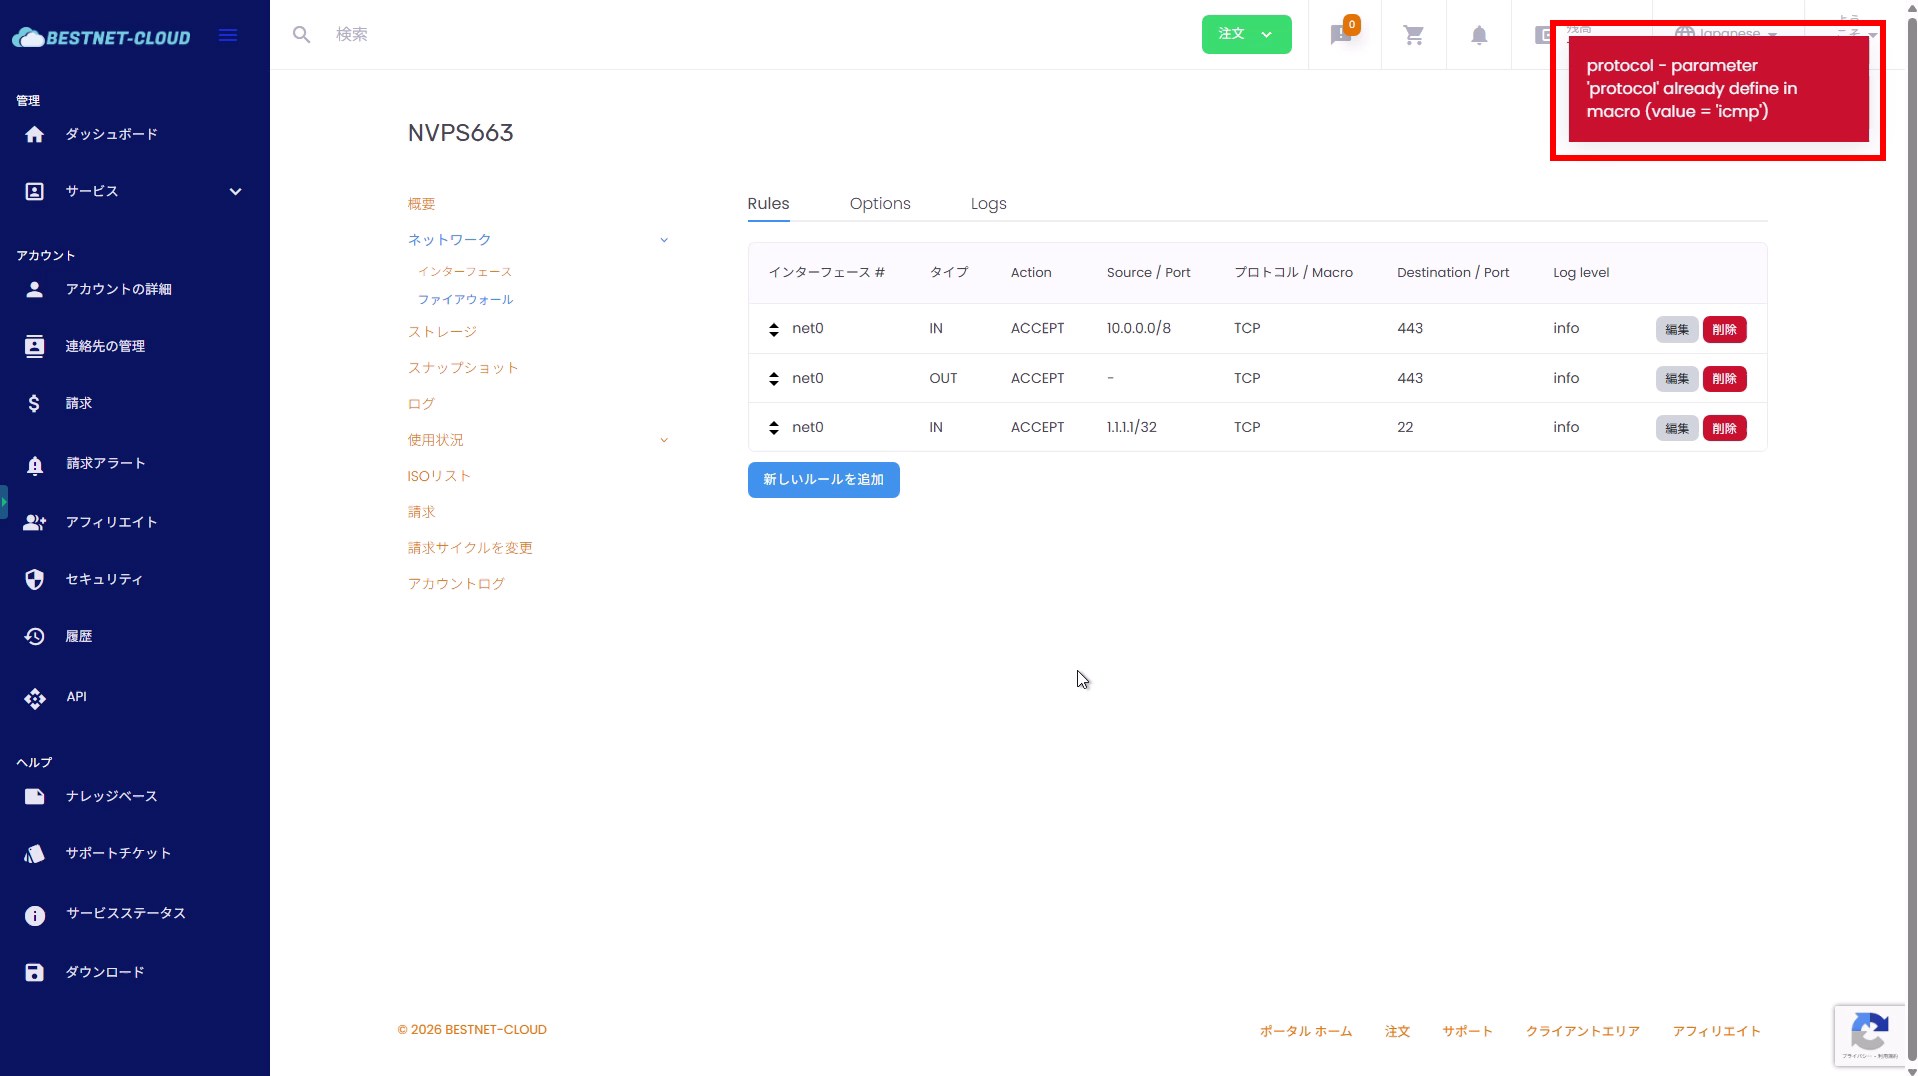
Common errors and solutions #
Error when specifying protocol with macro selected #
Some macros have the protocol fixed internally, so specifying a separate protocol may cause an error
(e.g., protocol already define in macro).
- Solution: Set the protocol to “-” when using Macro, or set Macro to “-” and then specify the protocol.
Check points if changes are not reflected #
- Check if a notification such as “Pending creation” or “Pending deletion” appears in the top right (the change may be waiting to take effect)
- After adding / editing rules, check if the display is updated by refreshing the page
- If Input Policy is set to DROP, ensure that ACCEPT rules for necessary communications exist
- If logs do not appear: check if the rule’s Log level / Options Log Level setting is enabled
- Check that you have not missed submitting an approval request for the protocol / port number
Supplementary: Recommended security operations #
- Limit source IPs as much as possible for administrative ports (e.g., SSH
22). - Do not allow ports that do not need to be public (principle of least privilege)
- Verify connectivity before and after changes to confirm that necessary ports are open.


