
Overview #
This procedure describes how to add, configure permissions, edit, and delete sub-users (contacts) in the client portal.
Please Note: This procedure was created with the assistance of generative AI. Annotations (arrows, boxes, numbers, etc.) in screenshots may be slightly offset from the actual screen. When performing operations, please prioritize the screen display and text content.
What are Sub-users (Contacts)? #
Sub-users are users created as “Contacts” linked to the main account, with only the necessary operational permissions granted to allow portal access.
Prerequisites #
- You are logged into the client portal with the main account
- You have prepared the email address to be registered as a sub-user in advance
Adding a Sub-user #
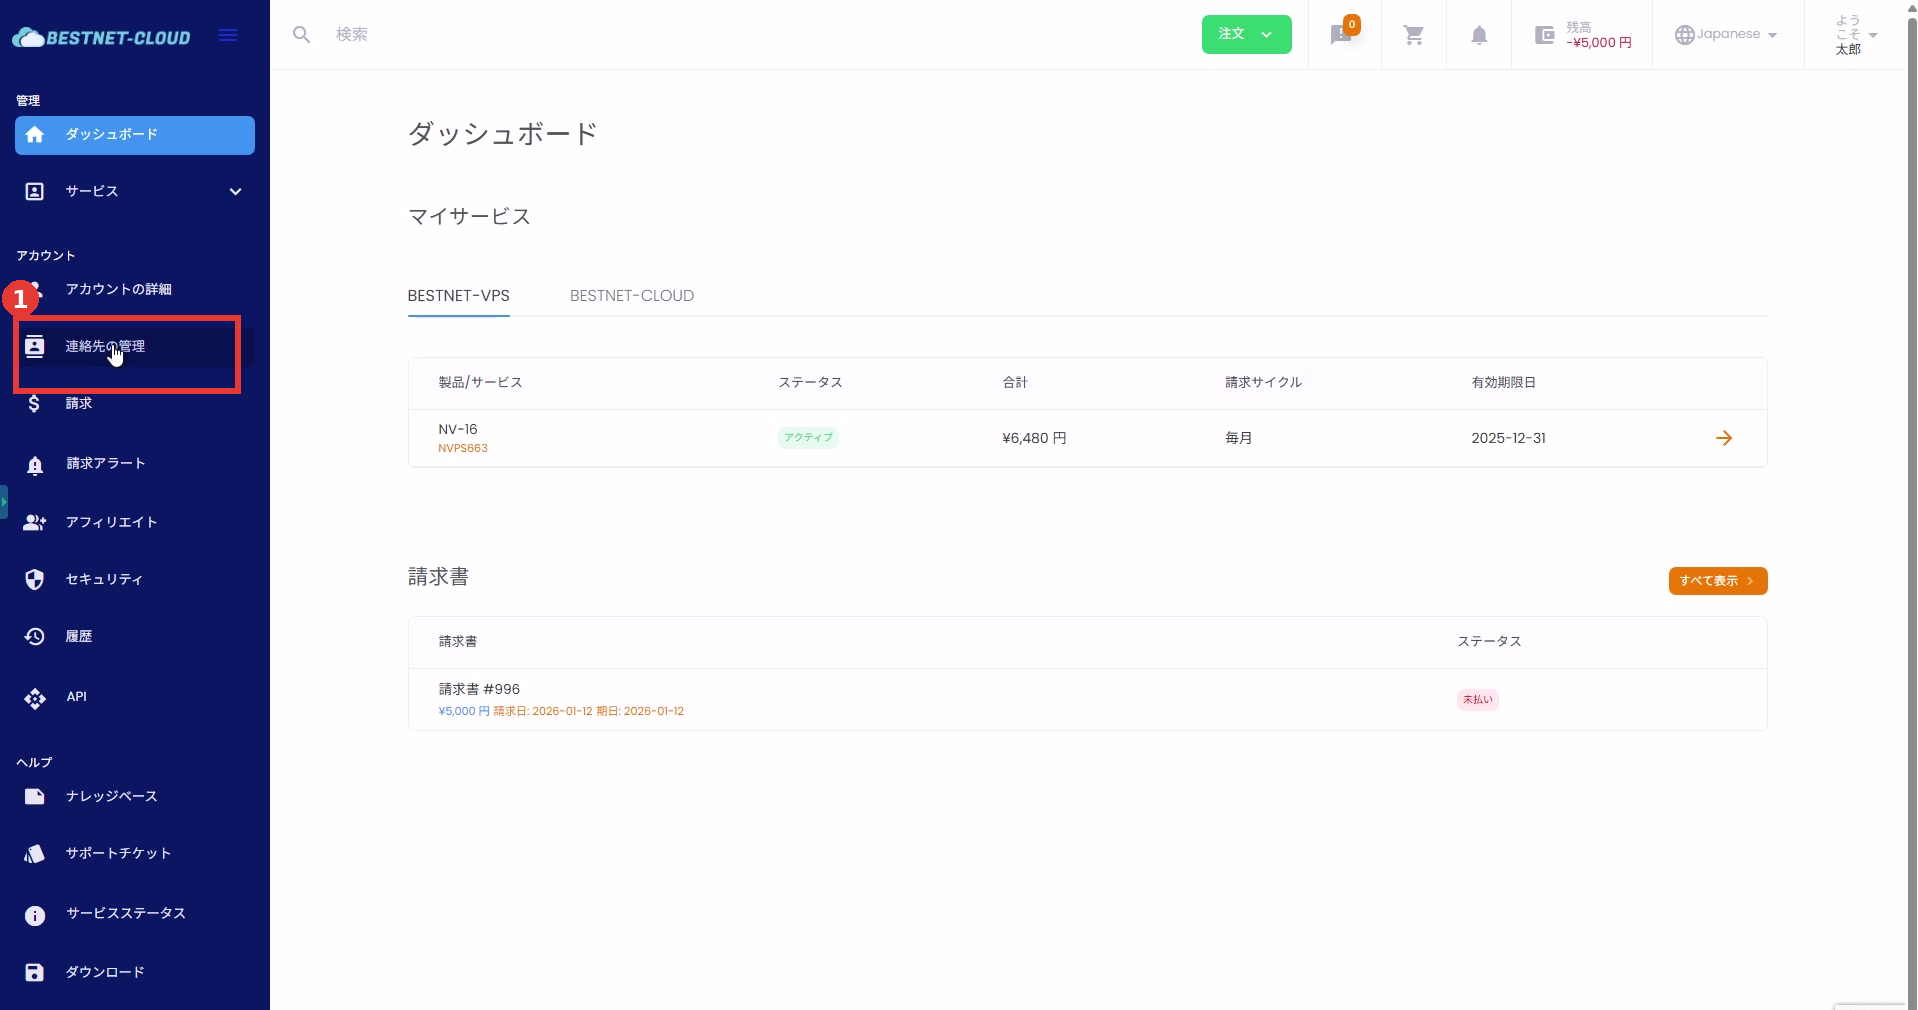
1. Open the Contact (Sub-user) Management Screen #
- Click [Account] → [Manage Contacts] in the left menu.
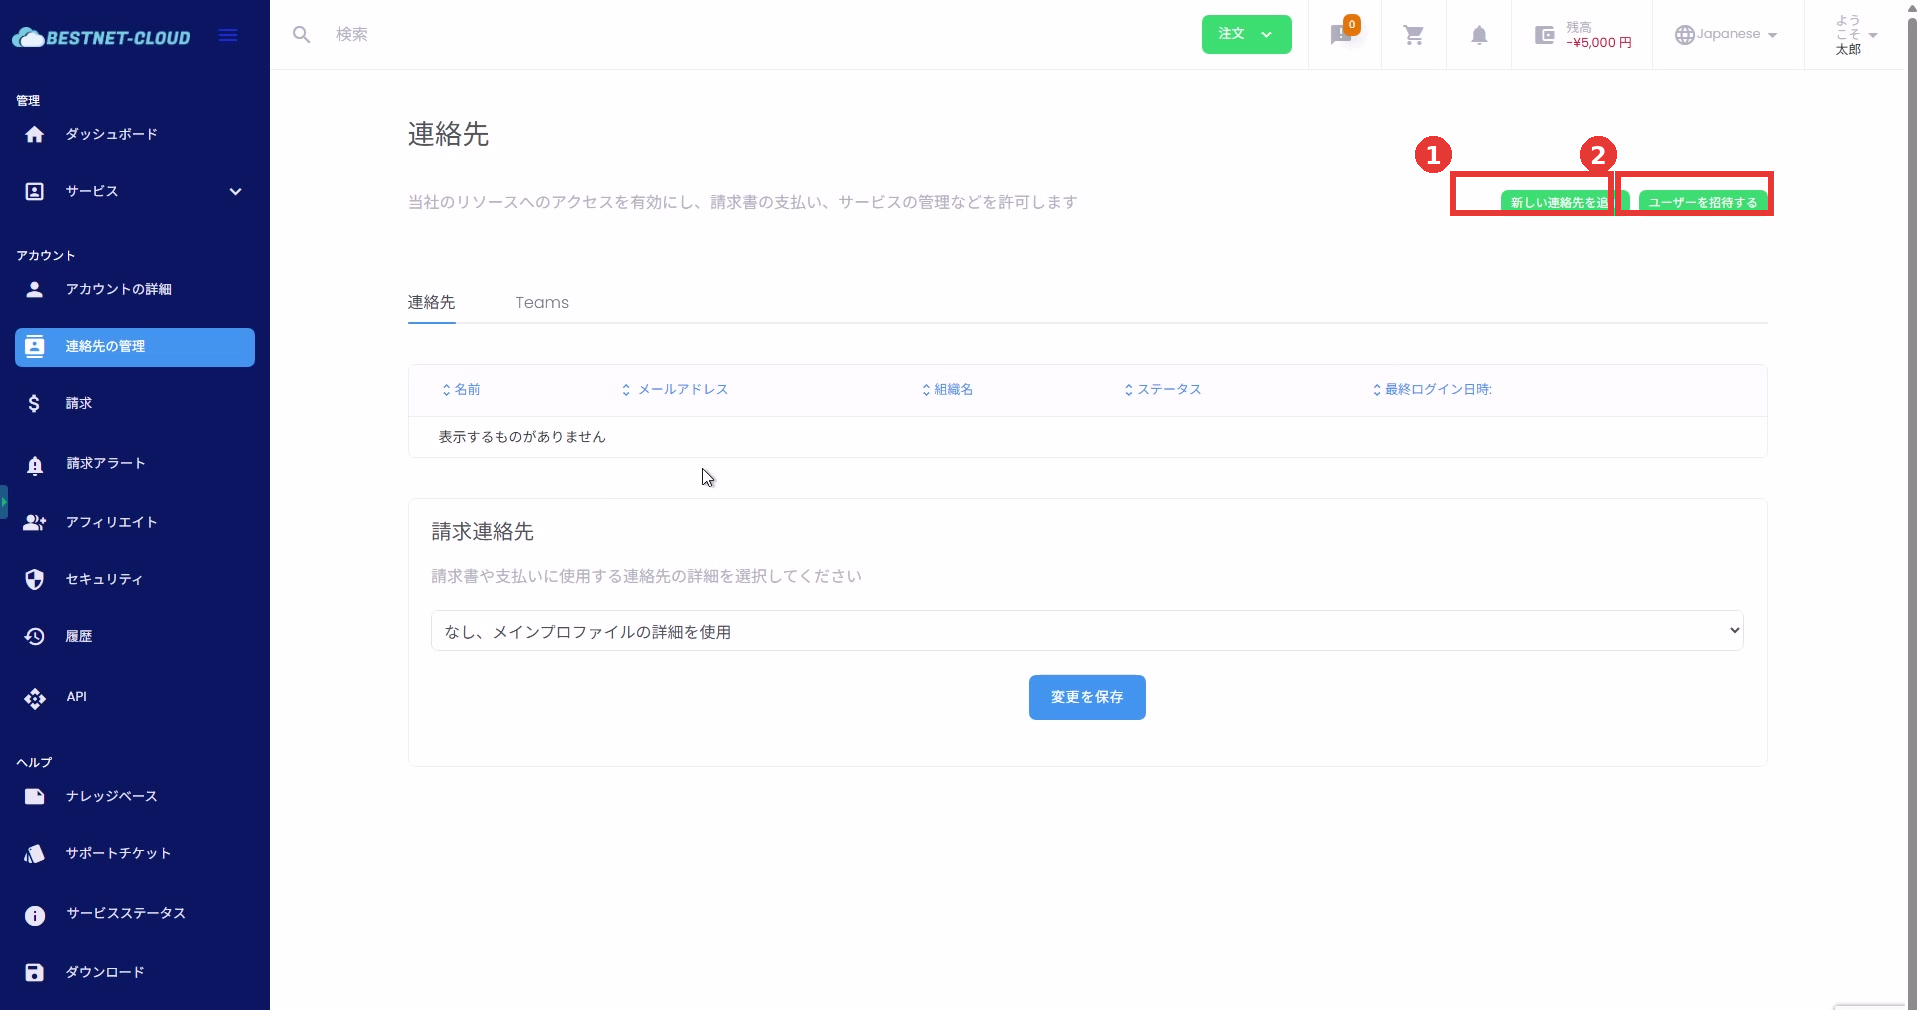
2. Choose an Addition Method (New Addition / Invite) #
From the top right of the contact screen, select the addition method according to your use case.
- [Add New Contact]: The administrator sets up user information, password, and permissions on the spot to create the contact.
- [Invite User]: Send an invitation email and have the user complete registration on their end (display content may vary depending on environment settings).
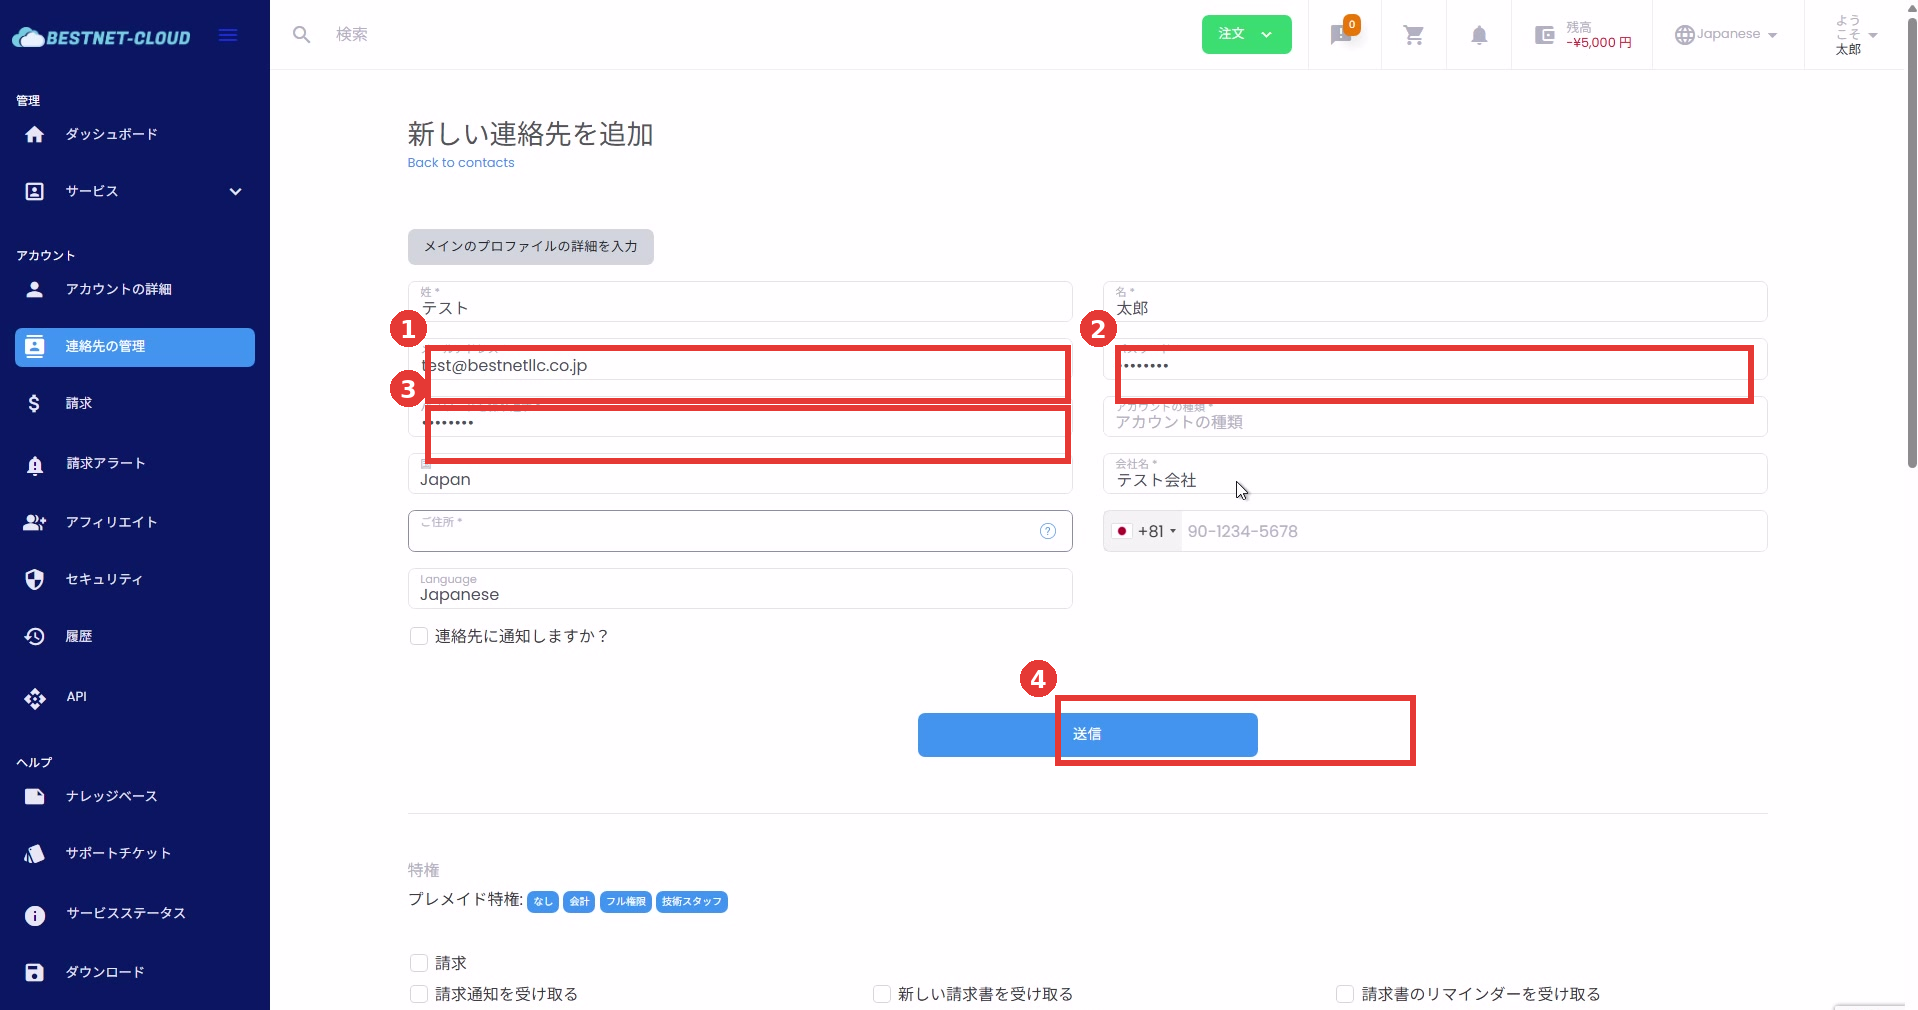
3. Enter Sub-user Basic Information #
- Click [Add New Contact].
- Enter required fields (first name, last name, email address, password, etc.).
- If necessary, enable [Notify the contact?] (notification content may vary depending on environment settings).
Configuring Permissions (Privileges) #
1. Select a Permission Template #
In the “Privileges” section, you can select a template (for example: None / Accounting / Full Access / Technical Staff) to grant commonly used permission sets at once.
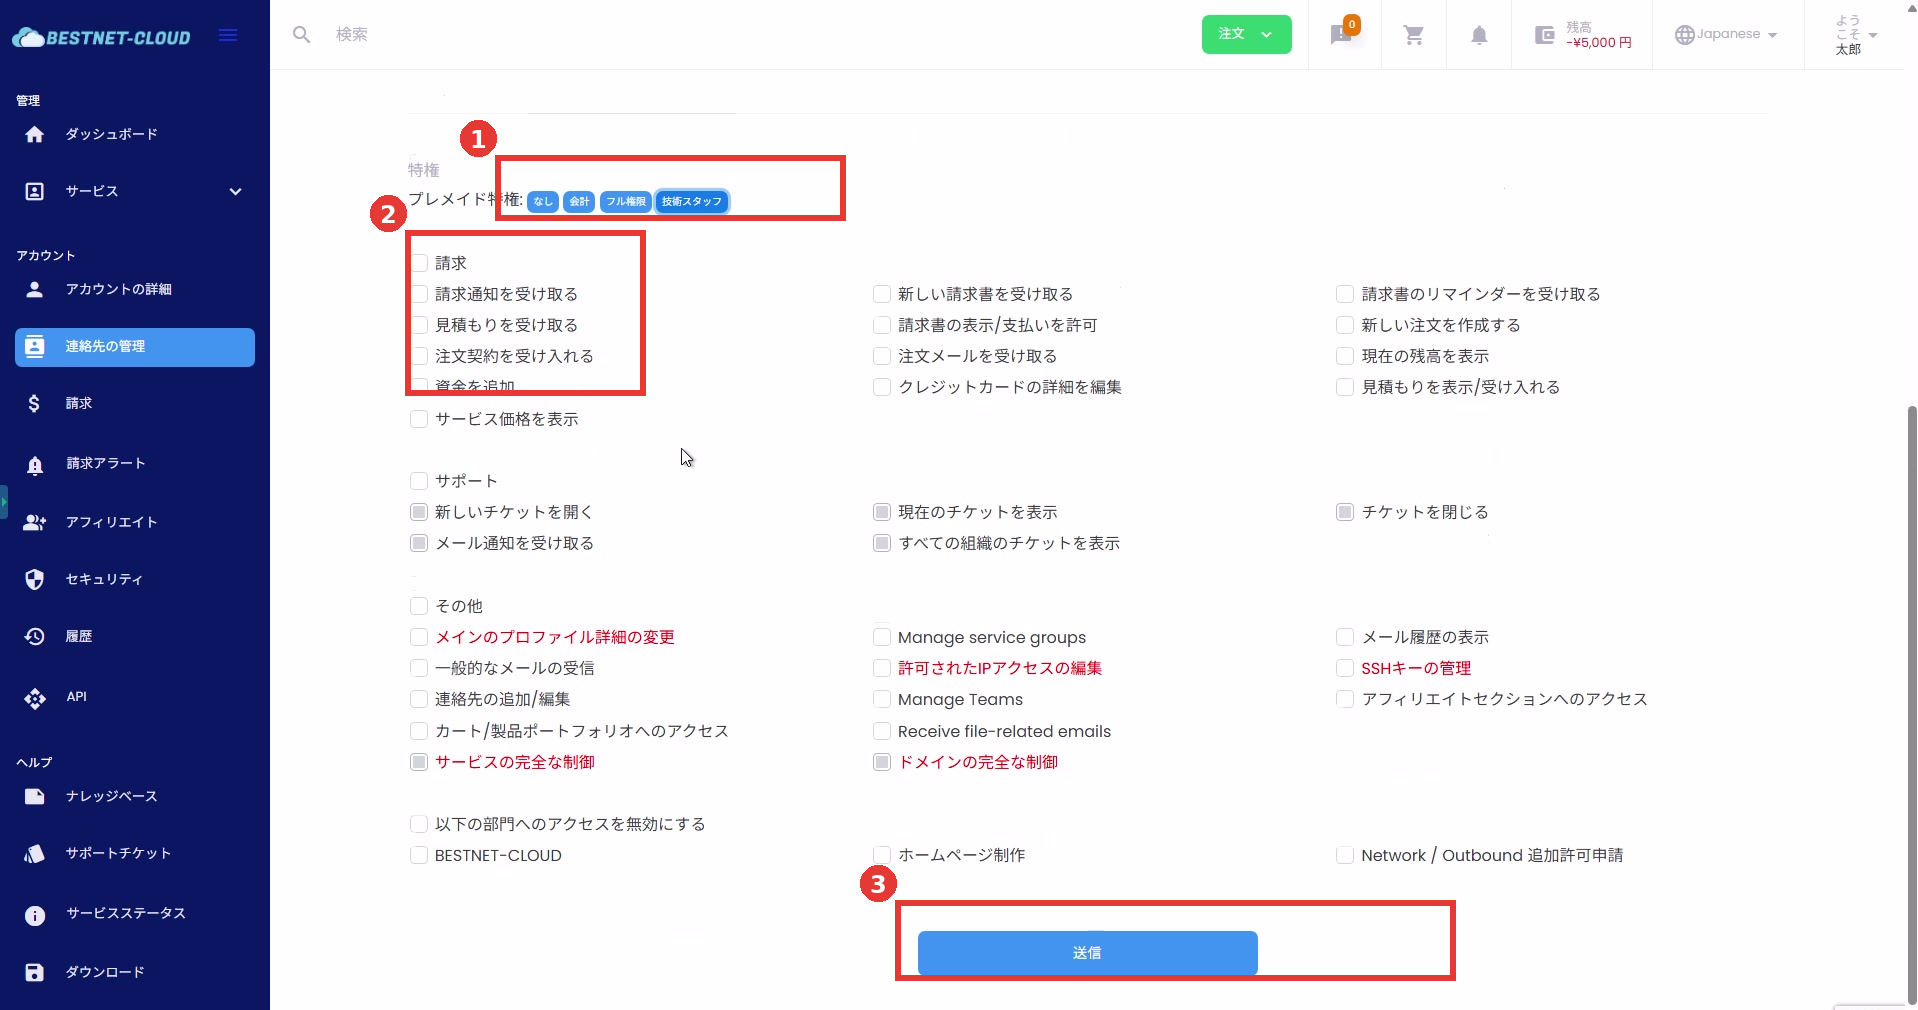
2. Adjust Individual Permissions #
- Minimum privileges is recommended as the baseline, granting only the necessary operations.
- Be cautious about granting permissions such as “Modify main profile details” that affect the entire account.
3. Set Service (Contract) Level Permissions #
For each active service contract, you can control which operations are permitted (for example: Power Management, Rebuild, VNC Console, etc.).
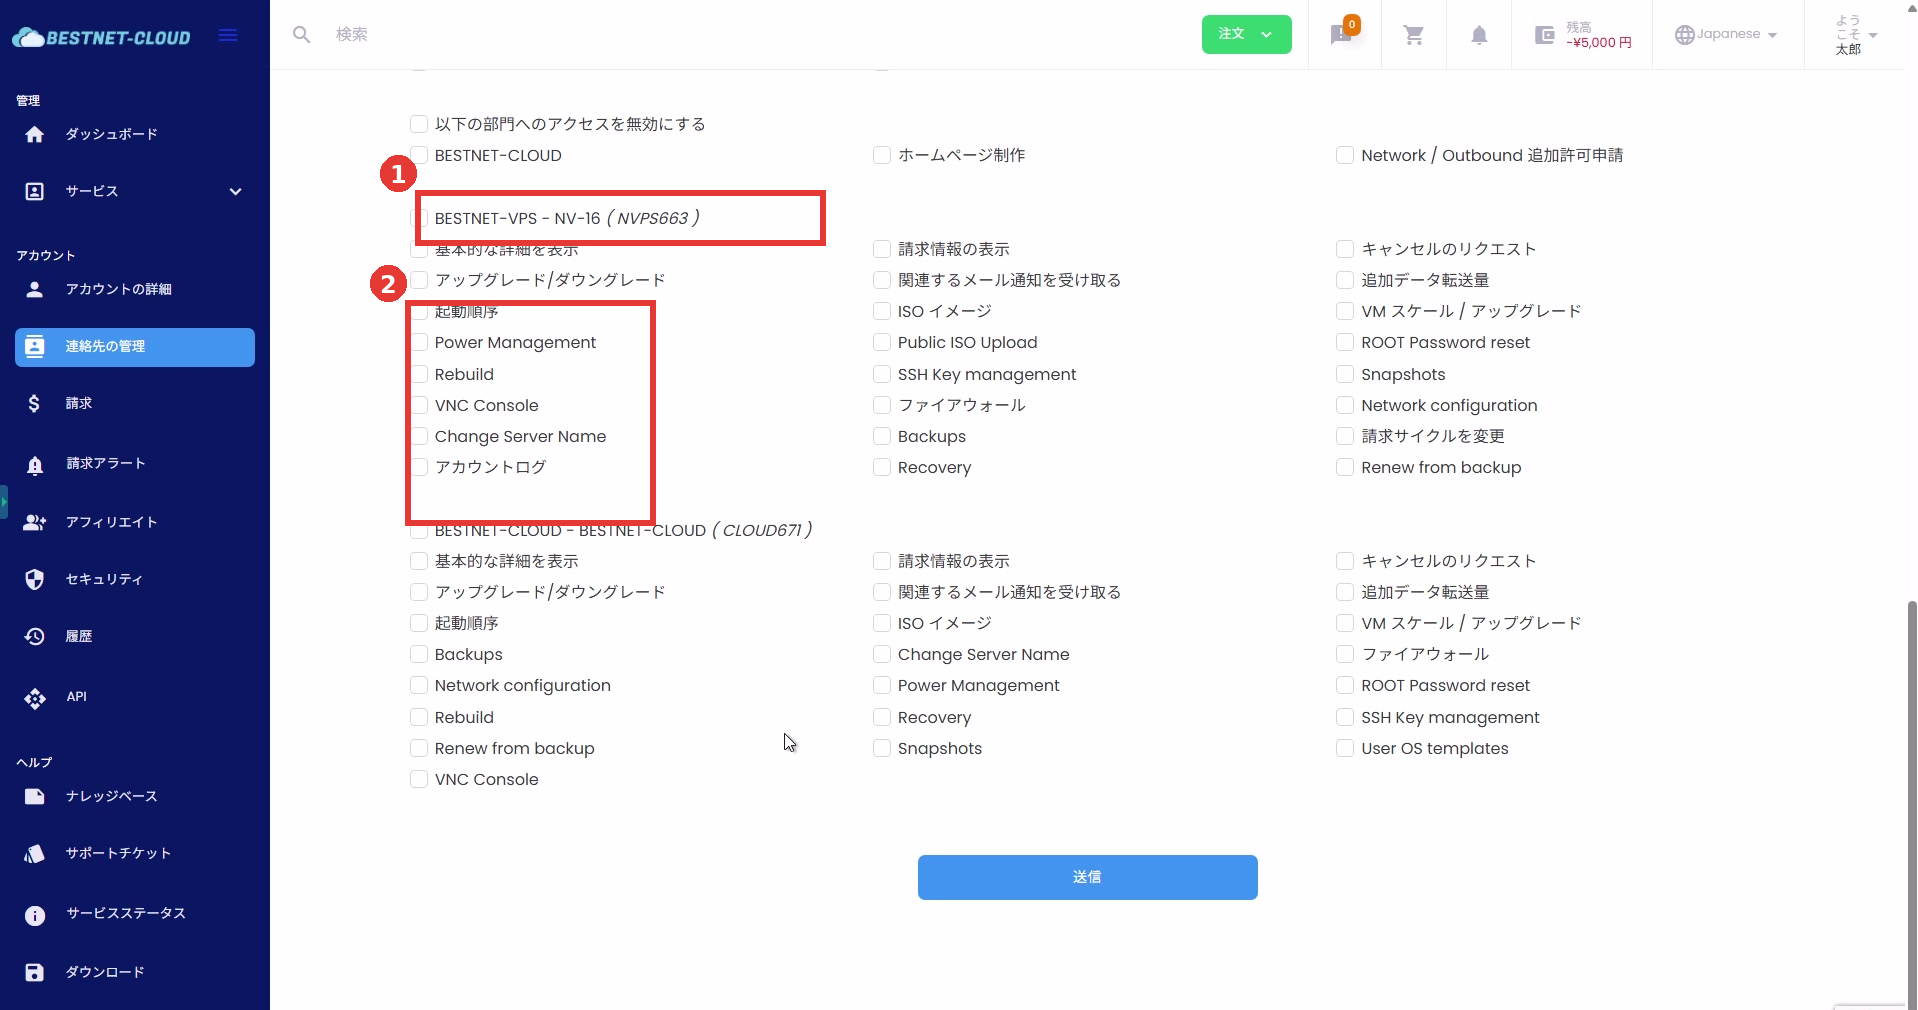
4. Save Configuration #
Once input and permission configuration are complete, click [Submit] on the screen to save.
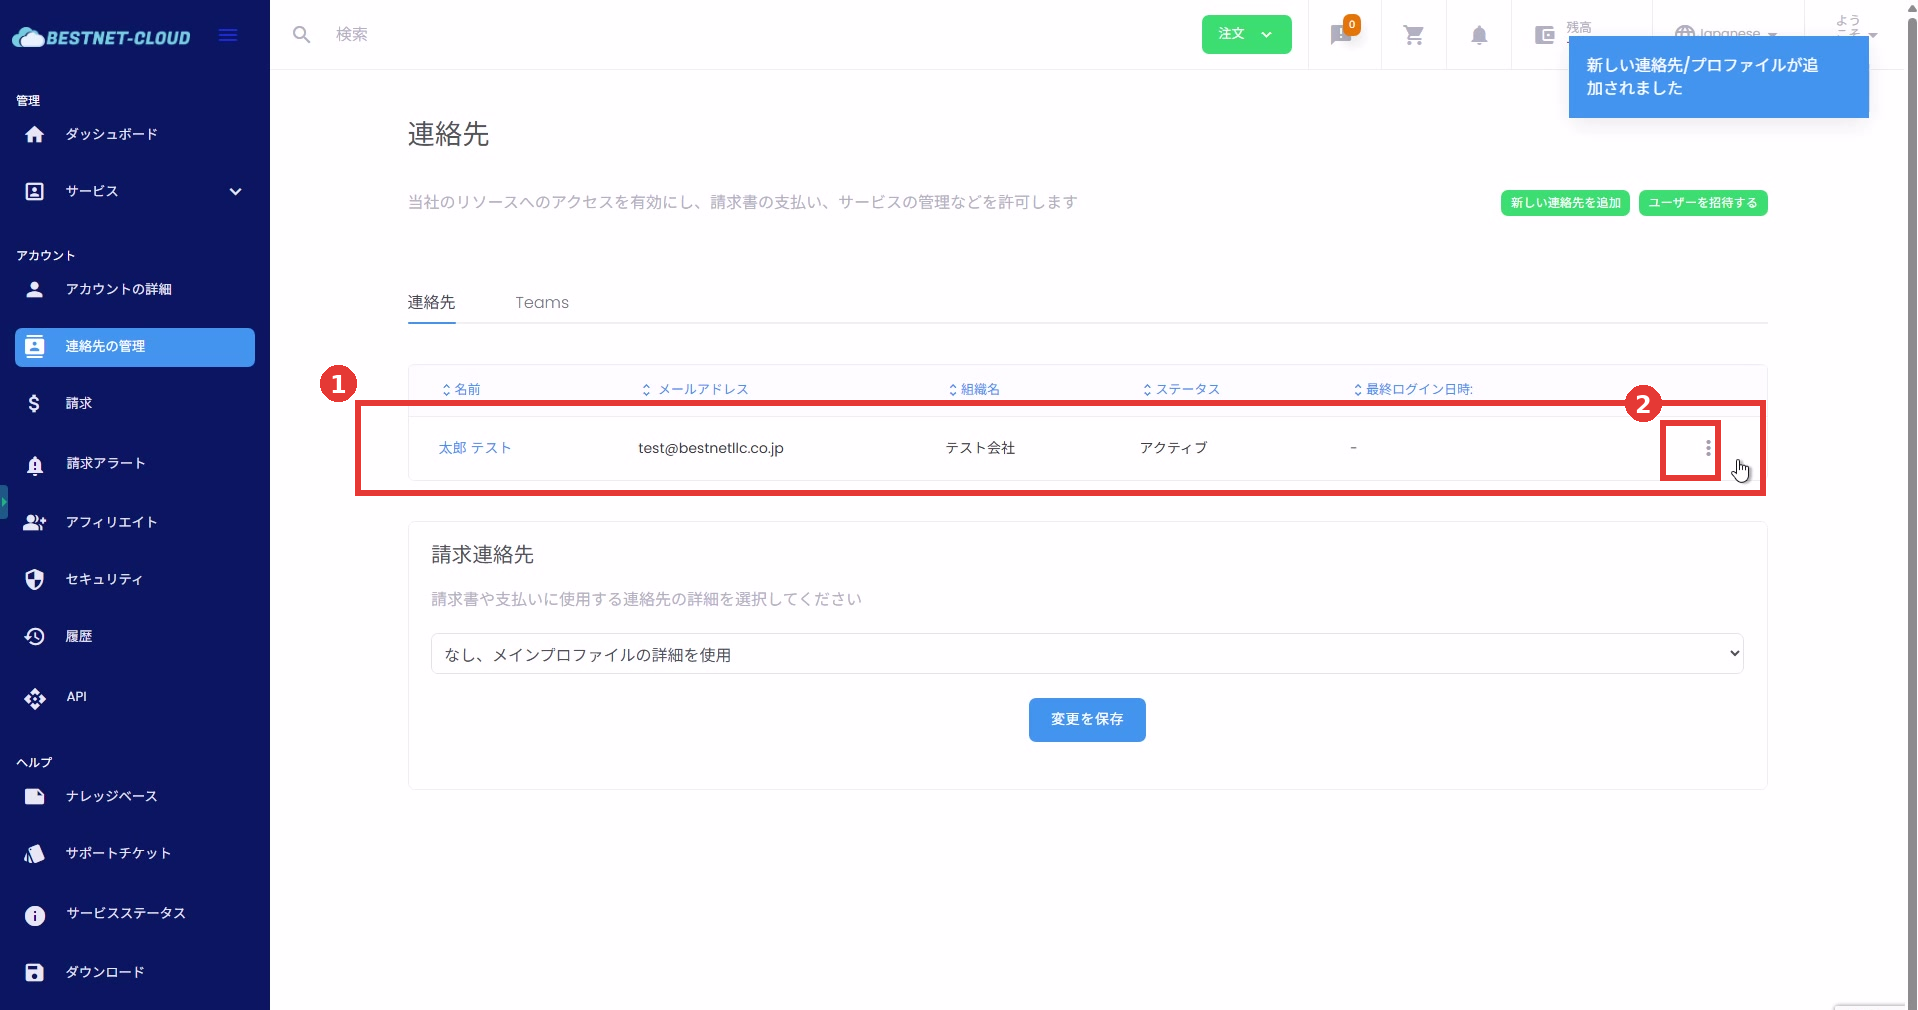
Post-creation Confirmation #
- Verify that the added sub-user appears in the contact list.
- Confirm that the status (for example: Active) and email address are correct.
Editing and Deleting Sub-users #
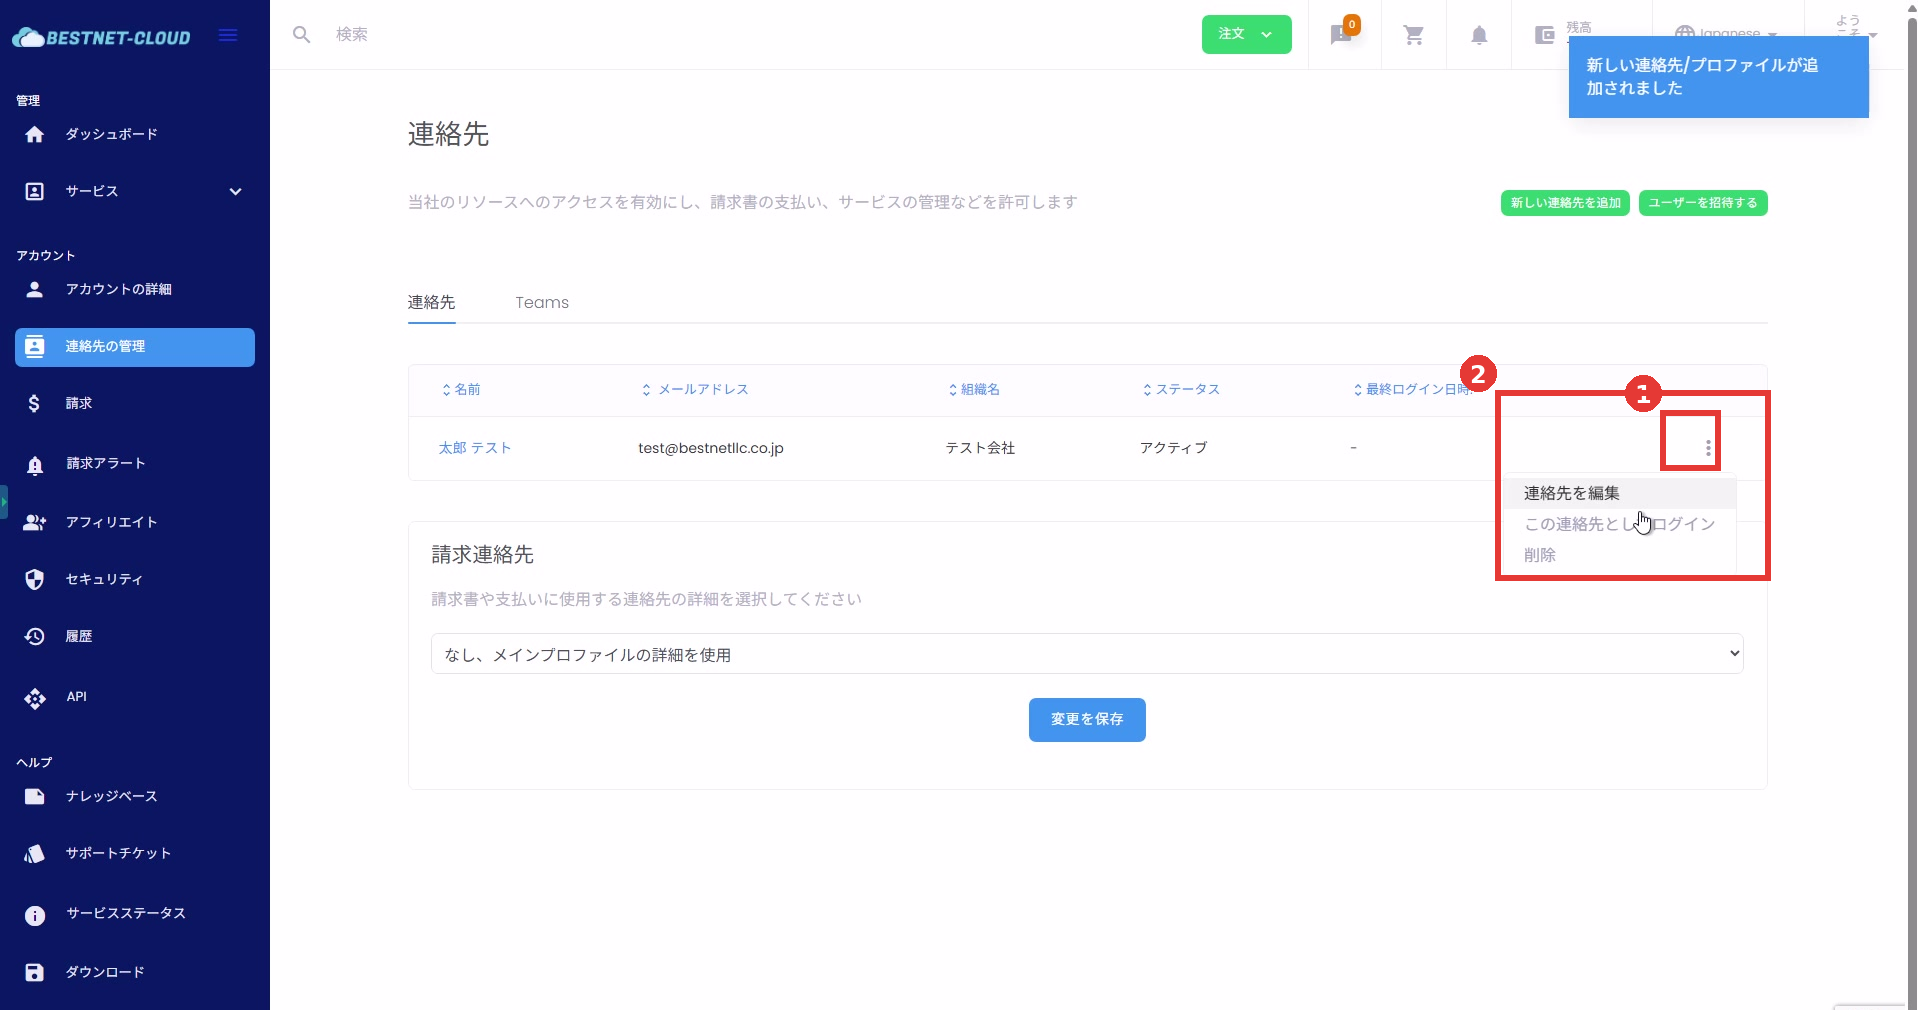
1. Open the Action Menu #
Click the ︙ (three-dot menu) at the right end of the target user row in the contact list.
2. Execute Edit / Login As / Delete #
- Edit Contact: Modify the email address, password, permissions, etc.
- Login as This Contact: Use this to view from the sub-user perspective and verify permissions.
- Delete: Remove the sub-user (note that recovery possibility after deletion varies depending on the environment).
Operational Notes #
- Keep permissions to the “minimum necessary” level. Special care is needed when granting billing, payment, or account setting change permissions.
- If a sub-user cannot log in, the cause is often incorrect email address, password configuration, or insufficient permissions.
- Screen displays and text may vary slightly depending on portal customization and language settings.


