
VPS Bandwidth Upgrade Guide
This guide outlines the steps to increase the VPS transfer capacity (monthly bandwidth limit [GB]) from the client portal.
Note
Screen text and layout may vary depending on the service type, contract details, and display language.
Scope #
- For those who want to increase the monthly bandwidth limit (GB) for VPS from the client portal
- For those who want to issue an invoice after applying for an upgrade and complete payment
Prerequisites #
- You can log in to the client portal
- You can open the service details screen for the target service (VPS) to be upgraded
- You have prepared a payment method (bank transfer / credit card / PayPal, etc.)
Steps #
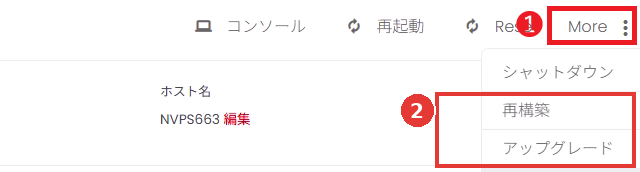
1Open “Upgrade” from Service Details #
- Open the service details screen for the target VPS.
- Open the More menu in the operation menu in the top right of the screen (① in the image).
- Click Upgrade from the displayed menu (② in the image).
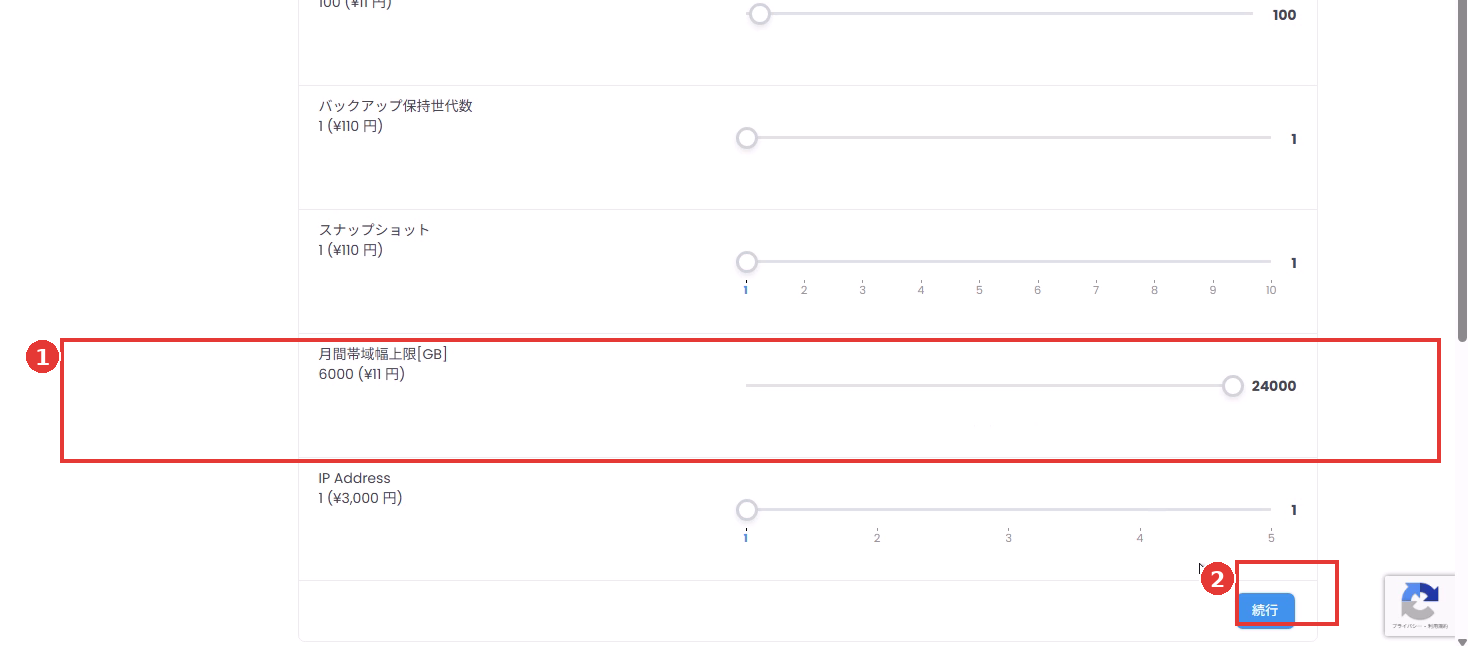
2Change Monthly Bandwidth Limit (GB) to Desired Value and Click “Continue” #
- On the upgrade screen, find Monthly Bandwidth Limit [GB] from the list of items.
- Drag the slider for Monthly Bandwidth Limit [GB] to set it to your desired capacity (GB) (① in the image).
- After setting, click Continue in the bottom right (② in the image).
Caution
This procedure is for changing the transfer capacity (bandwidth). Do not touch the sliders for other items such as RAM / CPU / Disk if you do not intend to change them.
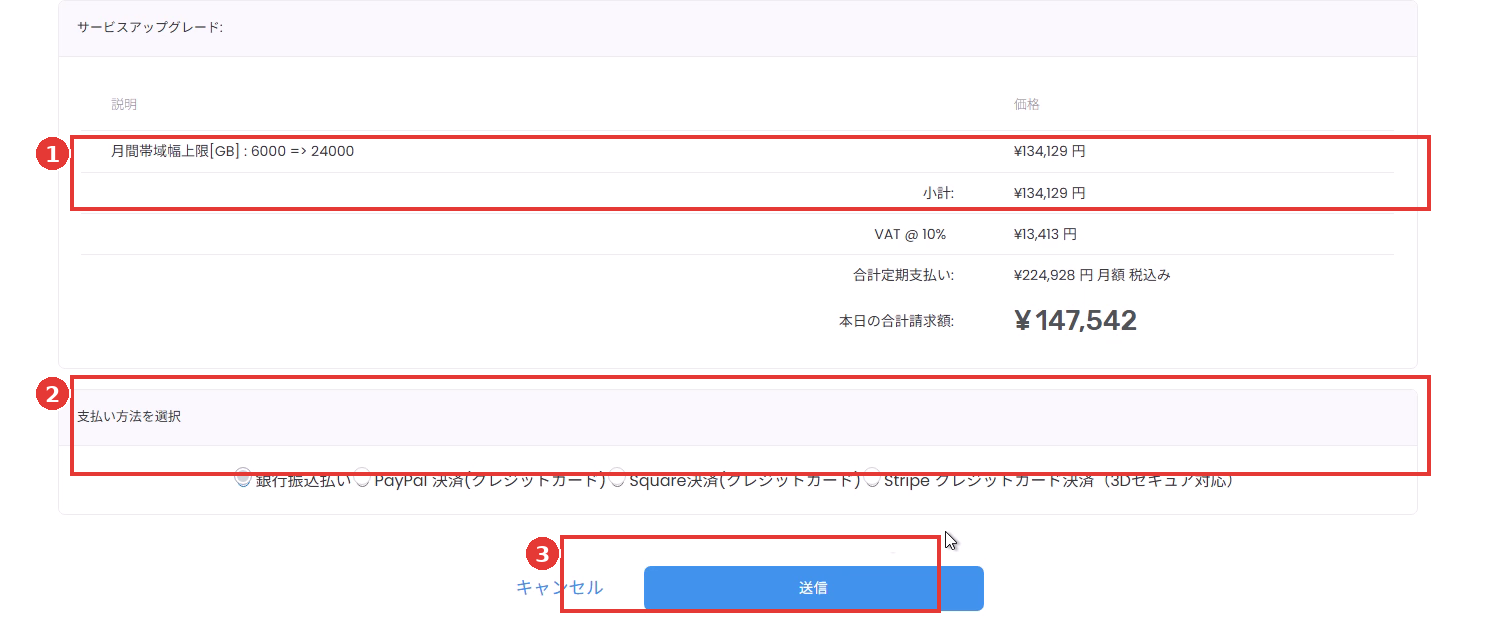
3Confirm Details and Payment Method, Then Submit Upgrade #
- On the “Service Upgrade” screen, confirm the changes (example: Monthly Bandwidth Limit [GB]: 6000 => 24000) (① in the image).
- Select a payment method (② in the image).
- Click Submit to confirm the upgrade order (③ in the image).
Note
The amount, tax, and “total billing amount today” may vary depending on your contract status and upgrade details. Please be sure to check the amount displayed on the screen.
4Check Invoice and Pay or Download PDF #
- Once submission is complete, you will be redirected to the invoice screen.
- If you want to pay immediately, click Pay Now! (① in the image).
- If you want to keep the invoice, click Download PDF (② in the image).

Frequently Asked Questions #
“Upgrade” is not displayed #
- If the target service is in a canceled or stopped state, upgrades may not be available.
- Depending on your contract plan, bandwidth upgrades may not be offered. Please contact support.
“Continue” or “Submit” cannot be clicked #
- Required fields (such as payment method) may not be selected.
- Browser extensions or ad blockers may interfere with the operation. Please disable them if necessary.
When will the upgrade be reflected? #
- The timing of reflection varies depending on the service, payment method, and operations workflow. The upgrade is typically reflected after the invoice is paid.
- If it is not reflected, check the invoice status (unpaid / paid) and contact support if necessary.
Update History #
- 2026-01-10: Initial version created


