Prerequisites: #
When using BESTNET Cloud, you can install the OPNsense virtual router from the standard-provided ISO file.
This procedure covers the flow from virtual machine creation through ISO boot installation to initial configuration.
STEP1. Creating a Virtual Machine #
Follow the steps below to create an OPNsense virtual machine.
1. Create a new server
2. Enter an arbitrary hostname
3. Enter the password you plan to configure (OPNsense does not support automatic password configuration, so you will need to log in to the OS and set it manually)
4. SSH Key Management (OPNsense does not support automatic SSH key management, so you will need to configure it manually)
5. OS Template Selection Please select OPNsense-25.1-dvd-amd64.iso
6. Allocate computing resources
7. Assign Public IP(s) to interface net0.
8. Click “Create New Virtual Machine”.
STEP2. Creating an Additional Interface for LAN #
On the overview page of the created virtual machine, proceed to “Network” → “Interfaces” and click “Add New Network Interface”.
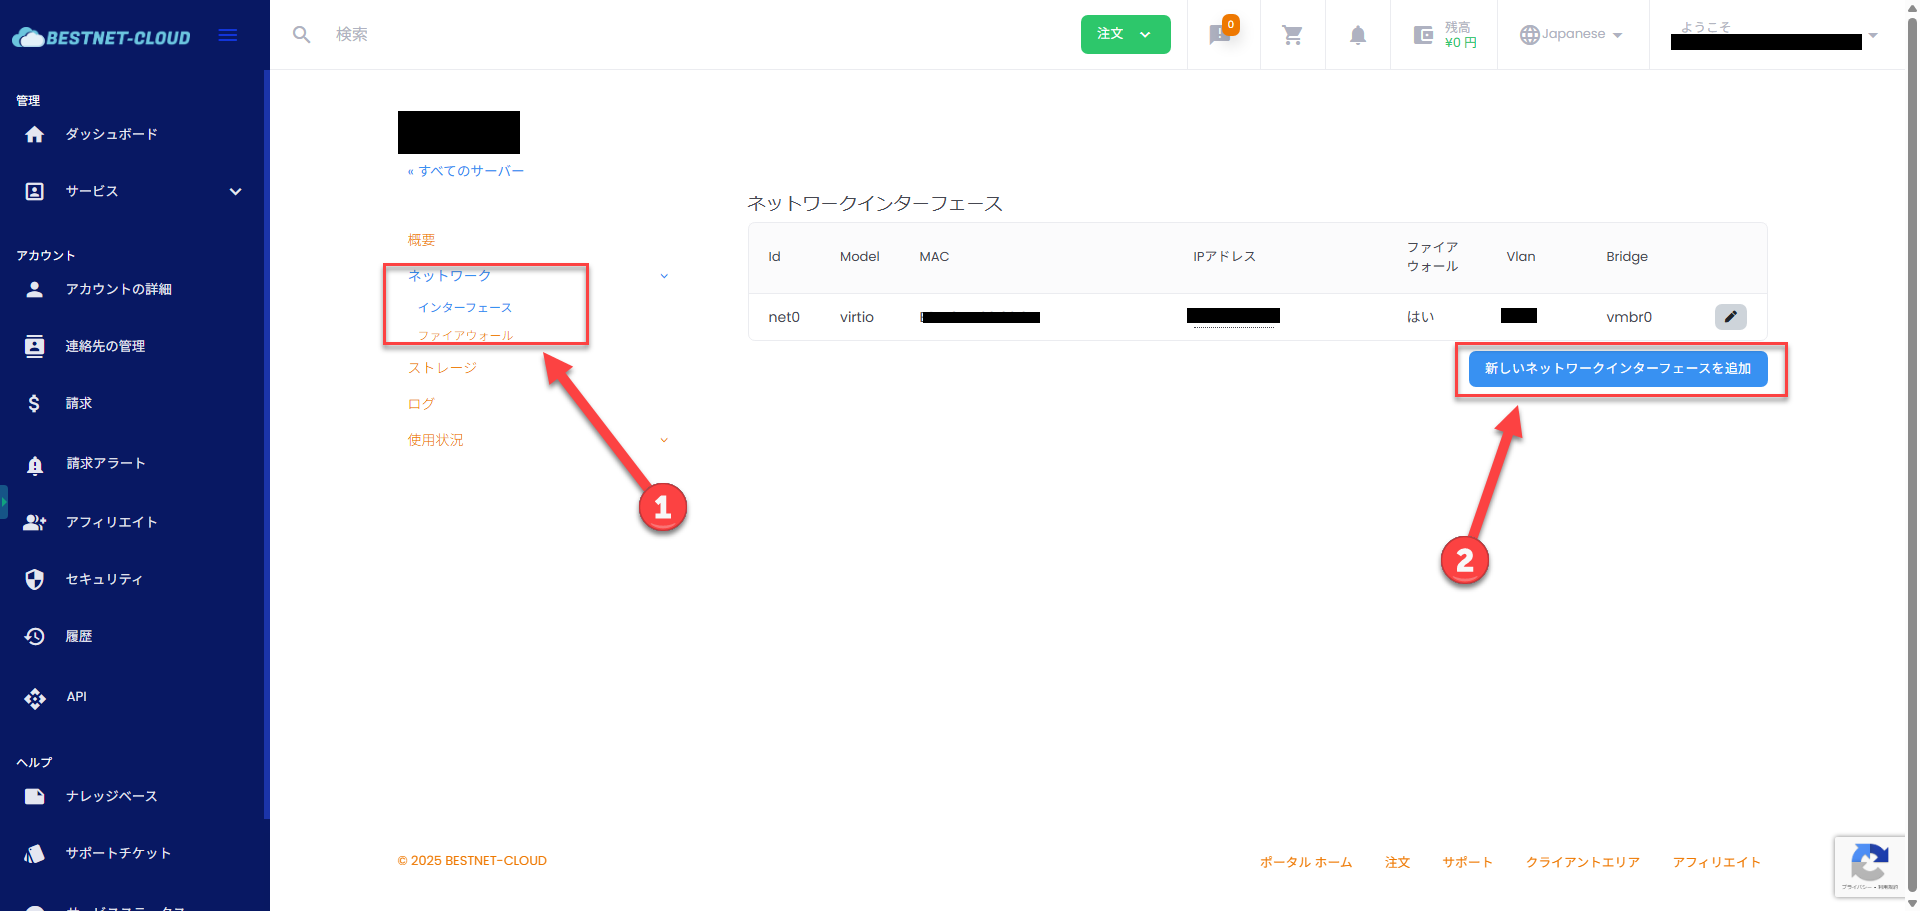
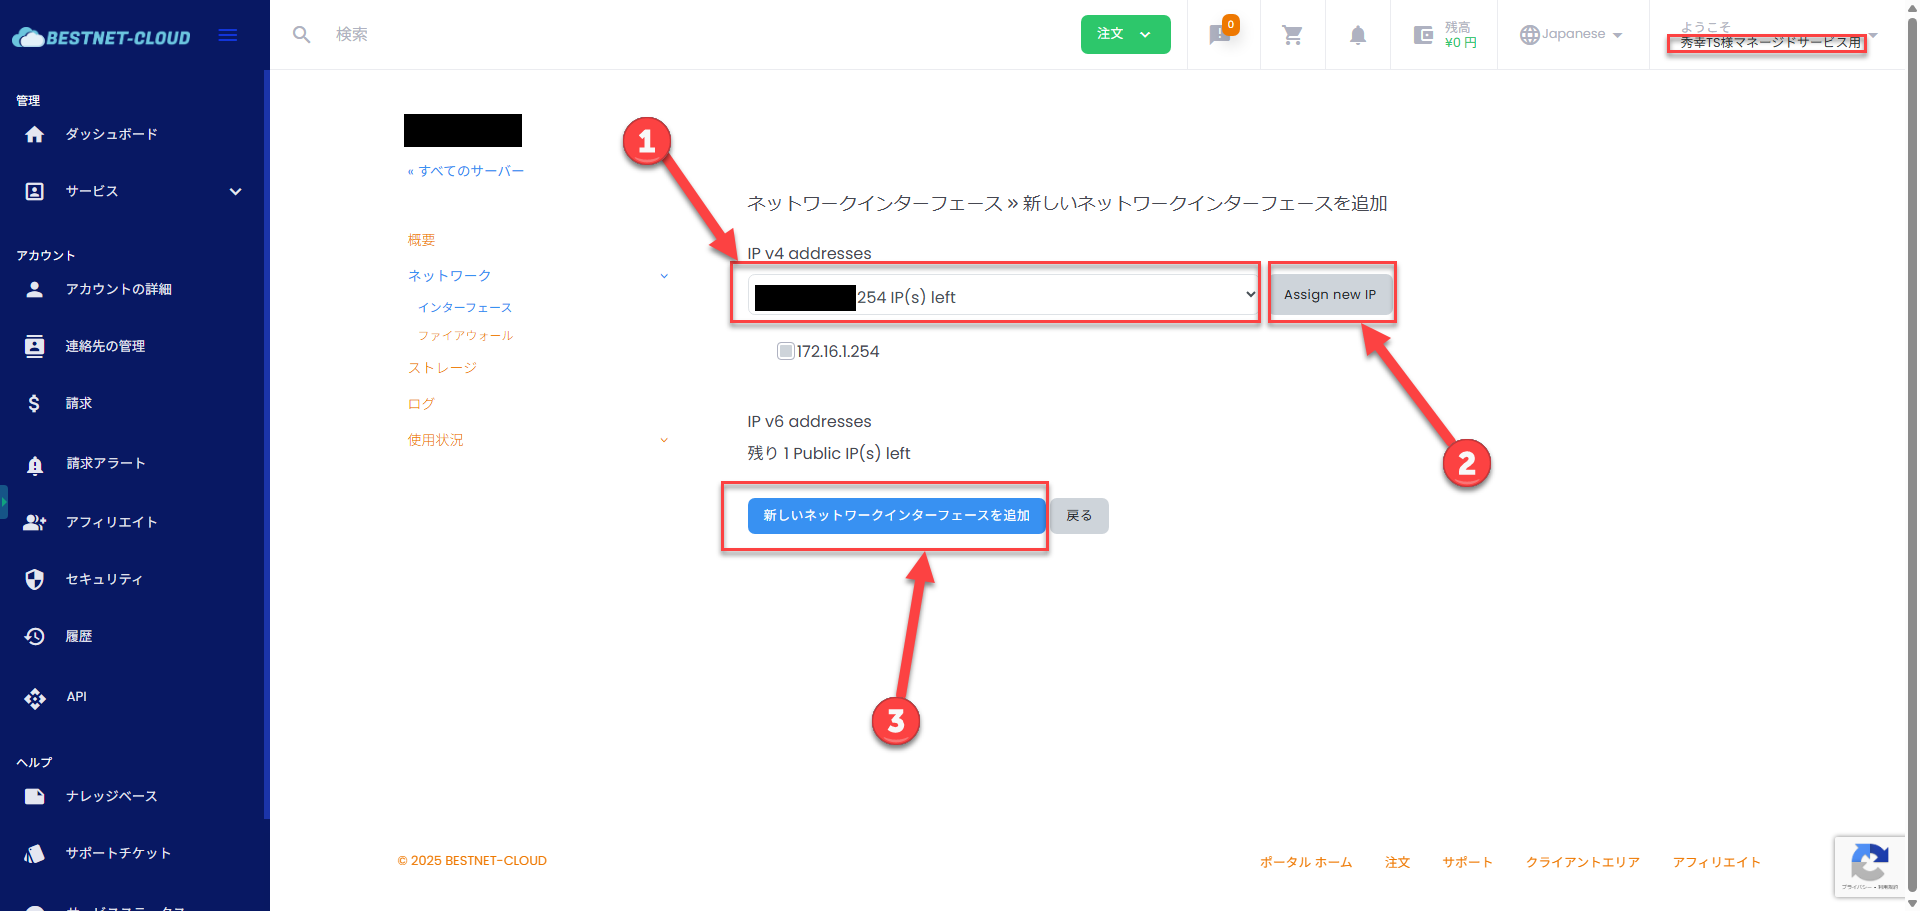
Next, select the private network assigned to your cloud instance from Public IP(s) for the address to be allocated and click “Assign new IP”.
Finally, click “Add New Network Interface” to complete.
STEP3. OS Installation #
Once the virtual machine is started, it will boot from the ISO file.
After startup, various processes will begin and eventually the login screen should be displayed.
Here, log in with the following user to begin the installation process.
Default user: installer
Default password: opnsense
After completing login, setup will be in interactive format.
Please proceed with the configuration following the steps below.
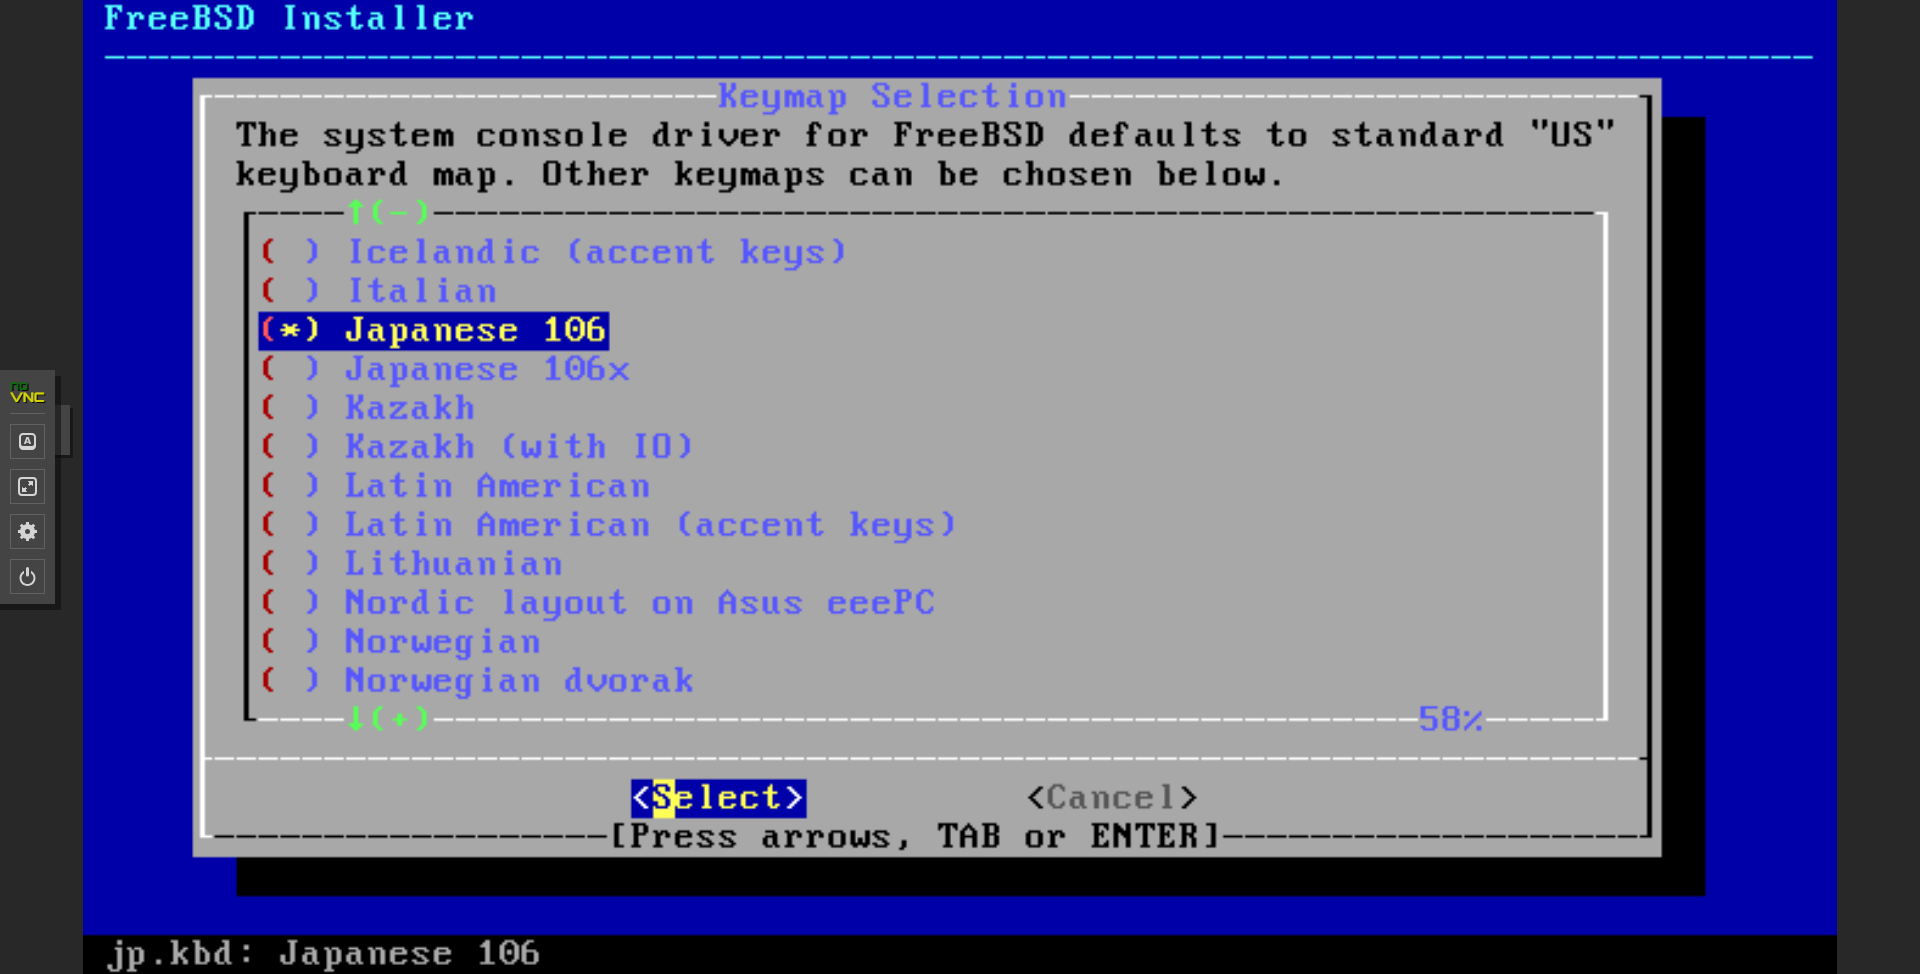
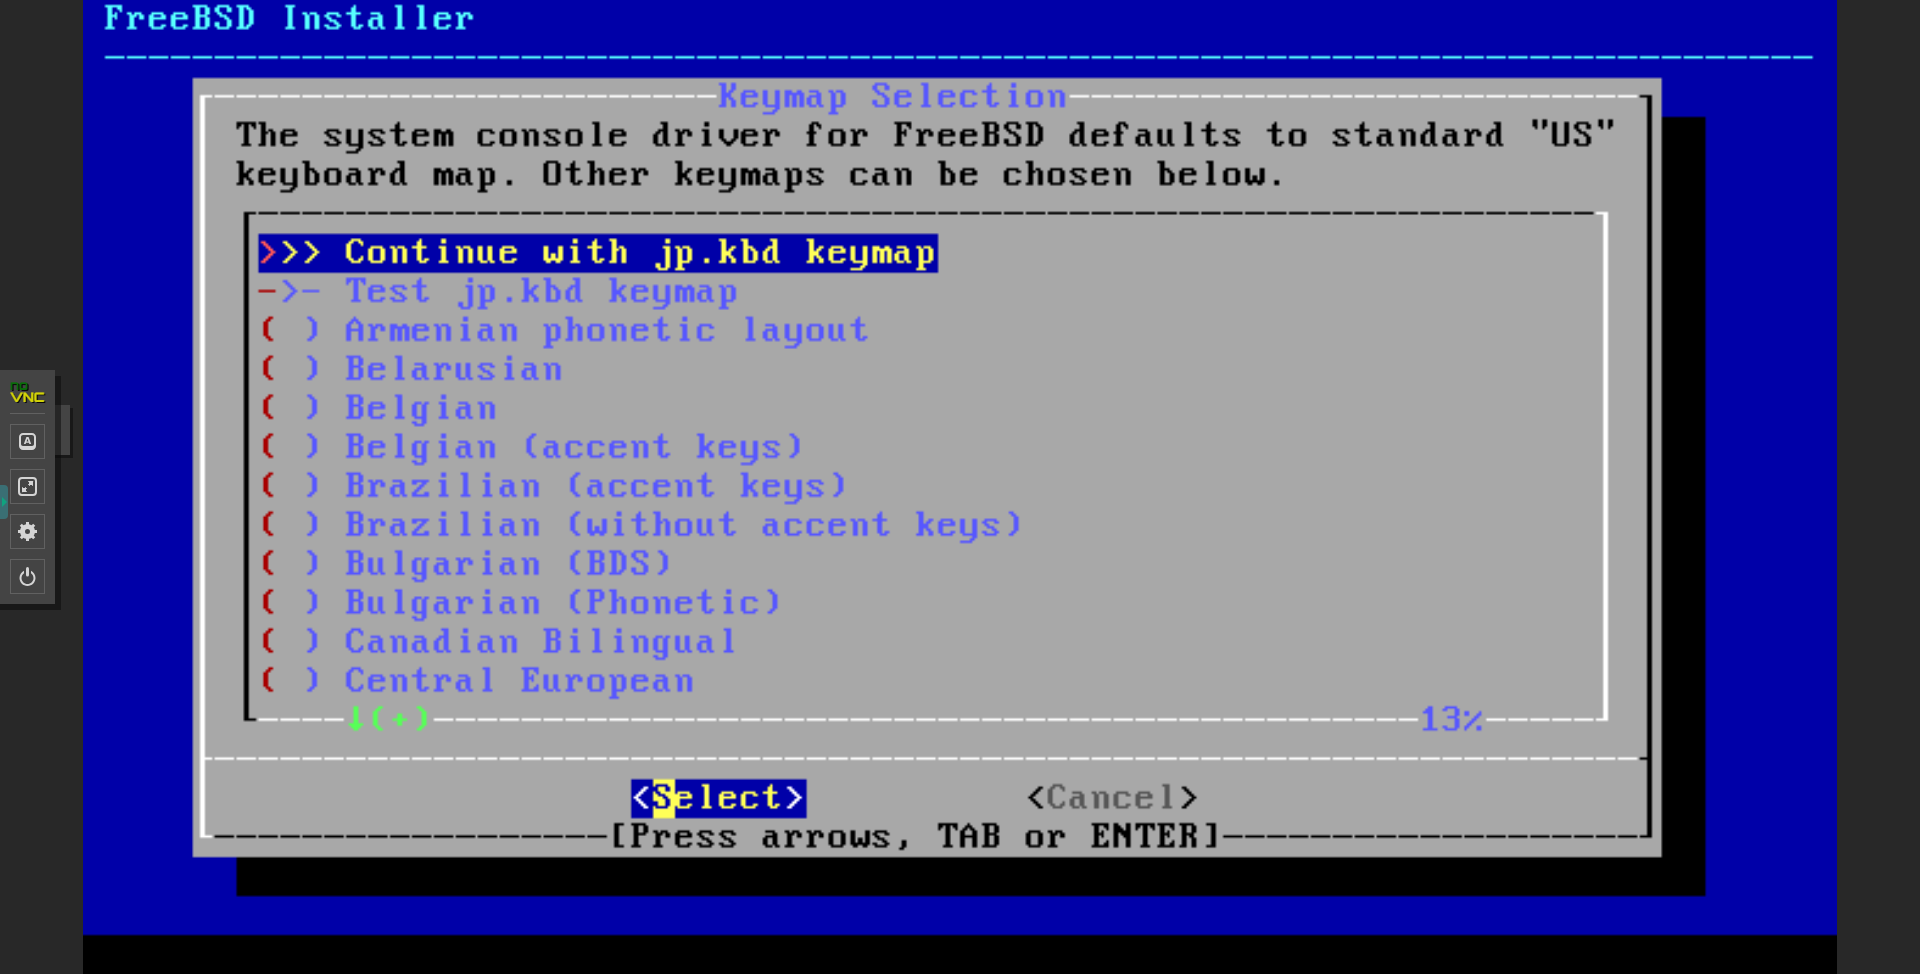
1. Select keyboard KeyMap, Continue
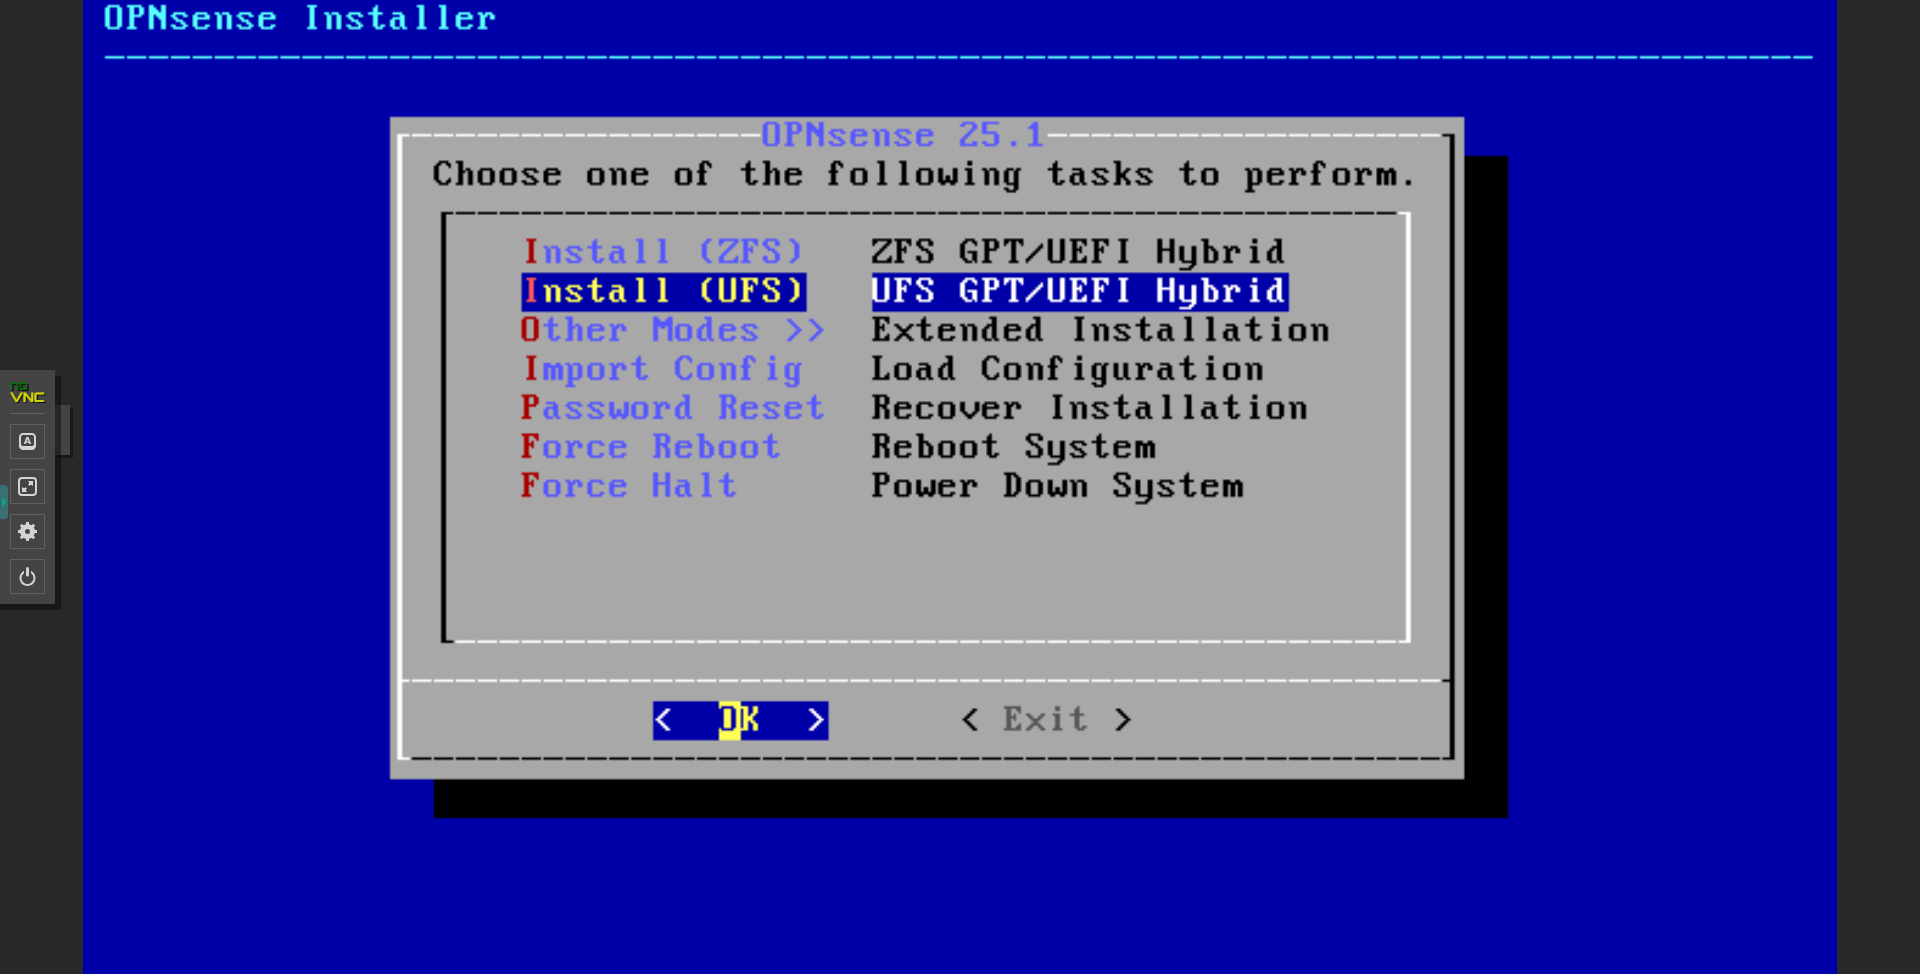
2. Select Install format (UFS)
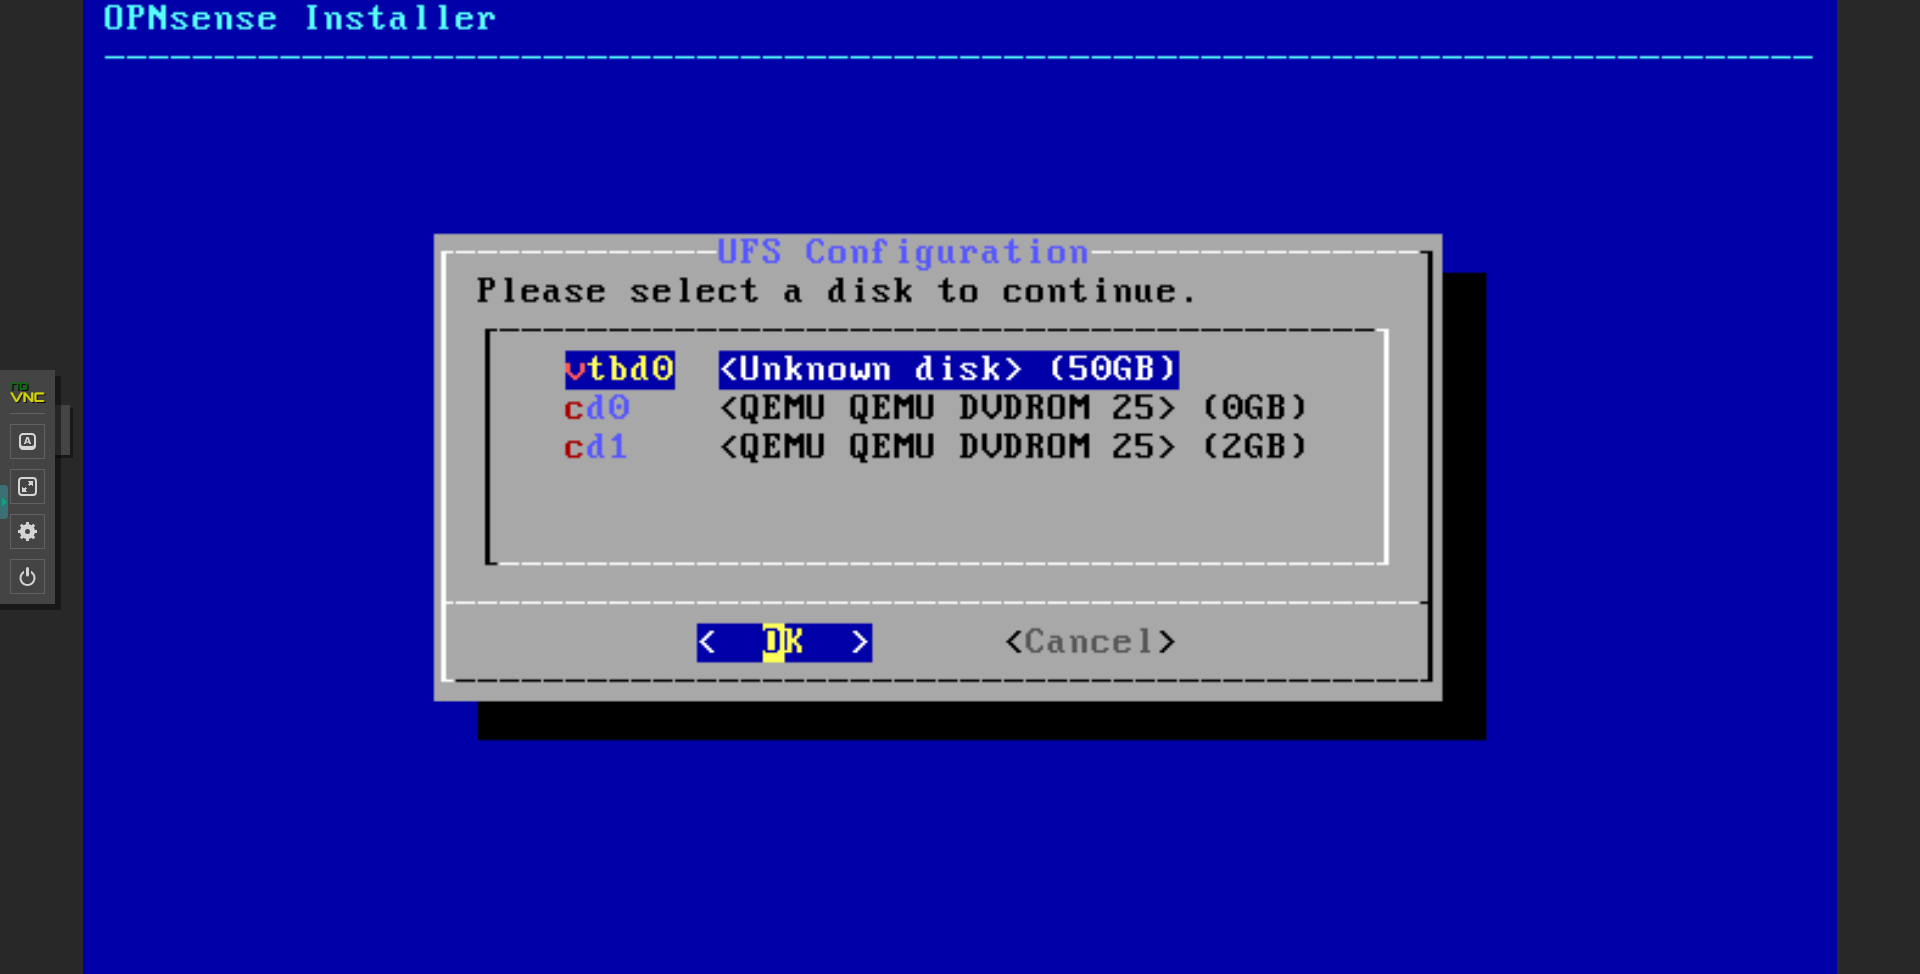
3. Select installation destination disk (vtbd0)
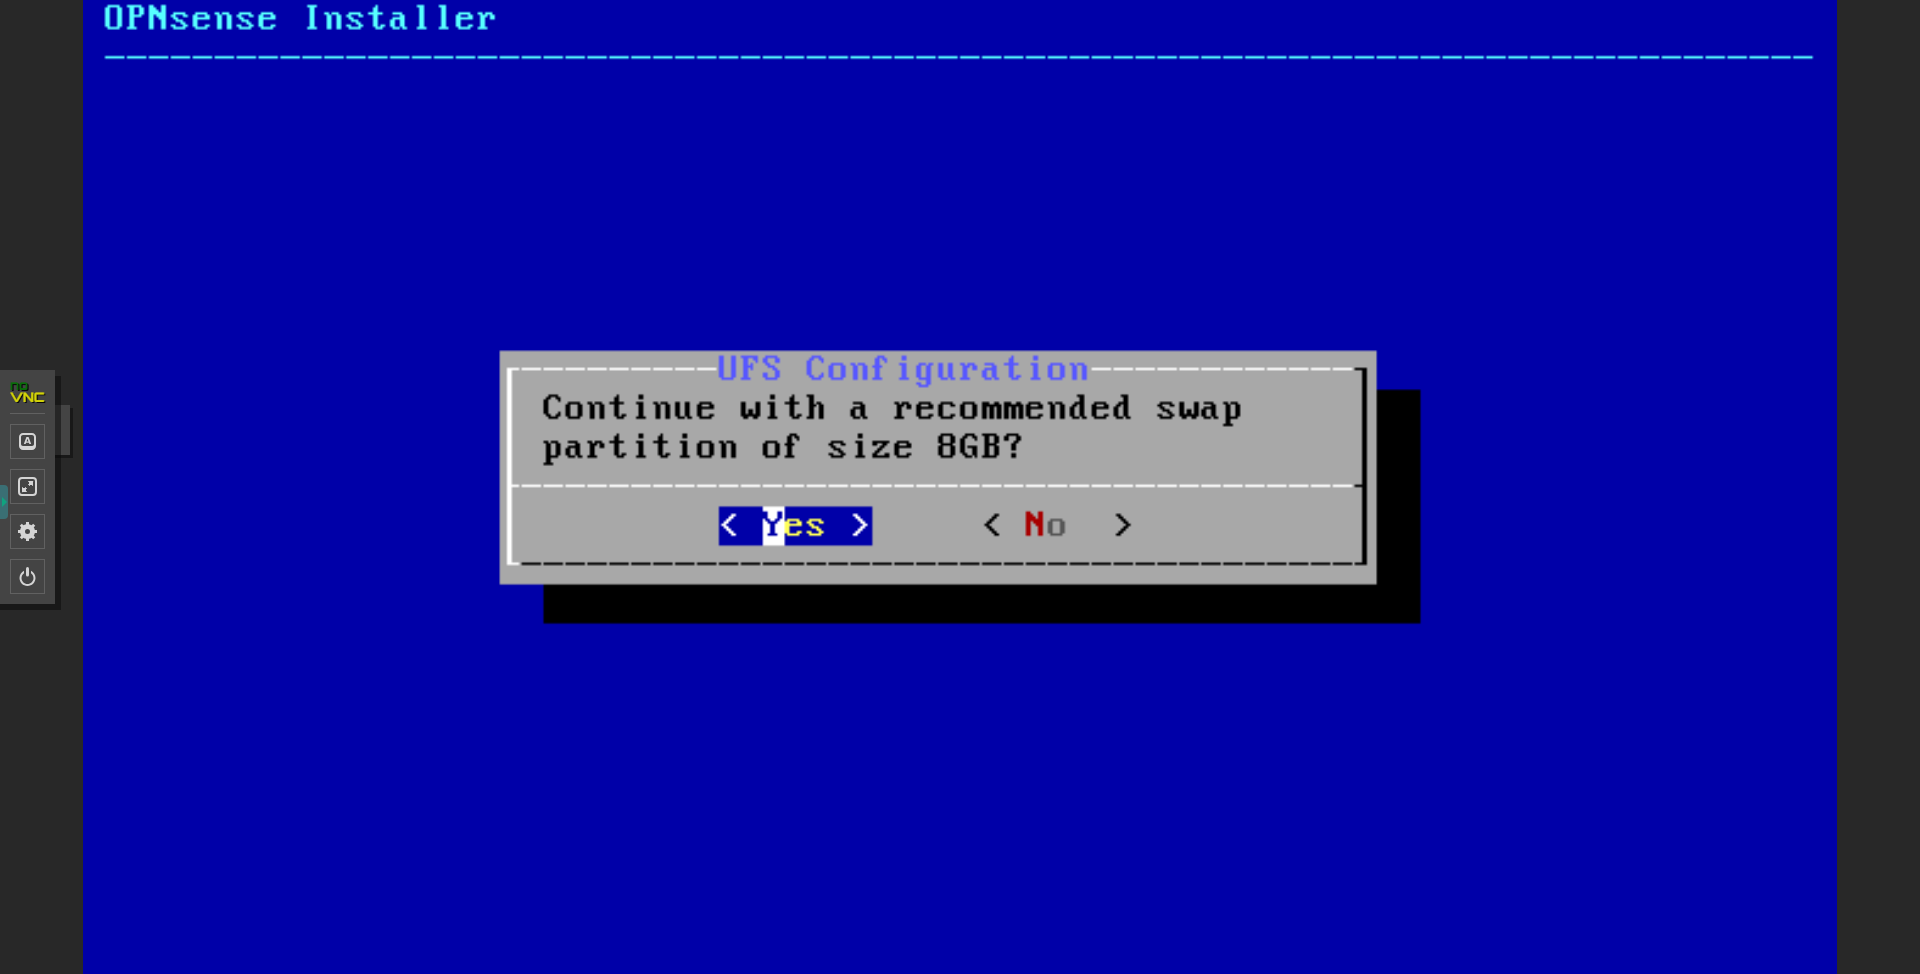
4. Confirm swap partition size (YES)
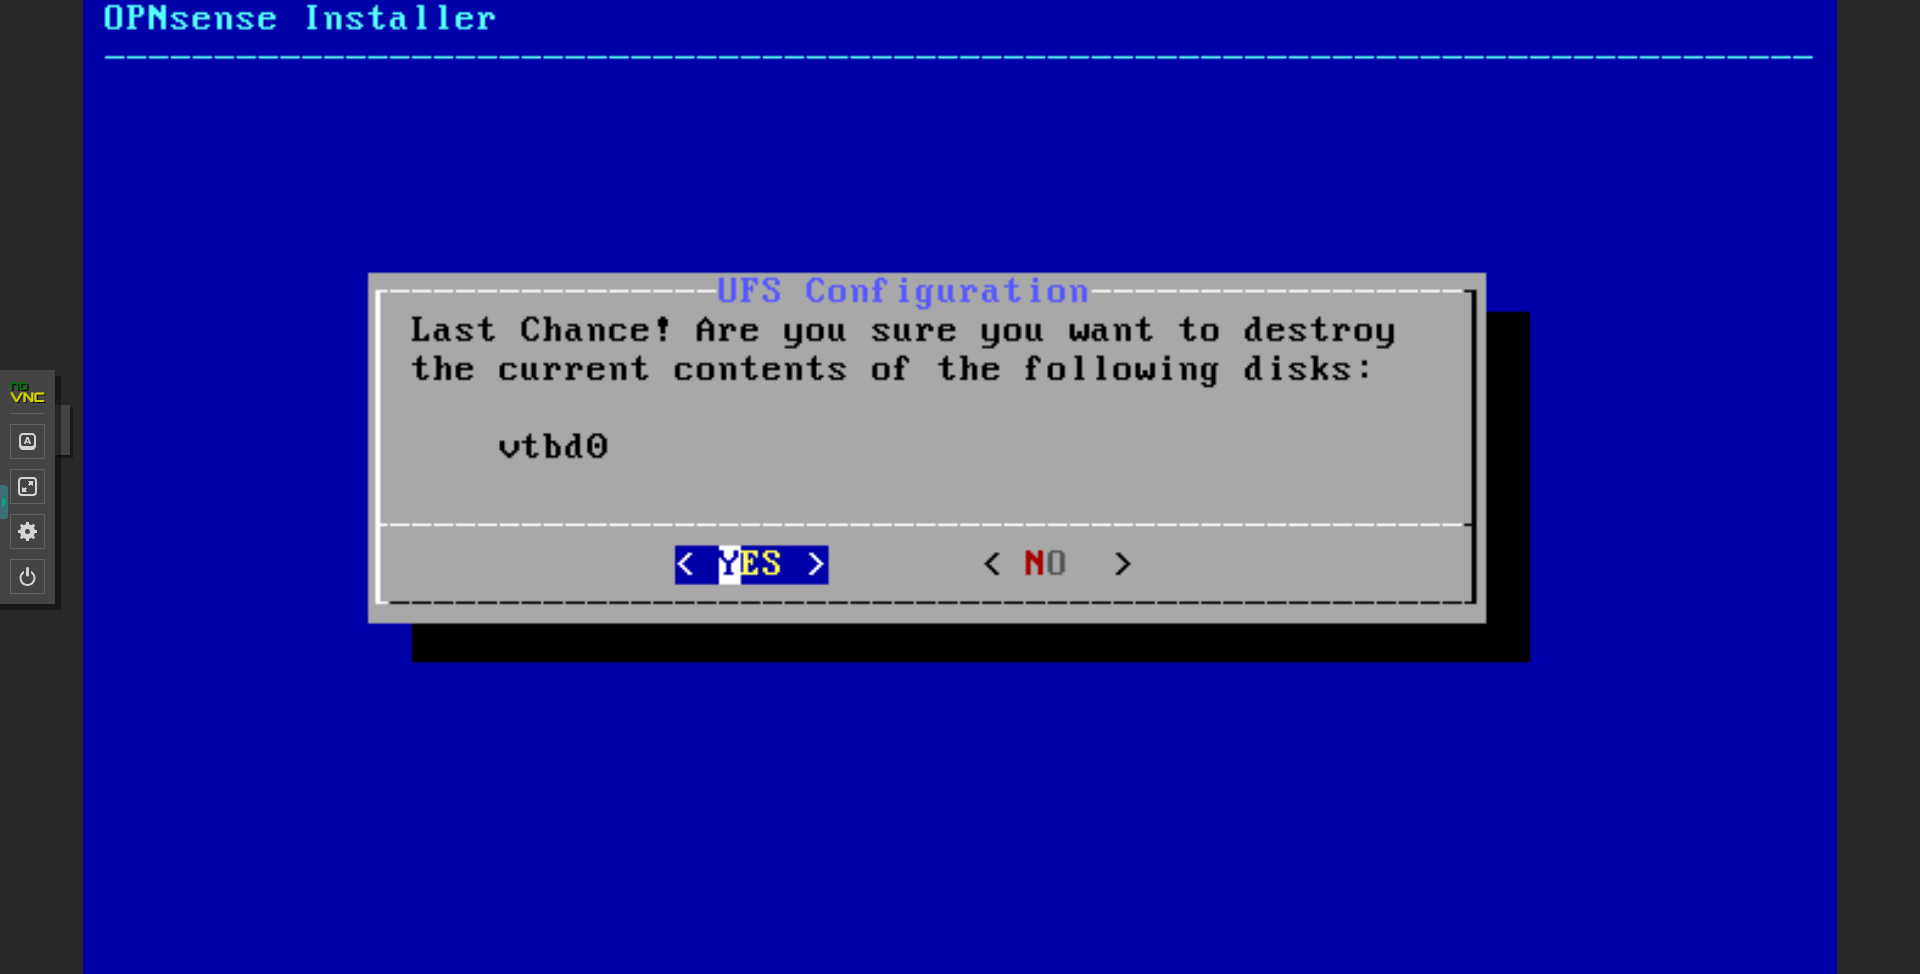
5. Confirm that existing data on the installation destination disk can be deleted (YES)
6. Change Root password (arbitrary value)
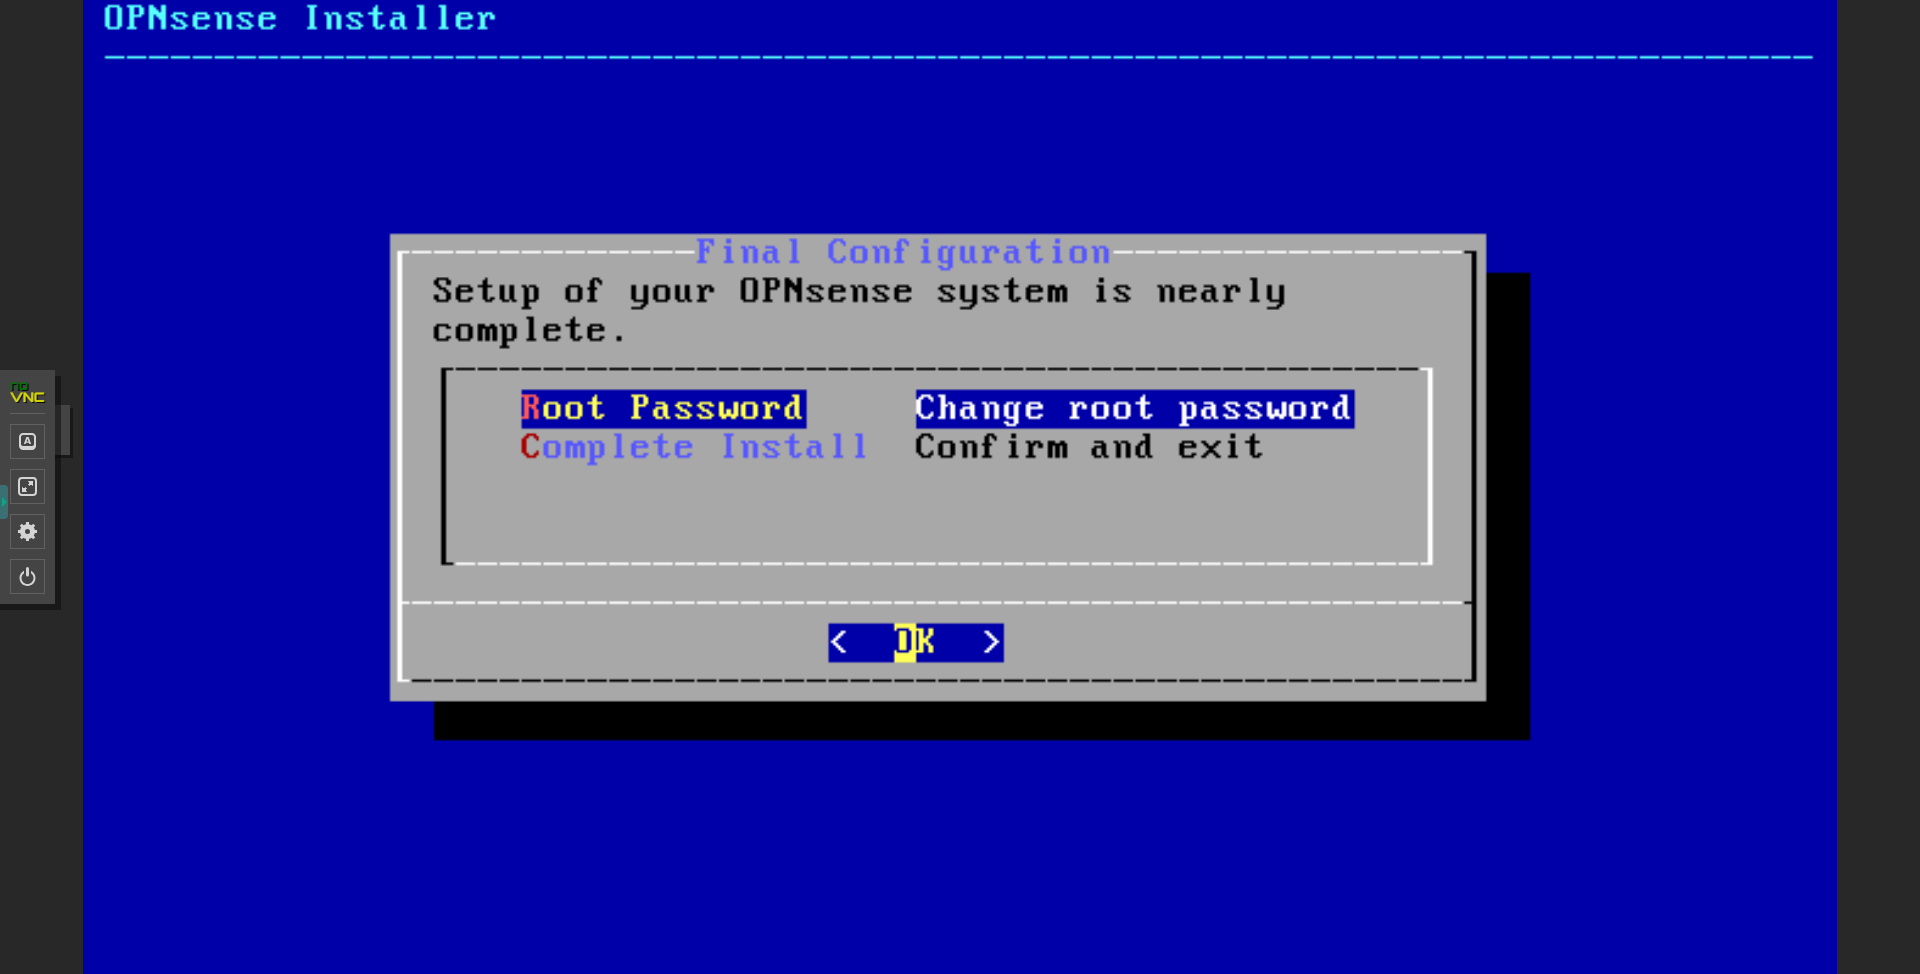
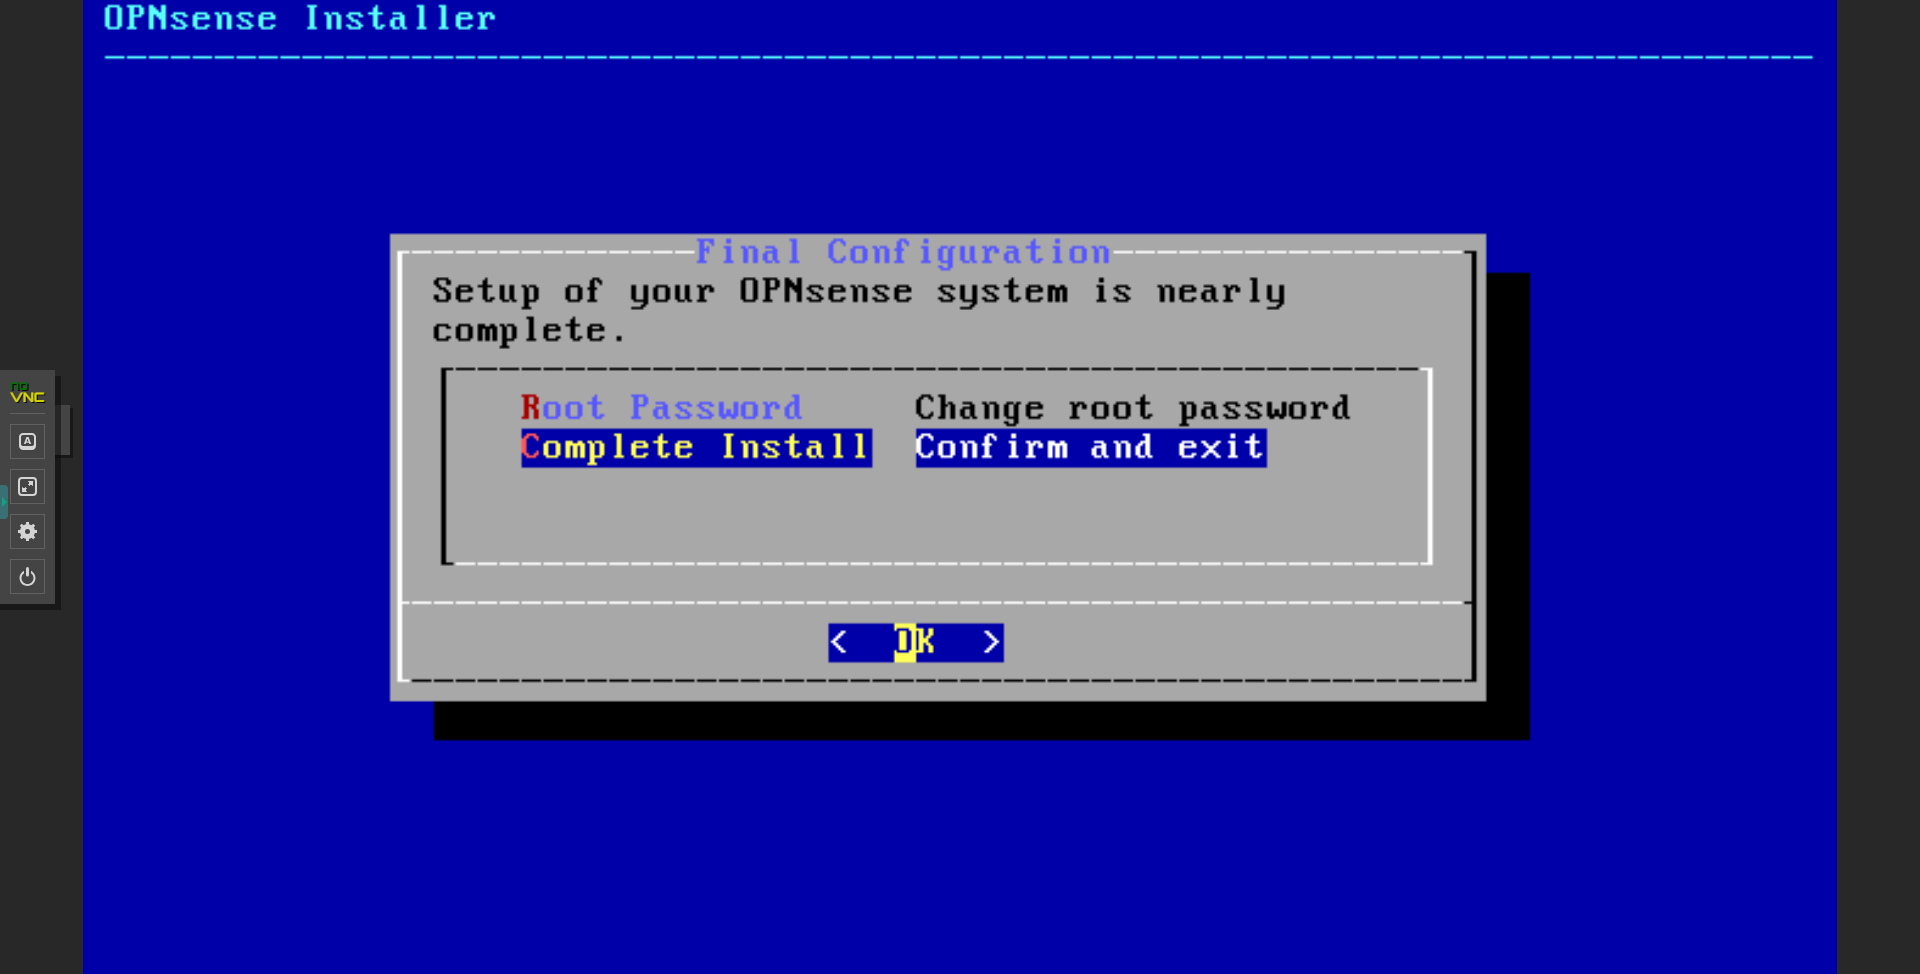
7. Installation complete (Complete Install)
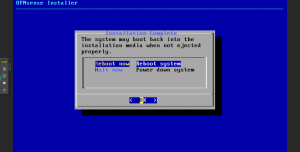
8. Perform reboot (Reboot now)
STEP4. Assigning the WAN Interface #
After the restart is complete, a login screen will appear. Log in and proceed to WAN interface assignment.
Default user: root
Default password: The root password you set in STEP3
Once logged in, you can configure settings in an interactive format.
Enter 1 at “Enter an option:” and press Enter
Then proceed in the following order:
・Do you want to configure LAGGs now ? [y/N] = N
・Do you want to configure VLANs now ? [y/N] = N
・Enter the WAN interface name or a for auto-detection = vtnet0
・NOTE: this enables full Firewalling/NAT mode. = Enter
・Enter the Optional interface 1 name or a for auto-detection = Enter
・Do you want to proceed?[y/N] = Y
Once complete, you will return to the initial interactive selection screen.
In the next step, proceed to WAN interface IP address assignment.
STEP5. WAN Interface IP Address Assignment #
Enter 2 at “Enter an option:” and press Enter
Execute option 2 on the selection screen.
Then proceed in the following order:
・Configure IPv4 address WAN interface via HDCP? [Y/n] = N
・Enter the new WAN IPv4 address . press <ENTER> for none:
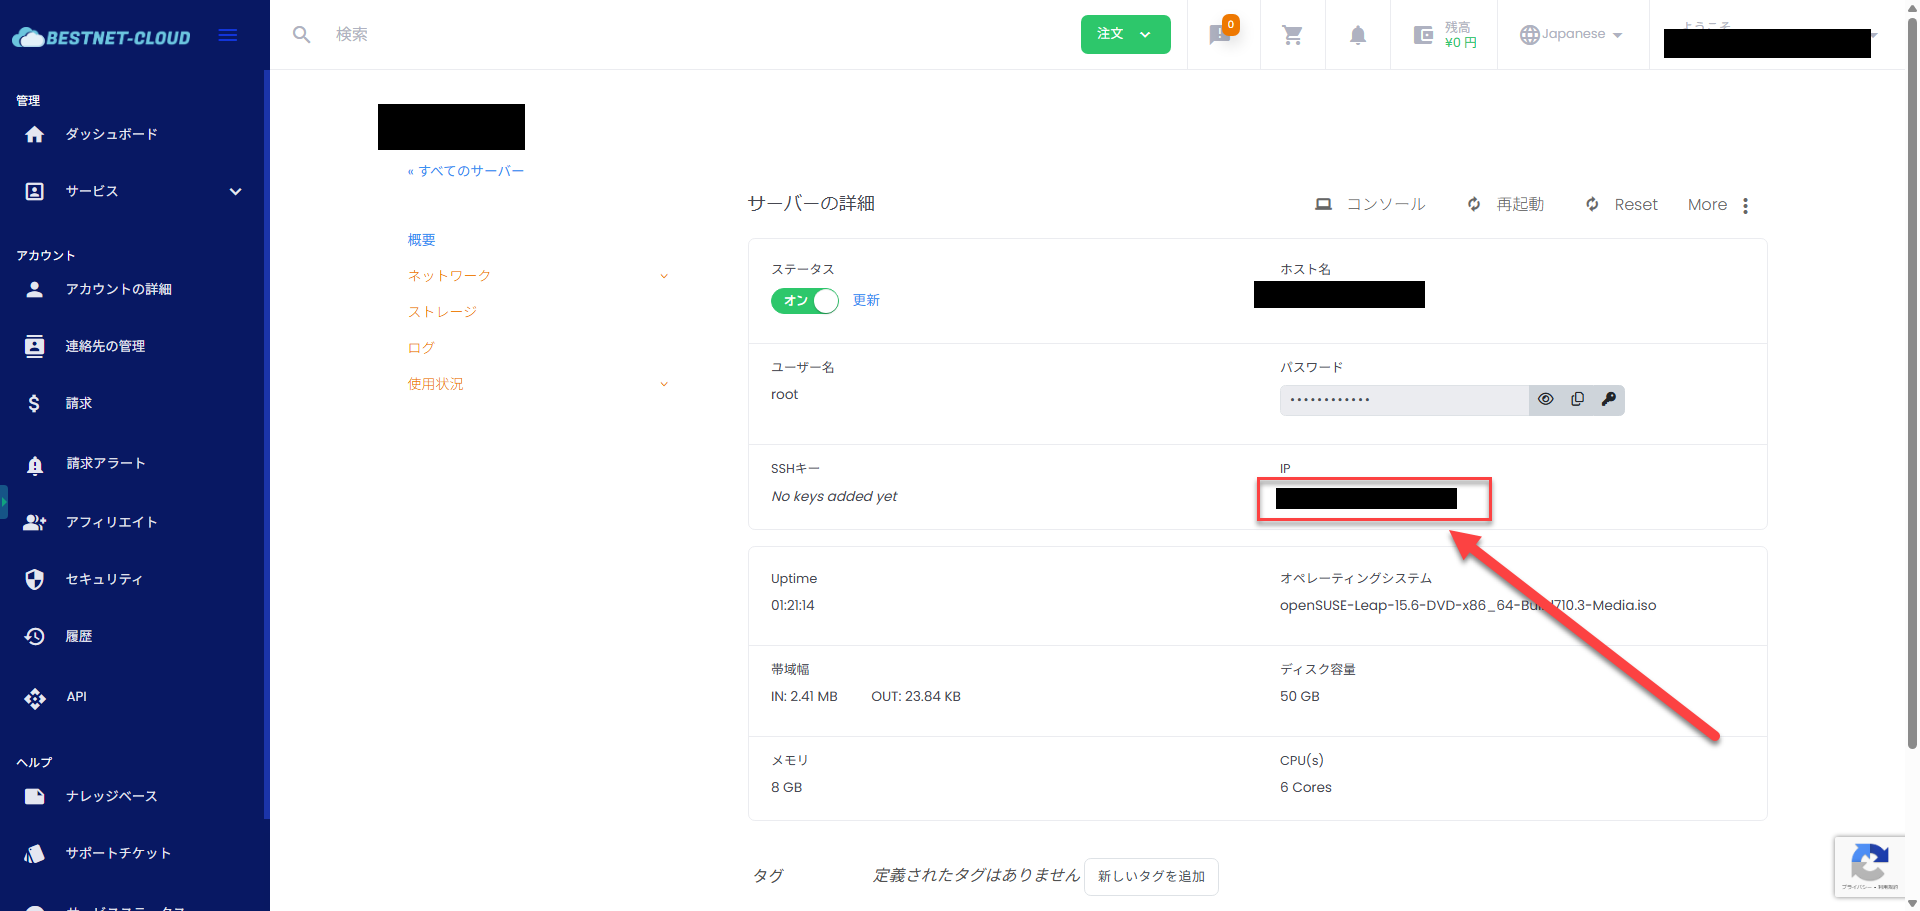
→Enter the global IP address displayed on the virtual machine overview screen.
・Enter the new WAN IPv4 Subnet bit counts (1 to 32).
・For a WAN, enter the new WAN IPv4 upstream gateway address.
→For subnet and gateway, hover your mouse over the corresponding IP address section to display them.
Example: In the case of /27, enter 27 at the interactive prompt and press Enter
・Do you want to use the gateway as the IPv4 name server too? [Y/n] = Y
・Configure IPv6 address WAN Interface via DHCP6? [Y/n] = N
・Enter the new WAN IPv6 address . Press <ENTER> for none: = Press Enter as is.
・Do you want to enable the DHCP server on WAN? [y/N] = N
・Do you want to chage the web GUI protocol from HTTPS to HTTP? [y/N] = N
・Do you want to generate a new self-signed web GUI certificate? [y/N] = Y
・Restore web GUI access defaults? [y?N] = N
Once you complete this, the self-signed certificate generation process and other processes will start. Upon completion, port 443 will be listened on the configured WAN IP address, but you need to allow port 443 in the virtual machine Firewall Settings, which will be described in the next step.
STEP6. Allowing Https (Port 443) Access from External Sources to WAN IP Address #
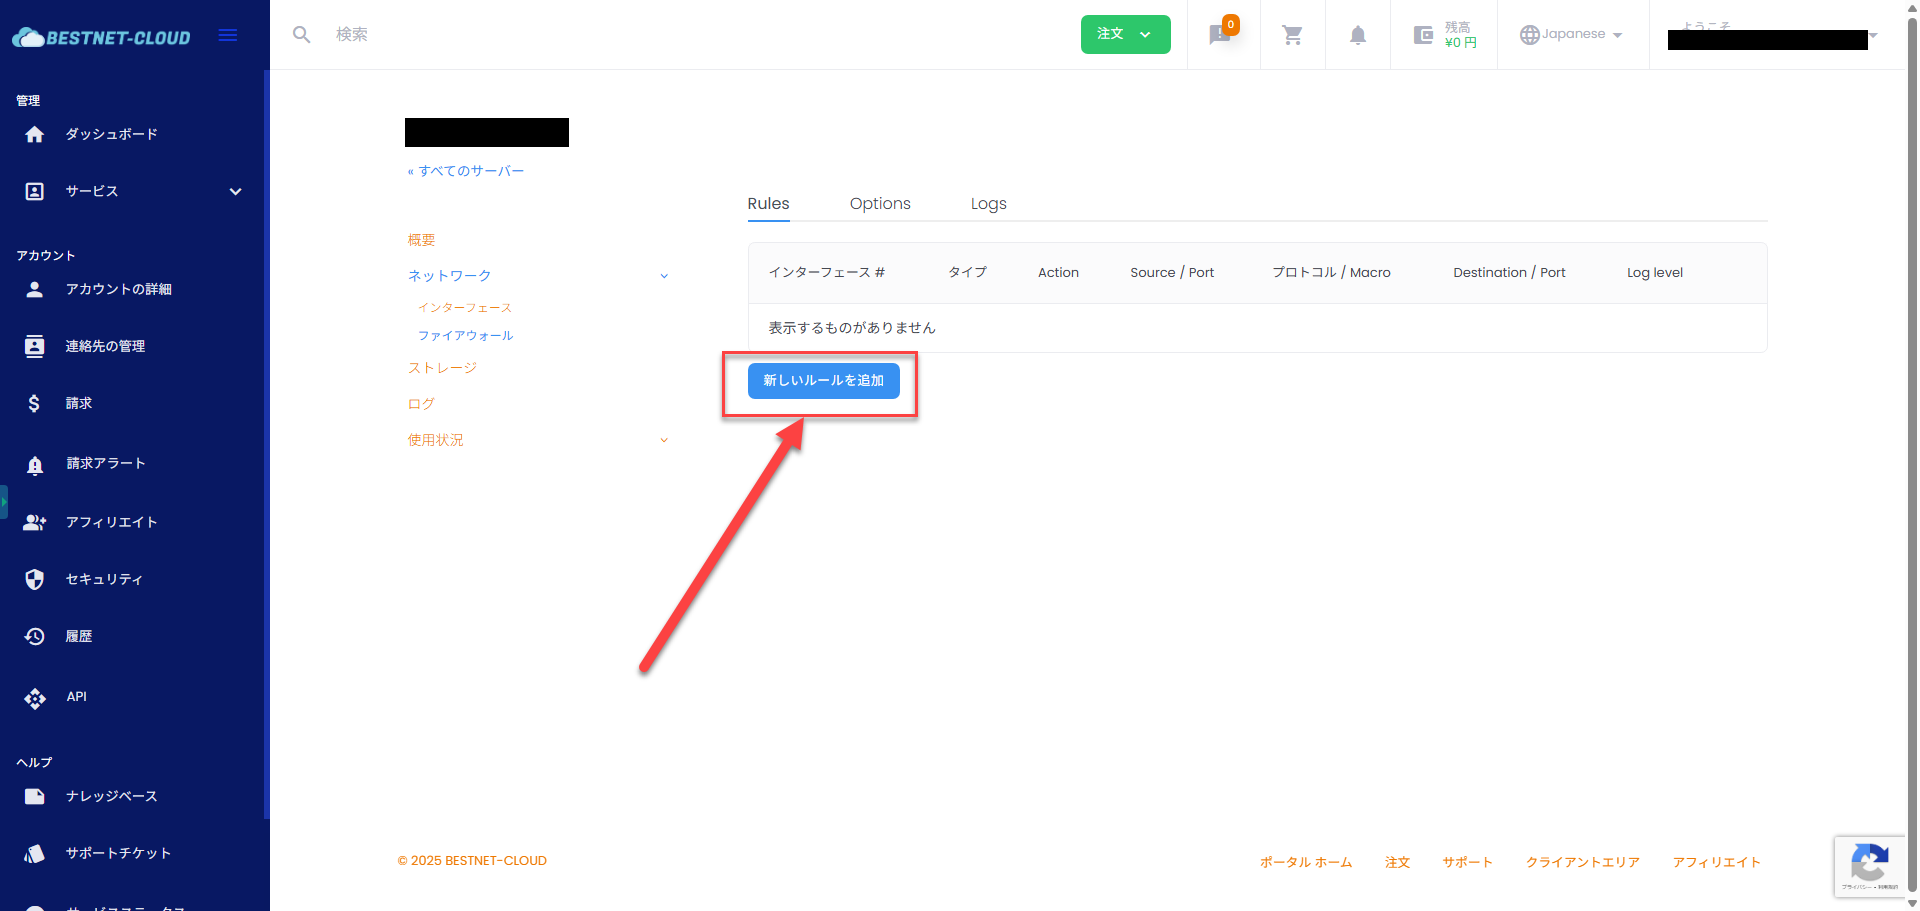
On the Opensense virtual machine overview page, click “Network” → “Firewall” in order.
In the initial state, no firewall rules are configured, and all access from the internet to the virtual machine is denied.
Click “Add new rule”.
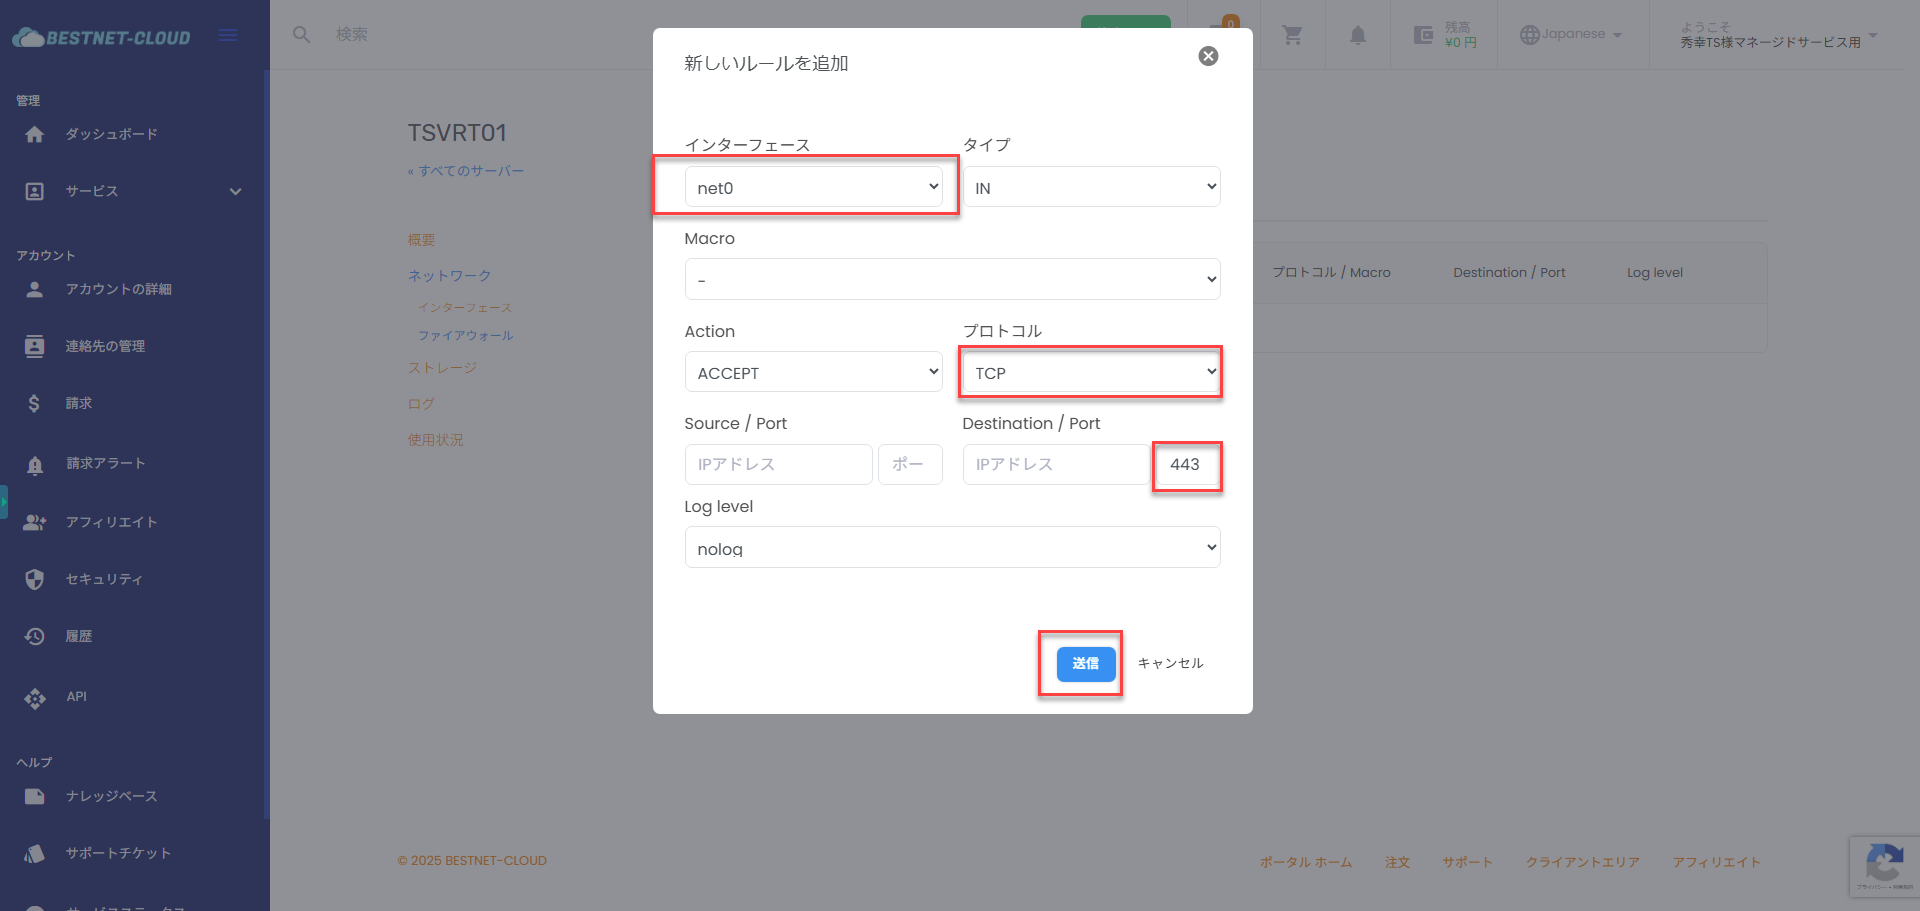
Confirm that interface net0, to which the WAN IP is assigned, is selected. Select TCP for protocol, enter 443 in the Destination/port field, and click the “Submit” button to allow access from the internet to port 443 of the WAN interface on the Opensense virtual machine.
※We recommend restricting the source IP address※
※Select Log level according to your requirements※
STEP7. Language Change (Optional) #
Access the WAN IP of the Opensense virtual machine via https from your device: https://Opensense virtual machine WAN IP address
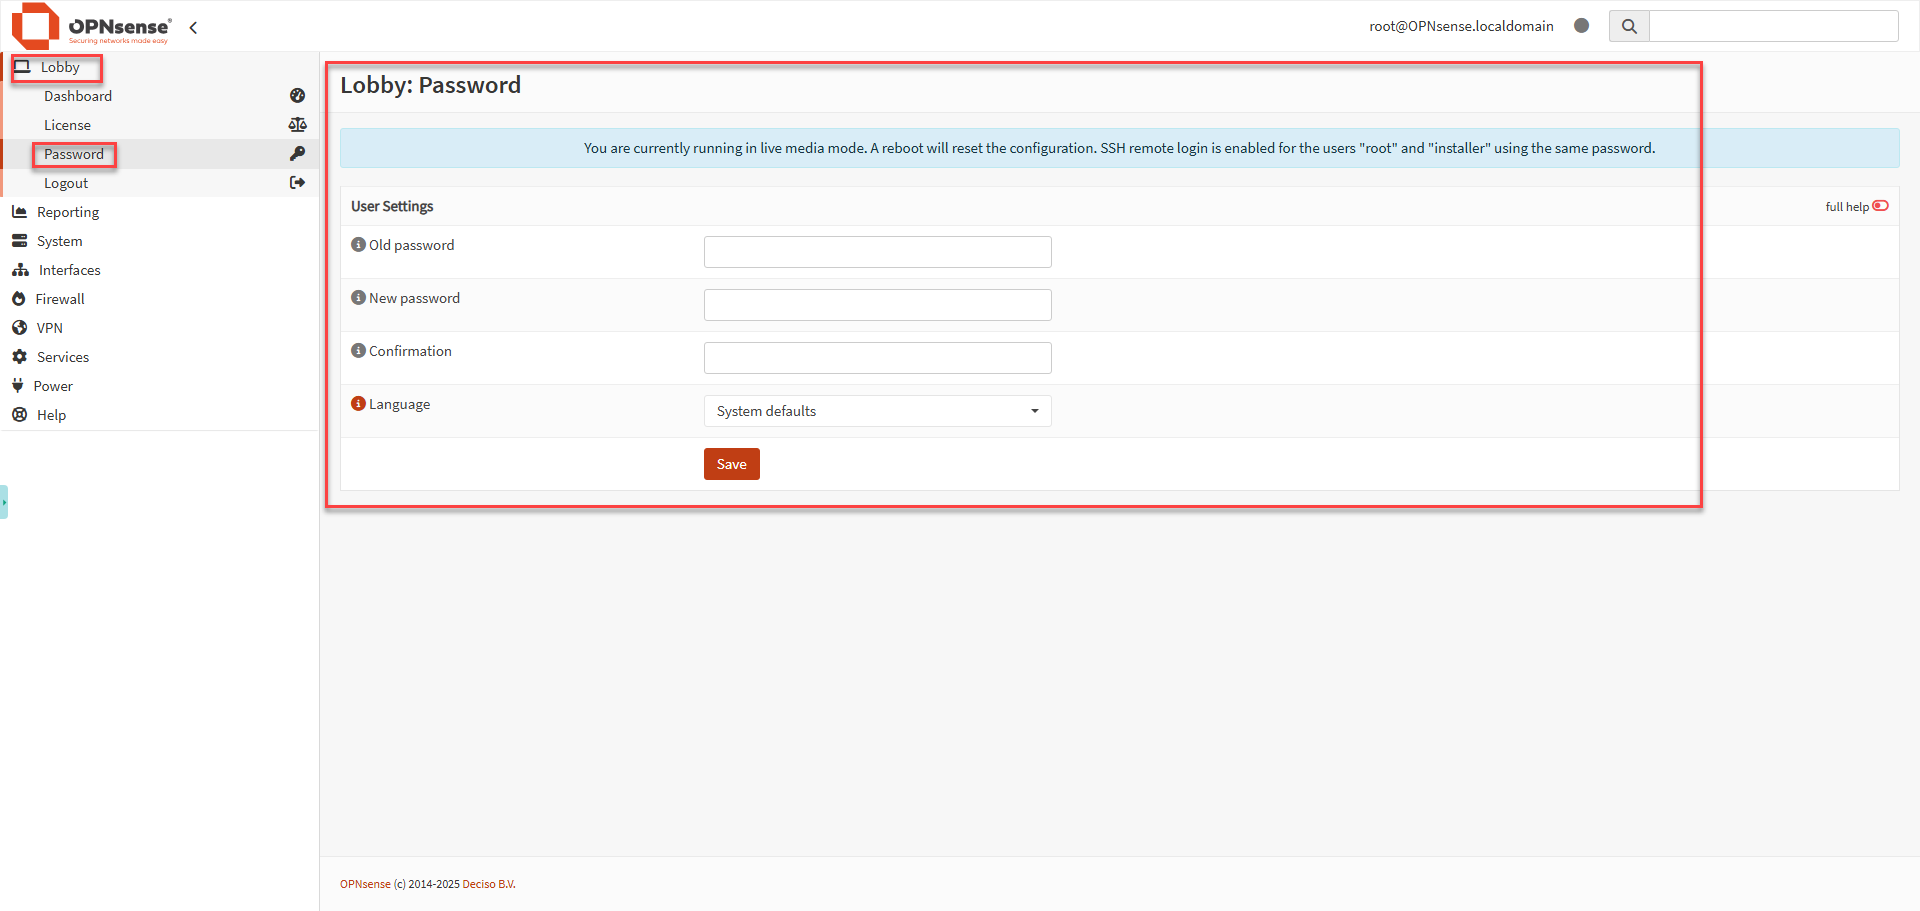
A login screen will appear, so enter the user and password you set in STEP3 and log in.
Click Lobby → Password in order, and you can change the GUI language to your preferred language.
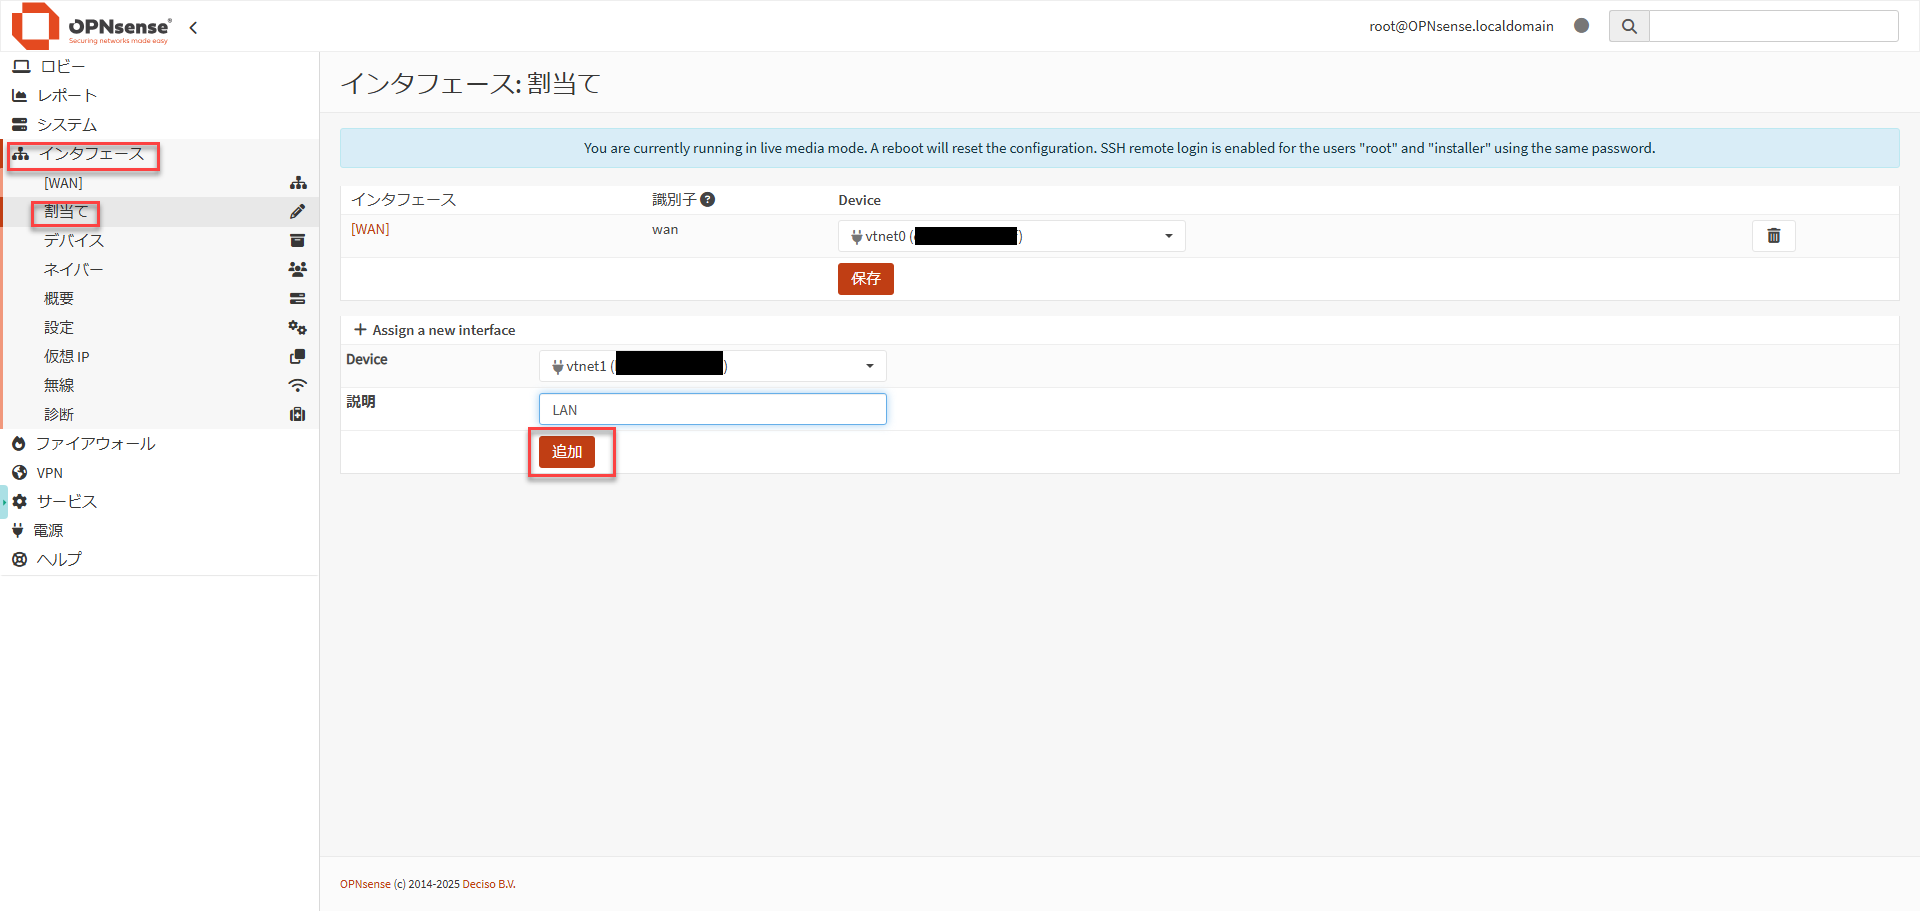
STEP8. LAN Interface Assignment #
To create a LAN interface within the cloud environment, you need to make Opensense recognize the network adapter assigned to the Opensense virtual machine.
Navigate the tree in the order of Interface → Assignments, select “vtnet1” under “Assign a new interface” and click the “Add” button to complete the assignment.
※When assigning multiple LAN interfaces, the vtnetX number will increment in the order they are added, allowing you to identify the association with the interface information listed on the virtual machine overview page.※
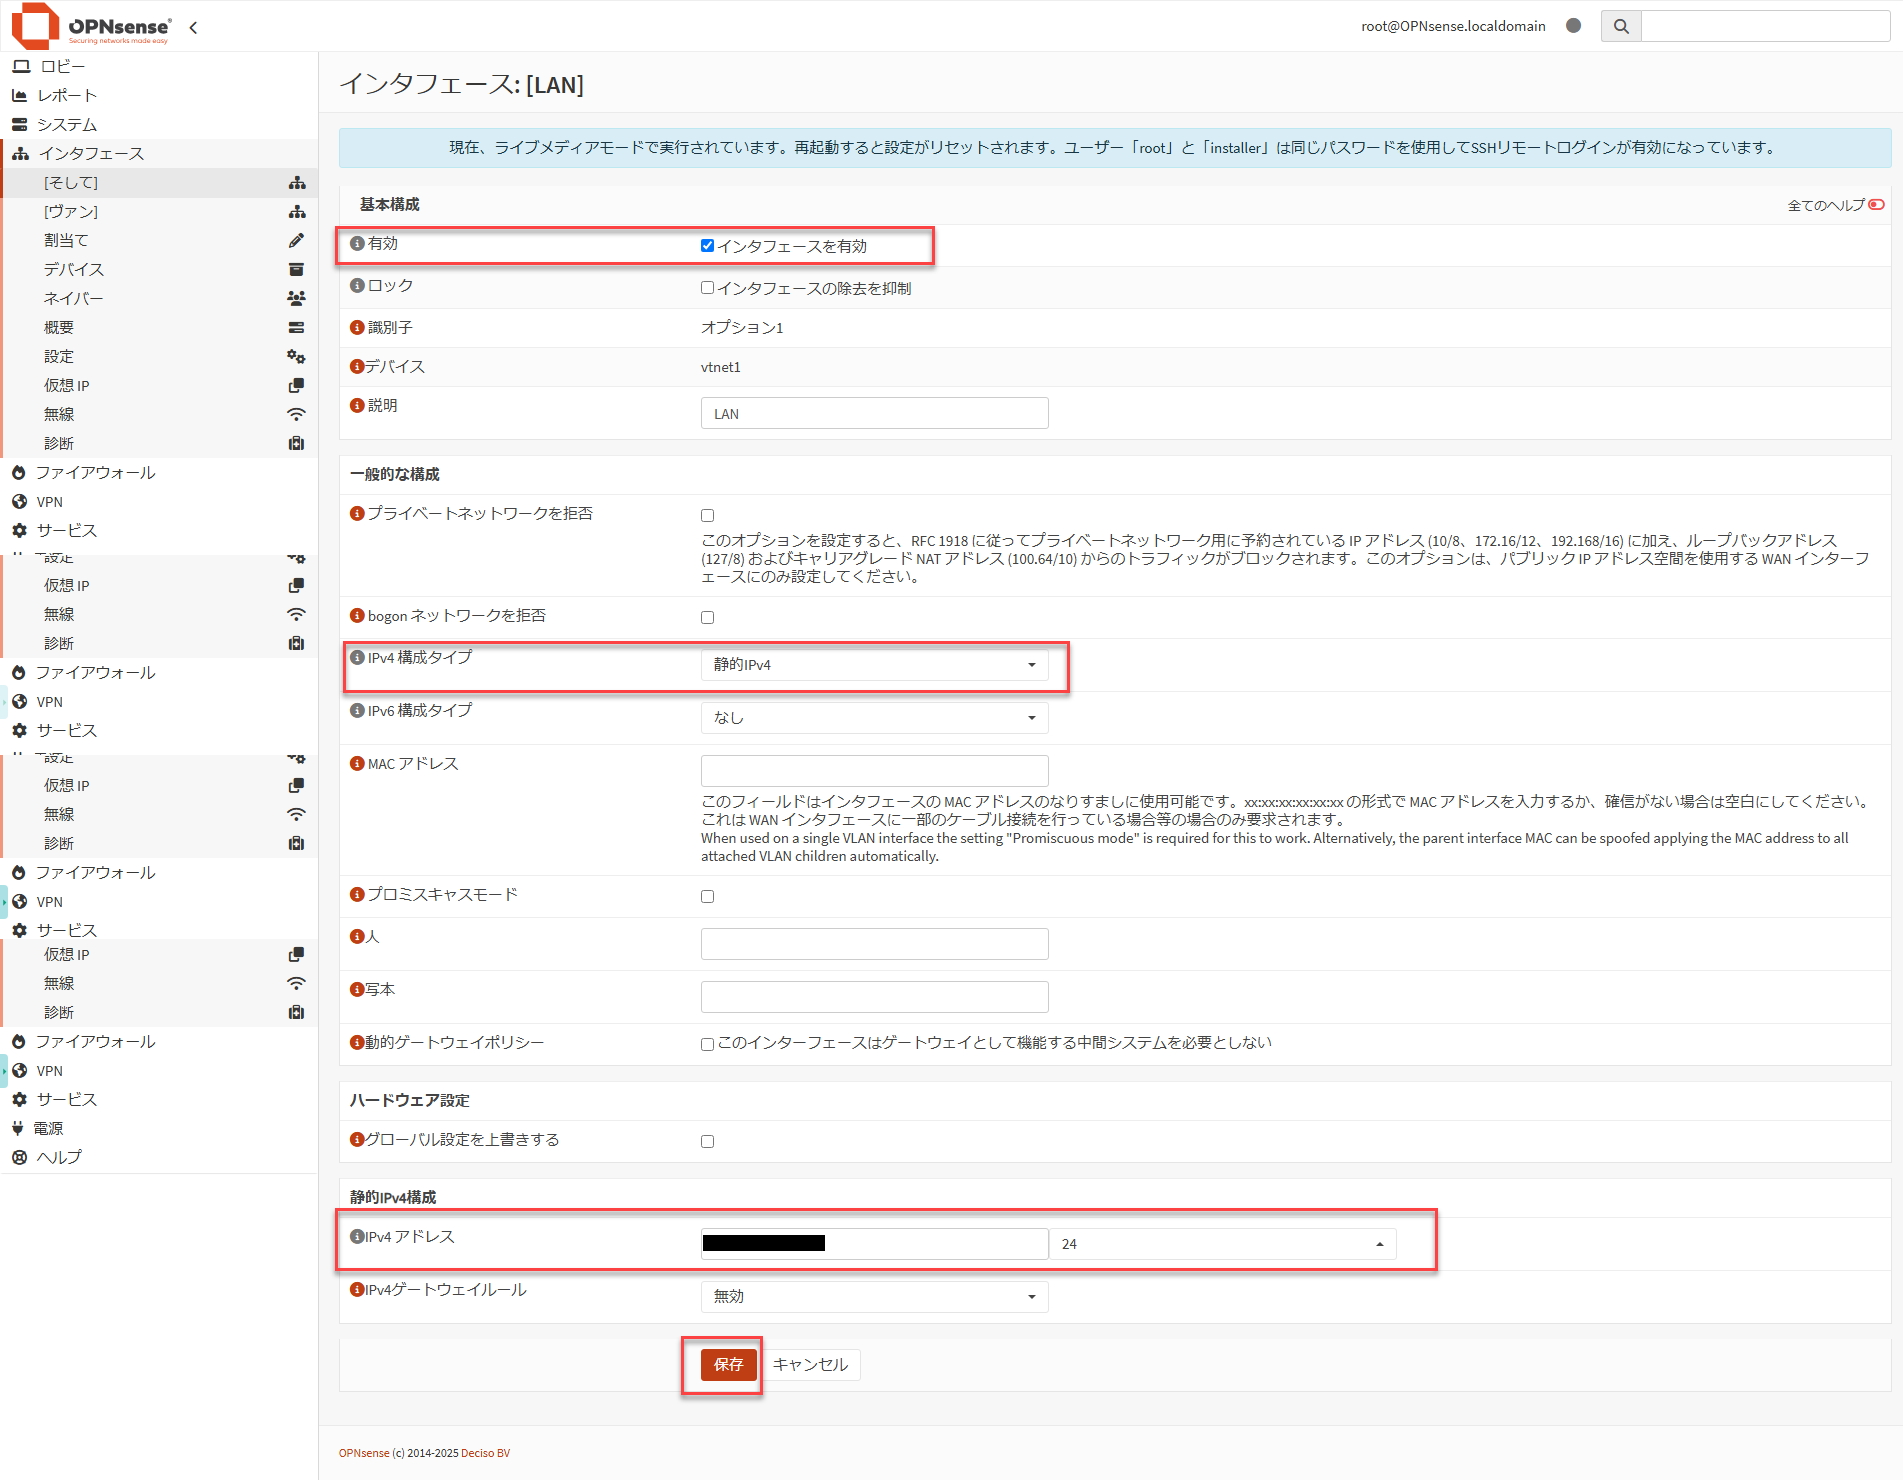
STEP9. Configure IP Address for LAN Interface #
You need to set an IP address for the LAN interface assigned in STEP8.
・Check “Enable interface”
・Set “ IPv4 Configuration Type” to “Static IPv4”
・”IPv4 Address” (Enter the LAN IP address displayed on the virtual machine overview page)