
Overview #
This is a procedure for creating a new server (virtual machine) using an existing template in the client portal (screen example: BESTNET-CLOUD).
Please Note: This manual is created using generative AI and similar tools. The positions of annotations (arrows, frames, numbers, etc.) in the screen captures may be slightly offset from the actual screen display. When performing operations, please prioritize confirming the screen display and the content of the instructions.
Prerequisites #
- You can log in to the client portal
- The template you want to use (for example, a template under
Private) has been created and you have permission to use it - If you want to log in using an SSH key, register the SSH key in advance (you can register it from the “SSH Key Management” screen)
Procedure #
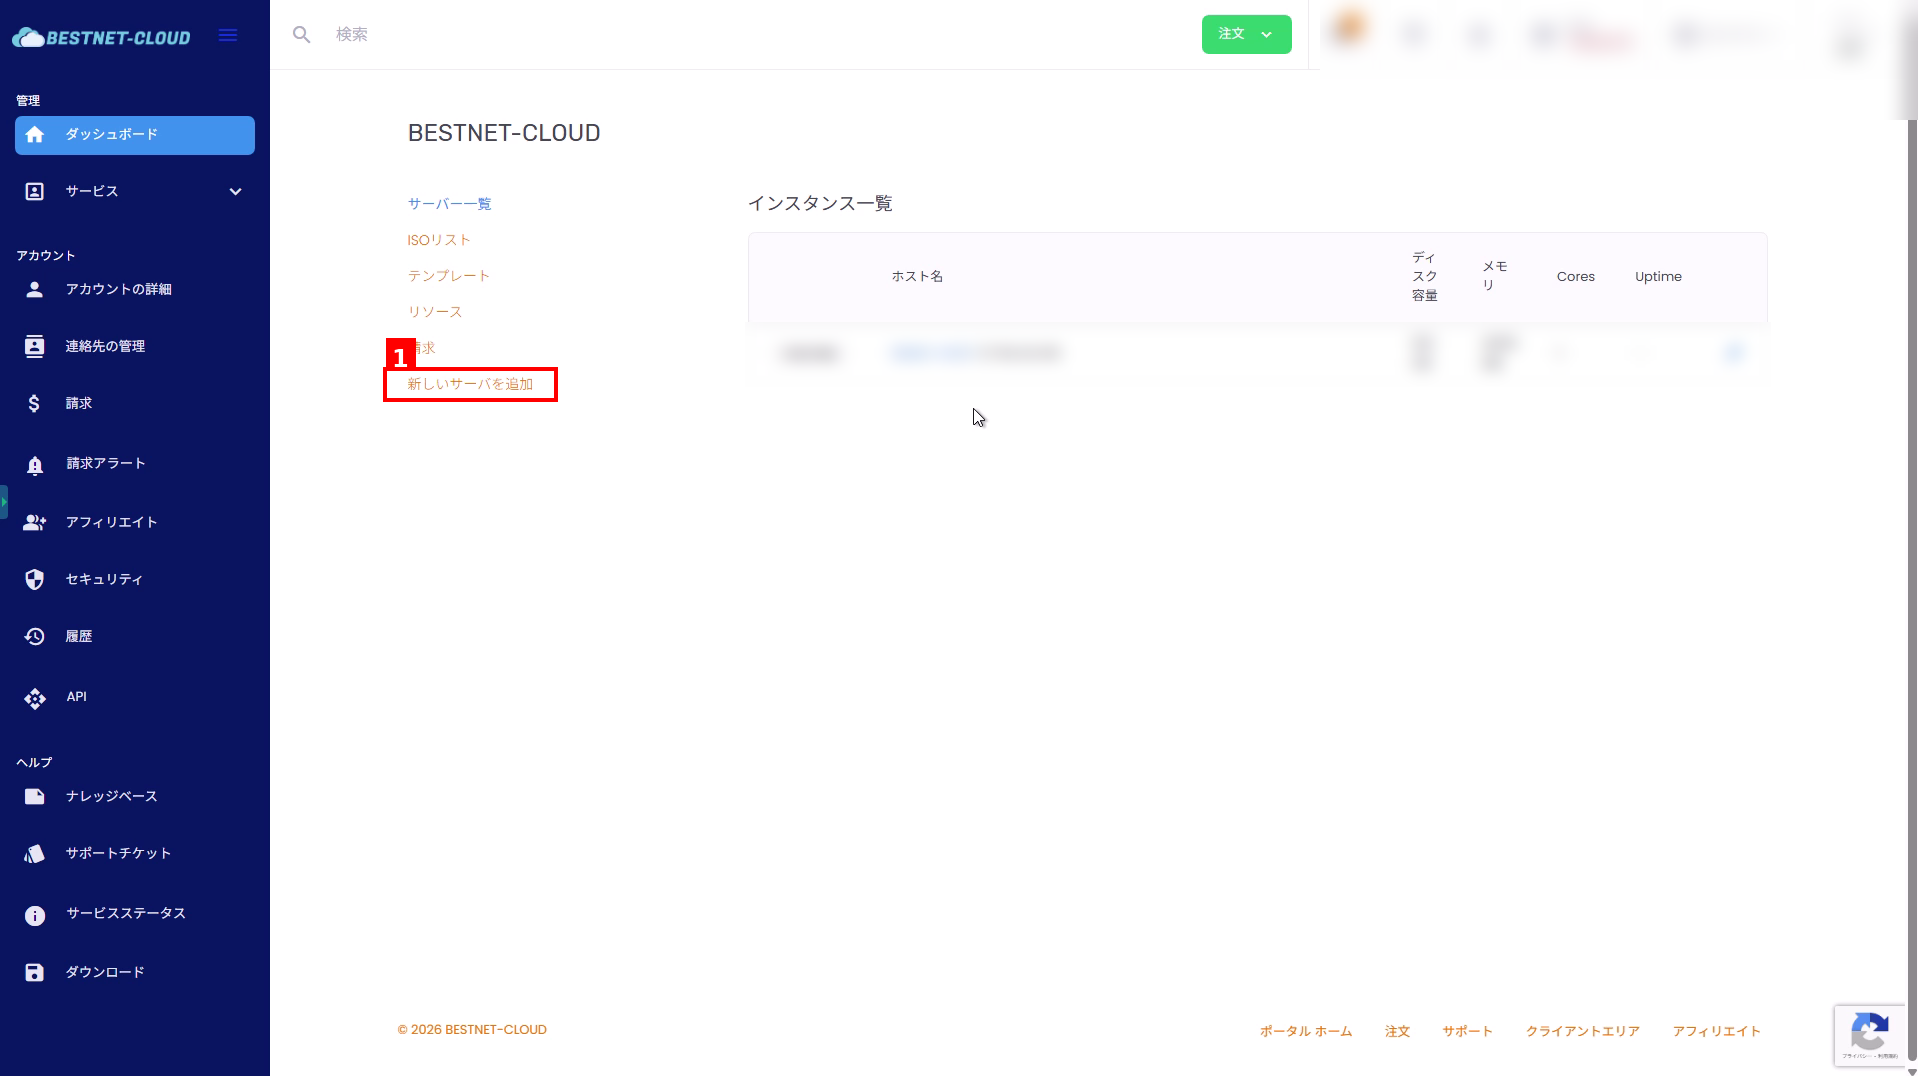
1. Open “Add New Server” #
- Open the “Server List (Instance List)” in the client portal.
- Click “Add New Server” in the left menu.
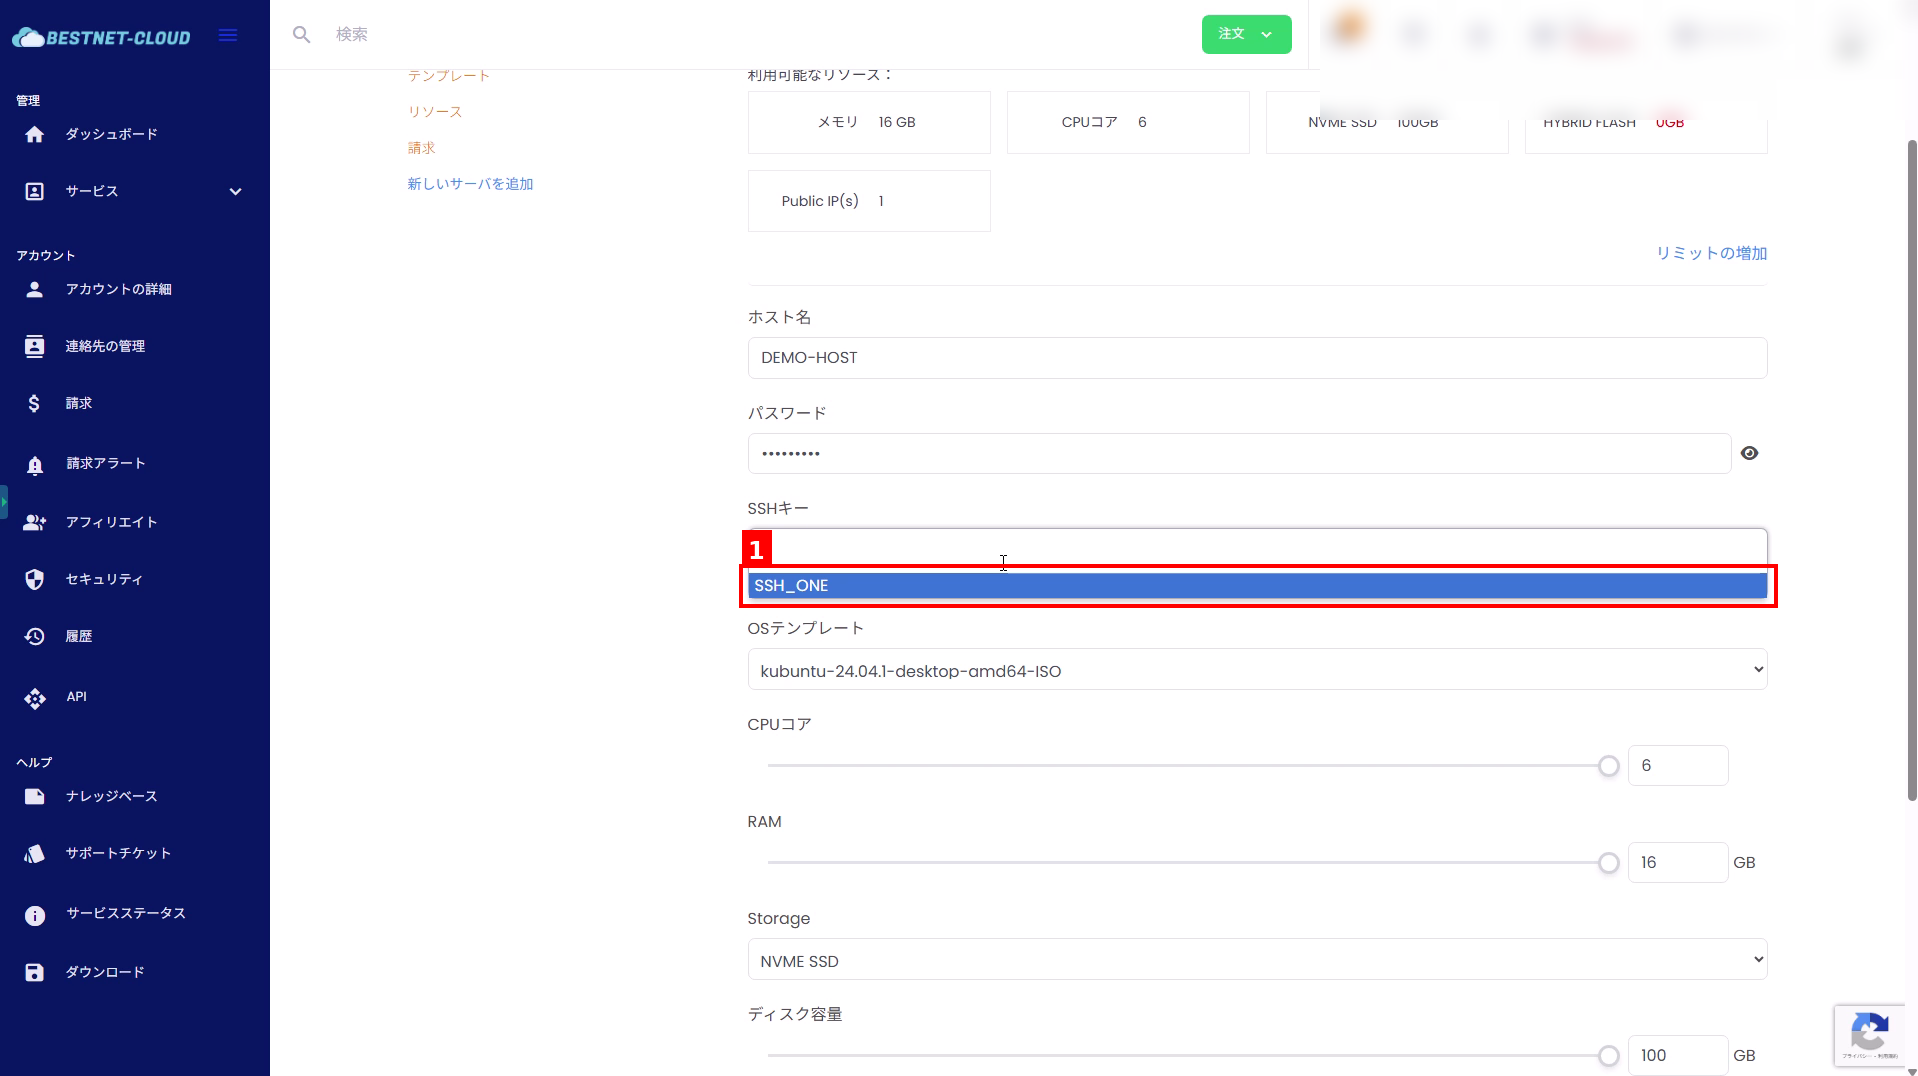
2. Enter Hostname and Password #
- Enter the hostname (example:
DEMO-HOST). - Enter the password.
Set a password that is difficult for third parties to guess.

3. Select SSH Key #
- Click “SSH Key” and select a registered key (example:
SSH_ONE).
If you cannot select an SSH key, register the key in advance from “SSH Key Management”.
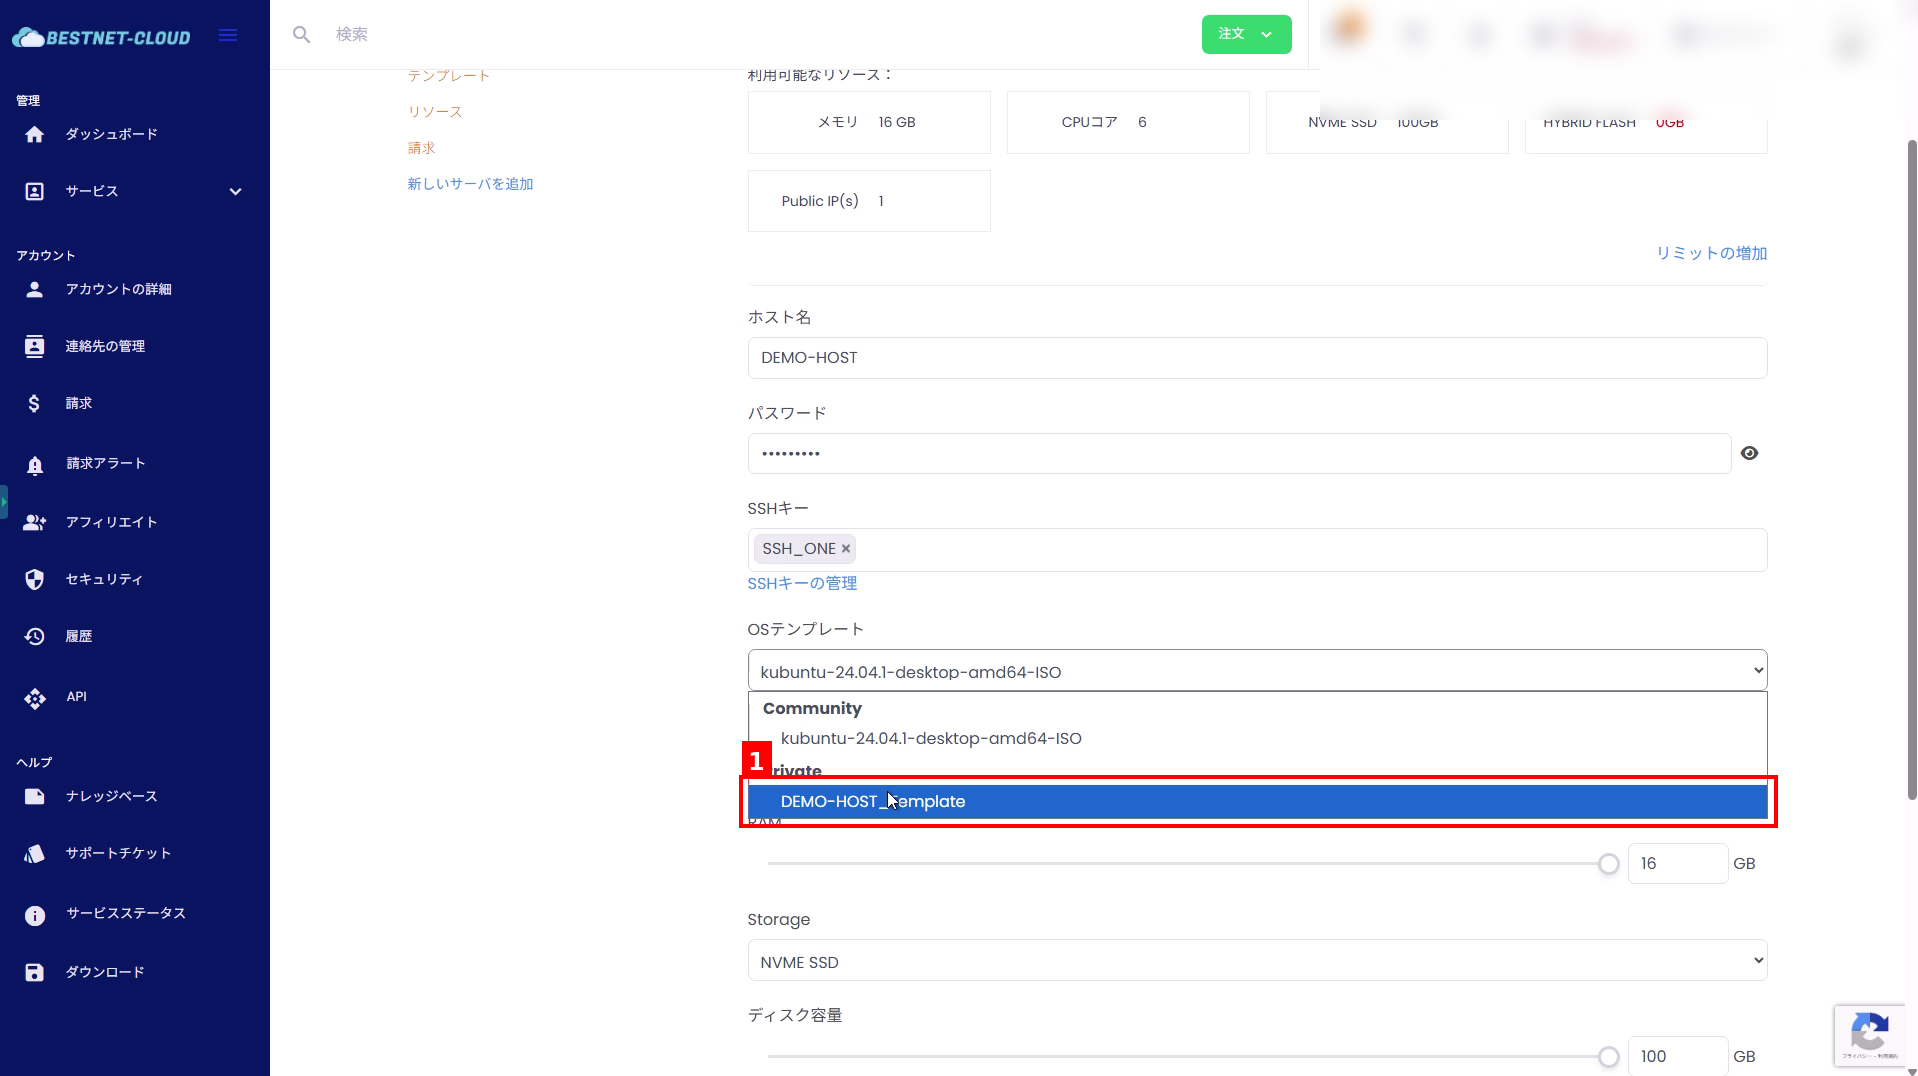
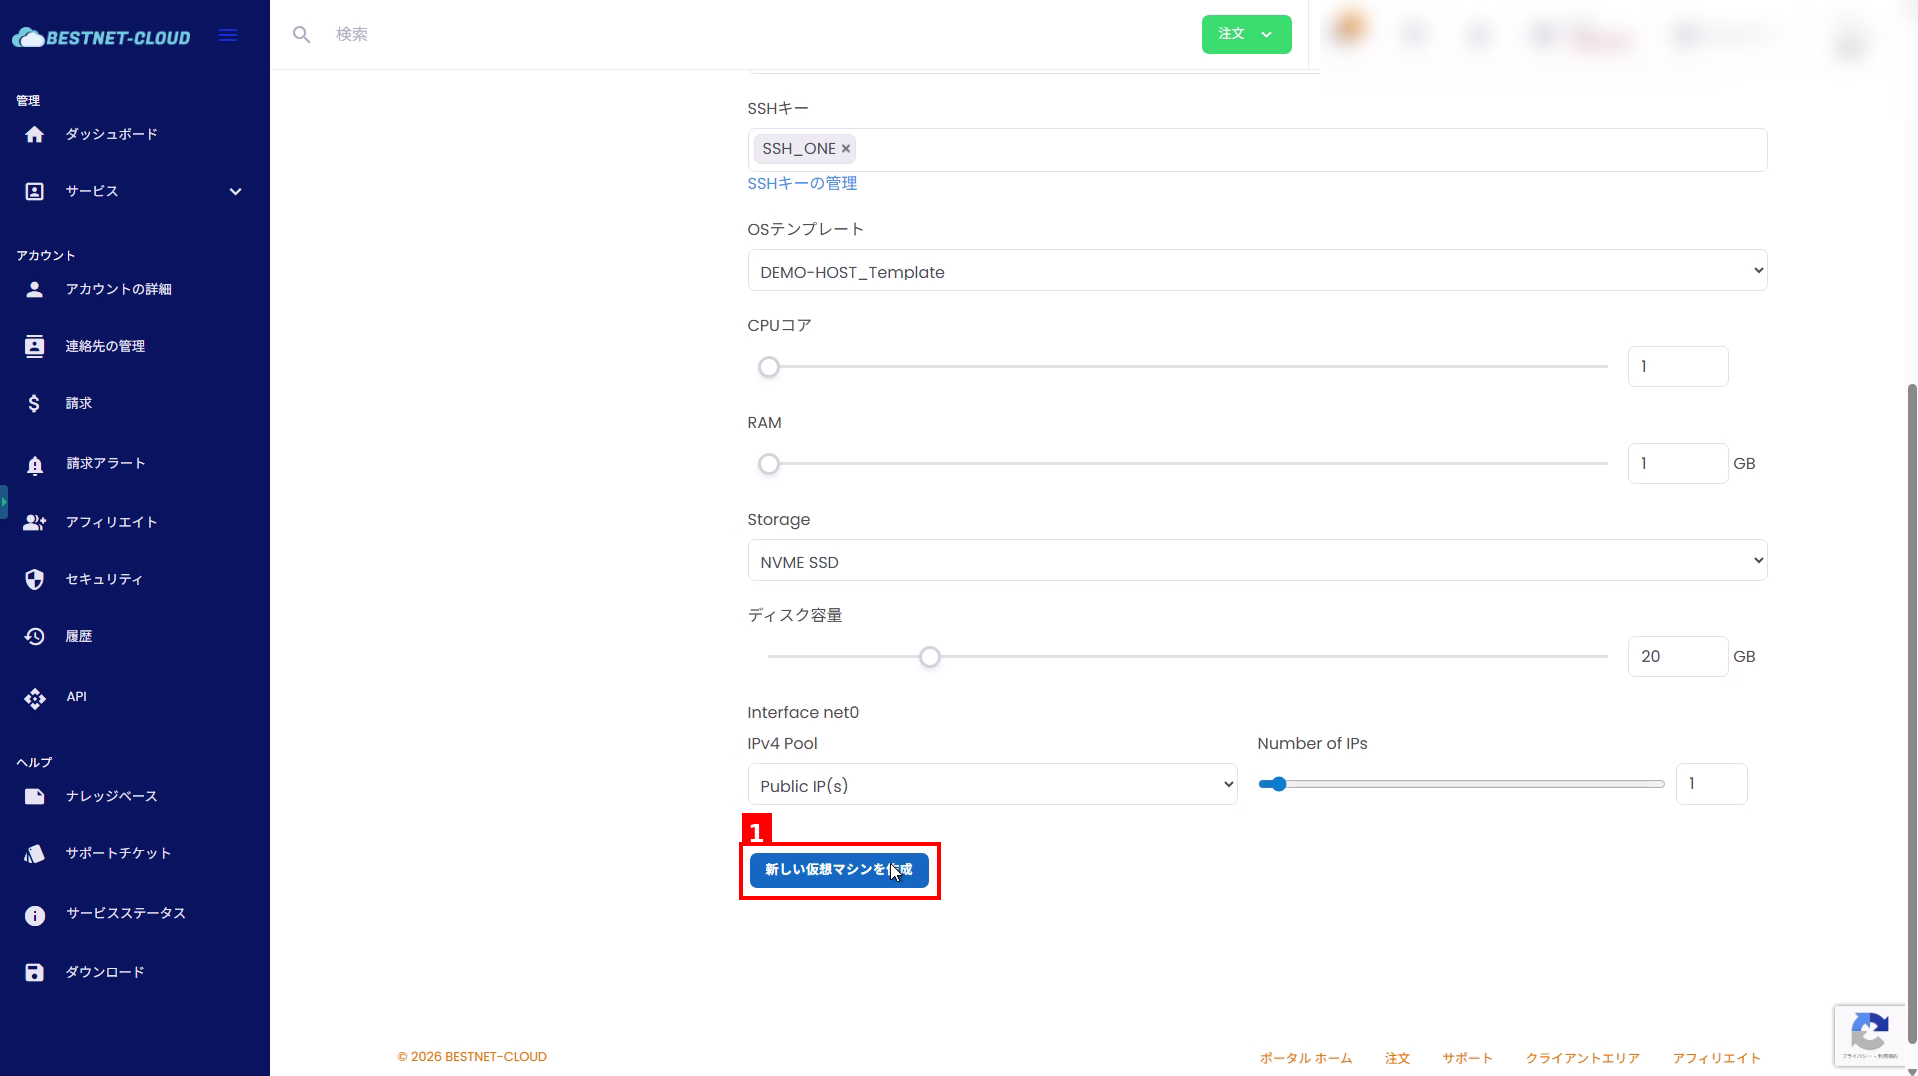
4. Select Template #
- Click “OS Template”.
- Select a template displayed under Private in the list (example:
DEMO-HOST_Template).
If you want to create from a template, select a Private template, not an ISO (Community).
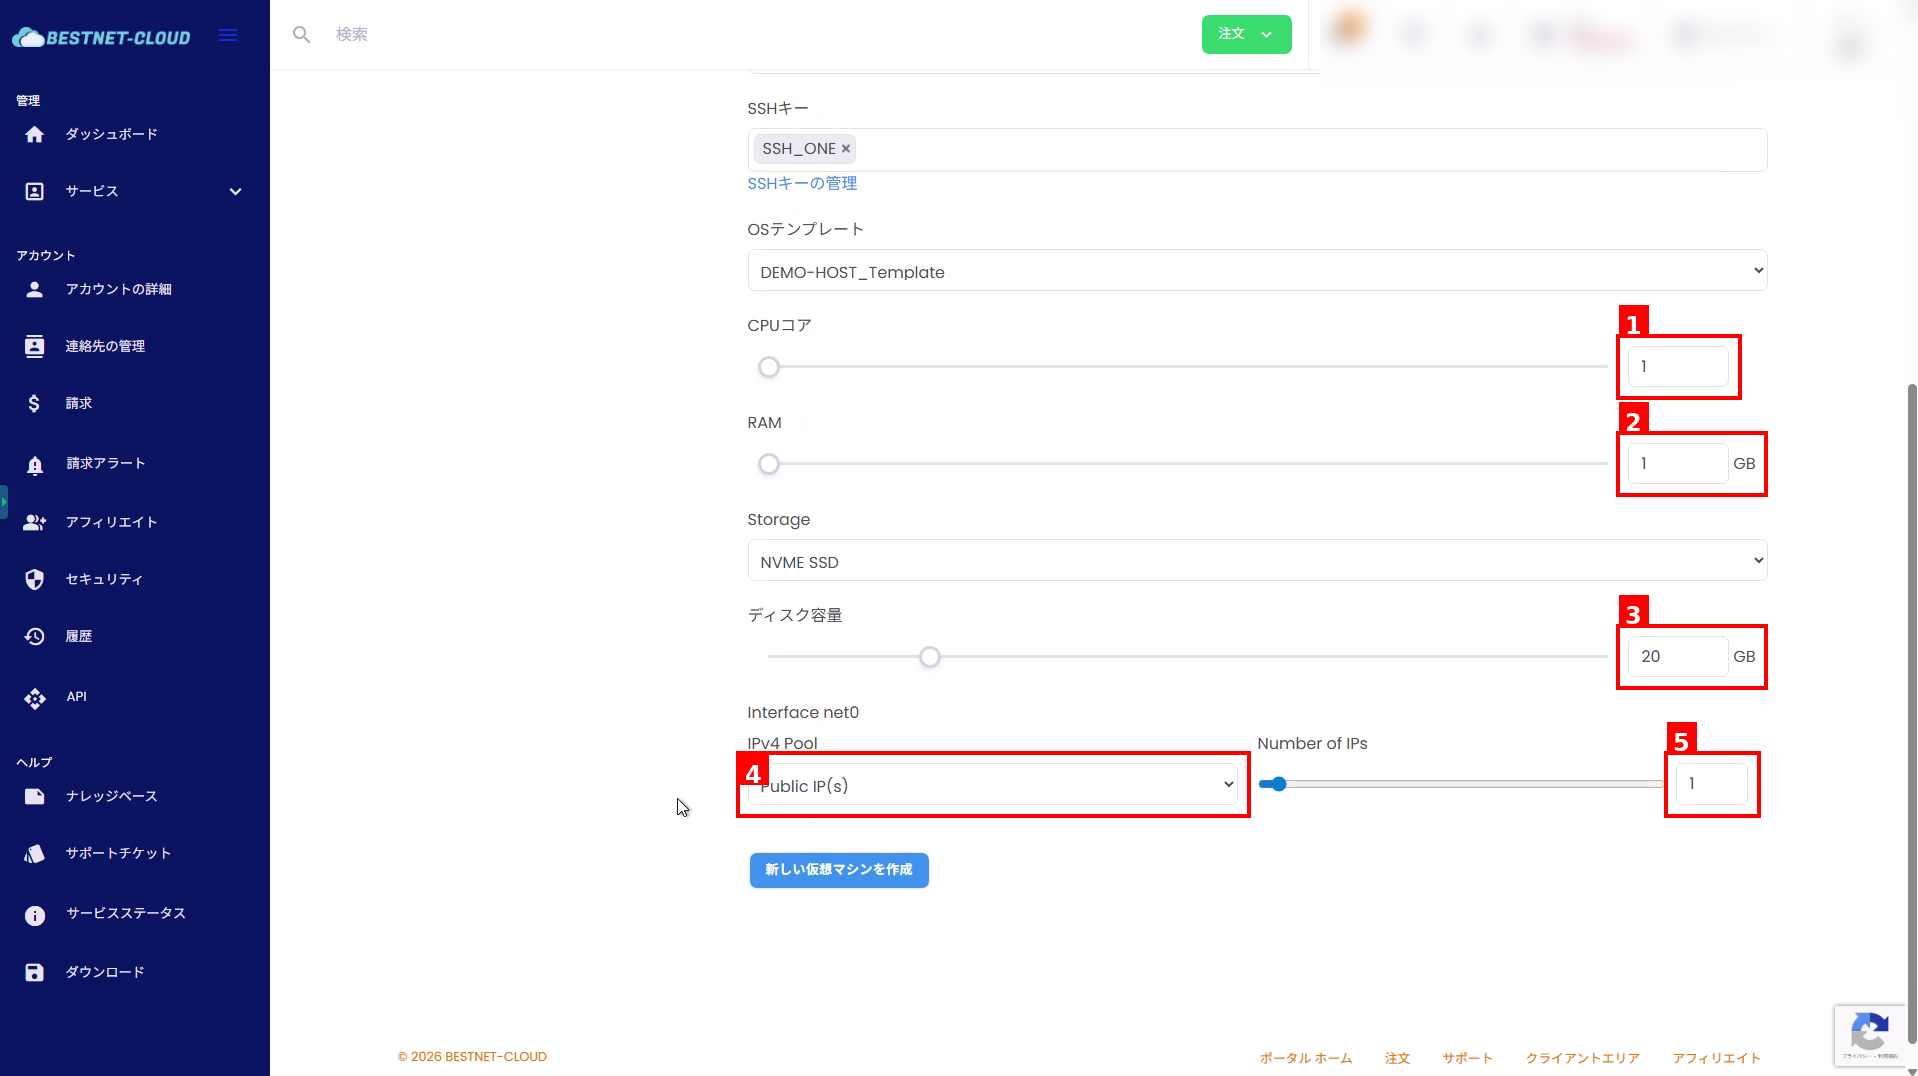
5. Configure Resources and Network #
- Set the CPU cores.
- Set the RAM.
- Set the disk capacity.
- Select the IPv4 Pool for “Interface net0” (example:
Public IP(s)). - If necessary, set the Number of IPs.
The configurable limits vary depending on the “Available Resources” shown at the top of the screen and your contract. Depending on the template specifications, some values may be reflected to match the template settings after creation.

6. Create Virtual Machine #
- Click “Create New Virtual Machine” at the bottom of the screen.
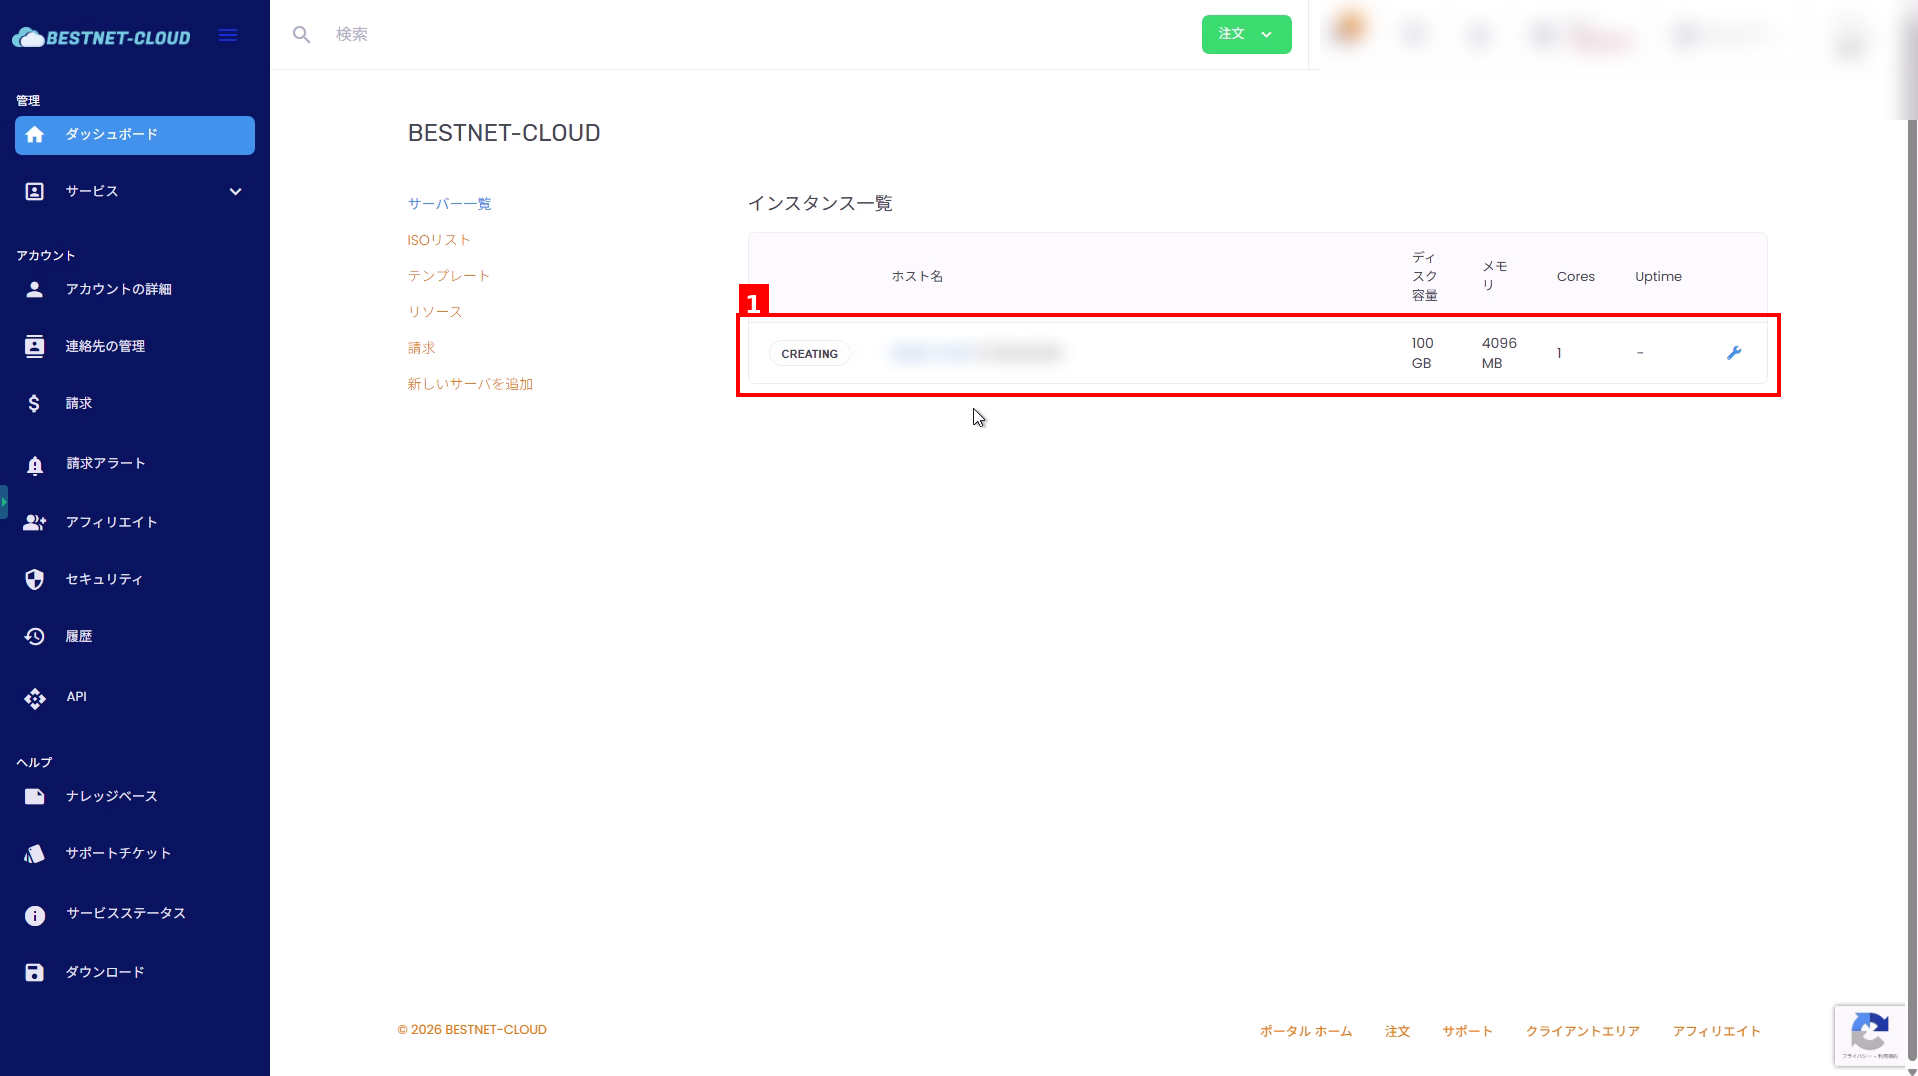
7. Check Creation Status #
- Return to the “Server List (Instance List)” and the created instance will be displayed.
- While the status is CREATING, the instance is being created. Wait for completion and refresh the screen if necessary.
Notes and Troubleshooting #
Template is not displayed #
- The template may not have been created yet, or you may not have permission to view it. Ask your administrator to create the template or grant you permission.
Cannot select SSH key #
- If the SSH key is not registered, register it from “SSH Key Management” and then return to the creation screen.
Creation does not progress or fails #
- Check that resources (CPU / RAM / disk) and the number of IPs do not exceed the limit.
- If the status does not change for a long time, contact support via a support ticket with details (hostname, time of occurrence, etc.).


