
Purpose #
This procedure enables secure login to a host in the cloud using SSH public key authentication by performing the following steps: create public and private keys → register the public key in the cloud → verify login with the private key.
About Public Keys and Private Keys #
A public key (Public Key) and a private key (Private Key) are a key pair used for encryption and authentication. The public key can be shared, while the private key must be managed securely by the owner alone.
Characteristics of Public Key (Public Key) #
- Can be shared:There is no problem distributing it to anyone.
-
Primary uses:
- Encryption (data encrypted with a public key can only be decrypted with the corresponding private key)
- Signature verification (content signed with a private key can be verified with the public key)
Characteristics of Private Key (Private Key) #
- Absolutely confidential:Do not share with others. If it is leaked, it can lead to unauthorized access and other issues.
-
Primary uses:
- Decryption (decryption of data encrypted with a public key)
- Signing (creation of digital signatures)
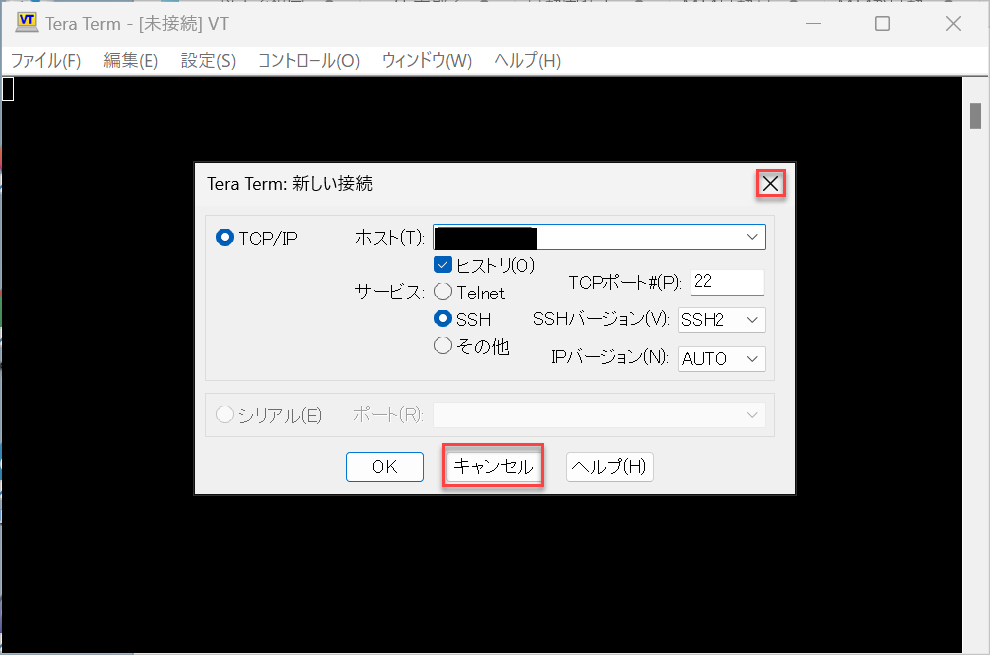
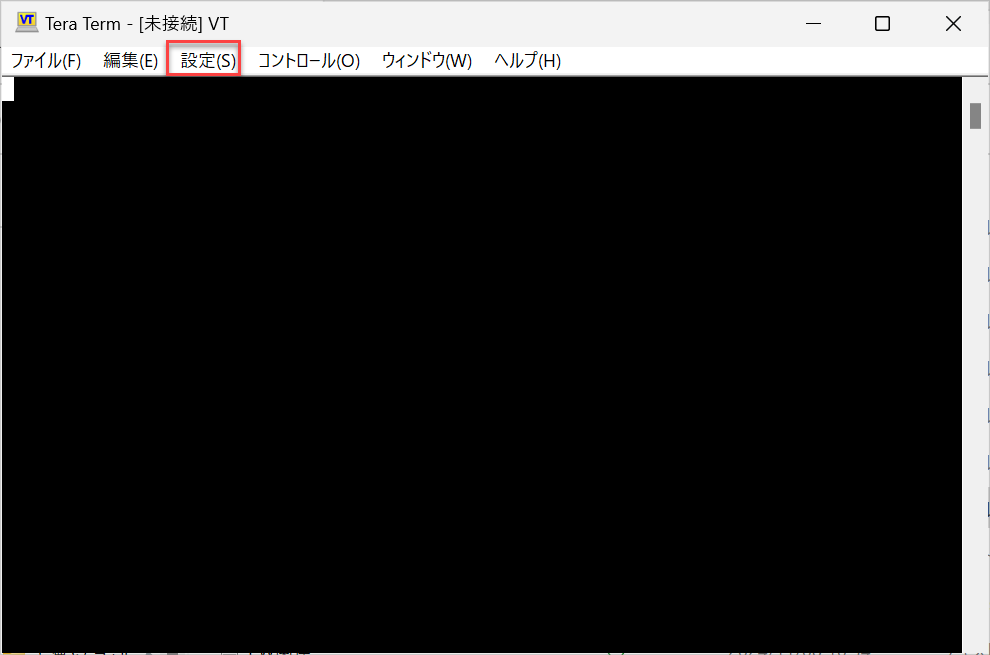
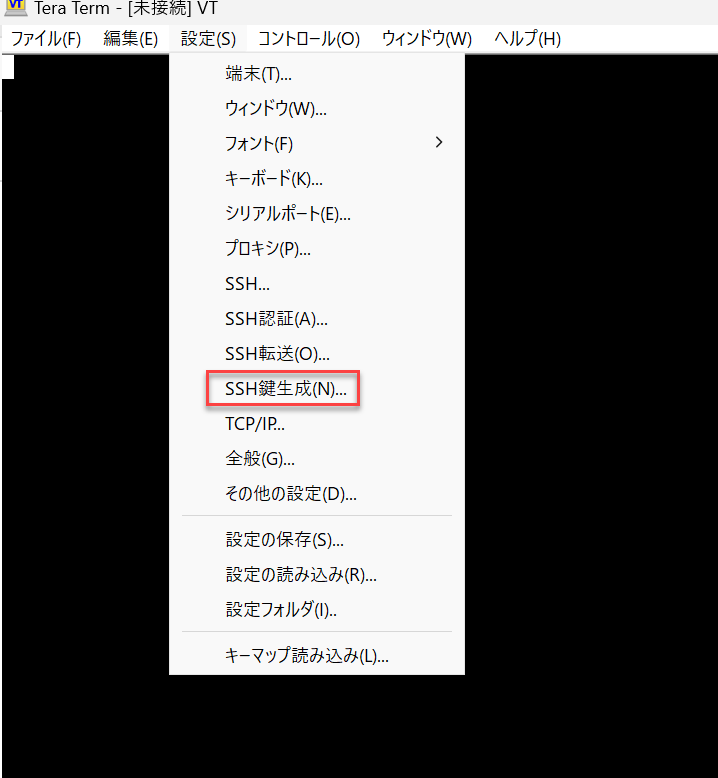
Creating Public and Private Keys (Tera Term) #
Here, we will create a public key and a private key using Tera Term’s key generation function. A bit length of 4096 is recommended.
Creation Steps #
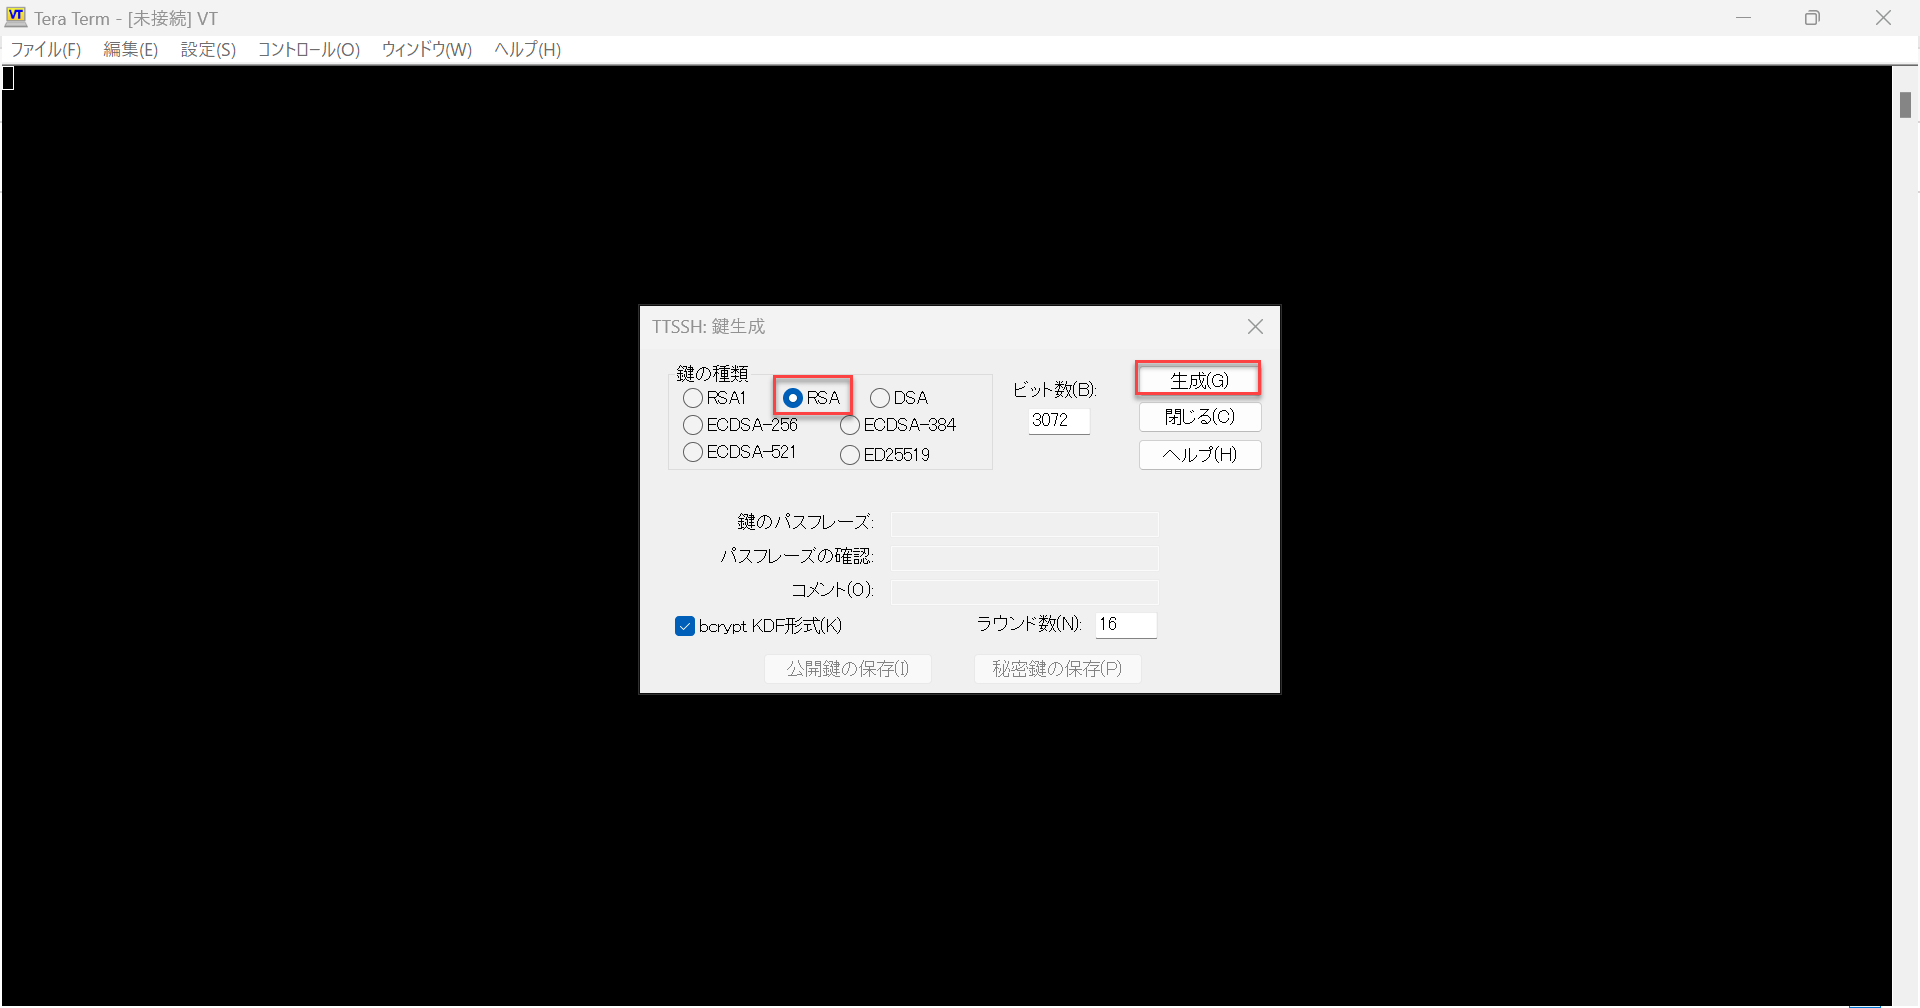
Recommended: 10 characters or more, including uppercase and lowercase letters, numbers, and symbols.
※Creation is possible without setting a passphrase, but it is advisable to set one.
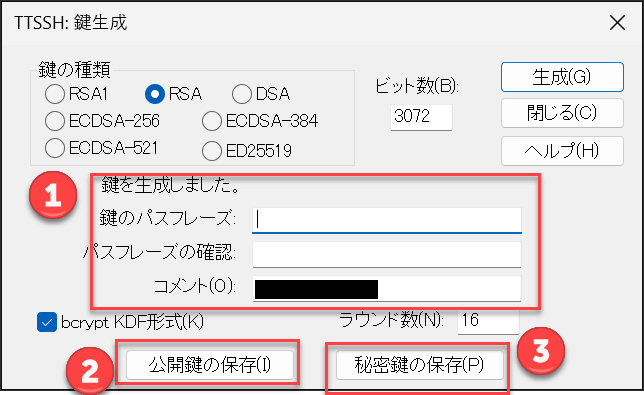
※If save format options (such as bcrypt KDF) are displayed on the screen, select them according to the guidance and operational rules.
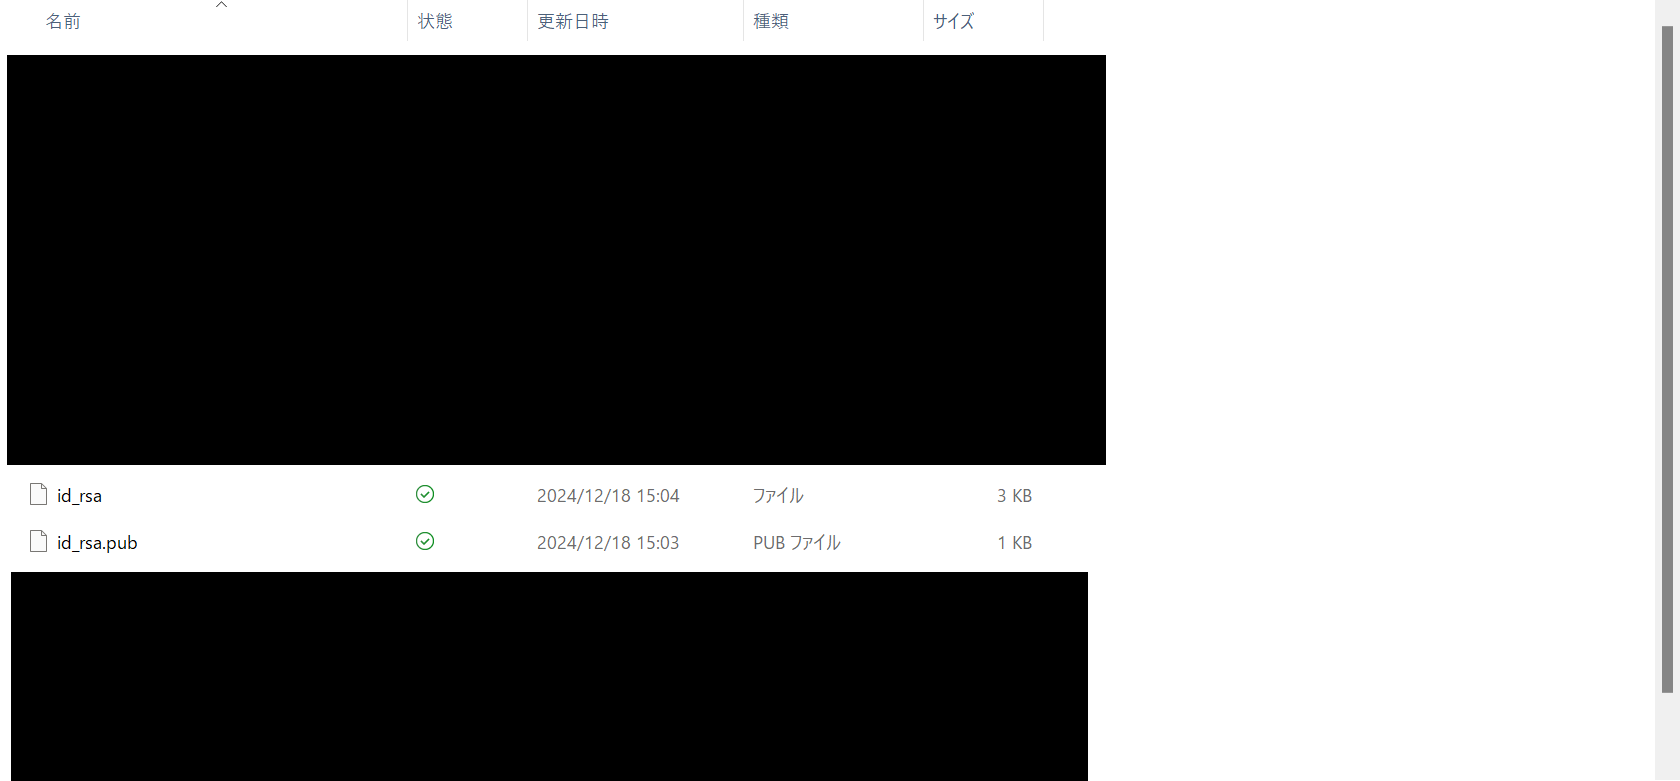
※Save the key pair (public key and private key) as a set created from the same generation operation.
id_rsa / public key id_rsa_pub).
Security Precautions #
- Never share the private key (for example,
id_rsa). - Avoid email attachments, chat pasting, and shared folder storage; keep it in a location with restricted access.
- If you set a passphrase, manage it safely so you do not forget it.
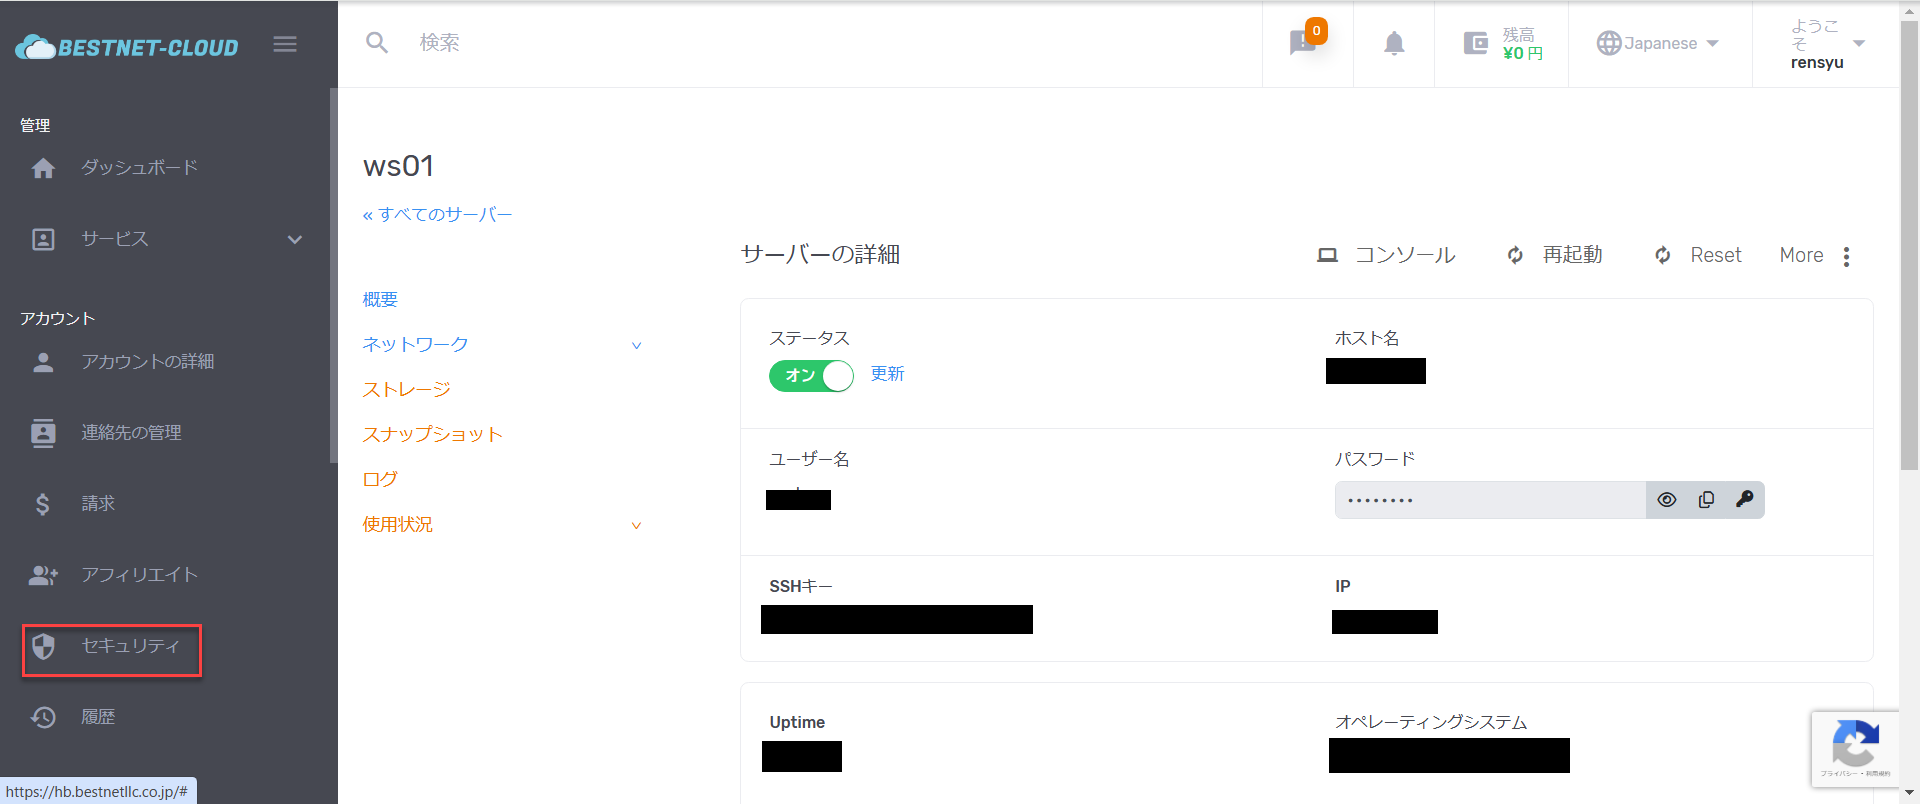
Register Public Key in Cloud #
The created key is not yet linked to the cloud (host), so it cannot be used as is. Here, we will register the public key in the cloud and apply it to the host.
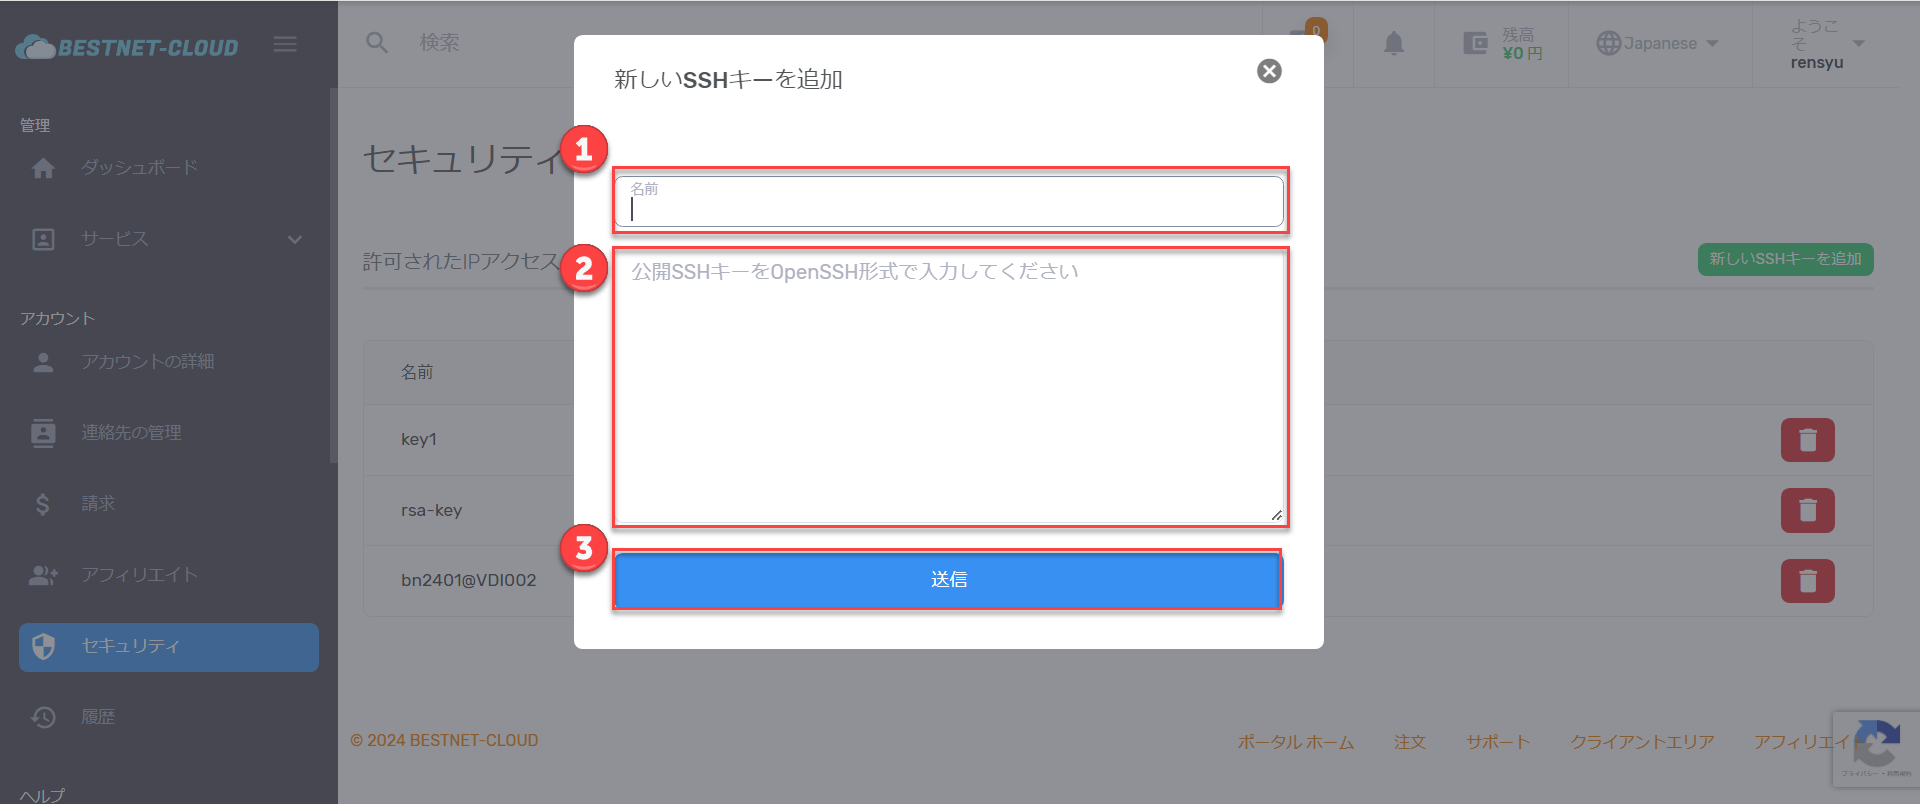
Registration Steps #
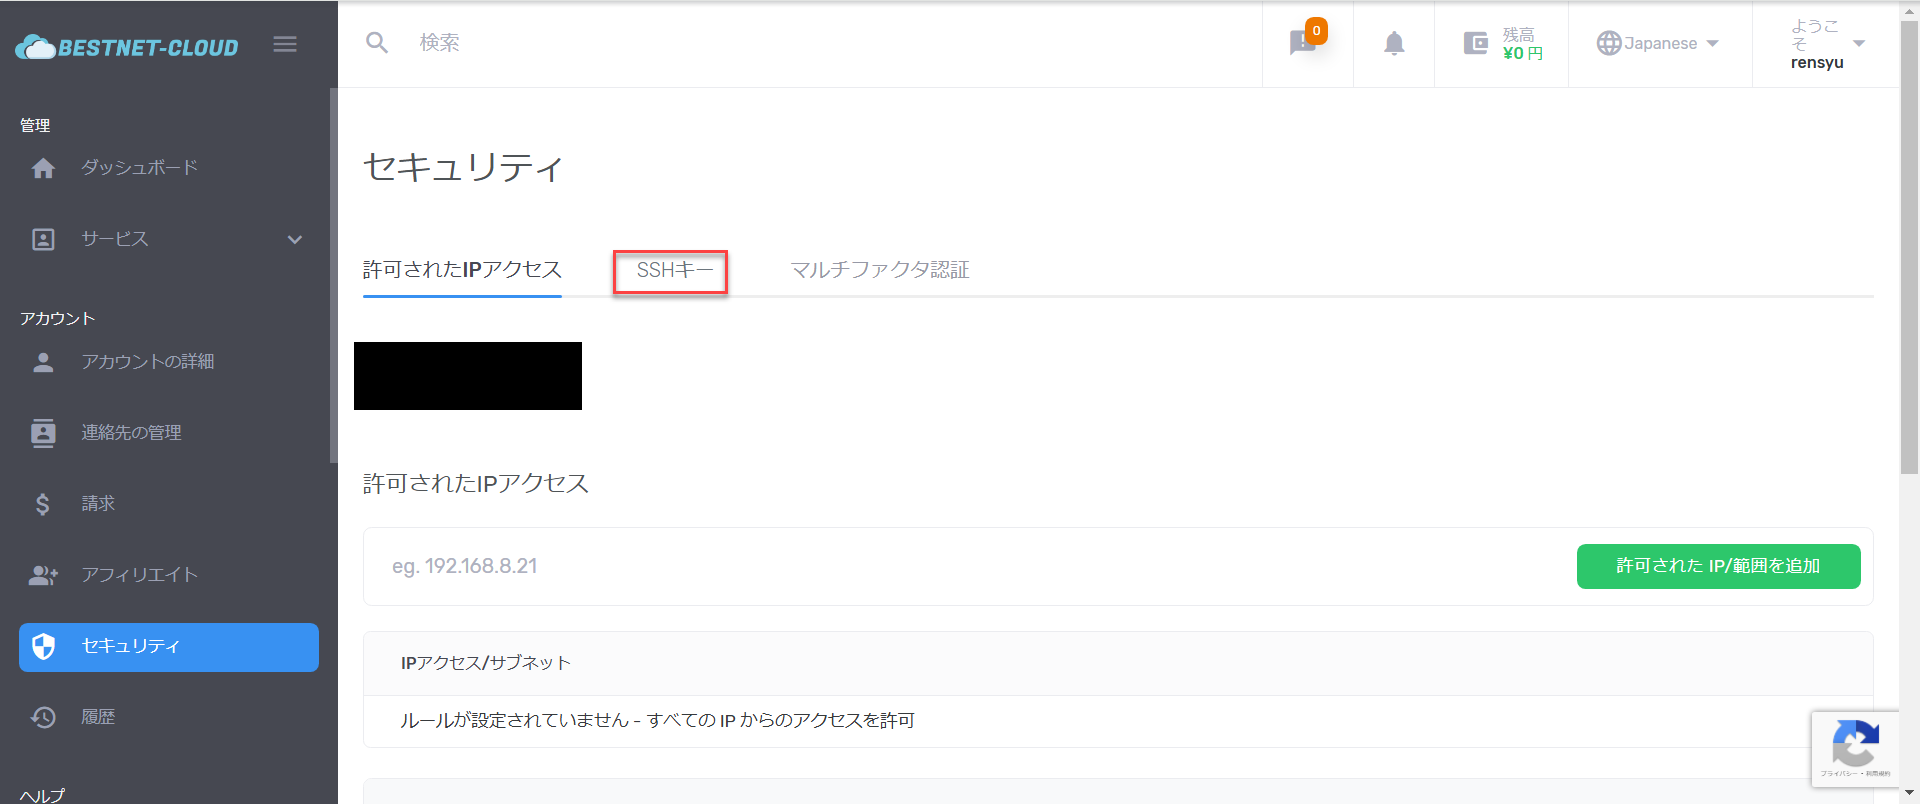
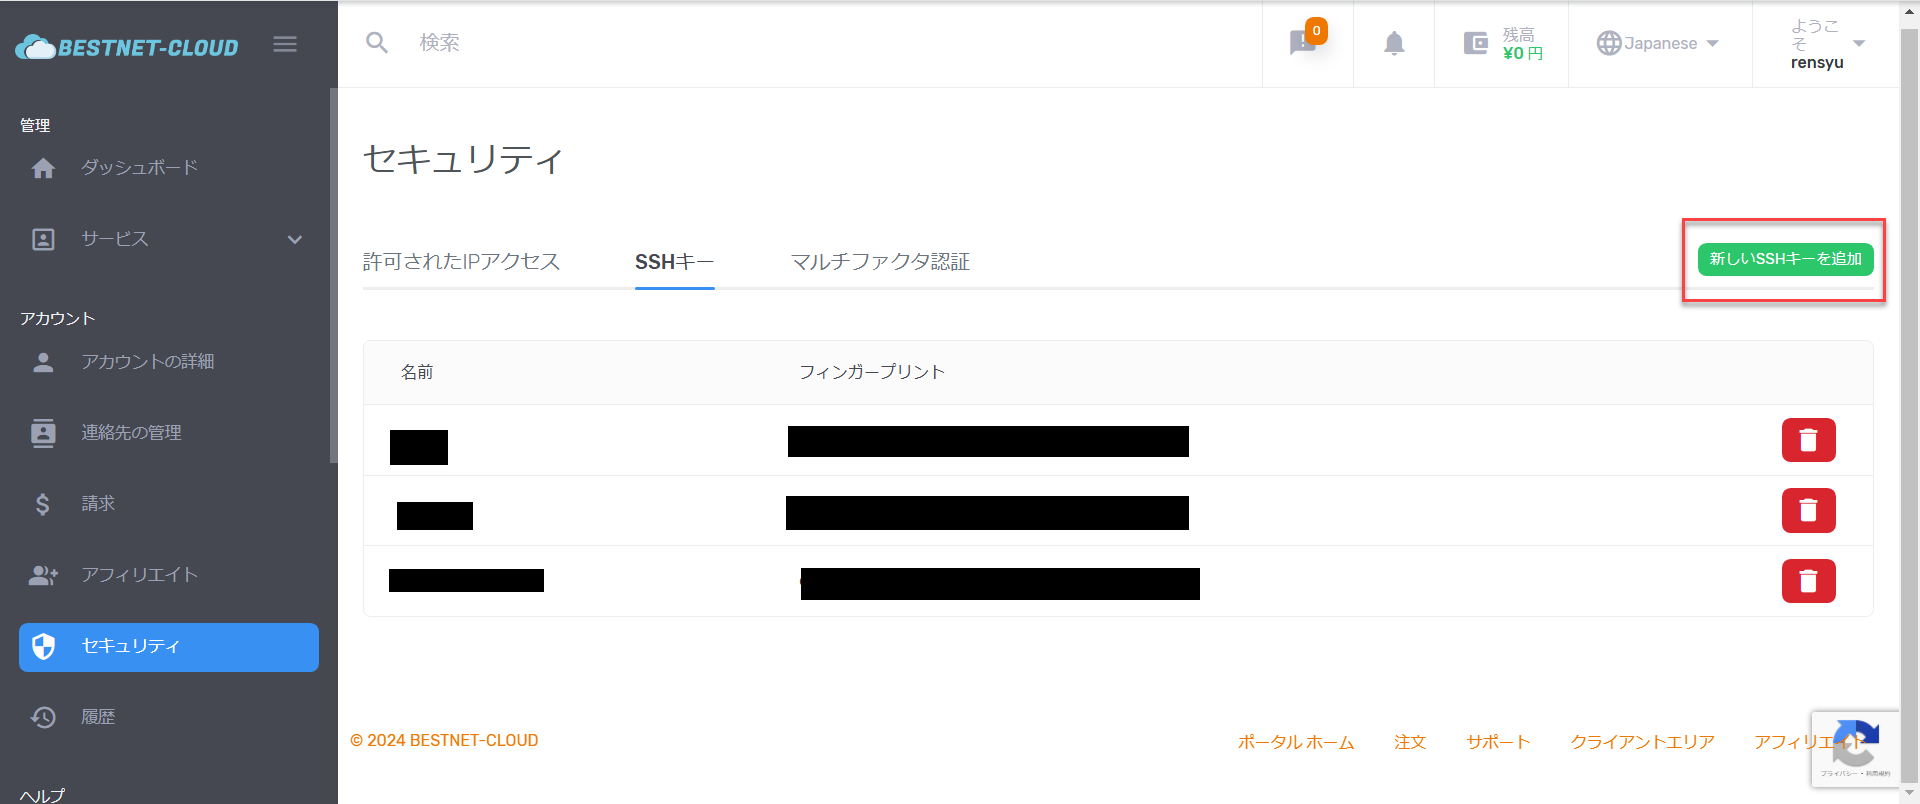
- SSH Key Name (optional)
-
Full text of the public key (open the public key file
id_rsa_pub, copy all its contents, and paste it)
※If format instructions (such as OpenSSH format) appear on the screen, follow the instructions for input.
★ The 3 golden rules for pasting your public key (this is the most common place people get stuck)
- ① Paste the public key (not the private key). What you paste is the public key with the
.pubextension. Never paste your private key (such asid_rsa). - ② Paste it as a single line. The public key is a single line of text that begins with
ssh-rsa. Do not insert any line breaks in the middle (if a line break gets mixed in, the connection will fail even if registration succeeds). - ③ Copy the entire text. Open the public key file in a text editor such as Notepad, then press
Ctrl+A(Select All) →Ctrl+C(Copy). Paste everything from the leadingssh-rsato the trailing comment, with no missing characters or extra whitespace.
Example of the correct format (in reality it is a single line and much longer than this):
※ If you created your key with PuTTY, copy and paste the string (single line) from the “Public key for pasting into OpenSSH authorized_keys file” box at the top of the PuTTYgen screen. The file saved via “Save public key” uses a different format and cannot be registered as-is.
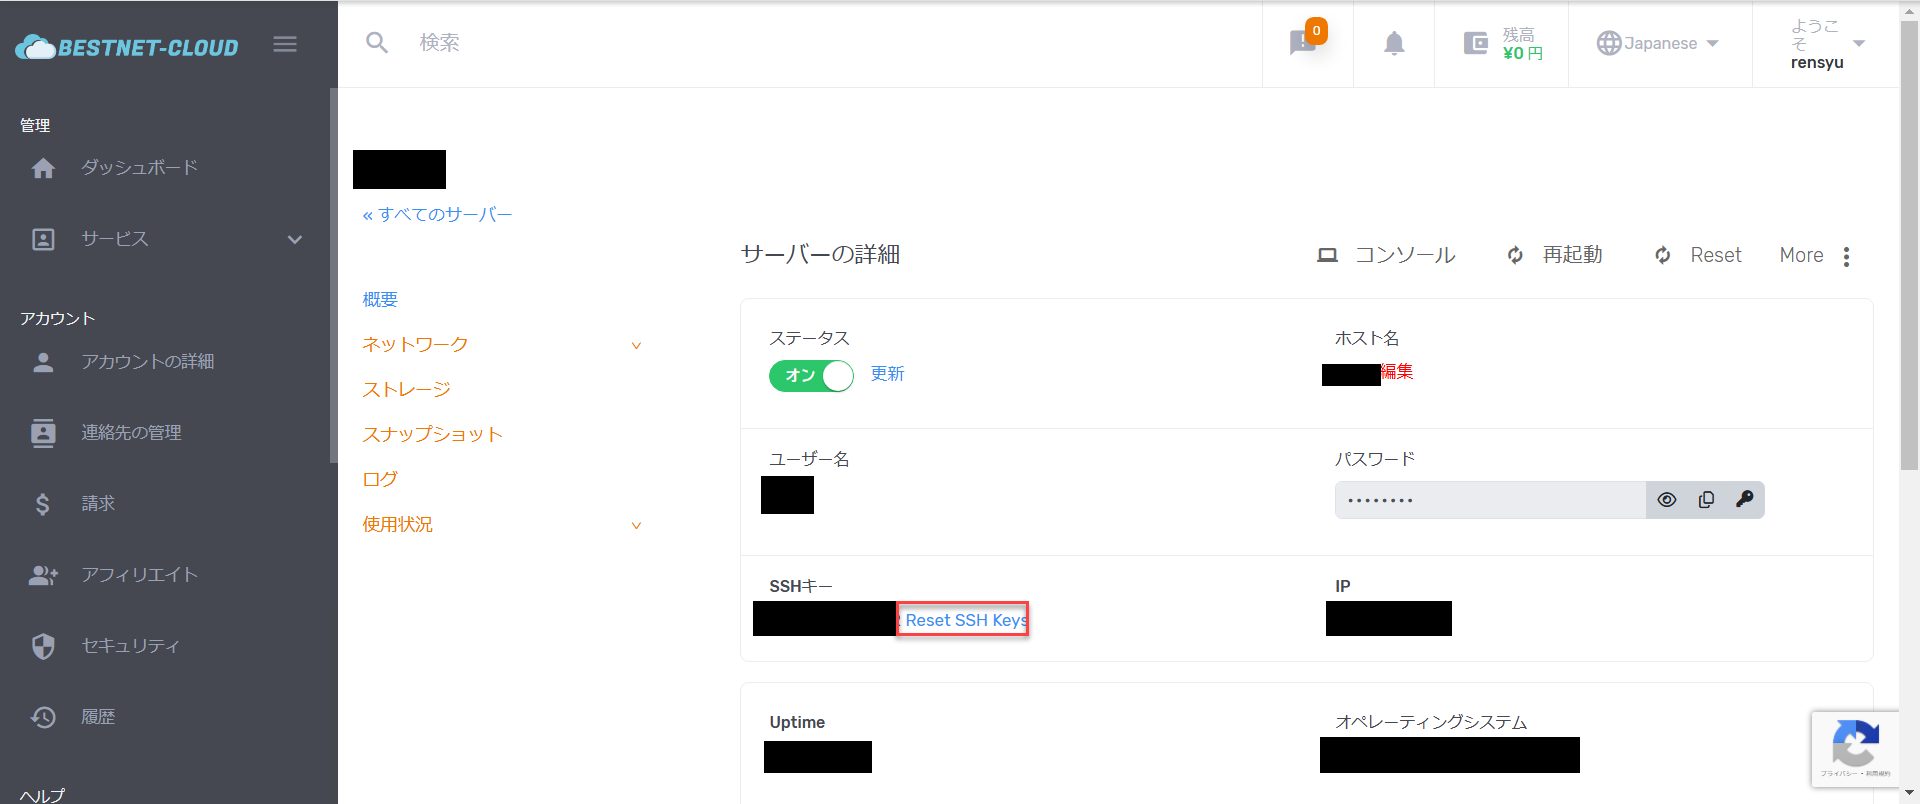
It may take a few minutes for the change to take effect. Once the status is On, the setup is complete.

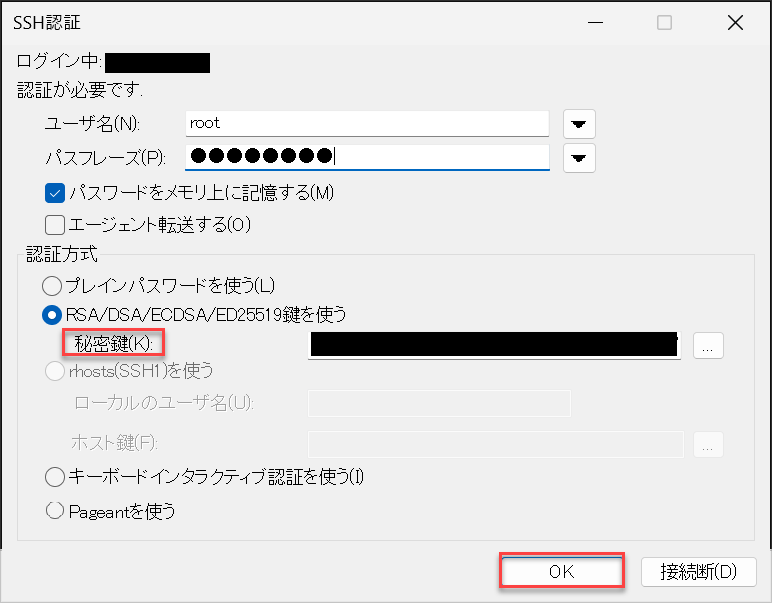
Login with Private Key (Operation Verification) #
Once the public key has been linked, finally verify that you can log in with the private key.
Login Steps #
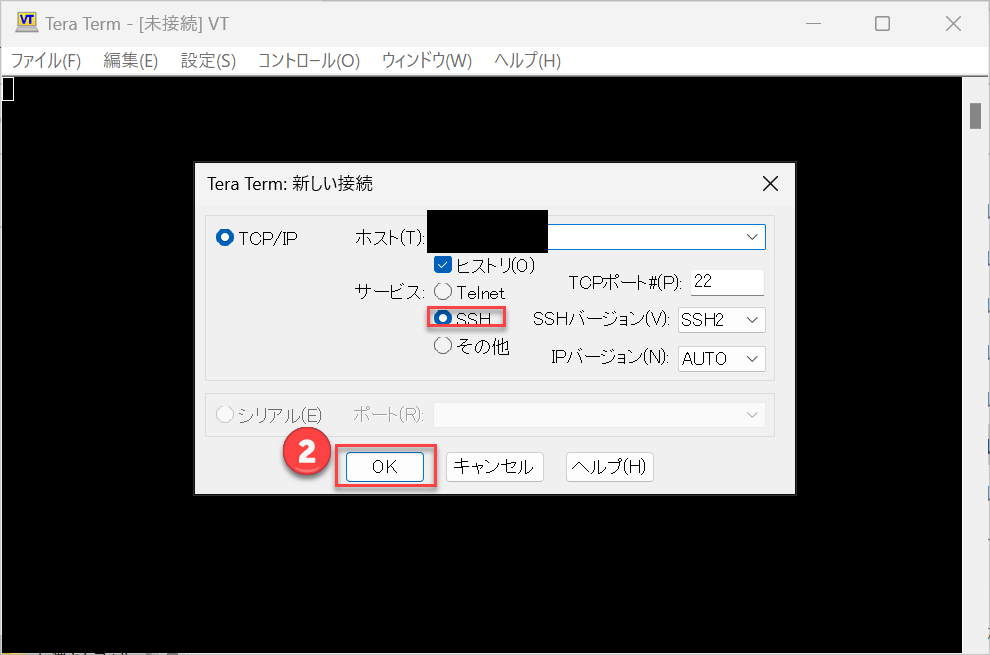
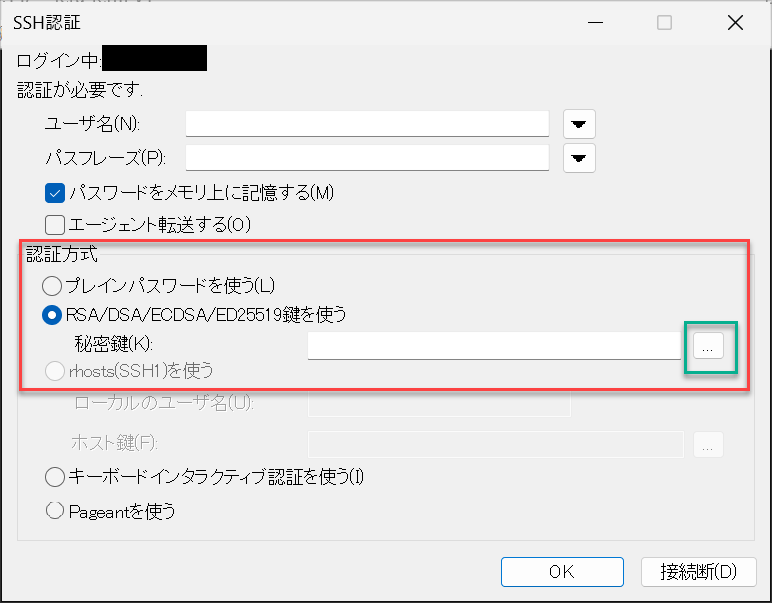
id_rsa).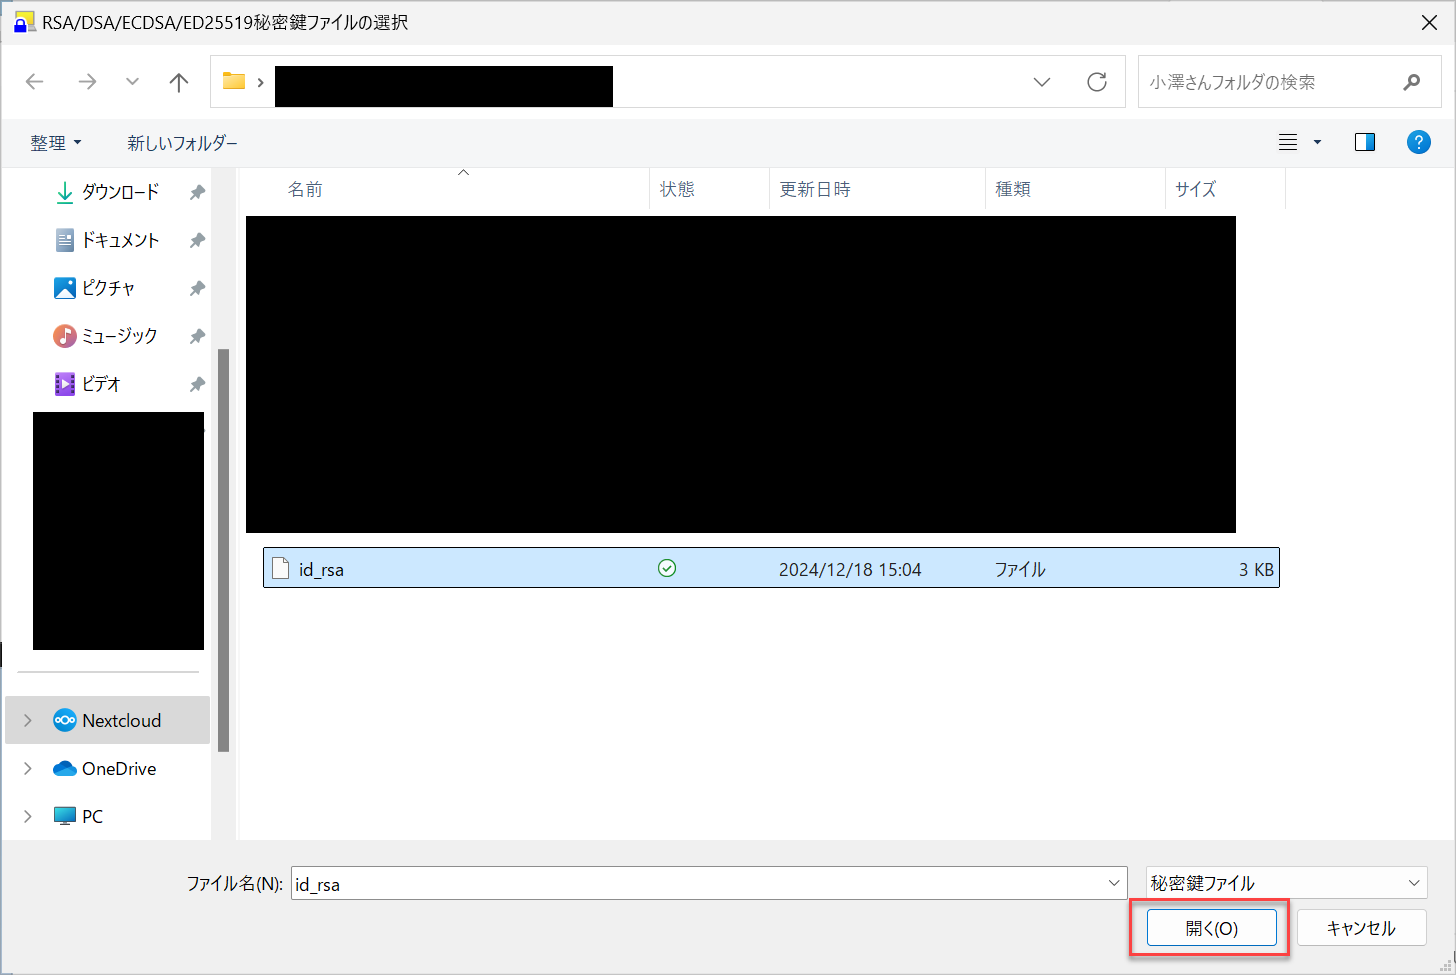
※Enter the passphrase you set when creating the key. After entering it, click OK.
When it does not work / you cannot connect (checklist) #
“I registered it but cannot connect,” “I get an error during registration”—most of these come down to one of the following. Check them in order from the top.
- Did you paste the public key (.pub)? If you paste the private key, registration and connection will fail.
- Did you paste it as a single line? Make sure no line breaks or extra whitespace got mixed in (one continuous line from
ssh-rsato the end). - Did you paste the entire text? Check that neither the leading
ssh-rsanor the end is missing. - Did you run [Reset SSH Keys]? Simply registering the public key does not apply it to the host. Run it on the target host and wait a few minutes until the status turns on.
- Did you specify the correct private key on the connecting side? Make sure you selected the private key that is the pair of the registered public key.
- Is the passphrase correct? Enter the one you set when creating the key.
You see “Permission denied (publickey)” → This is caused by one of the items above. In particular, “a line break got mixed in,” “you pasted the private key,” and “Reset SSH Keys was not run” are the most frequent culprits.
You forgot the passphrase → A private key cannot be recovered. Recreate the key pair and re-register the new public key.
If that still does not resolve the issue, please contact us via a support ticket.


