
Overview #
This procedure document summarizes the operational steps for placing a new order for VPS (NV Plan) from the client portal.
Preparation #
- Email address to be used for the order (for new registration)
- Login password (for new registration)
- SSH public key (OpenSSH format, if you want to log in with public key authentication)
- Payment method (bank transfer / credit card payment, etc.)
Note: Screen displays and text may differ slightly depending on portal settings.
1. Select a Plan and Proceed to Order Screen #
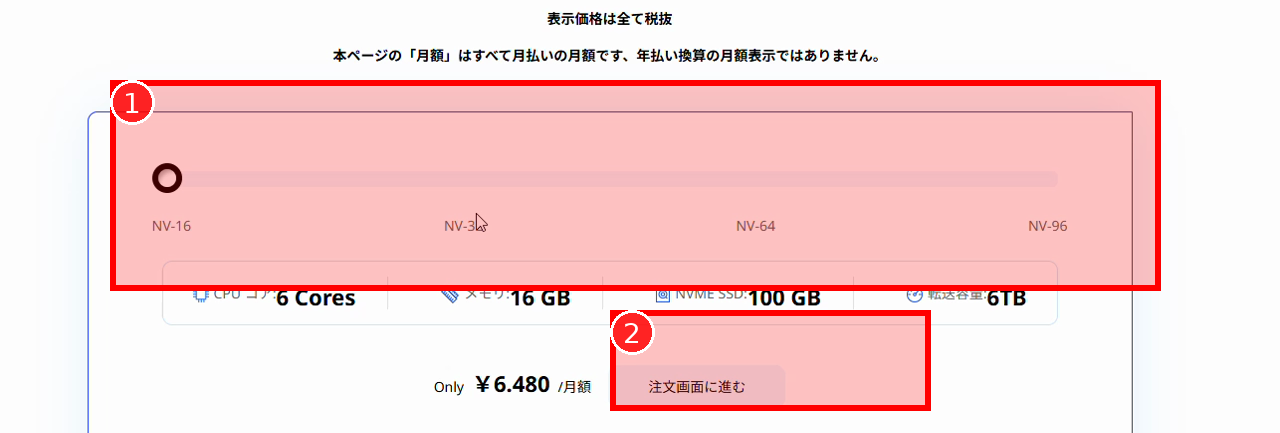
1-1. Select Your Desired Plan on the Plan Page #
- Open the portal’s plan (pricing) page.
- Select your desired plan from the slider (e.g., NV-16 / NV-32 / NV-64 / NV-96).
- Check the displayed specifications (CPU / Memory / NVMe SSD / Transfer Volume) and monthly price.
1-2. Proceed to Order Screen #
- Click “Proceed to Order Screen“.
- If a cookie consent popup appears, click “Accept” or similar to close it.
2. Configure Resource Settings on the Order Screen #
On the order screen, as you configure each item, the amount will be reflected in the “Cart Summary” on the right side.
(The recording shows NV-32 as an example)
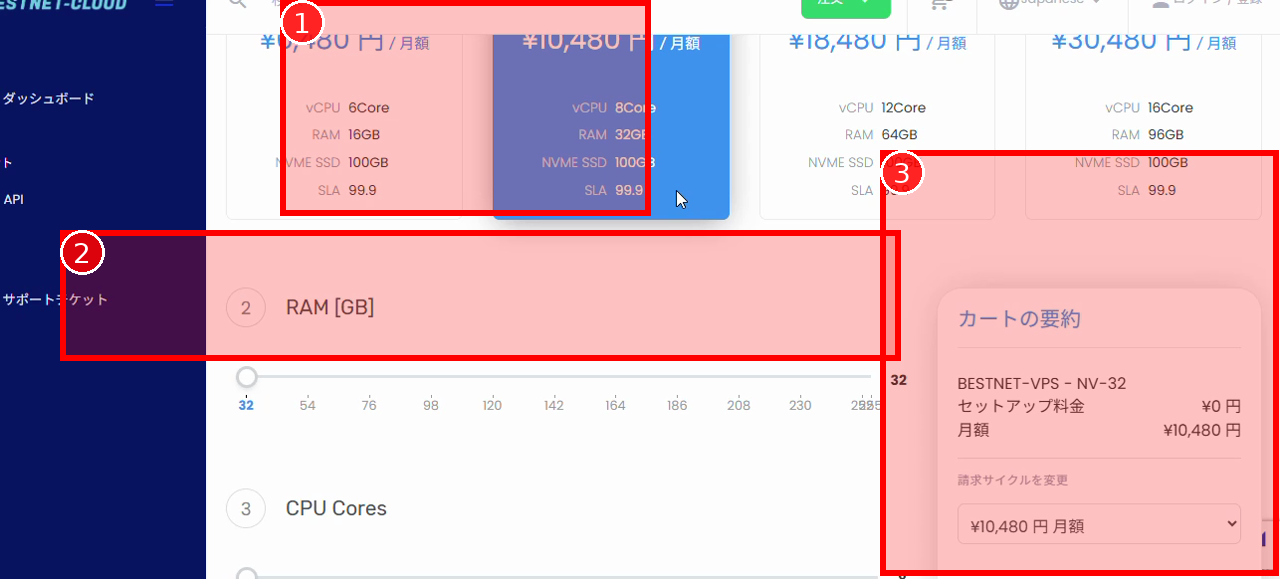
2-1. Select Product (Plan) #
- In “Select Product“, click your desired plan (e.g., NV-32).
2-2. Configure RAM / CPU / Disk #
- Select the memory amount using the “RAM [GB]” slider.
- Select the number of CPU cores using the “CPU Cores” slider.
- Select the disk capacity using the “Disk Size [GB]” slider.
2-3. Configure Backup/Snapshot (if needed) #

- In “Backup Retention Generations“, select the number of retention generations (additional, etc.).
- In “Snapshot“, select the required number of snapshots.
2-4. Configure Bandwidth/IP/SSH Key #

- In “Monthly Bandwidth Limit [GB]“, set the required transfer volume (bandwidth limit).
- In “IP Address“, set the required number of IPs.
- Configure “SSH Key“.
- To use an existing key: Log in from the “Login” link in the on-screen guidance and use your registered key.
- To use a new key: Paste the OpenSSH format public key in the text field.
2-5. Check Billing Cycle/Promotion Code #
- In “Change Billing Cycle” on the right side, check the billing cycle such as monthly (change if necessary).
- If you have a promotion code, enter it and click “Submit”.
- Check “Total Recurring Amount” and “Today’s Total Invoice Amount” (note the tax-exclusive/tax-inclusive display).
2-6. Create Order #
- If the content is correct, click “Order” on the right side.
3. Review Cart (Order Summary) #
After placing the order, the cart contents (product list, subtotal, consumption tax, total) will be displayed as “Order Summary“.
3-1. Check Products and Amounts #
- Check the product names and prices in the cart.
- Check the subtotal, consumption tax (e.g., 10%), and total recurring payment.
3-2. Delete Unwanted Products / Edit Configuration #
- If there are unwanted products, click “Delete” on the corresponding row.
- If you want to review the configuration, click “Edit Configuration“.
- To empty the entire cart, click “Clear Cart“.
Caution: In the recording, there was an example where multiple products remained in the cart.
Please make sure to delete any items that are not part of the intended order before proceeding.
4. Enter Payment Method and Client Information #
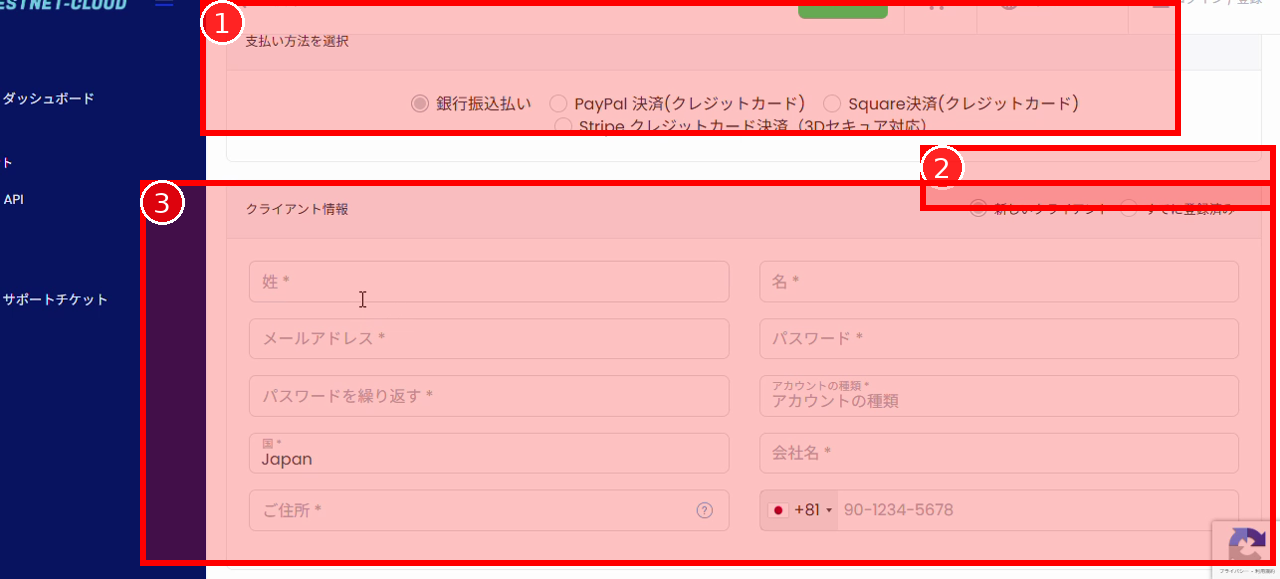
4-1. Select Payment Method #
- In “Select Payment Method“, choose your preferred payment method.
- Bank Transfer Payment
- PayPal Payment (Credit Card)
- Square Payment (Credit Card)
- Stripe Credit Card Payment (3D Secure supported)
4-2. Enter Client Information #
- If this is your first order, select “New Client“.
- If you have an existing account, select “Already Registered” and log in according to the guidance.
- Enter the required fields (Last Name / First Name / Email Address / Password / Country / Address / Phone Number, etc.).
- In “Account Type“, select “Individual” or “Business”.
- If Business, also enter “Company Name“.
・Email Address: example@yourdomain.jp
・Phone Number: 090xxxxxxxx (follow the on-screen display for country code +81 handling)
4-3. Notes/Additional Information (Optional) #
- If you have any communication matters, enter them in “Notes/Additional Information“.
5. Checkout (Order Confirmation) #
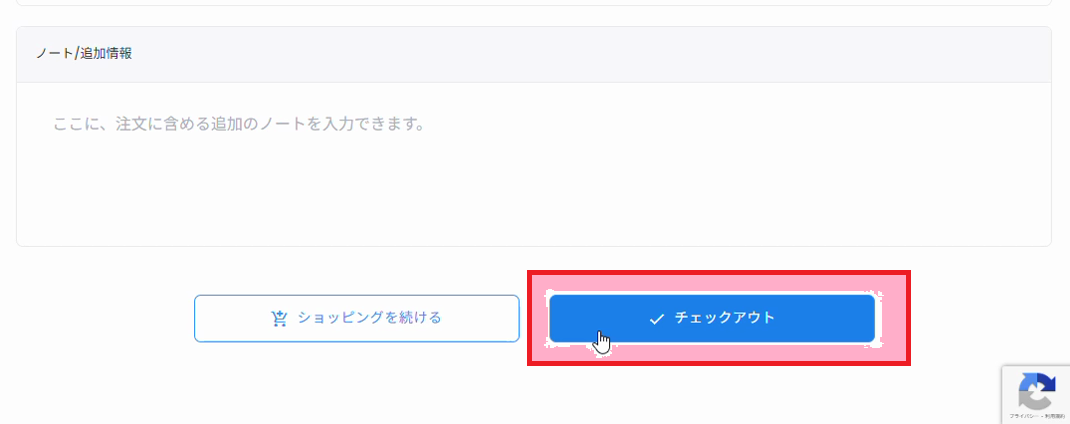
- Scroll down to the bottom of the page.
- Click “Checkout“.
- After order confirmation, follow the on-screen guidance (invoice display / payment procedure / email guidance, etc.).
Note: When Ordering with an Existing Account #
- For client information entry, select “Already Registered”, log in, and save the effort of entering information.
- To use a registered key for SSH Key, log in from the “Login to use current key” guidance.
Cautions #
- The on-screen amount display may be separated into “tax-exclusive” and “tax-inclusive”. Finally, check “Total Recurring Payment” or “Today’s Total Invoice Amount”.
- If there is a format error in the SSH public key (SSH Key), you may not be able to log in. Be sure to paste the public key in OpenSSH format.
- Past orders may remain in the cart. Delete unwanted products before checkout.


