
Overview #
This document describes the basic operational procedures for Teams management in the client portal. You will create a team, configure contacts (Contacts) and permissions (Privileges) associated with the team, and invite members using an invite code (Invite Code).
This manual has been created using generative AI and other tools, so annotations (arrows, frames, numbers, etc.) in the screenshots may be slightly misaligned with the actual screen display.
This manual is intended to help you understand the procedure intent. During operation, please prioritize the actual screen display and text content.
Prerequisites #
- An account that can log in to the client portal (administrator or user with permission to create teams).
- Contacts you want to add to the team must already be created (if not created, use the add function on the Contacts screen to create them).
Operating Procedures #
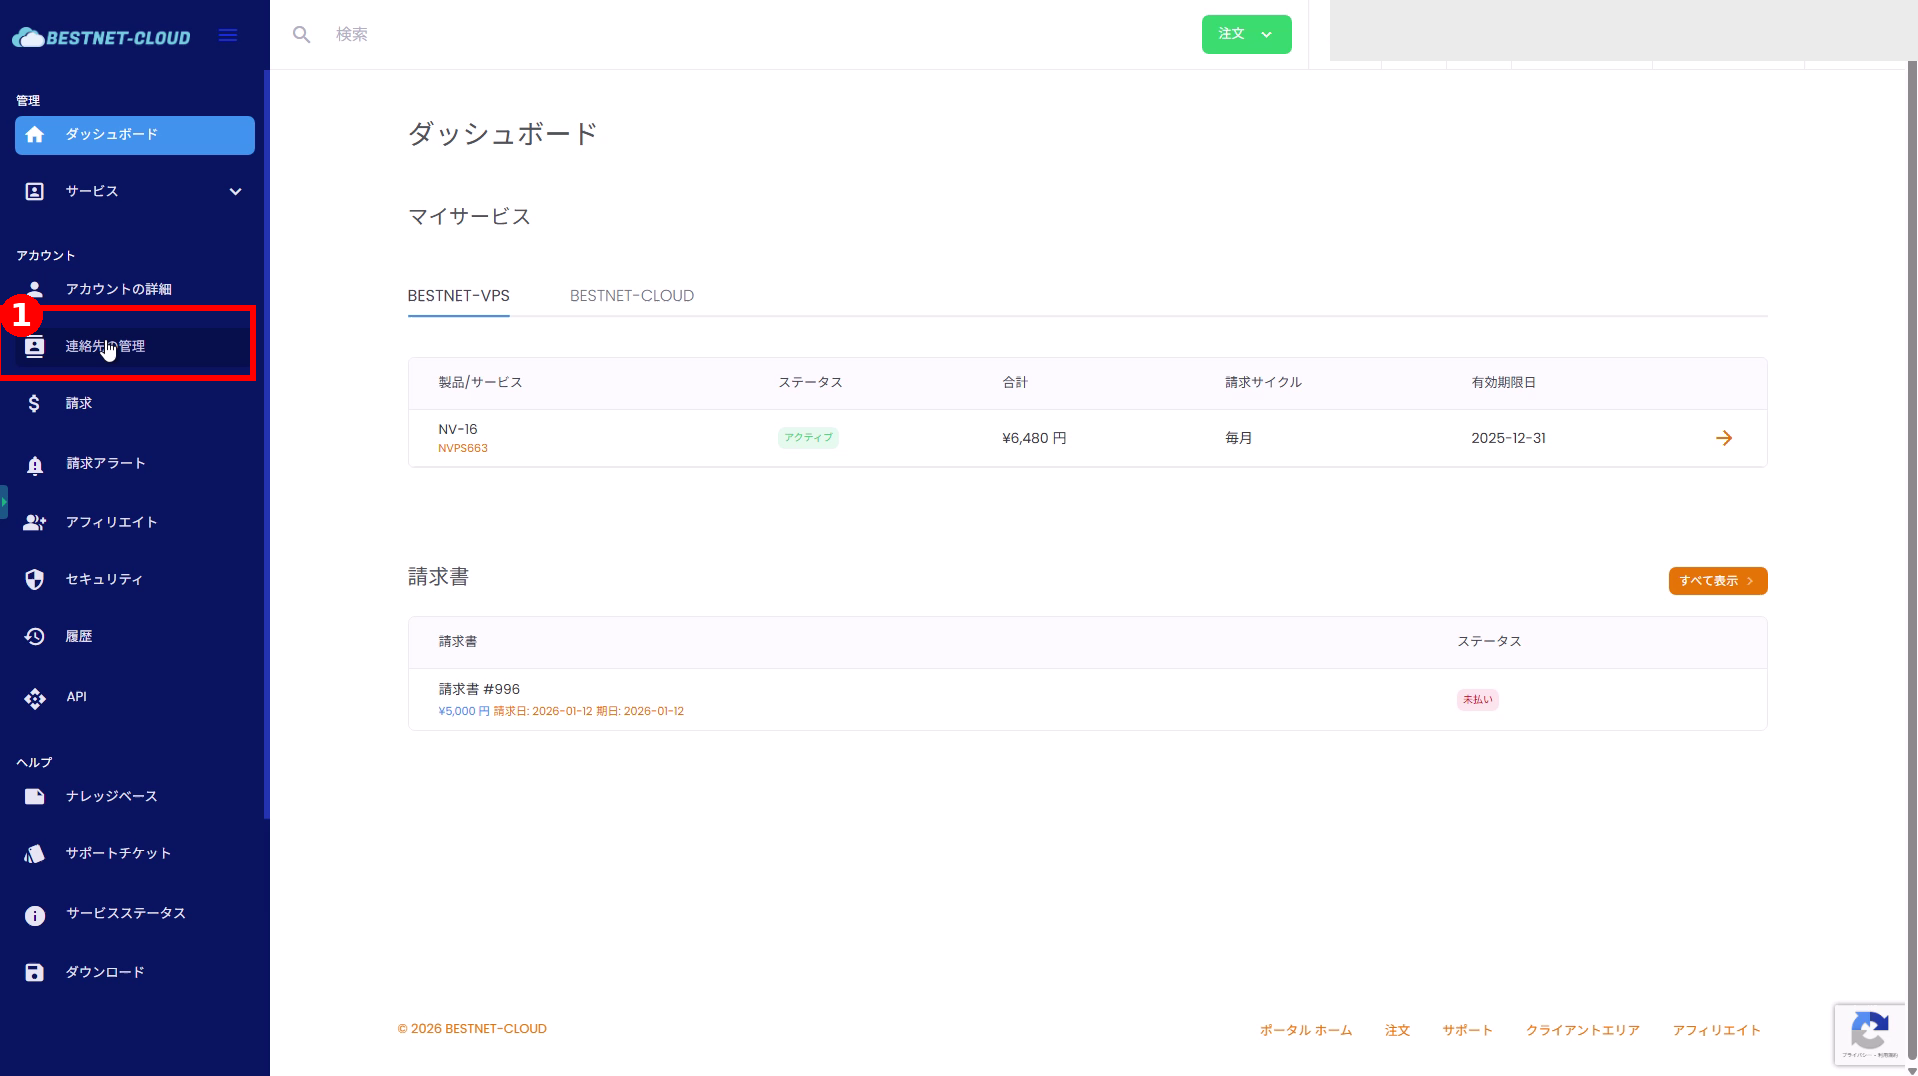
1. Open “Contact Management” #
- Click [Contact Management] in the left menu.
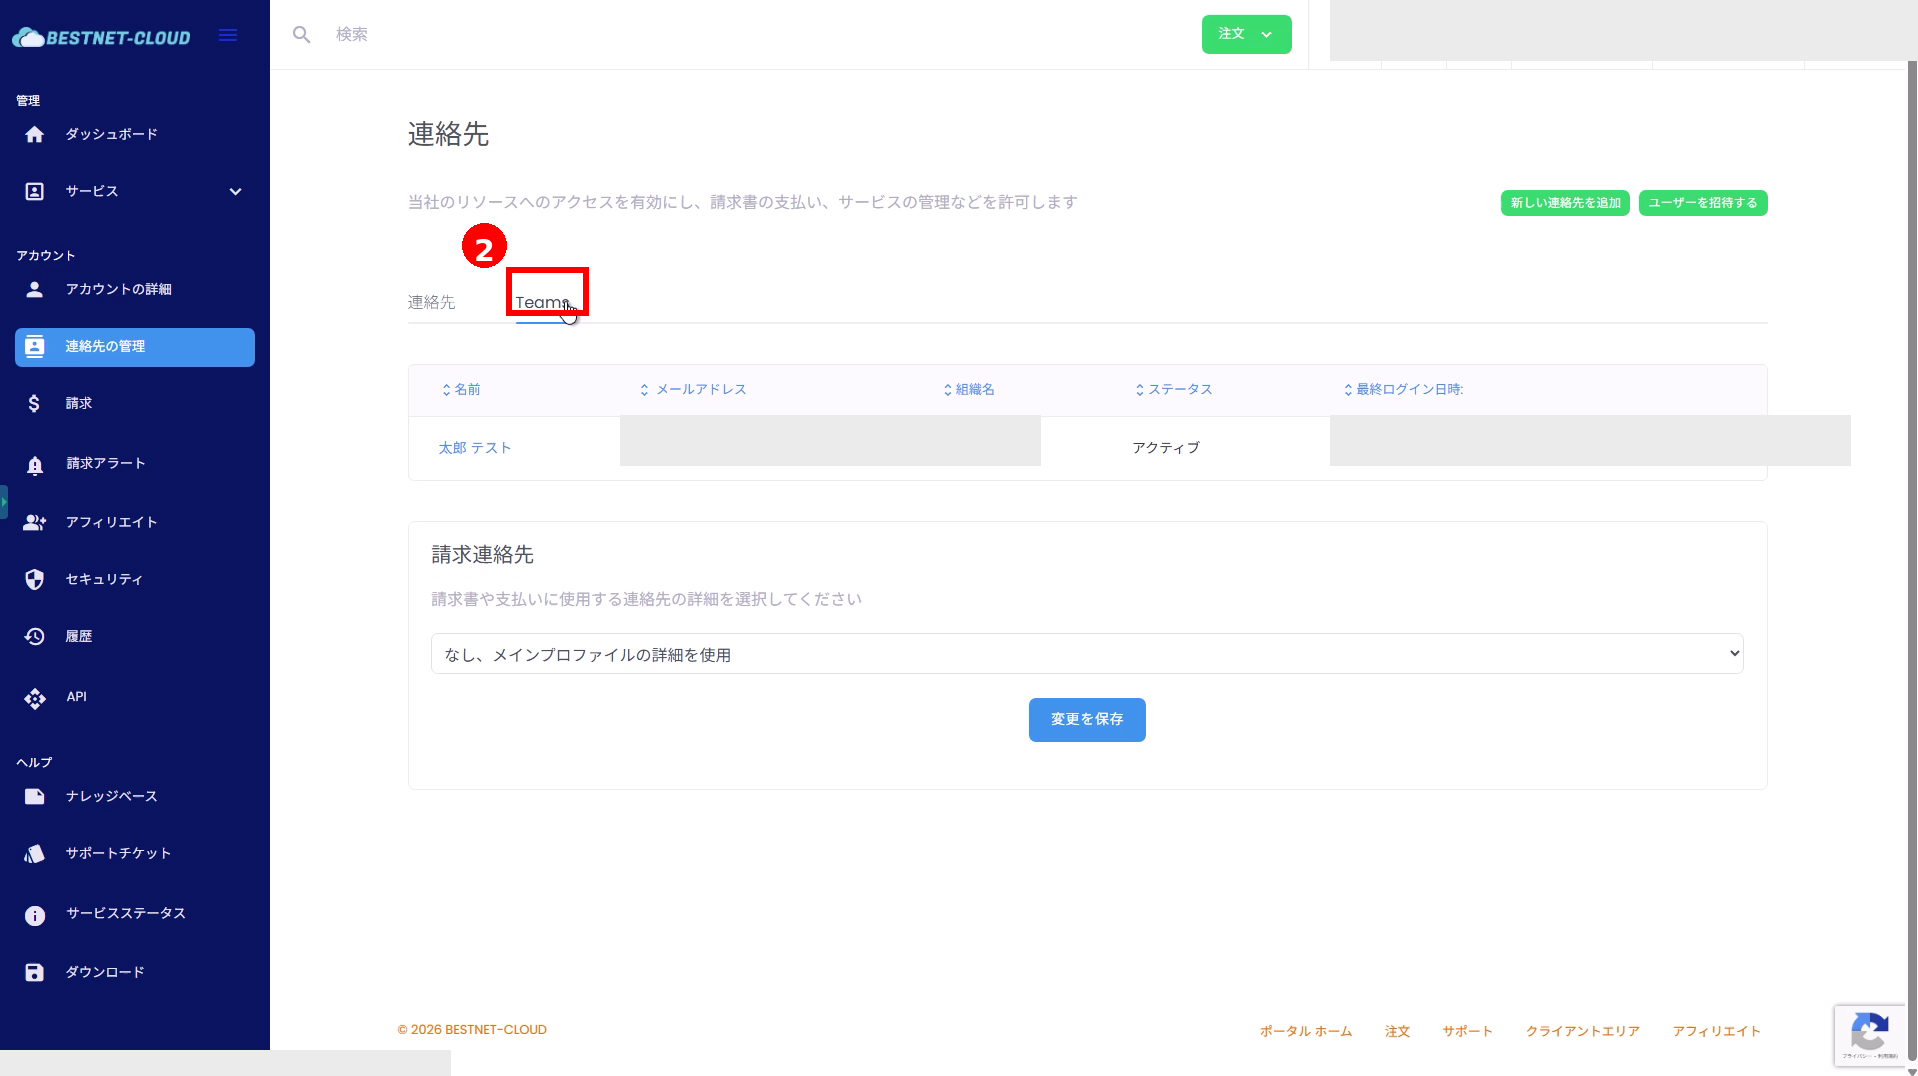
2. Switch to the “Teams” Tab #
- Once the contact list screen appears, click the [Teams] tab at the top.
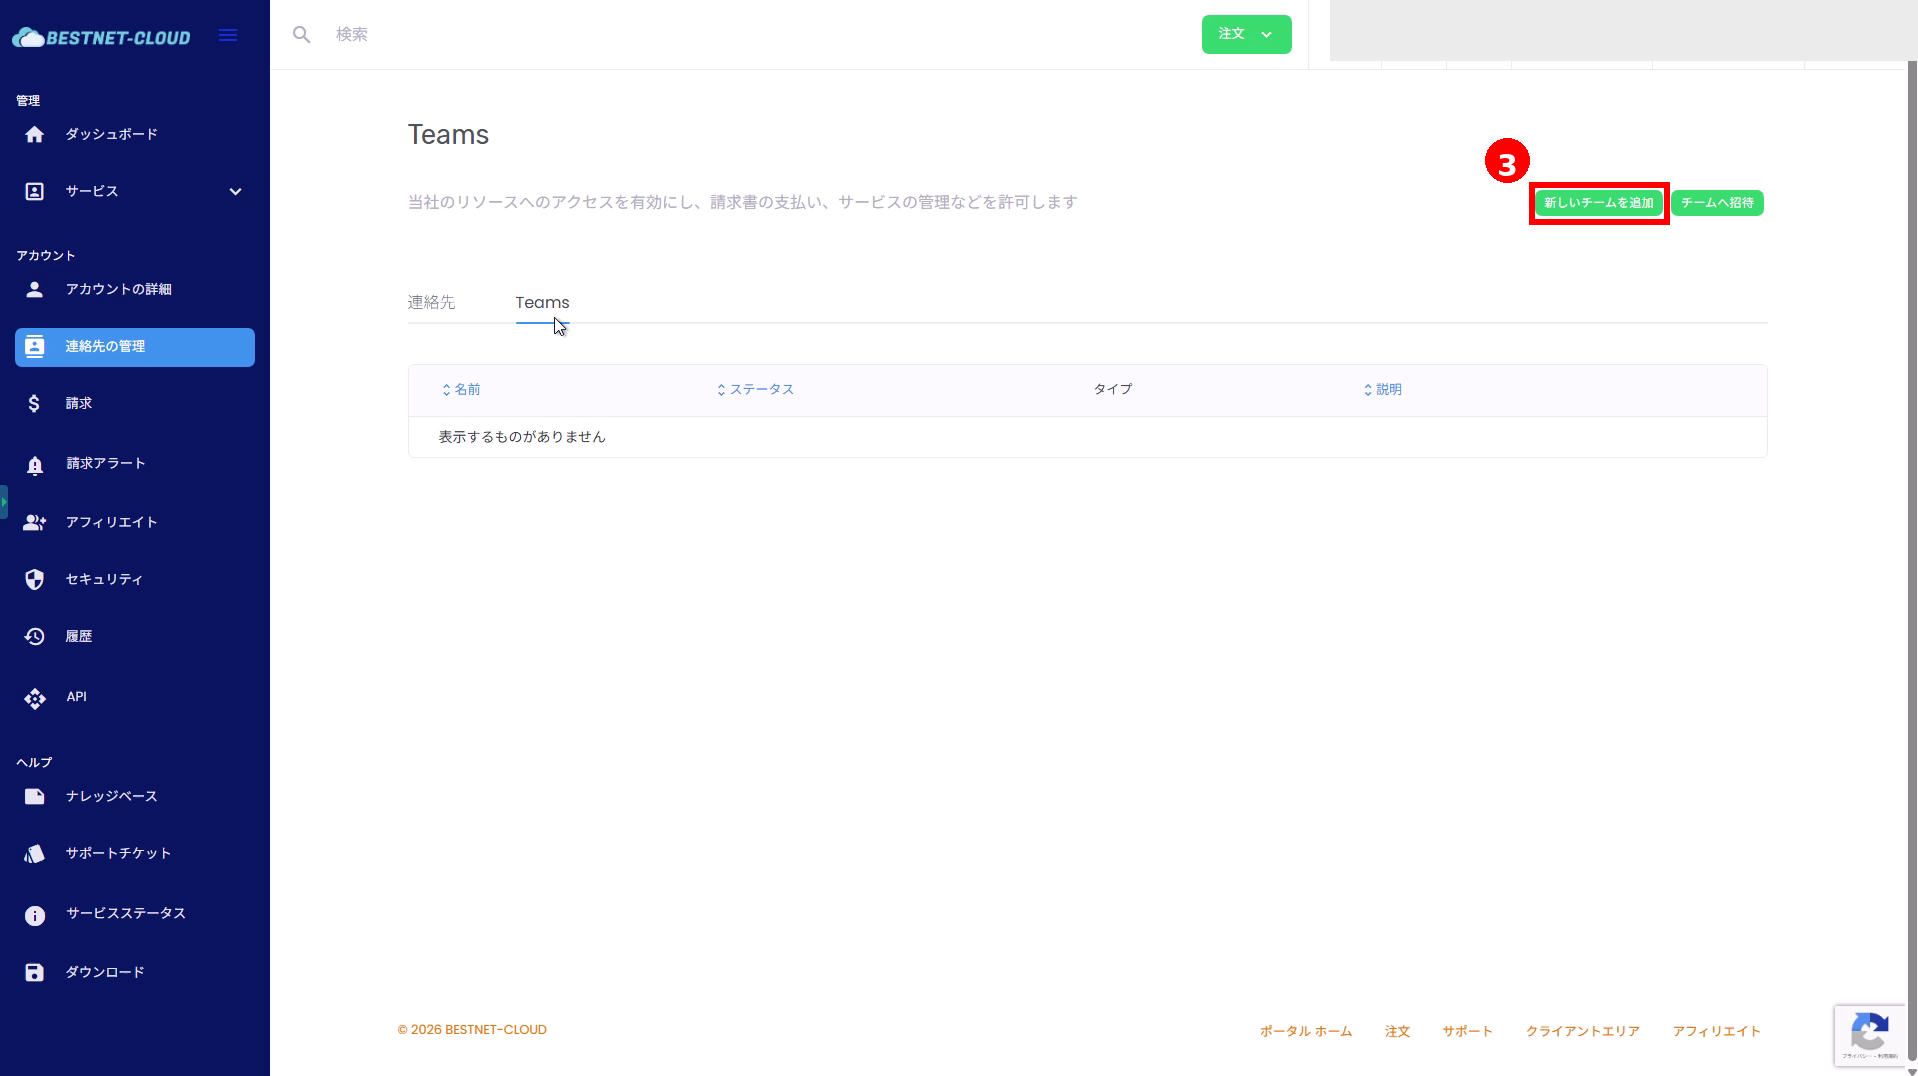
3. Add a New Team #
- Click [Add New Team] in the top right of the Teams screen.
4. Enter Team Basic Information #
- Name: Enter the team name (e.g., Development Team, Accounting Team, etc.).
- Description: Enter supplementary information to clarify the purpose (optional).
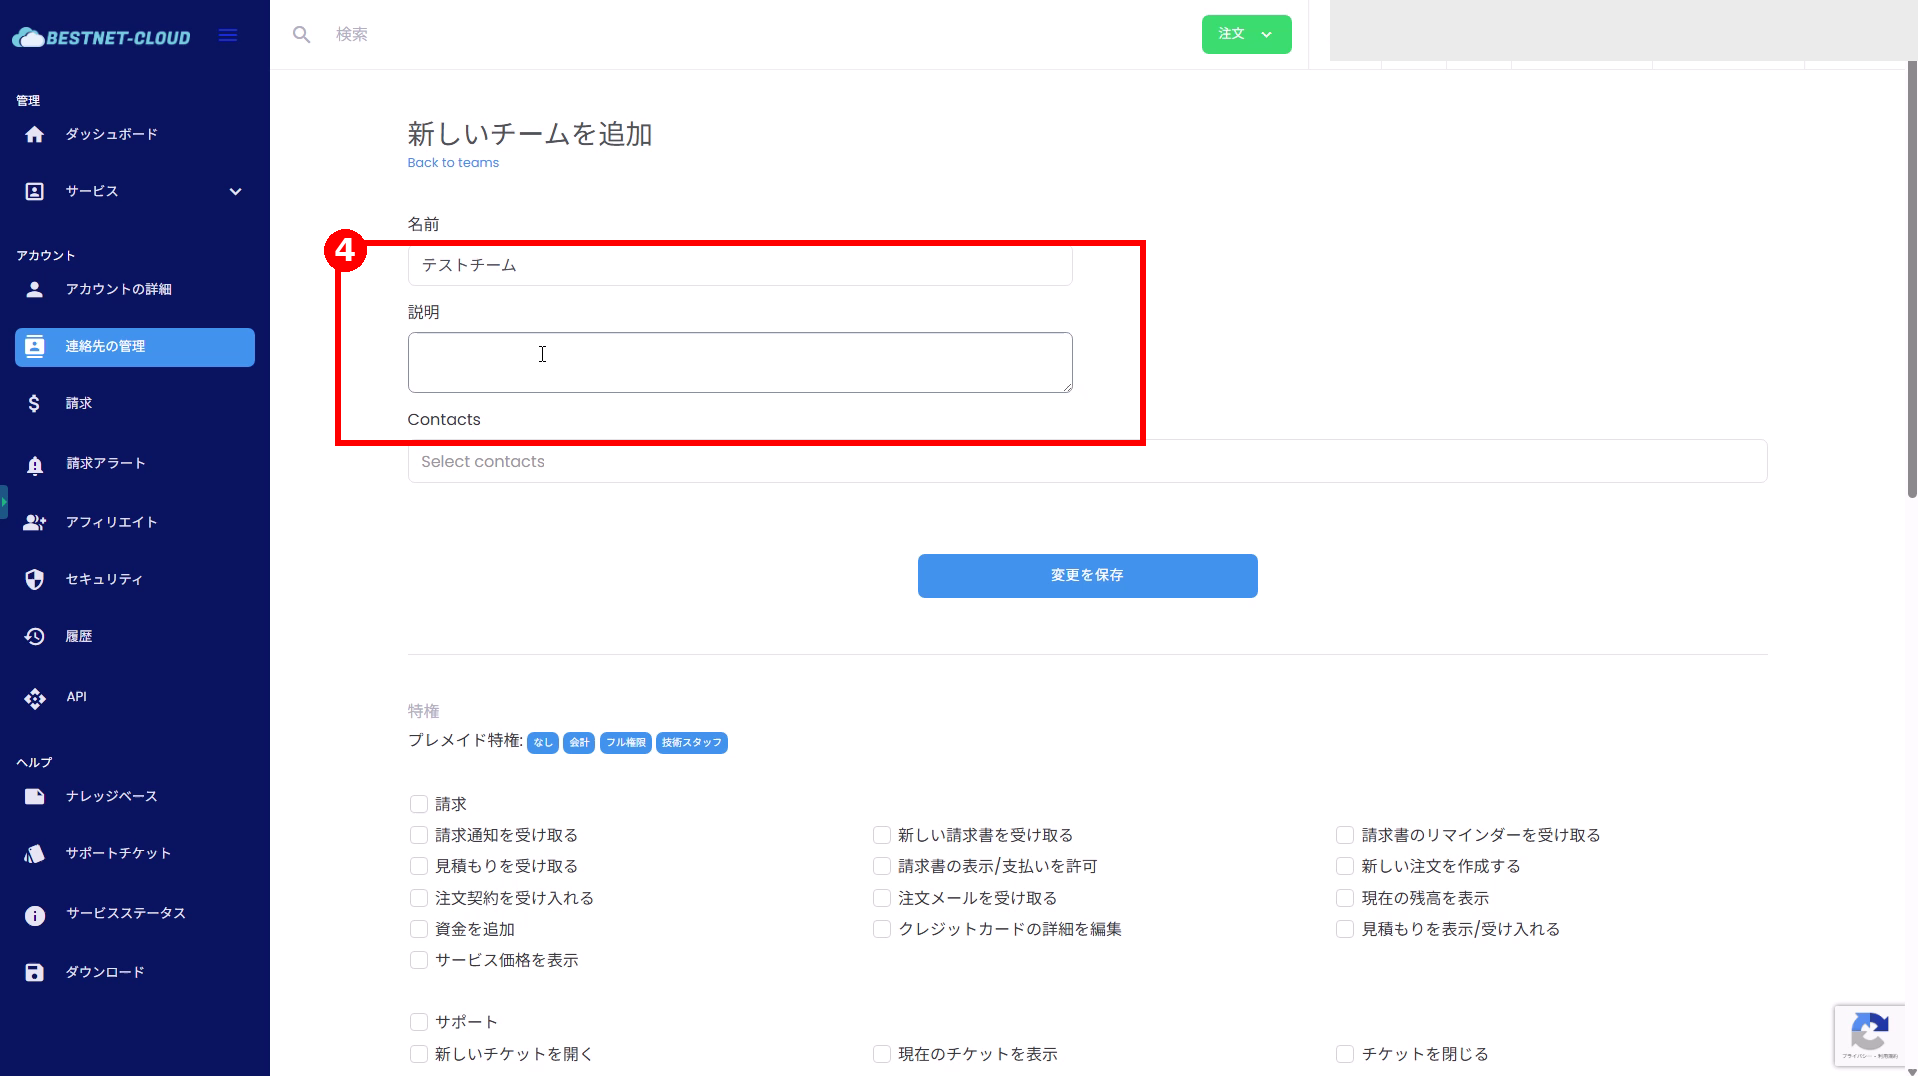
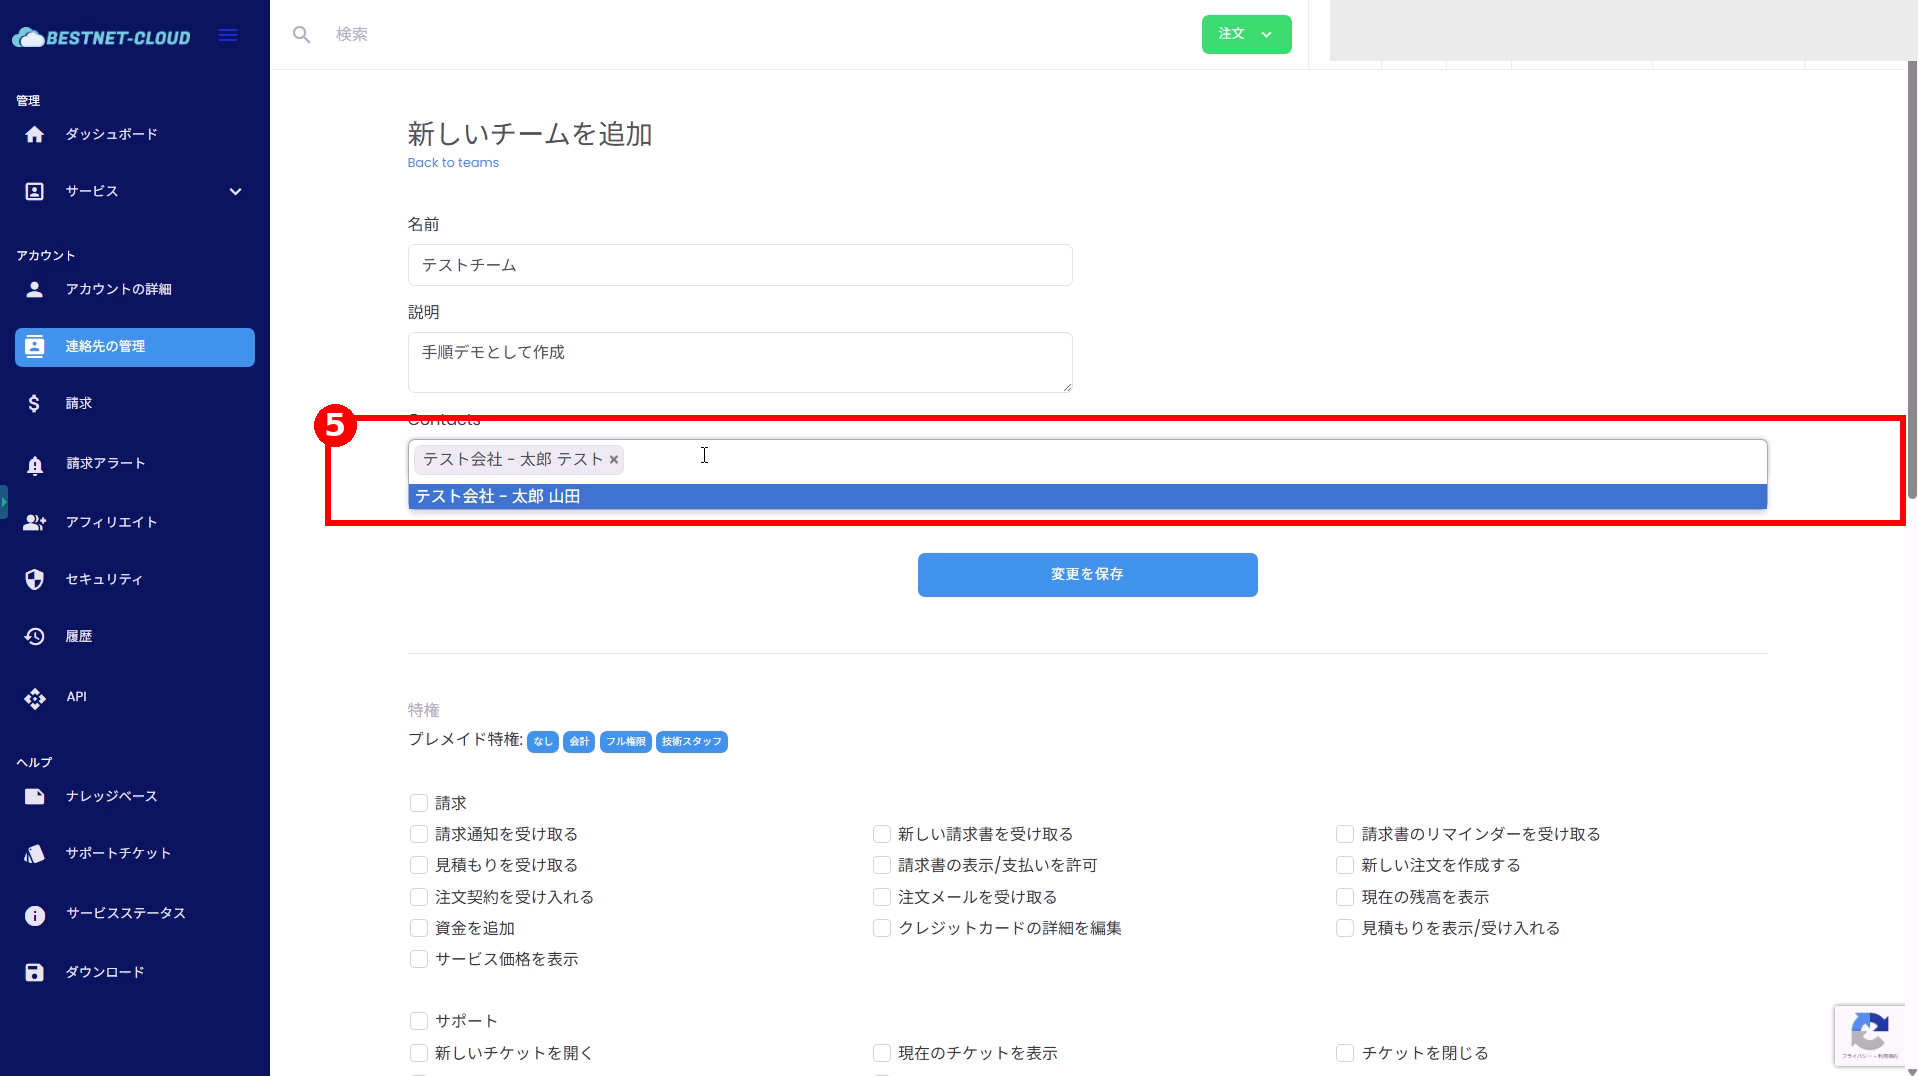
5. Add Contacts to the Team #
- Click the Contacts field and search for the contact you want to add.
- Click the relevant contact from the suggestions to add it (multiple selections are possible).
Note: Registered contacts will appear in the suggestions. If you cannot find what you need, the contact may not have been created yet.
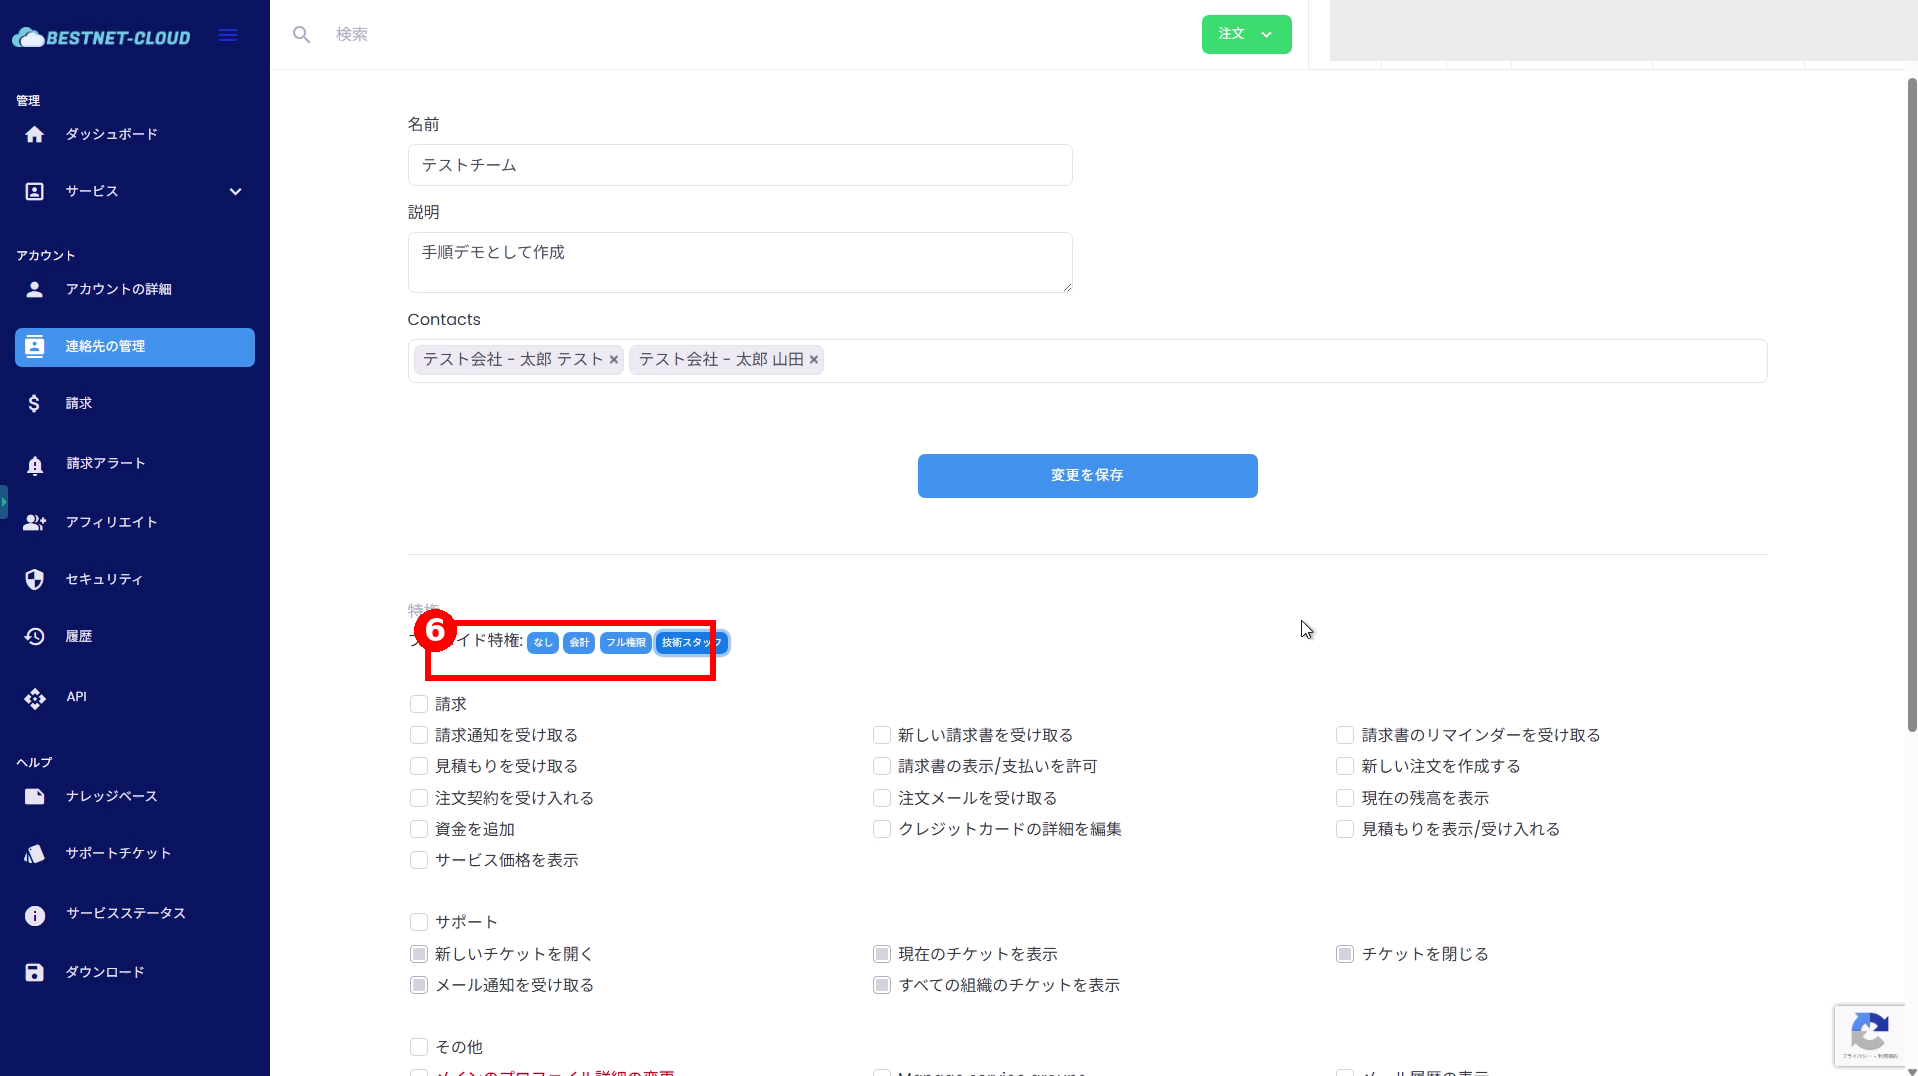
6. Set Permissions (Privileges) #
- In the Privileges section at the bottom of the screen, configure the permissions to grant to the team.
- First, select from Premade Privileges (presets) to quickly set the necessary permissions.
- If needed, individually toggle checkboxes ON/OFF to fine-tune permissions.
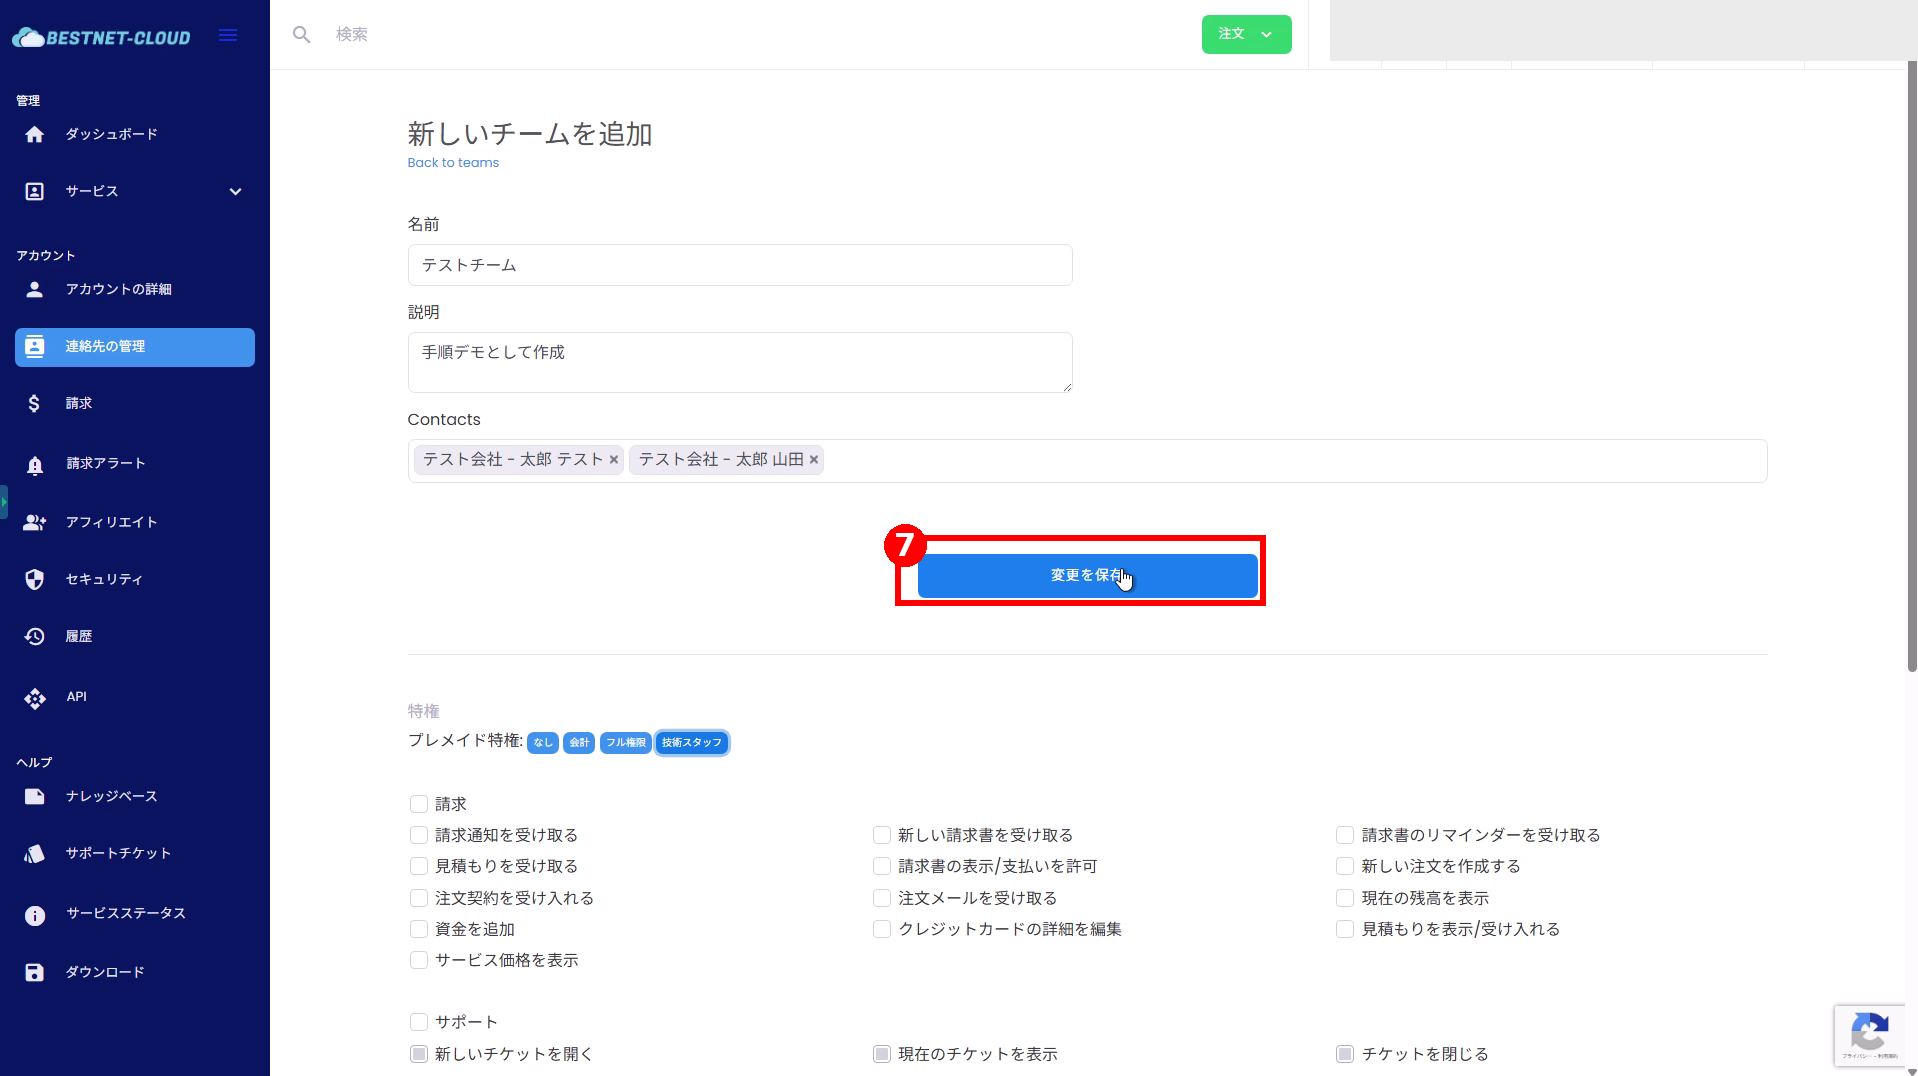
7. Save Changes and Create the Team #
- Once you have finished entering and configuring the information, click [Save Changes].
- After saving, you will automatically transition to the team details screen (the display may vary depending on the environment).
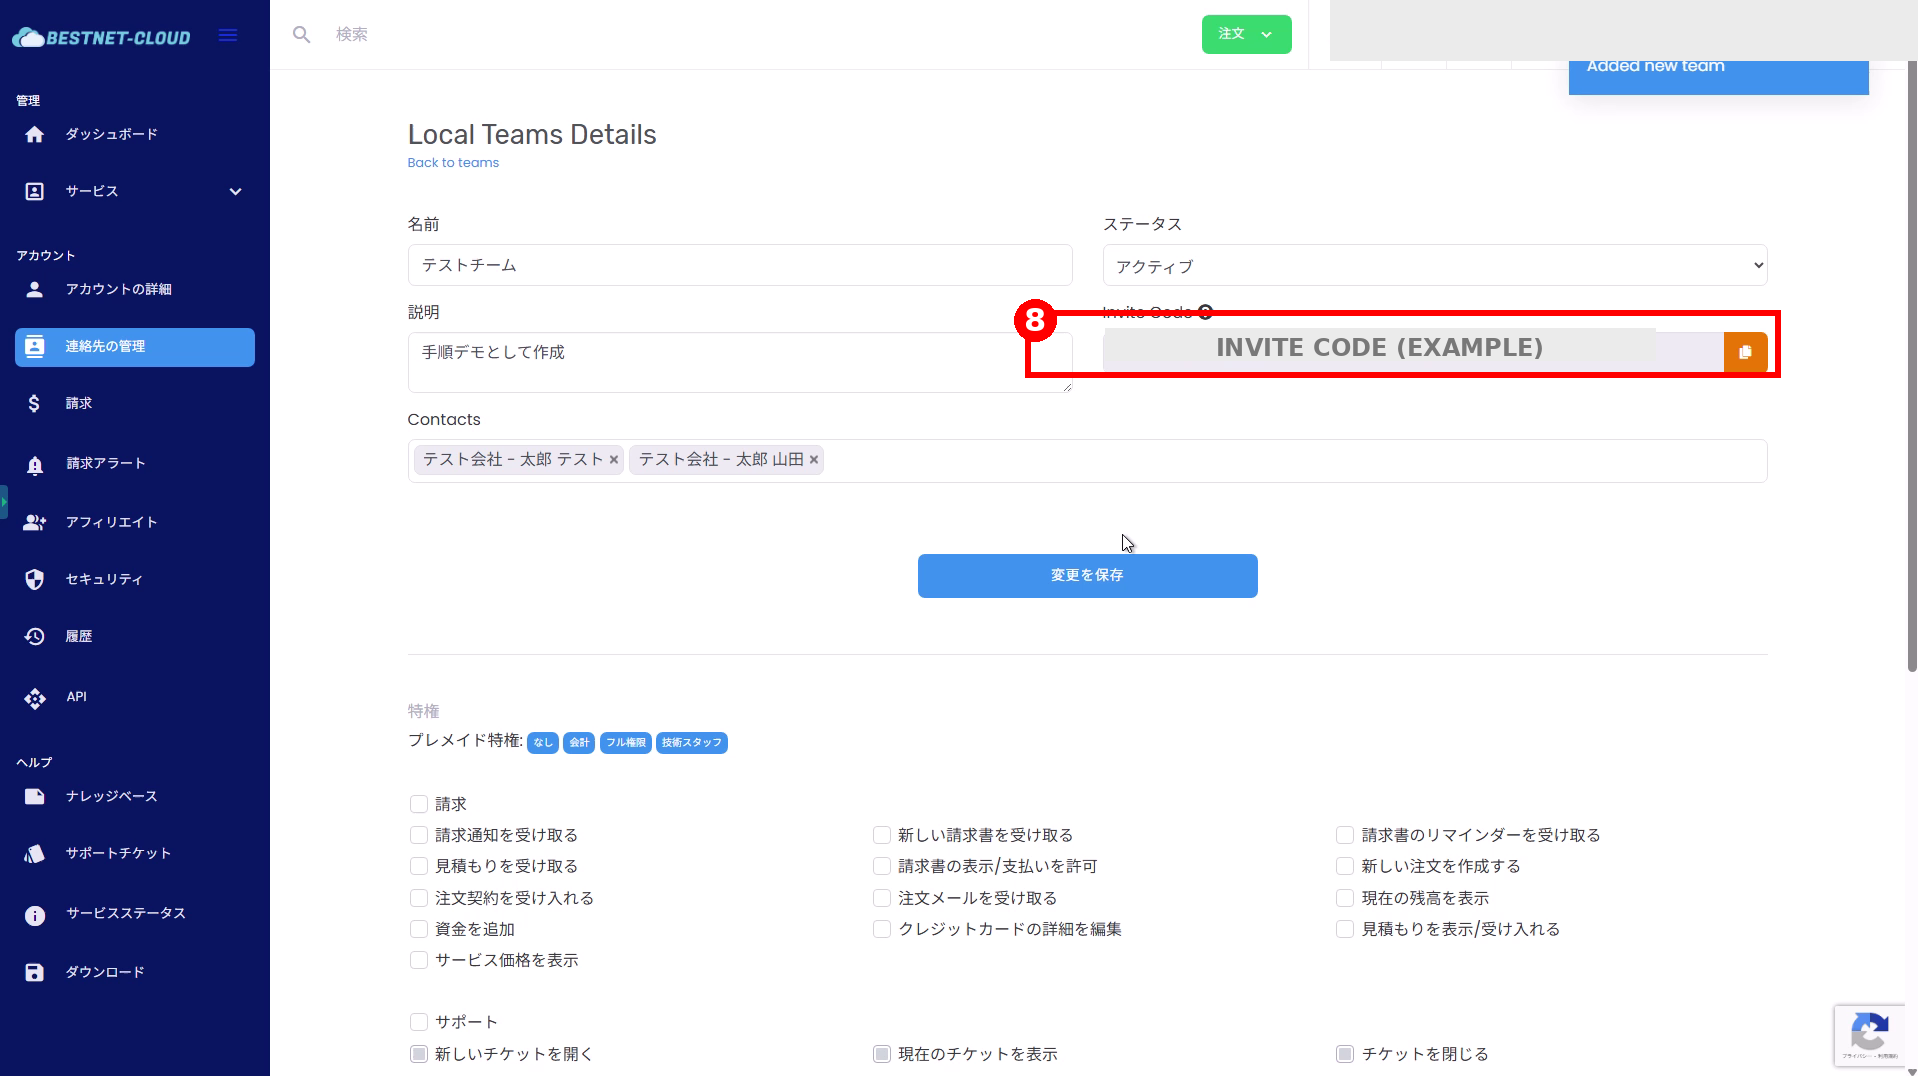
8. Share Invite Code and Invite Members #
- Confirm the Invite Code on the team details screen.
- Click the copy icon on the right to copy the invite code.
- Share the copied invite code with members you want to join (via internal chat, etc.).
Editing and Disabling Teams (Reference) #
On the team details screen, you can change the following as needed.
- Status: Active/Inactive, etc. (display names may vary depending on the environment)
- Contacts: Add or remove contacts associated with the team
- Privileges: Switch permission presets or adjust via checkboxes
After making changes, click [Save Changes] in the screen to apply them.
Operational Tips #
- Using clear team names that immediately identify roles (e.g., Accounting / Support / Engineering) makes management easier.
- It is recommended to grant permissions starting from “least privilege” and add more if gaps appear during operations.
- Be careful not to share the invite code with third parties (the example in this document is masked).
Troubleshooting #
-
Teams tab is not displayed
Your account permissions or features may be disabled. Check with your administrator. -
The user I want to add to Contacts does not appear
The contact may not have been created yet. Please create the contact first. -
I set permissions but cannot perform operations
There may be restrictions on the individual user side in addition to team permissions. Try re-logging in or reviewing permission settings.


