
Overview #
This document explains how to upgrade or downgrade your DNS SERVICE plan from the client portal.
Screenshots are from a sample environment (example: upgrading from Basic → Start). Displayed plan names, amounts, and billing timing may vary depending on your contract details and settings.
Open the details screen for the target DNS SERVICE from the service list.
Choose your desired plan in the upgrade/downgrade screen.
Verify the amount and billing cycle, then submit to complete.
Prerequisites #
- You must be able to log into the client portal
- The target DNS SERVICE must be in “Active” status
- Upgrading or downgrading may result in a difference charge or credit settlement
Upgrade Instructions #
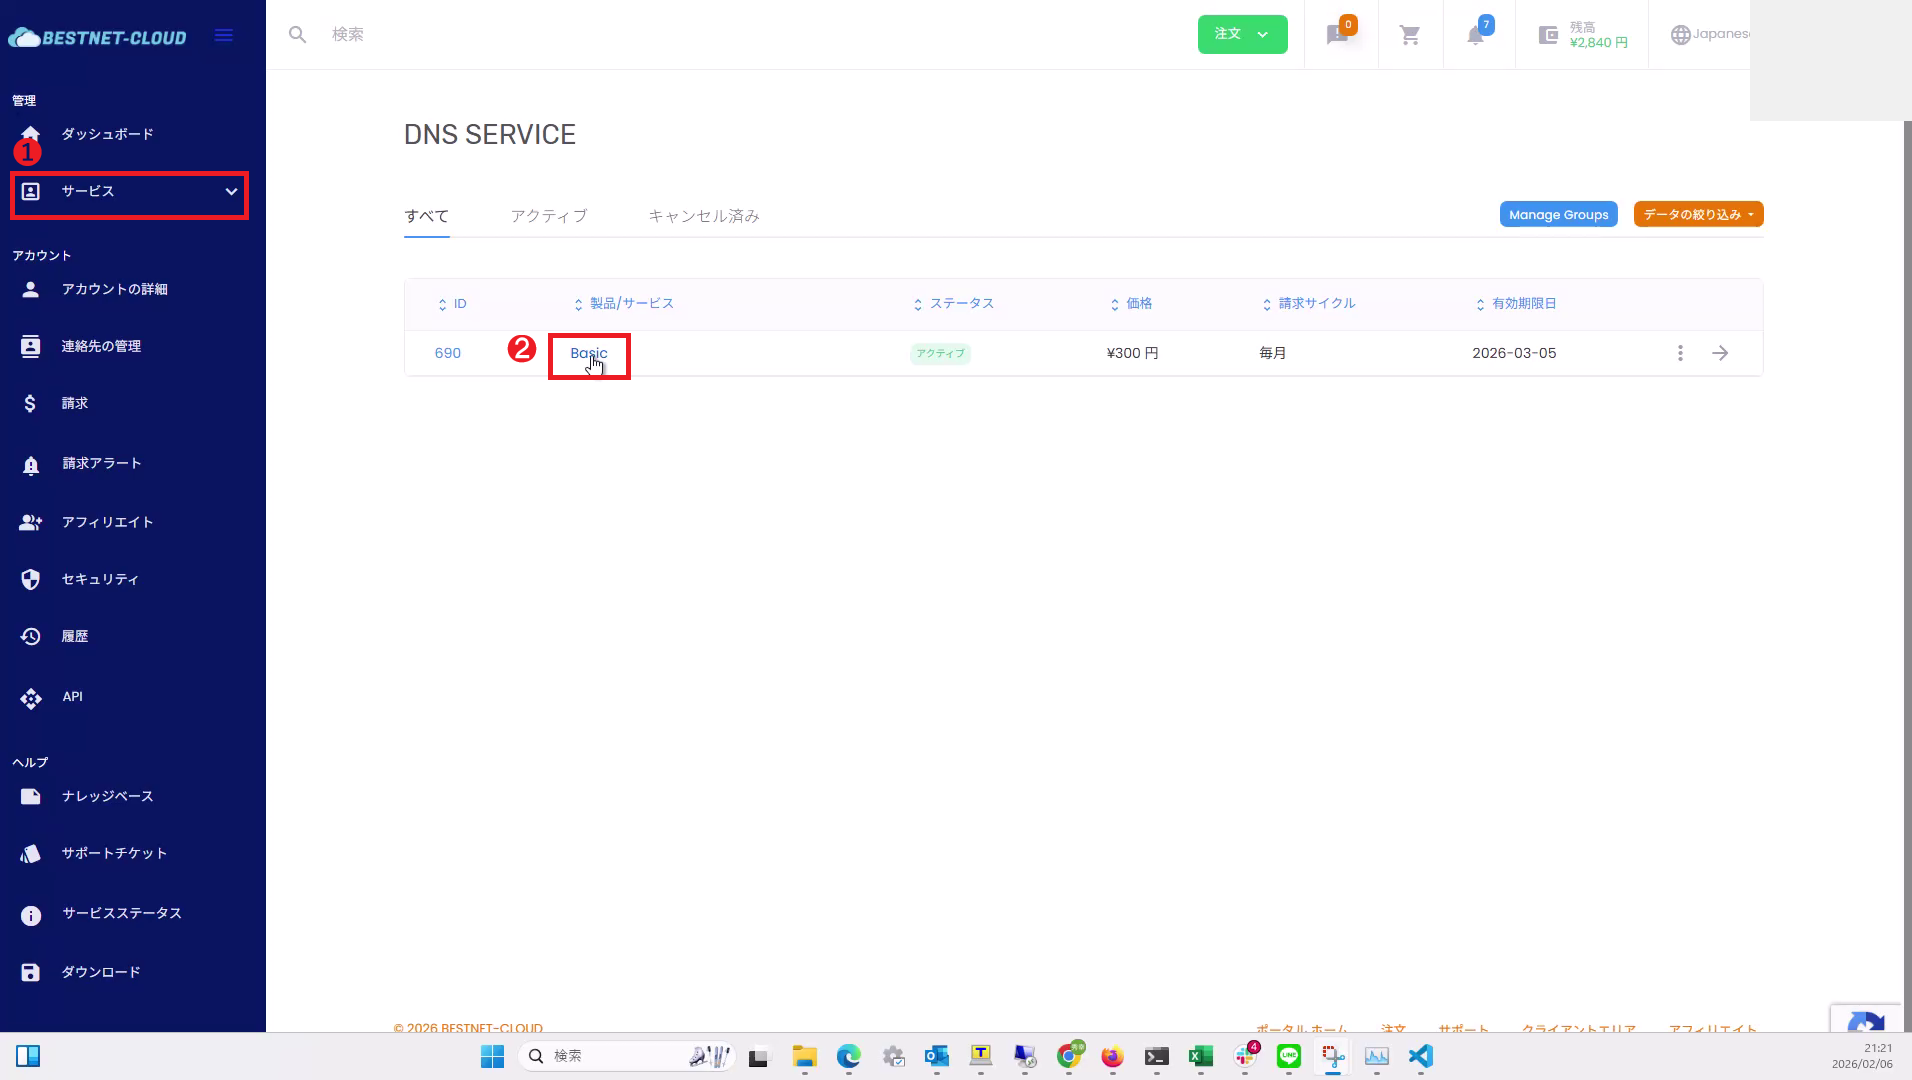
1Open the DNS SERVICE list and select the target service #
From the left menu, go to Services → DNS SERVICE, then click the service name (example: Basic) in the target row to proceed to the details screen.
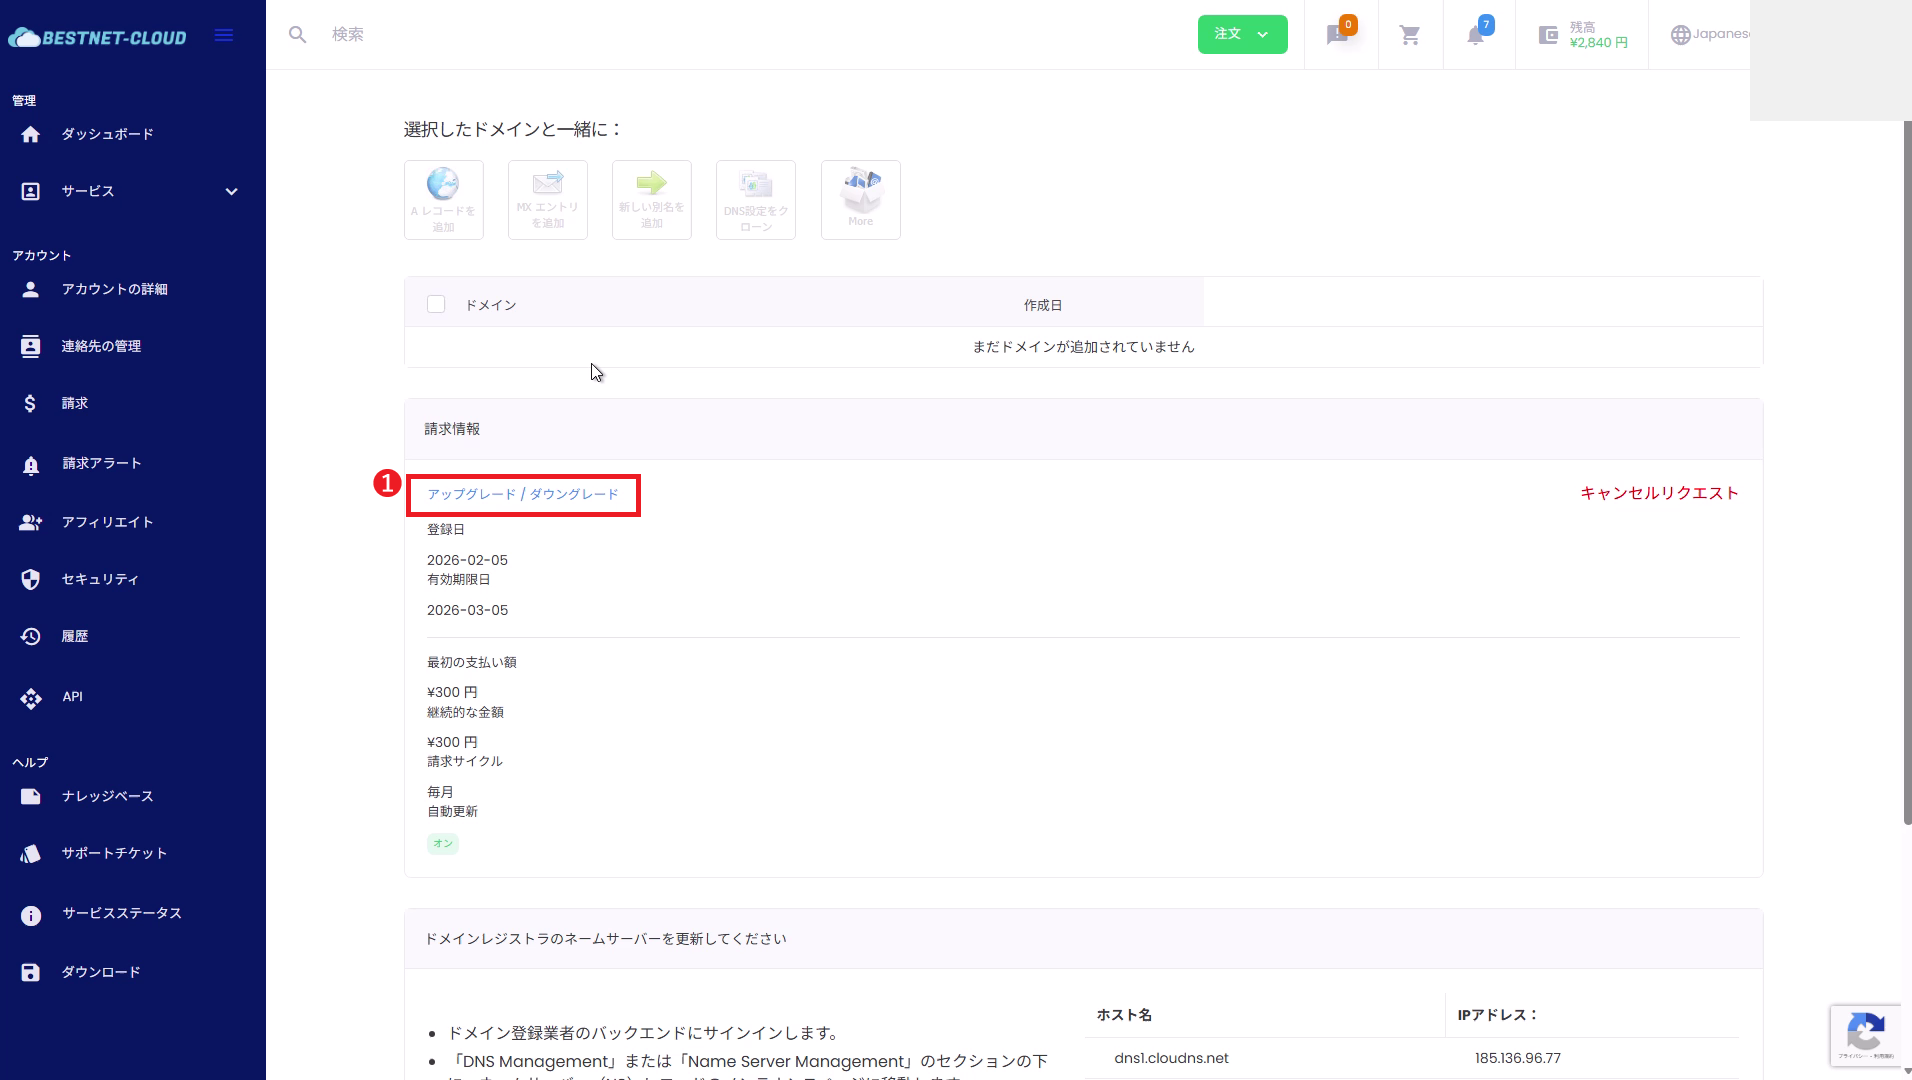
2Open “Upgrade / Downgrade” from the service details #
In the service details screen, click “Upgrade / Downgrade” in the “Billing Information” section.
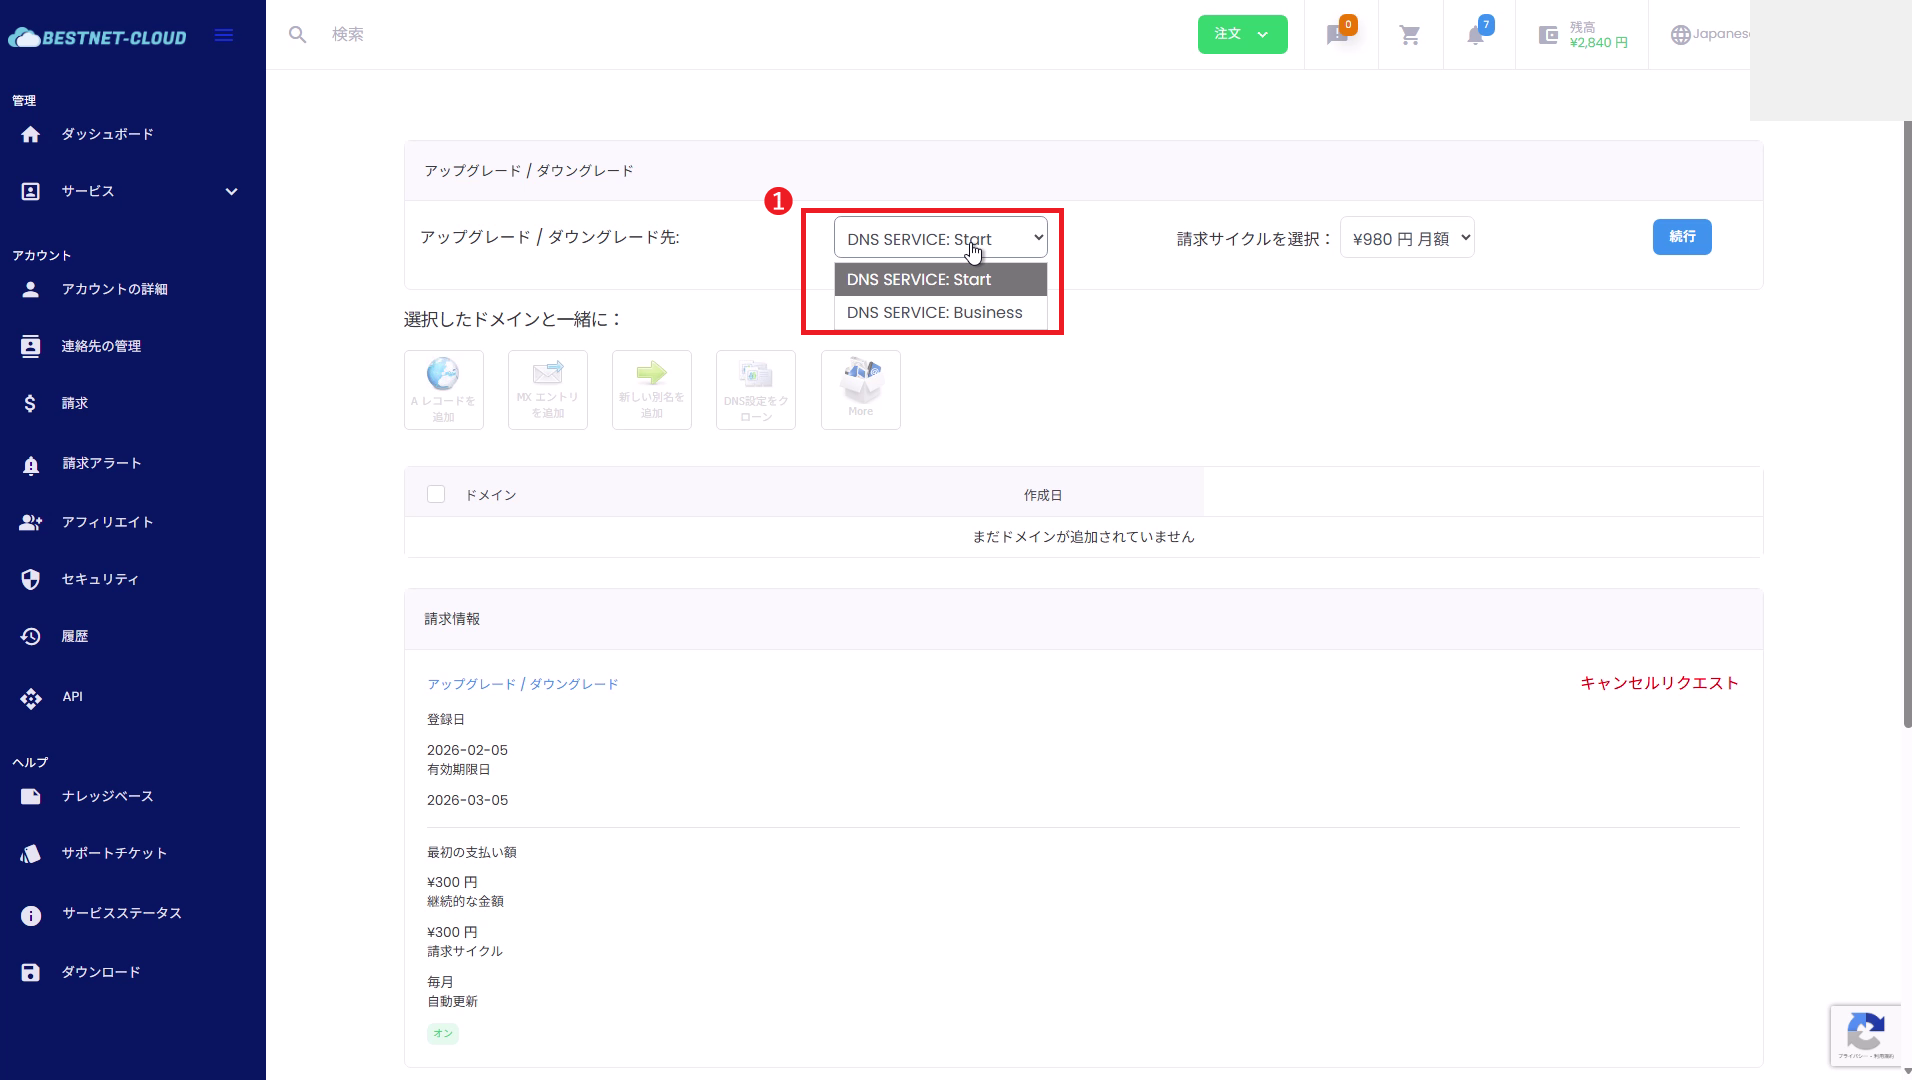
3Select the target plan #
Select the plan you wish to change to from “Upgrade / Downgrade to” (example: Start / Business).
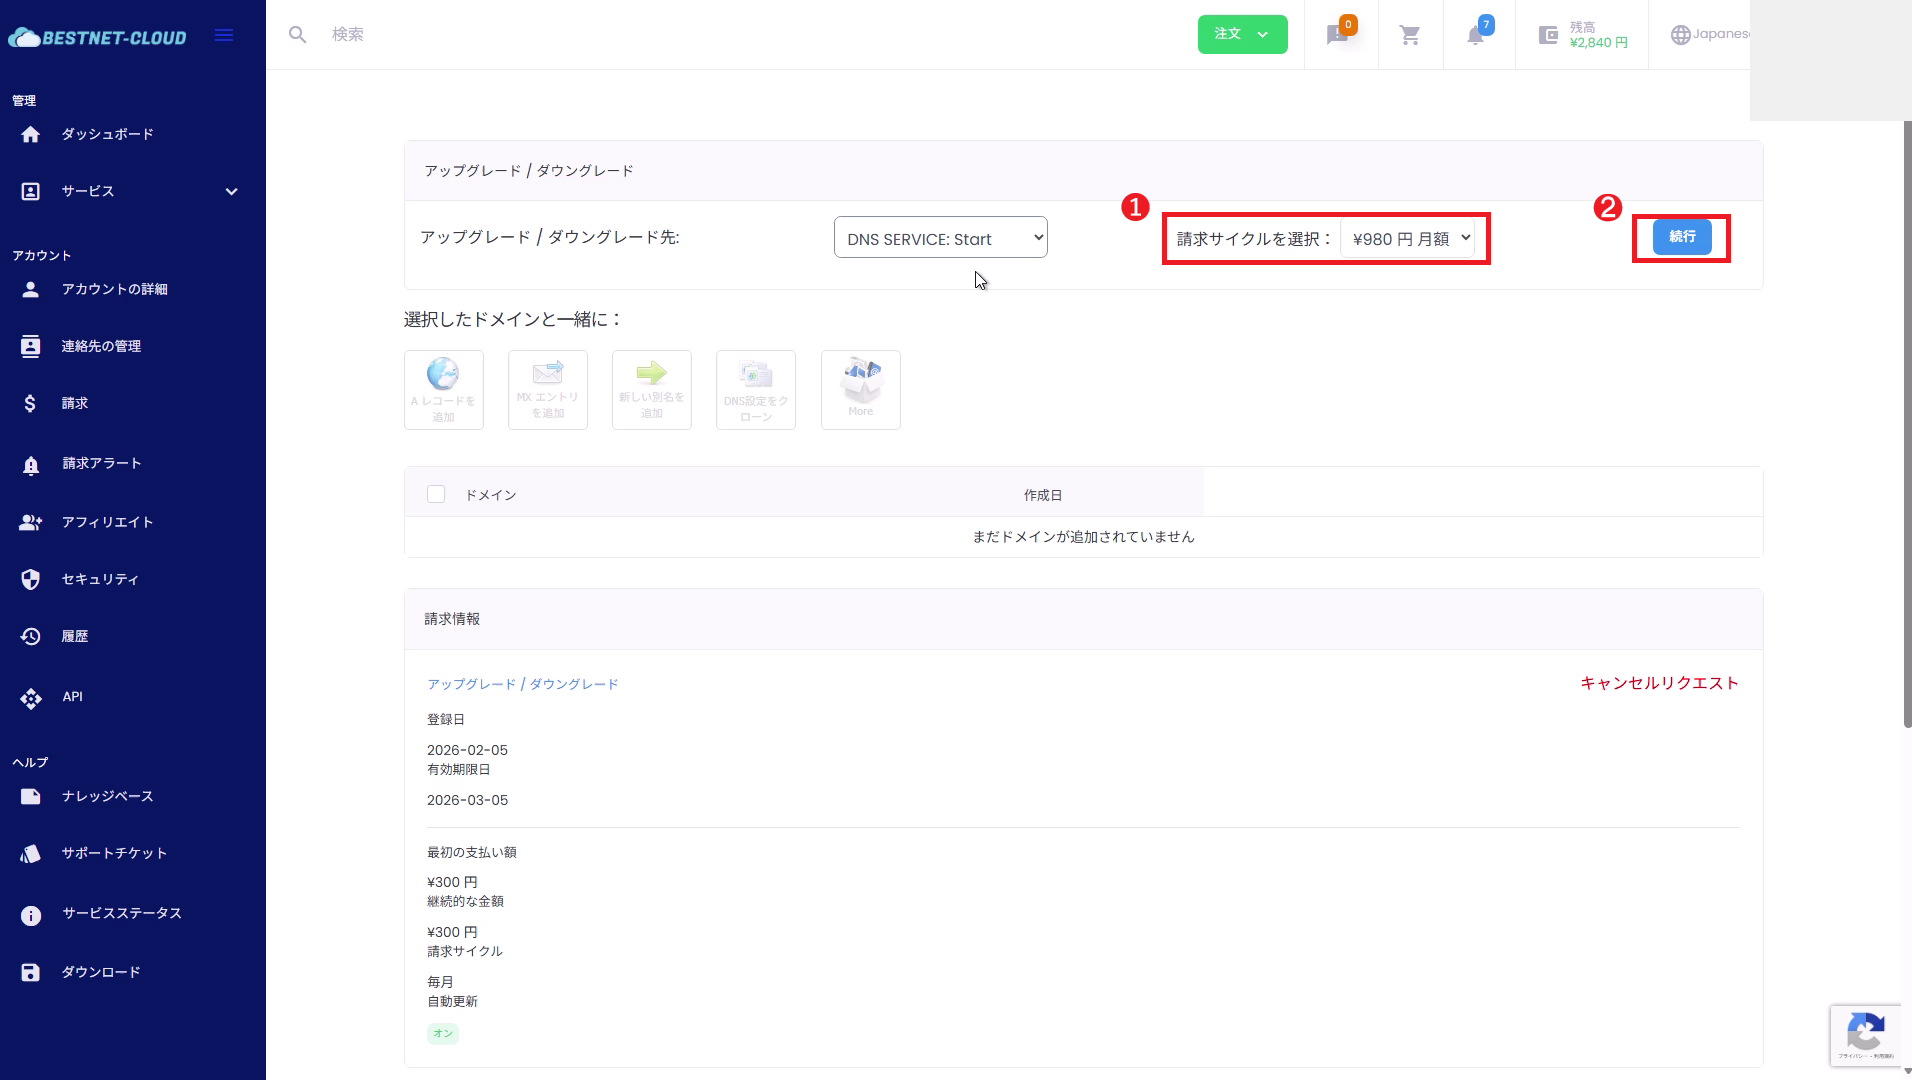
4Select the billing cycle and click “Continue” #
From “Select billing cycle,” choose your billing cycle such as monthly or annual, then click “Continue”.
5Review the details and click “Submit” #
Review the upgrade details (before → after) and the total charge for today. If everything looks correct, click “Submit” to confirm.
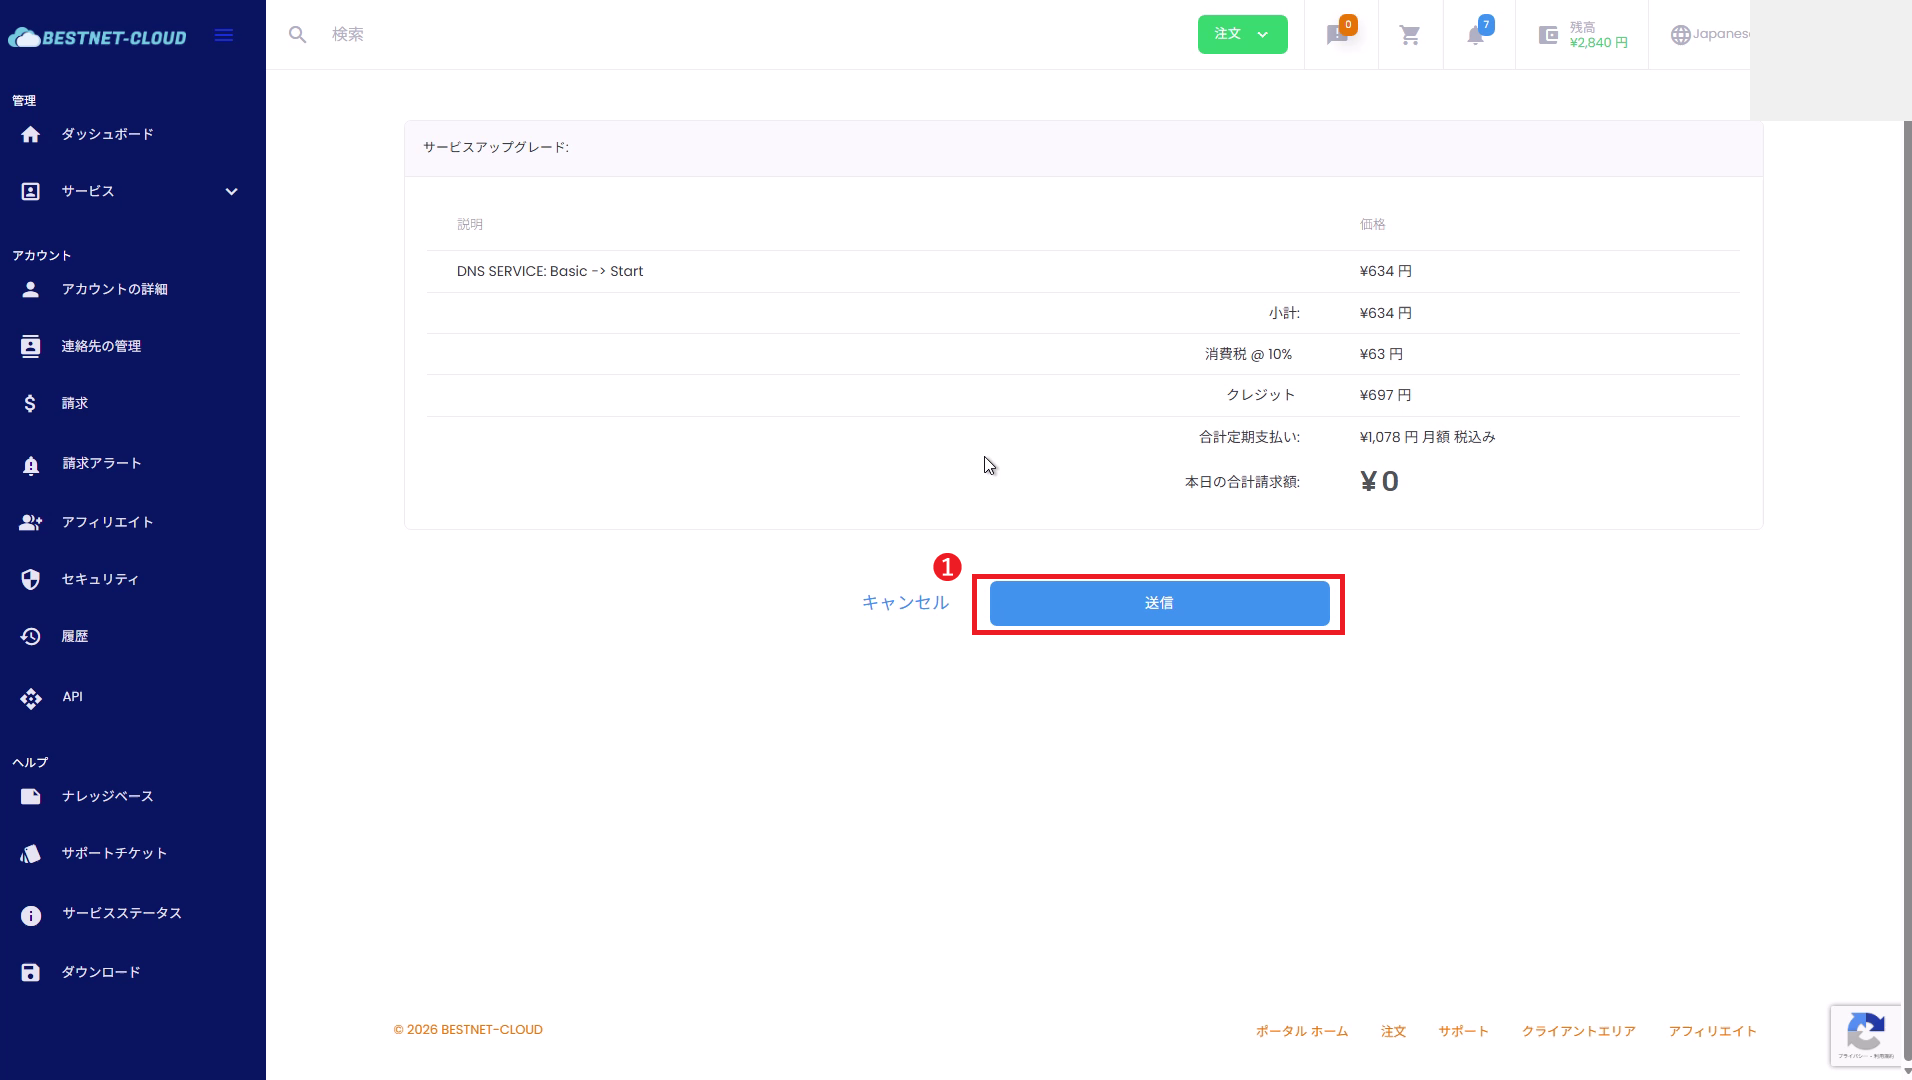
The amount displayed on the screen (difference, tax, credit application, etc.) is the final calculation result. If you have any questions about the amount, please contact support before submitting.
6Confirm the invoice has been issued #
After submission, the invoice screen will be displayed. You can download a copy from “Download PDF” if needed.

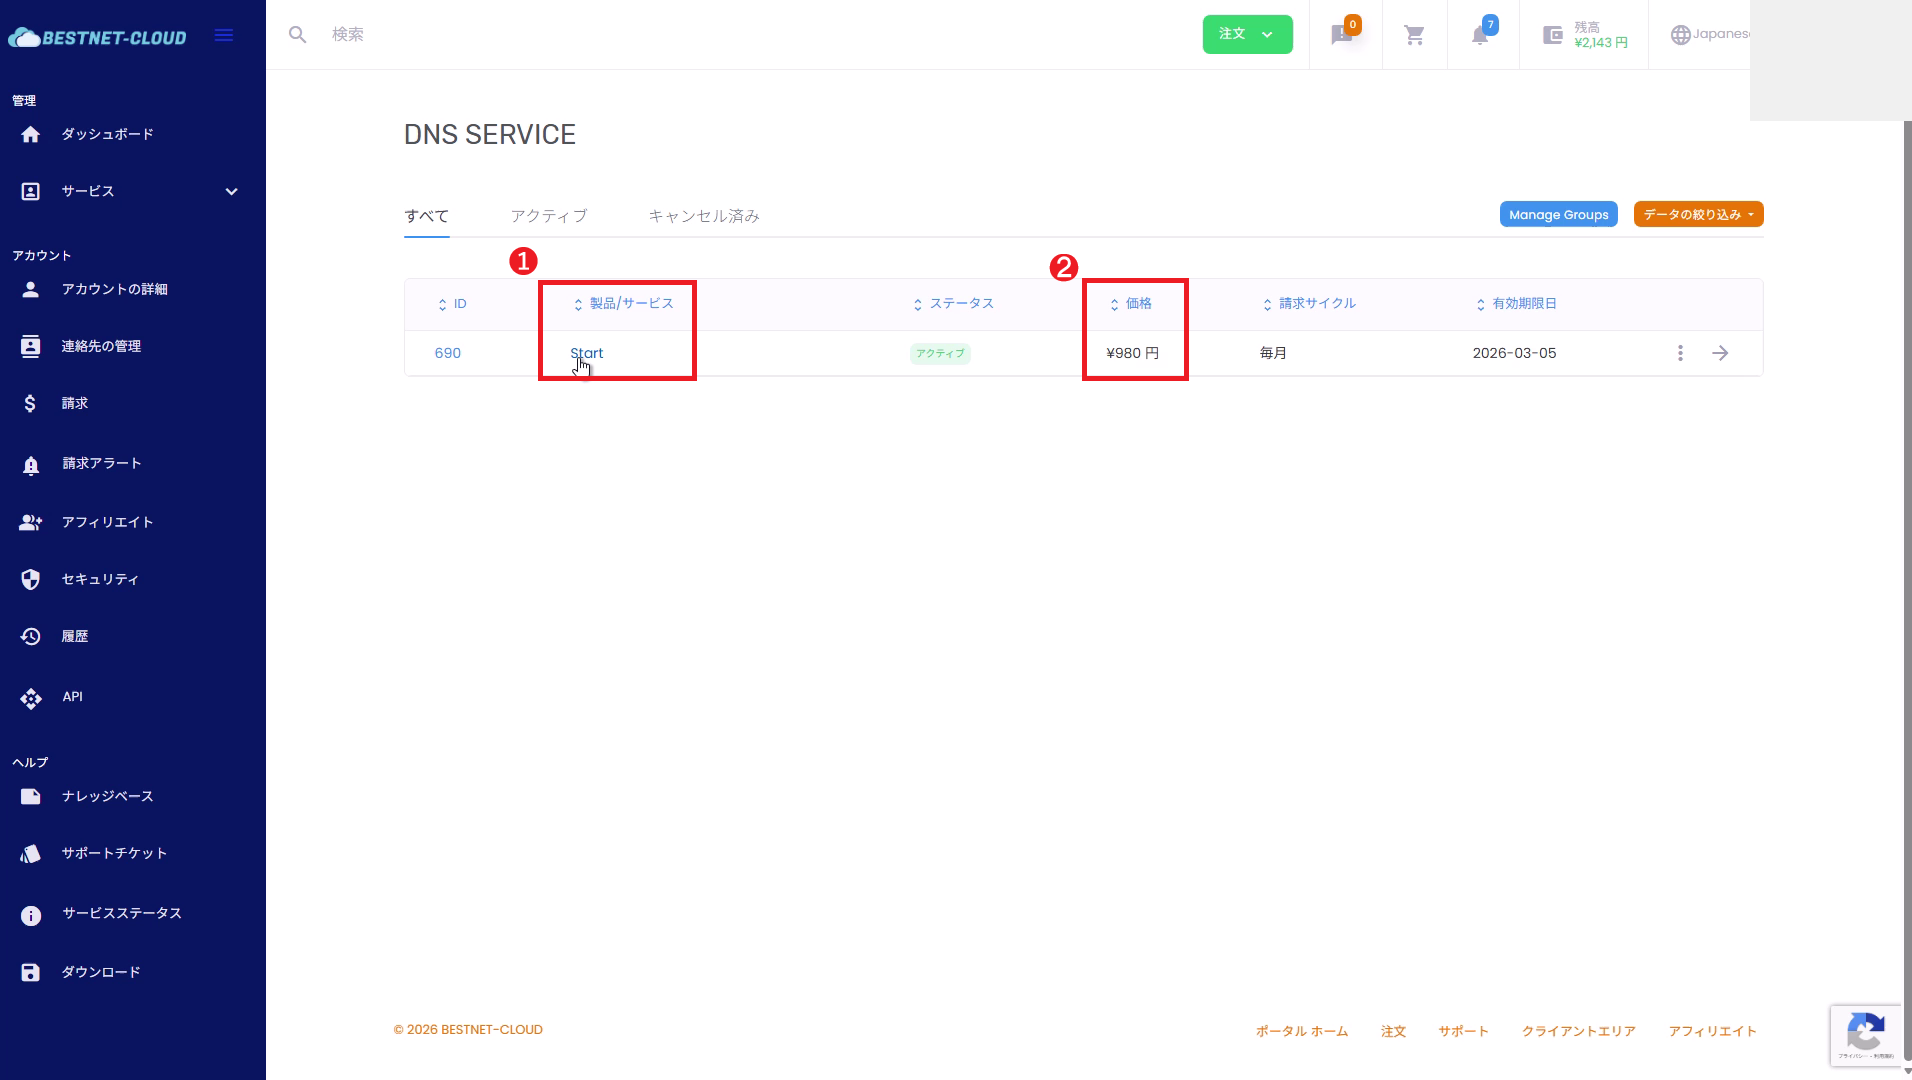
7Confirm the plan has been updated in the DNS SERVICE list #
Go back to Services → DNS SERVICE and confirm the service name and price have been updated to the new plan details.
Downgrade Instructions #
The basic operation flow for downgrading is the same as upgrading. The difference is that you select a lower-tier plan in the “Target plan”.
1. Select a lower-tier plan as the target plan #
- Follow steps 1–4 from “Upgrade Instructions” above.
- In “Upgrade / Downgrade to,” select a lower-tier plan than your current one (example: Basic).
- Select the billing cycle, click “Continue,” review the details, and click “Submit” to confirm.
2. Important notes for downgrading #
- Whether downgrading takes effect immediately or at the next renewal depends on the service settings. Please always check the on-screen guidance and invoice details.
- If a lower-tier plan is not available as an option, downgrading may not be possible due to the plan structure or contract terms. Please contact support.
Frequently Asked Questions #
The Upgrade / Downgrade link is not displayed #
- Verify that the service is in “Active” status.
- Plan changes may be restricted based on your contract details or permissions. Please contact support.
The amount shows $0 (or is different than expected) #
- The difference charge may be offset due to remaining contract days, credit balance, tax calculations, and other factors.
- The final billing result is shown in “Total charge for today.” Please always review before submitting.
The display is not updating after the plan change #
- Try refreshing your browser.
- It may take some time for changes to appear. Verify that an invoice has been issued and that the plan name has changed in the DNS SERVICE list.


