
Setup Guide
Steps to safely begin using after the first startup. Configure WAN first, then configure progressively while protecting LuCI with HTTPS.
Scope and Prerequisites #
- Target: OpenWrt template provided by BESTNET
- WAN =
eth0(interface where global IP is configured) - Work LAN =
eth1(DHCP / network for console recovery) - Initial login via HTTPS GUI (LuCI)
- SSH only when necessary (activate after key registration / port 22 open, password SSH prohibited)
Important Notes (Required Reading) #
This template does not support cloud-init, so manual configuration is required on first use.
- Access source IP restriction is mandatory (restrict both cloud-side FW / SG and OpenWrt-side FW to permit 443 / 22 only from your management IP)
- Misconfiguration may make the instance inaccessible. Keep the console open during the process
- The console may interpret US keyboard layout (especially for
/and:). Primary symbols needed in this guide are mainly.,/, and space
Overall Flow #
- (Optional) Create OpenWrt instance in the portal
- Note WAN information and management IP in the portal
- Log in as root via console
- Run
firstboot.shto initially configure WAN and HTTPS - In cloud-side FW / SG, permit TCP 443 from management IP only
- Log in to LuCI (HTTPS)
- (If necessary) Register SSH public key → enable SSH with
enable_ssh.sh→ permit TCP 22 from management IP only in cloud-side FW / SG
Step 0(Optional) Create OpenWrt Instance in Portal #
If the instance has already been provisioned, you may skip this step. Portal UI may vary by provider, but the example followed this flow:
Step 0.1 Set Template (OS) to OpenWrt #
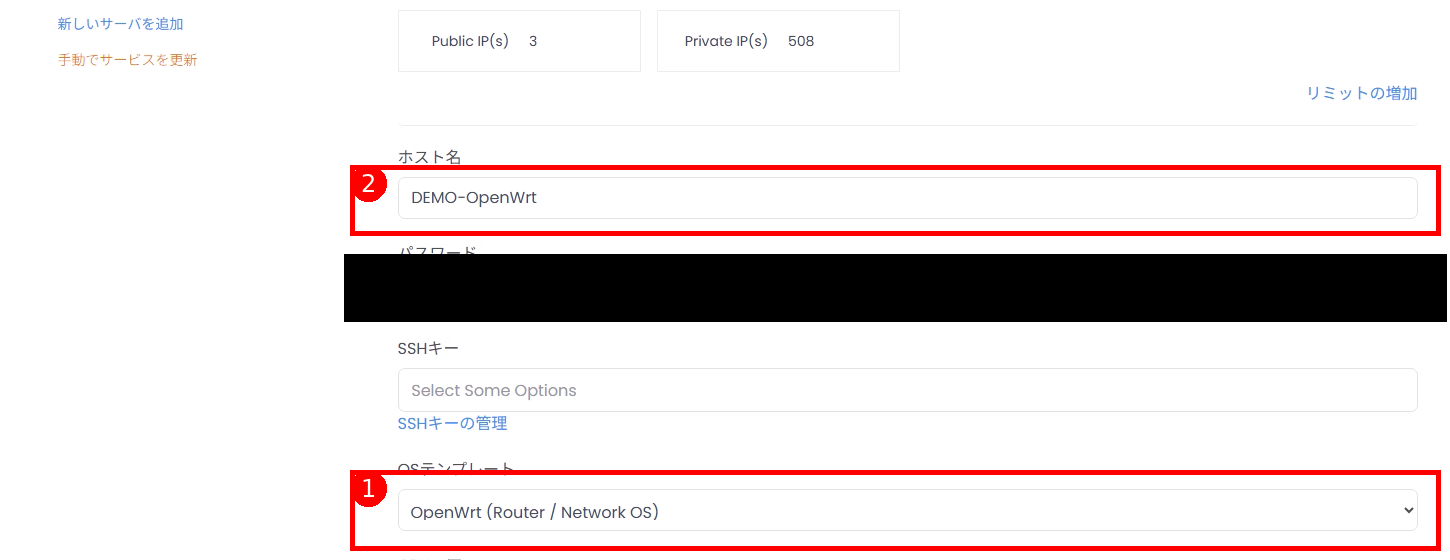 Figure: Example of selecting template in creation screen (1 = OS template / 2 = hostname).
Step 0.2 Verify Public IP Allocation Settings and Create #
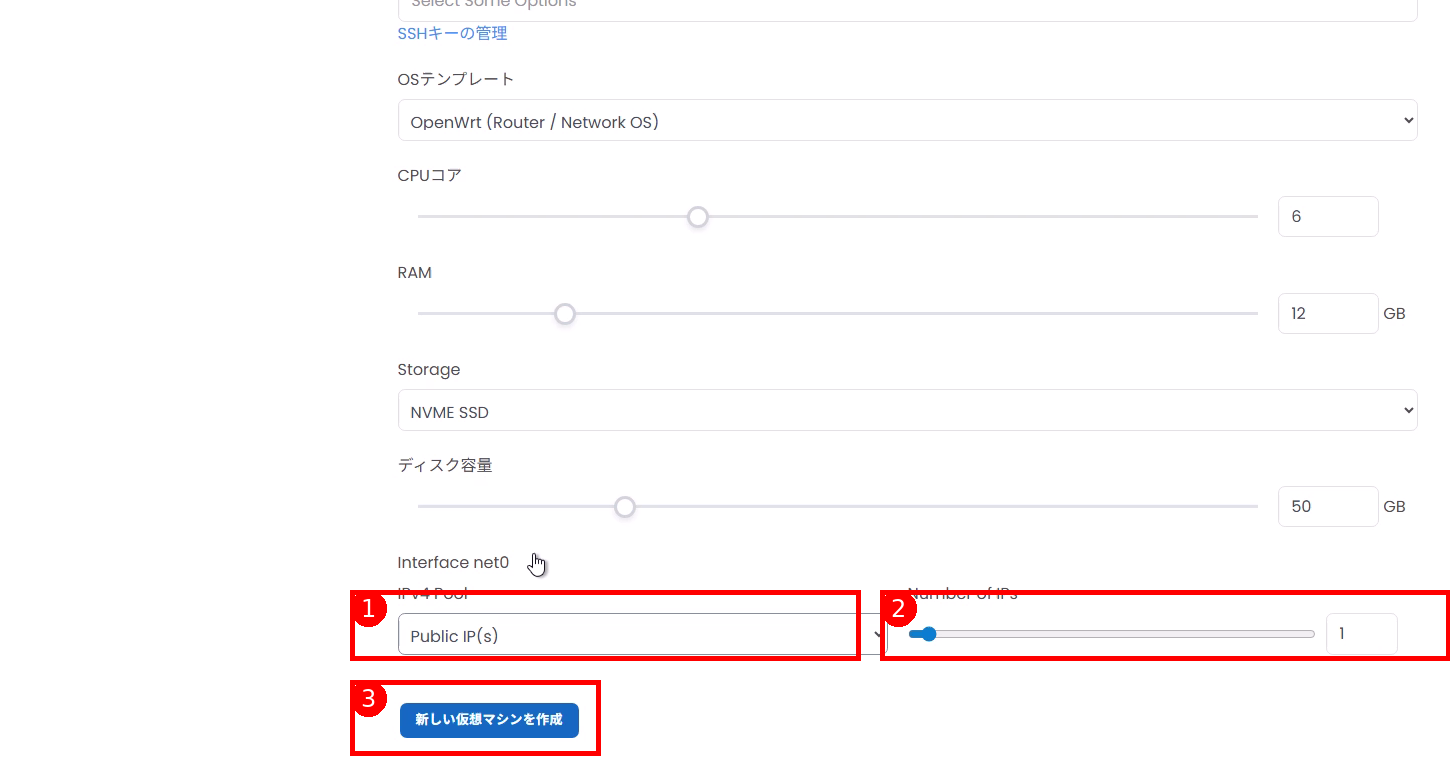 Figure: Network settings example (1 = set IPv4 Pool to Public IP / 2 = number of IPs (normally 1) / 3 = create button).
Point: The prerequisite for this guide is that eth0 is WAN (Public). If the portal allows changing NIC allocation or order, ensure eth0 is on the Public side.
Step 1Preliminary Preparation (Confirm in Portal) #
Note the following from the portal (allocation information):
WAN (Global) Information #
- IPv4 address (example:
203.0.113.2) - Netmask (example:
255.255.255.224) - Gateway (example:
203.0.113.1) - DNS (if not specified,
1.1.1.18.8.8.8is fine)
Management IP (Your Device’s Global IP) #
- Static global IP (recommended): company line / VPN exit, etc.
- Example:
203.0.113.10/32
If your management IP changes (mobile / home line), you are likely to lock yourself out later. Use a static IP (company / VPN) if possible.
If you have concerns, please open a support ticket to consult with us.
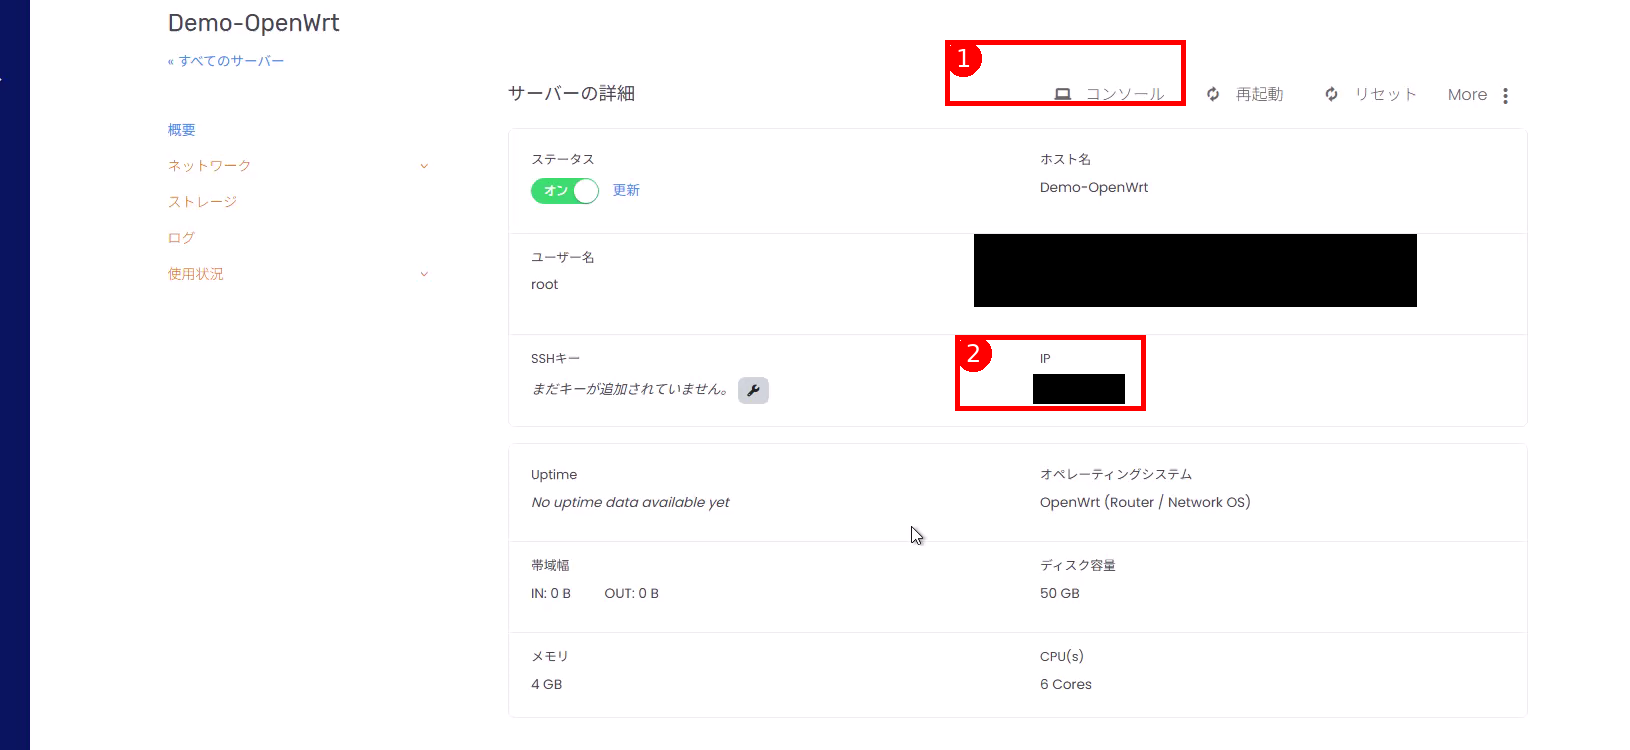 Figure: Example location to confirm “Console” and “IP (WAN)” in portal (1 = console / 2 = IP).
Reference: CIDR to Netmask Conversion #
| CIDR | Netmask |
|---|---|
| /29 | 255.255.255.248 |
| /28 | 255.255.255.240 |
| /27 | 255.255.255.224 |
| /26 | 255.255.255.192 |
| /24 | 255.255.255.0 |
Step 2Log In via Console (Required) #
- Open the console (noVNC / Proxmox, etc.) from the portal.
- When
login:appears, log in asroot.
In the initial state, the root password is often unset (locked), and the template assumes console login is possible. If prompted for a password you don’t know, contact the provider.
Step 3Run Initial Setup Script #
Verify the prompt is root@OpenWrt:~# and run firstboot.sh.
./firstboot.shIf this fails (Permission denied, etc.), run with path specification:
sh /root/firstboot.sh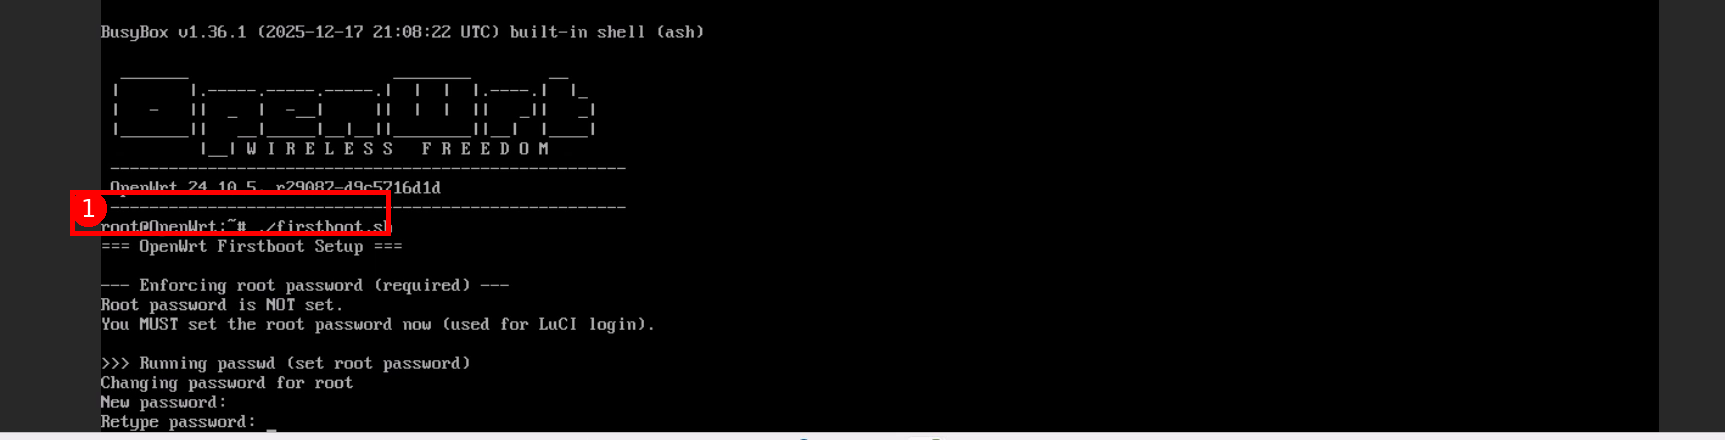 Figure: Example of running
 ./firstboot.sh in console (1 = command to execute).Step 4Answer Script Questions #
The script will ask questions in sequence. Use the information you noted in Step 1 for input values.
Step 4.1 Set root Password (Required) #
If the script initially detects an unset root password, passwd will start. Follow the instructions to set a new password.
This password is required for LuCI (HTTPS GUI) login.
Step 4.2 Input WAN Settings #
The prerequisite of this guide is that eth0 is WAN, so even if the prompt shows WAN device [eth1]:, enter eth0.
 Figure: Example inputs for
 firstboot.sh (1 = set WAN device to eth0 / 2 = input WAN IPv4, netmask, gateway, DNS).Items to input (example):
- WAN device:
eth0 - WAN IPv4 address: IP from portal (example:
203.0.113.2) - WAN netmask: Netmask from portal (example:
255.255.255.224) - WAN gateway: Gateway from portal (example:
203.0.113.1) - DNS servers: If not specified,
1.1.1.1 8.8.8.8is fine - Admin source IP / CIDR: Your management IP (example:
203.0.113.10/32)
Step 4.3 Confirm Application #
At the end, your settings are displayed. If everything looks correct, enter y at Apply these settings? [y/N]:.
After application, the script will configure OpenWrt-side network settings and HTTPS access permission (FW) with management IP restriction.
Step 5Configure Base Firewall (Cloud-side) (HTTPS) #
After the script completes, permit HTTPS on the cloud-side (base FW / SG).
- Permit: TCP 443
- Source: Management IP (example:
203.0.113.10/32) - Destination: This OpenWrt instance (WAN side)
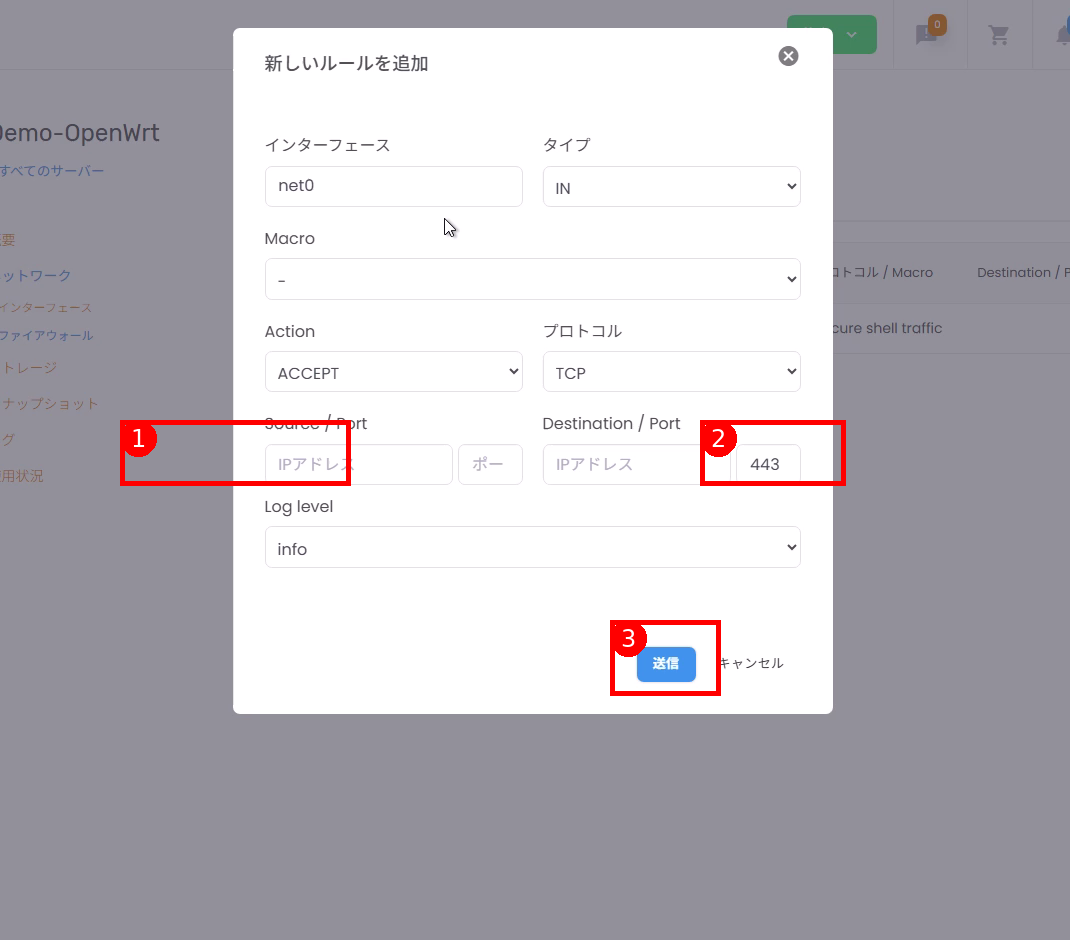 Figure: Example of opening port 443 in base FW / SG (1 = restrict source IP to management IP / 2 = destination port 443 / 3 = outbound).※ Item names and appearance may differ depending on the portal.
Even if you open port 443 in the base FW first, you cannot access until it is permitted on the OpenWrt side, so it is relatively safe, but always restrict the source IP.
Step 6Log In to HTTPS GUI (LuCI) #
Access the following from a browser:
https://<WAN_IP>/A self-signed certificate warning will appear. Review the content and proceed (browser display varies by environment).
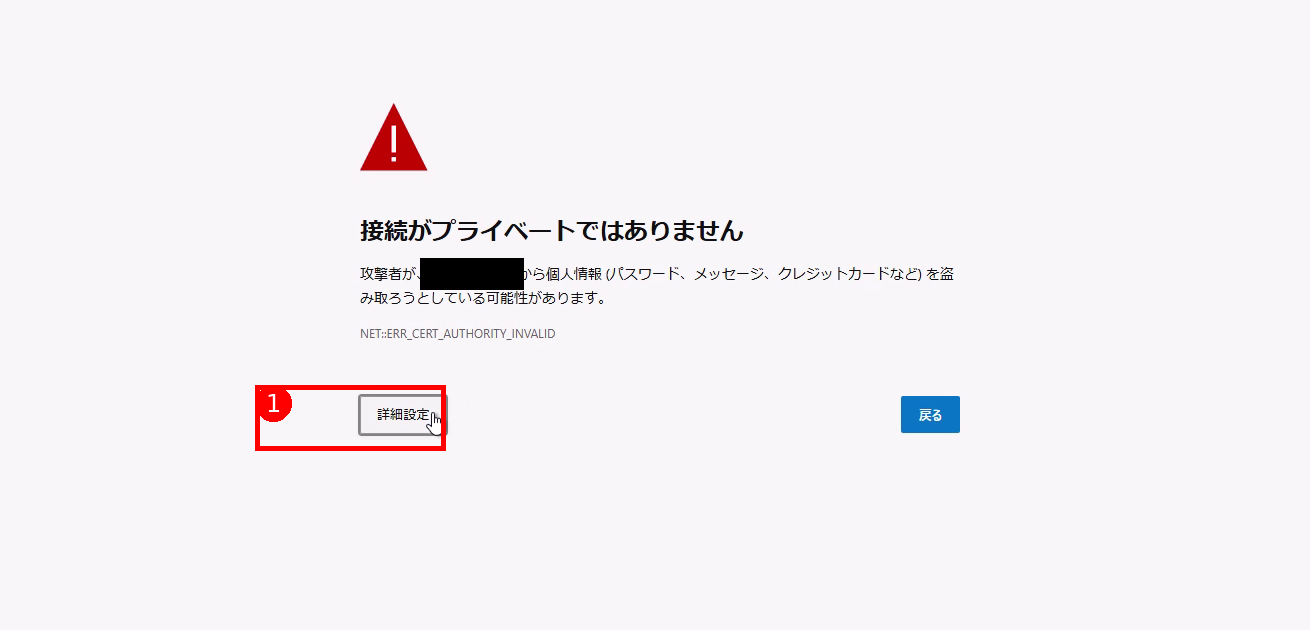 Figure: Example of self-signed certificate warning (1 = advanced settings).
When the login screen appears, log in with user root and the password you set in Step 4.1.
Step 7(If Necessary) Enable SSH #
Policy: Register keys before enabling SSH (password SSH is prohibited). If you do not use SSH in your operations, you may skip this section.
Step 7.1 Register SSH Public Key in LuCI #
LuCI menu example (notation may differ slightly by environment):
System → Administration → SSH-Keys
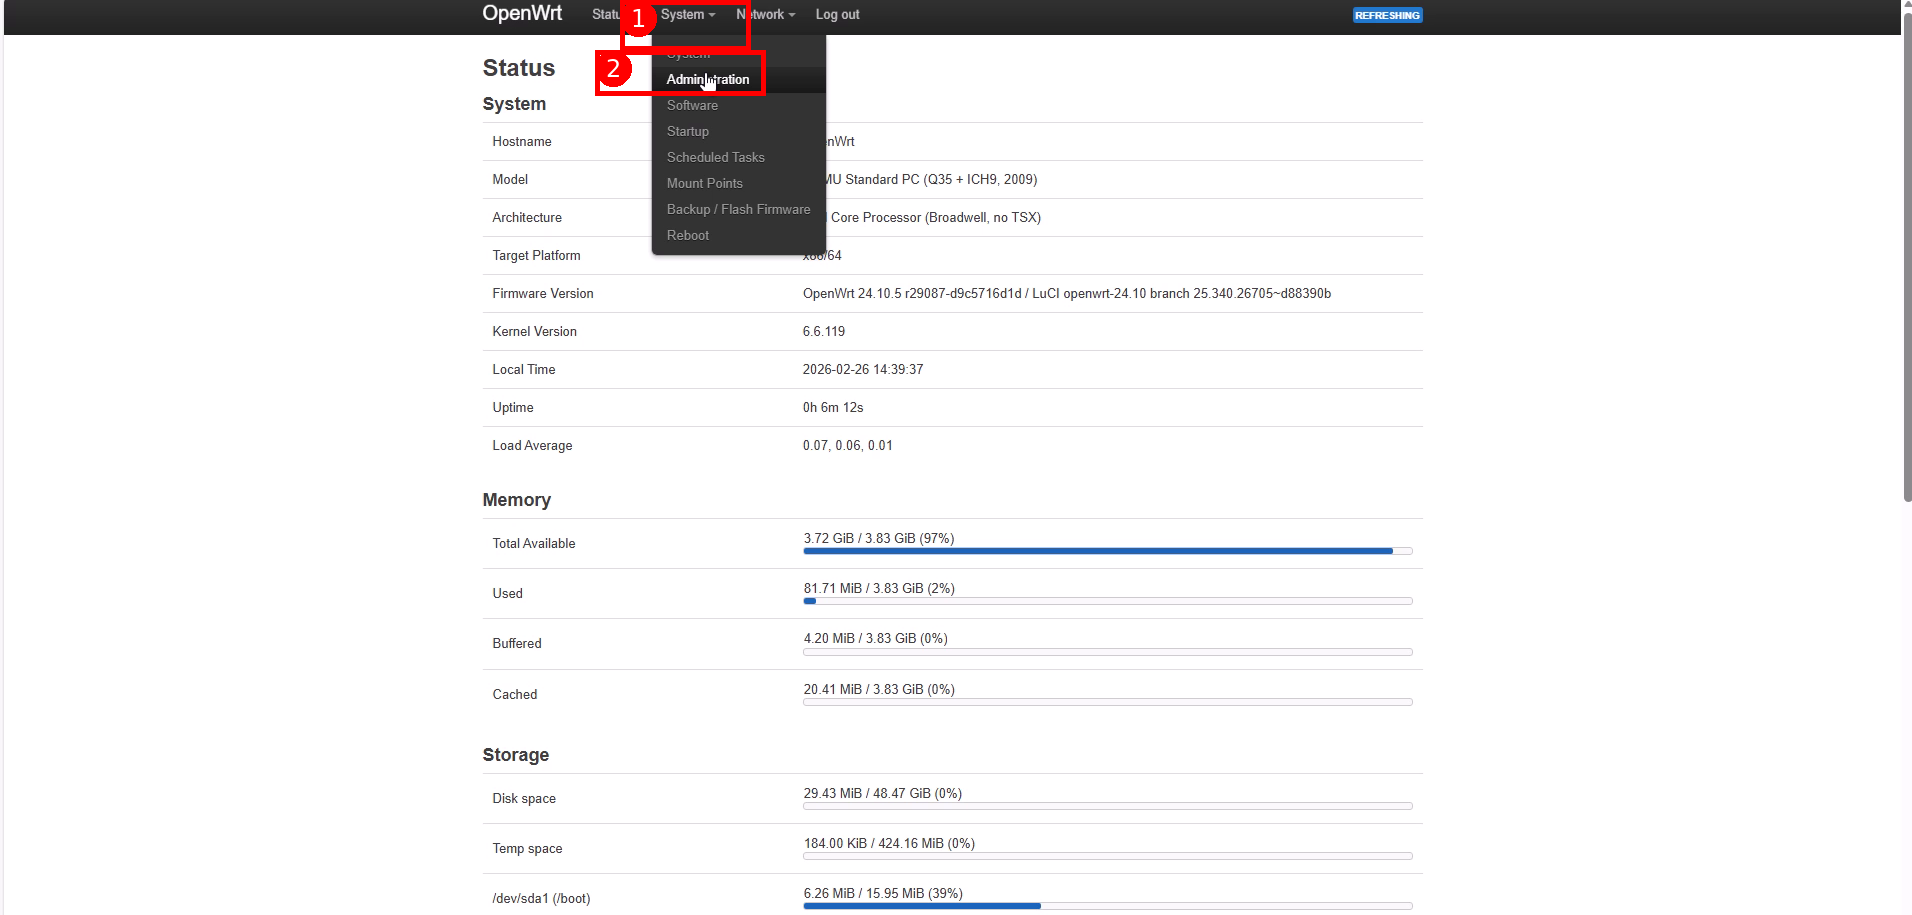 Figure: Example of opening
 System menu and selecting Administration in LuCI (1 = System / 2 = Administration).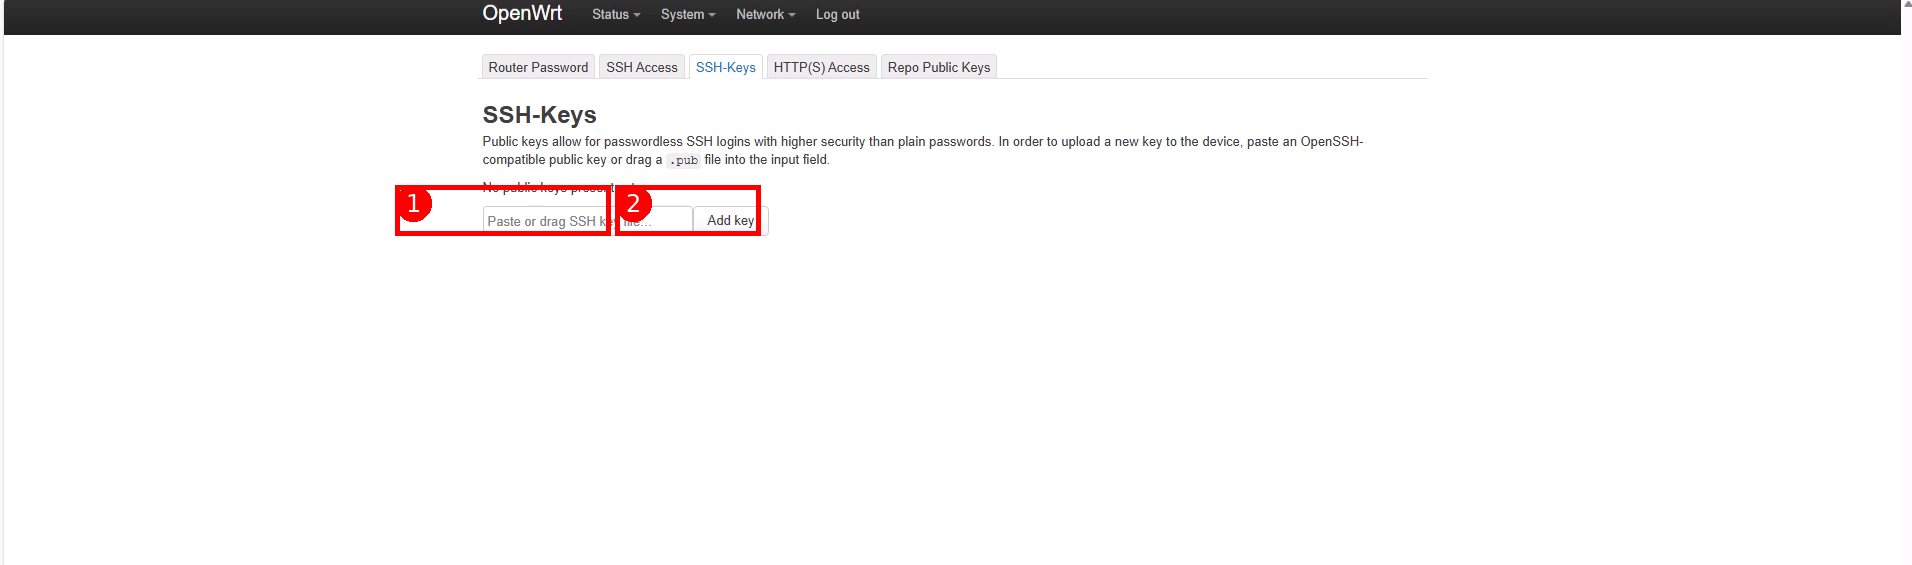 Figure: Example of SSH-Keys registration screen (1 = paste public key / 2 = Add key).※ Public key is the “non-private key” (example:
 ~/.ssh/id_ed25519.pub).Paste the public key (ssh-ed25519 AAAA... on one line) and save.
Do not paste the private key (id_ed25519, etc.).
Step 7.2 Run SSH Enable Script #
Execute the following in the console:
./enable_ssh.shIf this does not run properly, execute with path specification:
sh /root/enable_ssh.sh Figure: Example of starting
 enable_ssh.sh and inputting the permitted source IP for SSH (22) (1 = execution location).You will be asked for the management IP. If it is the same management IP you used for HTTPS, pressing Enter with the default is fine.
This script typically performs the following:
- Start dropbear (SSH)
- Configure key authentication only (disable password authentication)
- Add a rule to the OpenWrt firewall to permit port 22 from management IP only
Step 7.3 Open Port 22 on Cloud-side FW / SG as Well (Limited to Management IP) #
- Permit: TCP 22
- Source: Management IP (example:
203.0.113.10/32) - Destination: This OpenWrt instance (WAN side)
Warning: Do not open port 22 fully before SSH enablement on the OpenWrt side (key registration + enable_ssh).
Step 7.4 Verify Connection (From Your Device) #
ssh -i ~/.ssh/id_ed25519 root@<WAN_IP>SSH login with a password is expected to fail (keys only).
Step 8Common Troubleshooting and Recovery #
Step 8.1 Cannot Access HTTPS (Timeout) #
Troubleshooting order:
- Confirm TCP 443 is permitted from management IP in cloud-side FW / SG
- Verify your management IP is correct (has your line changed?)
- Verify WAN settings are configured in the console
Console verification:
uci show network.wan
ip -o -4 addr show
ip route
Verify packets are reaching (example):
tcpdump -ni eth0 tcp port 443Step 8.2 Management IP Changed and Cannot Access #
You can rewrite the permitted IP in the console (if management IP has changed).
Rewrite permitted source for HTTPS:
uci set firewall.allow_https_from_admin.src_ip='<NEW_IP/32>'
uci commit firewall
/etc/init.d/firewall restart
If using SSH:
uci set firewall.allow_ssh_from_admin.src_ip='<NEW_IP/32>'
uci commit firewall
/etc/init.d/firewall restart
Step 8.3 Wrong WAN Device (eth0 / eth1) #
Configuring WAN on the wrong interface makes the instance inaccessible. You can recover via console. Verify that network.wan.device is eth0.
uci show network.wan.device
uci show network.wan.ifname  # Depending on environment, this key may be used instead


