
Client Portal Guide
Client Portal: ISO Upload and Boot from ISO Operating Guide #
This guide explains how to upload ISO images on the client portal and mount the ISO (Boot from ISO) on your VPS to start it up.
Notice:
This guide has been created using generative AI and other tools. The positions of annotations (arrows, boxes, numbers, etc.) in the screenshots may be slightly offset from the actual screen. These are intended to help you understand the procedures. When performing operations, please prioritize the screen display and the content of the instructions.
Prerequisites #
- You are logged into the client portal
- You can open the target VPS (service details screen)
- You have the ISO file to upload ready on your local PC
Warning:
Executing “Boot from ISO” will restart the server. This may impact services in operation, so please ensure you have a maintenance window scheduled before proceeding.
Upload ISO #
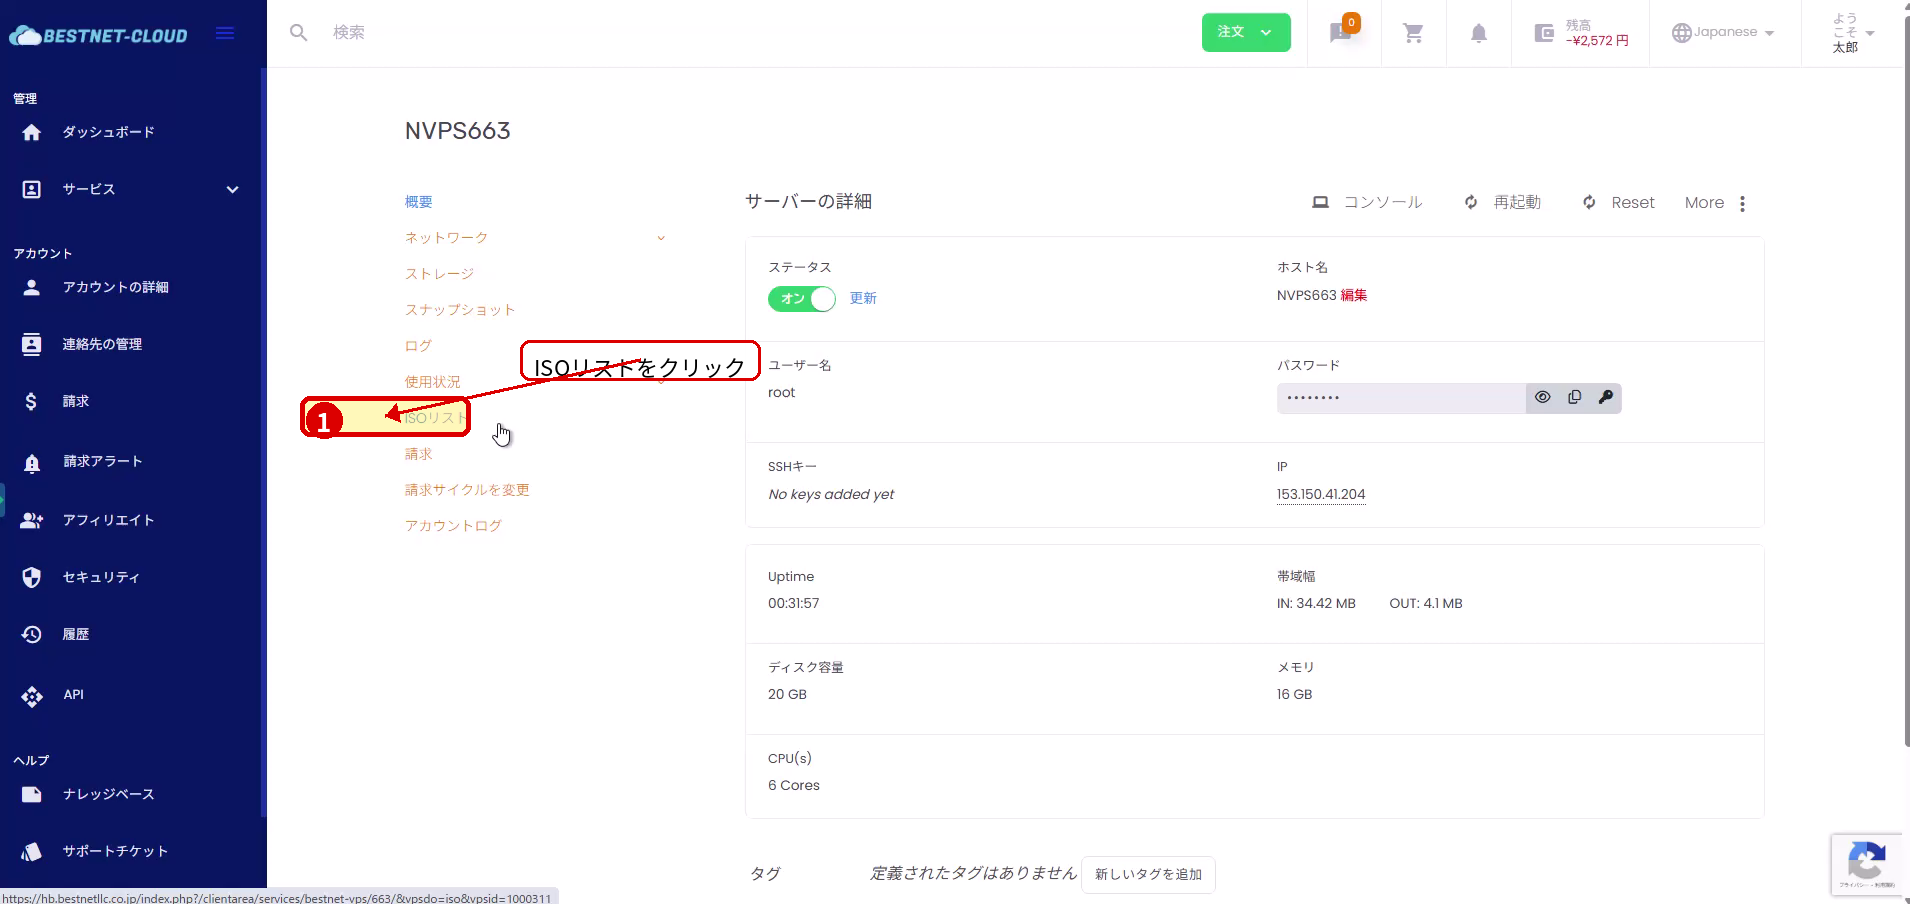
1. Open the ISO List #
- From the service menu of the target VPS, click “ISO List”.
2. Open the Upload Dialog #
- On the ISO List screen, click “Upload ISO”.
- In the dialog, select the “File Upload” tab and click “Choose File”.
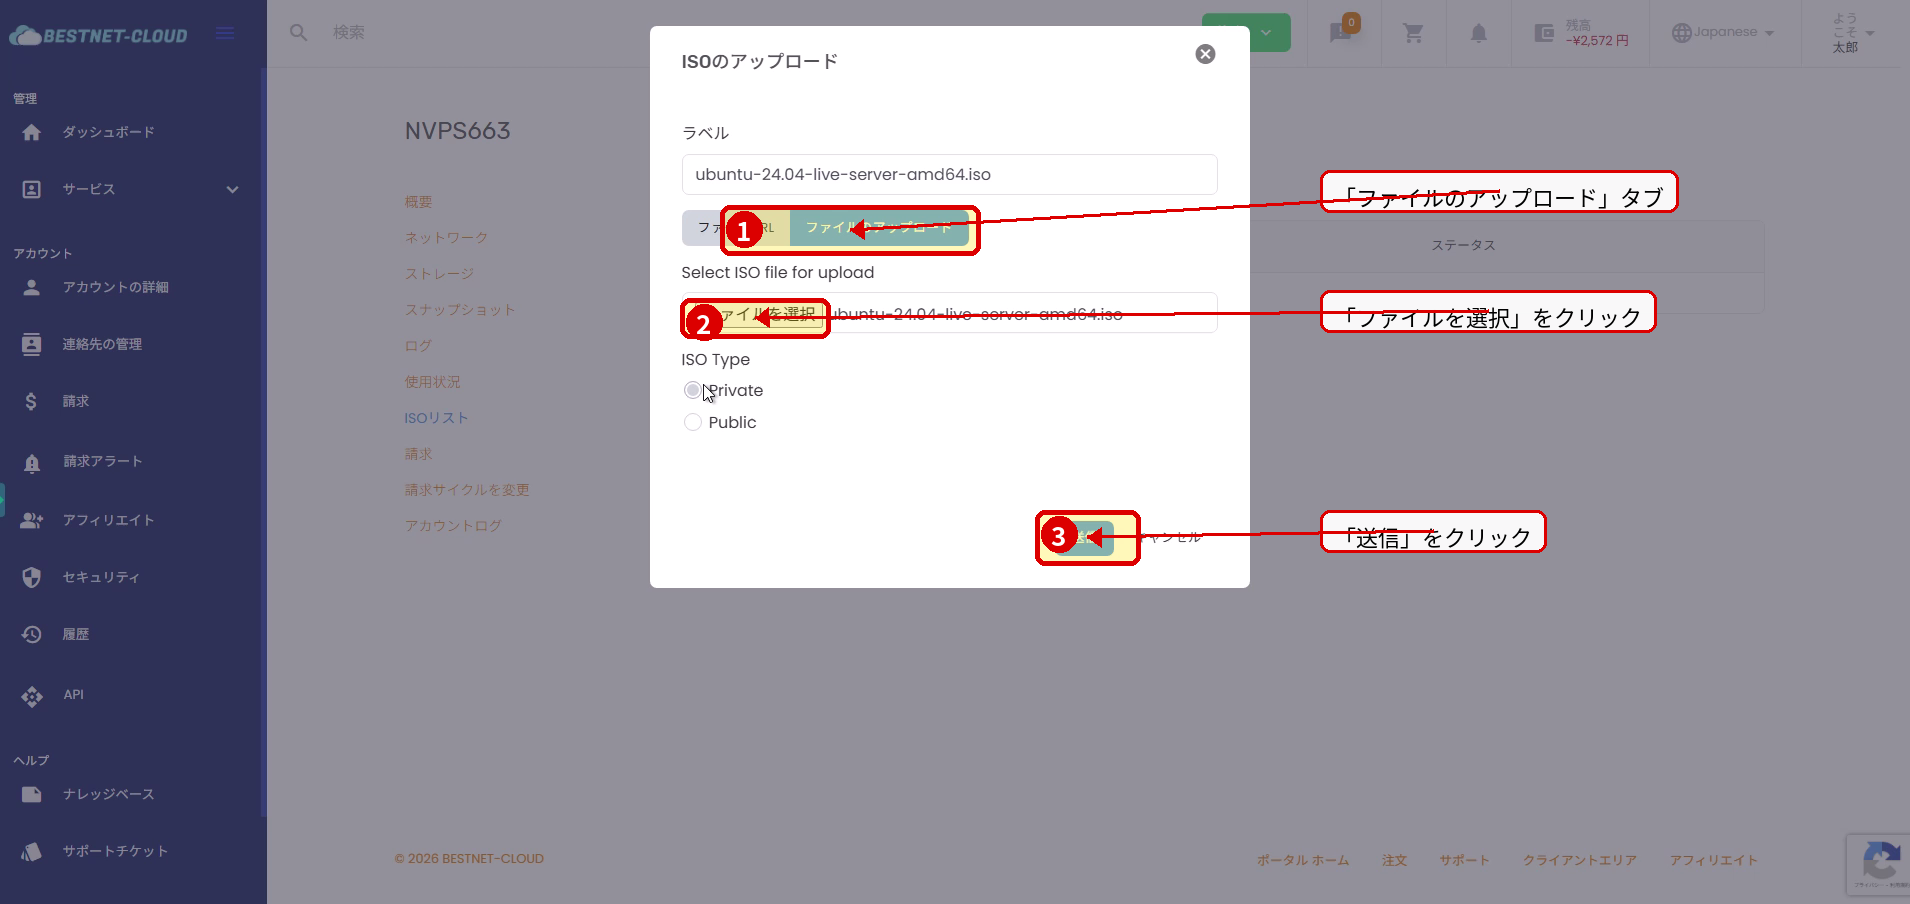
3. Select ISO File and Start Upload #
- In the file selection dialog, select the ISO file you want to upload and click “Open”.
- When you return to the portal upload dialog, click “Submit” to start the upload.
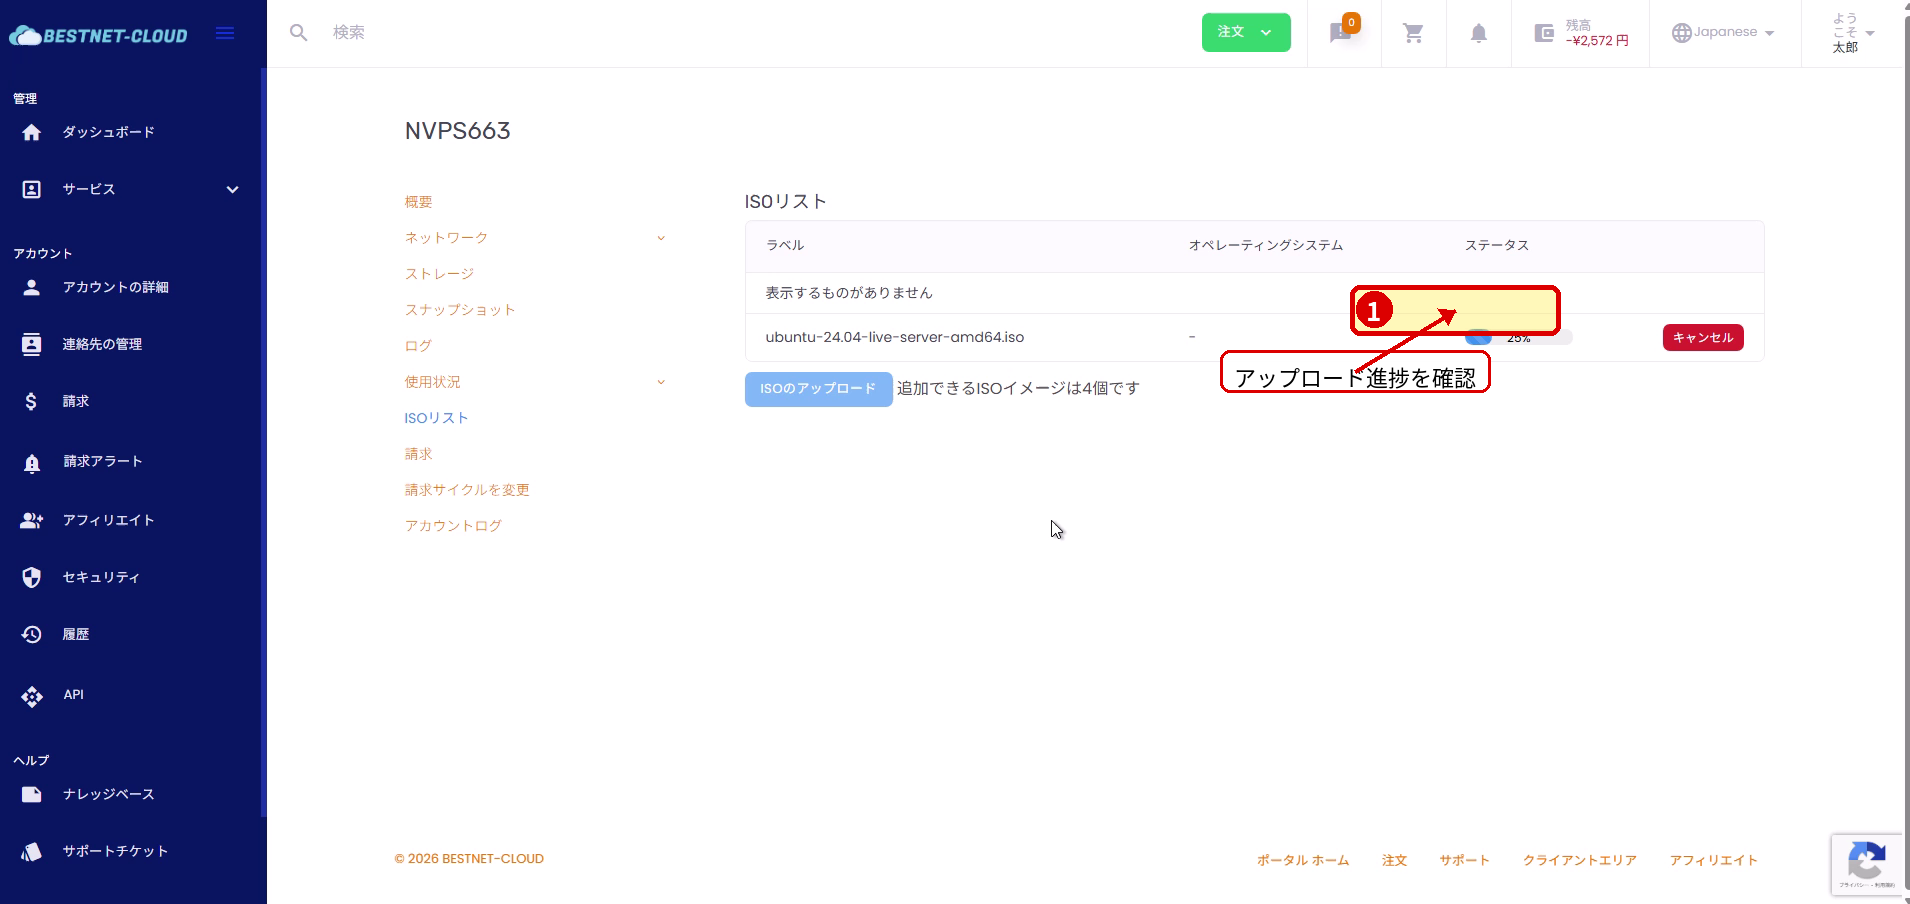
4. Wait for Upload and Import to Complete #
- The progress (%) will be displayed in the ISO List. Wait until it completes.
- After the upload is complete, the server may perform an import process. Wait until the status changes to Ready.
Boot from ISO (Mount) #
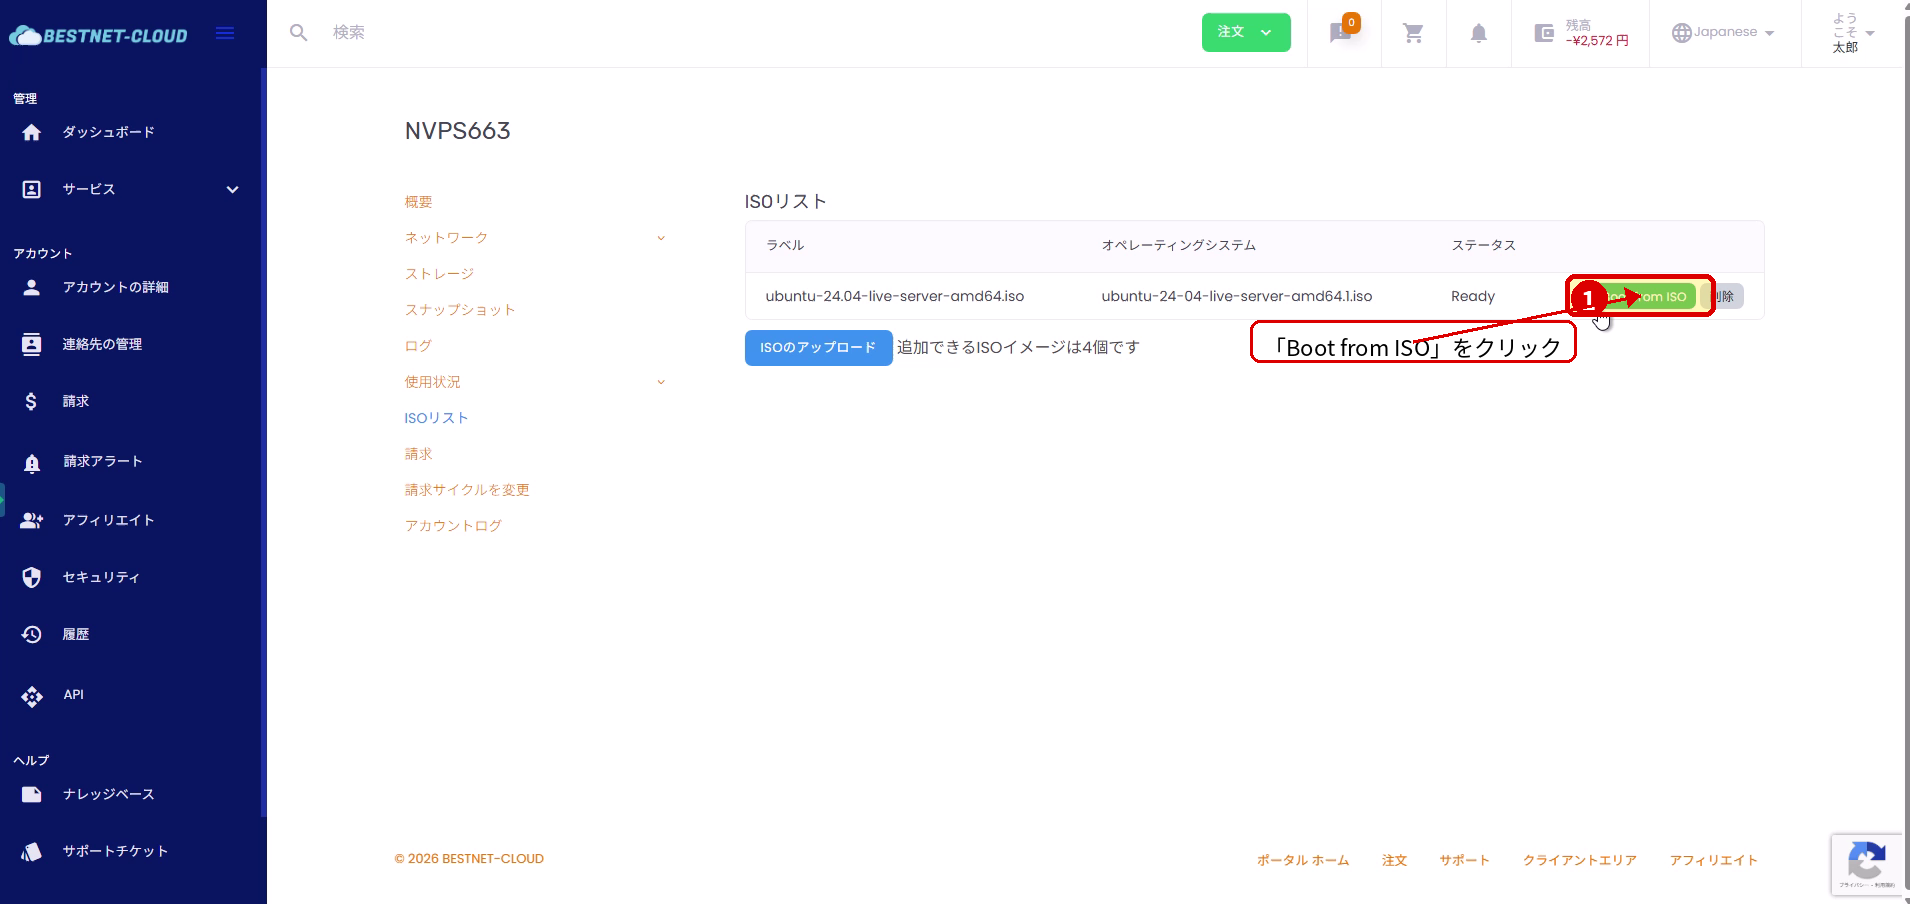
1. Execute Boot from ISO #
- Once the status of the target ISO in the ISO List becomes Ready, click “Boot from ISO”.
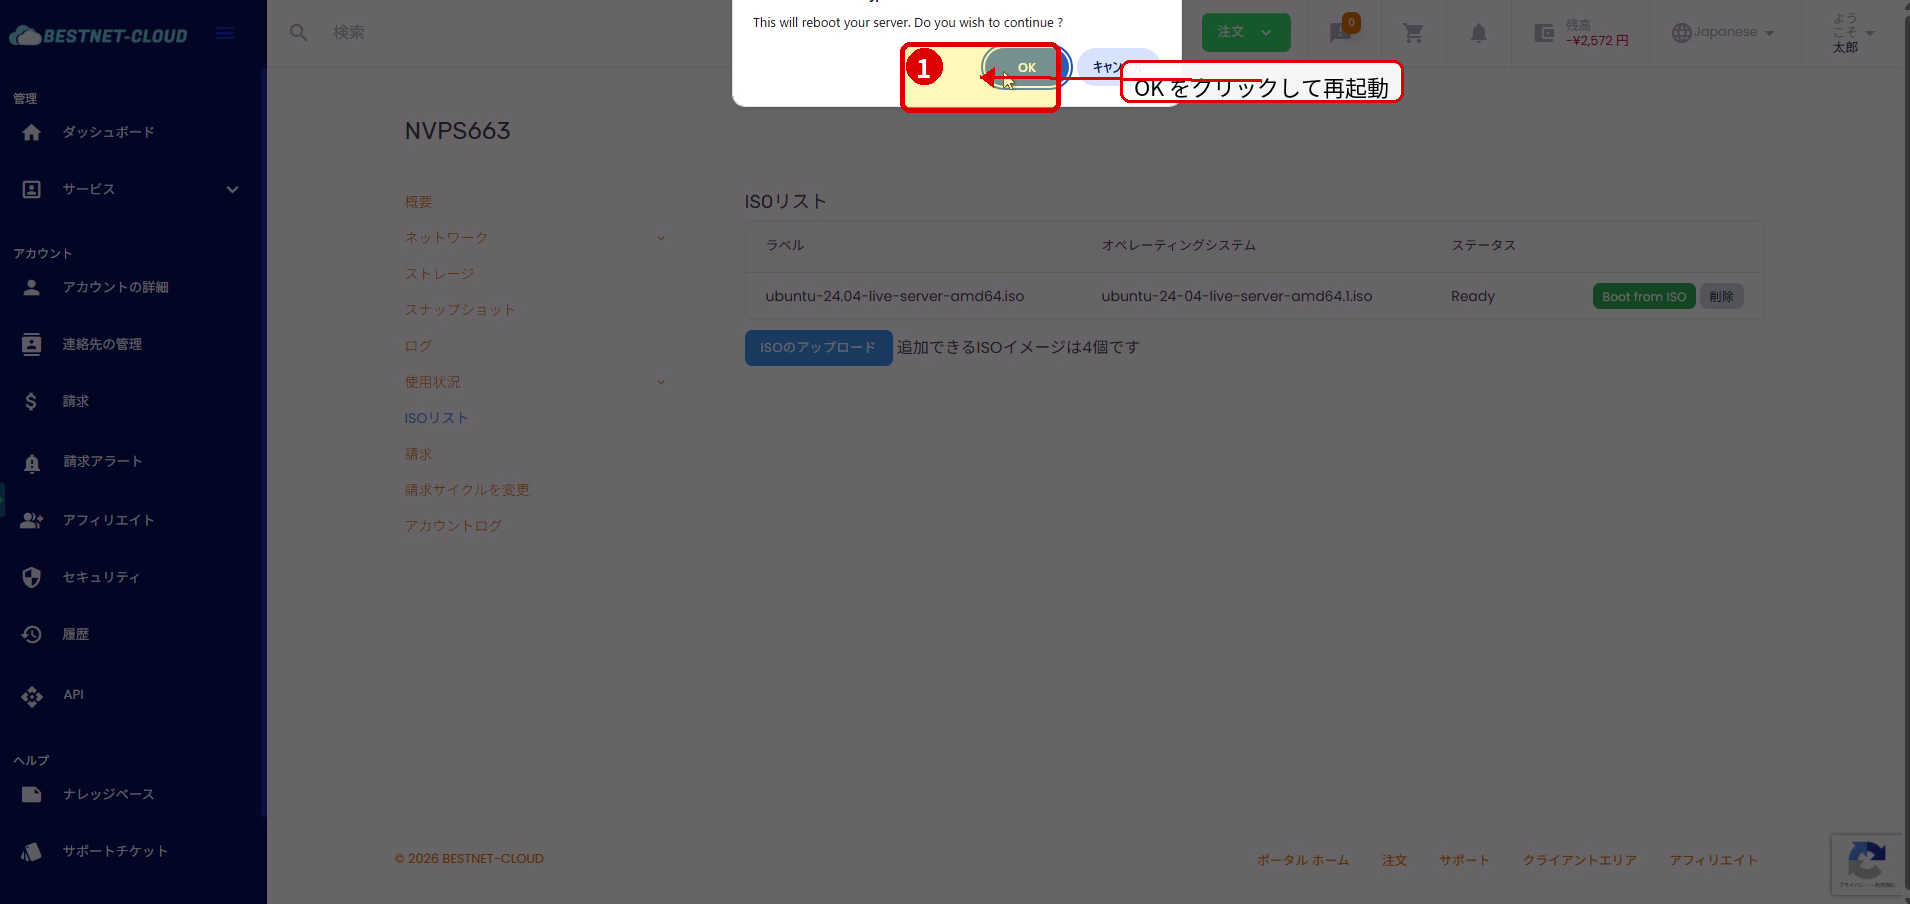
2. Press OK on the Restart Confirmation Dialog #
- When the confirmation “This will reboot your server…” is displayed, click OK.
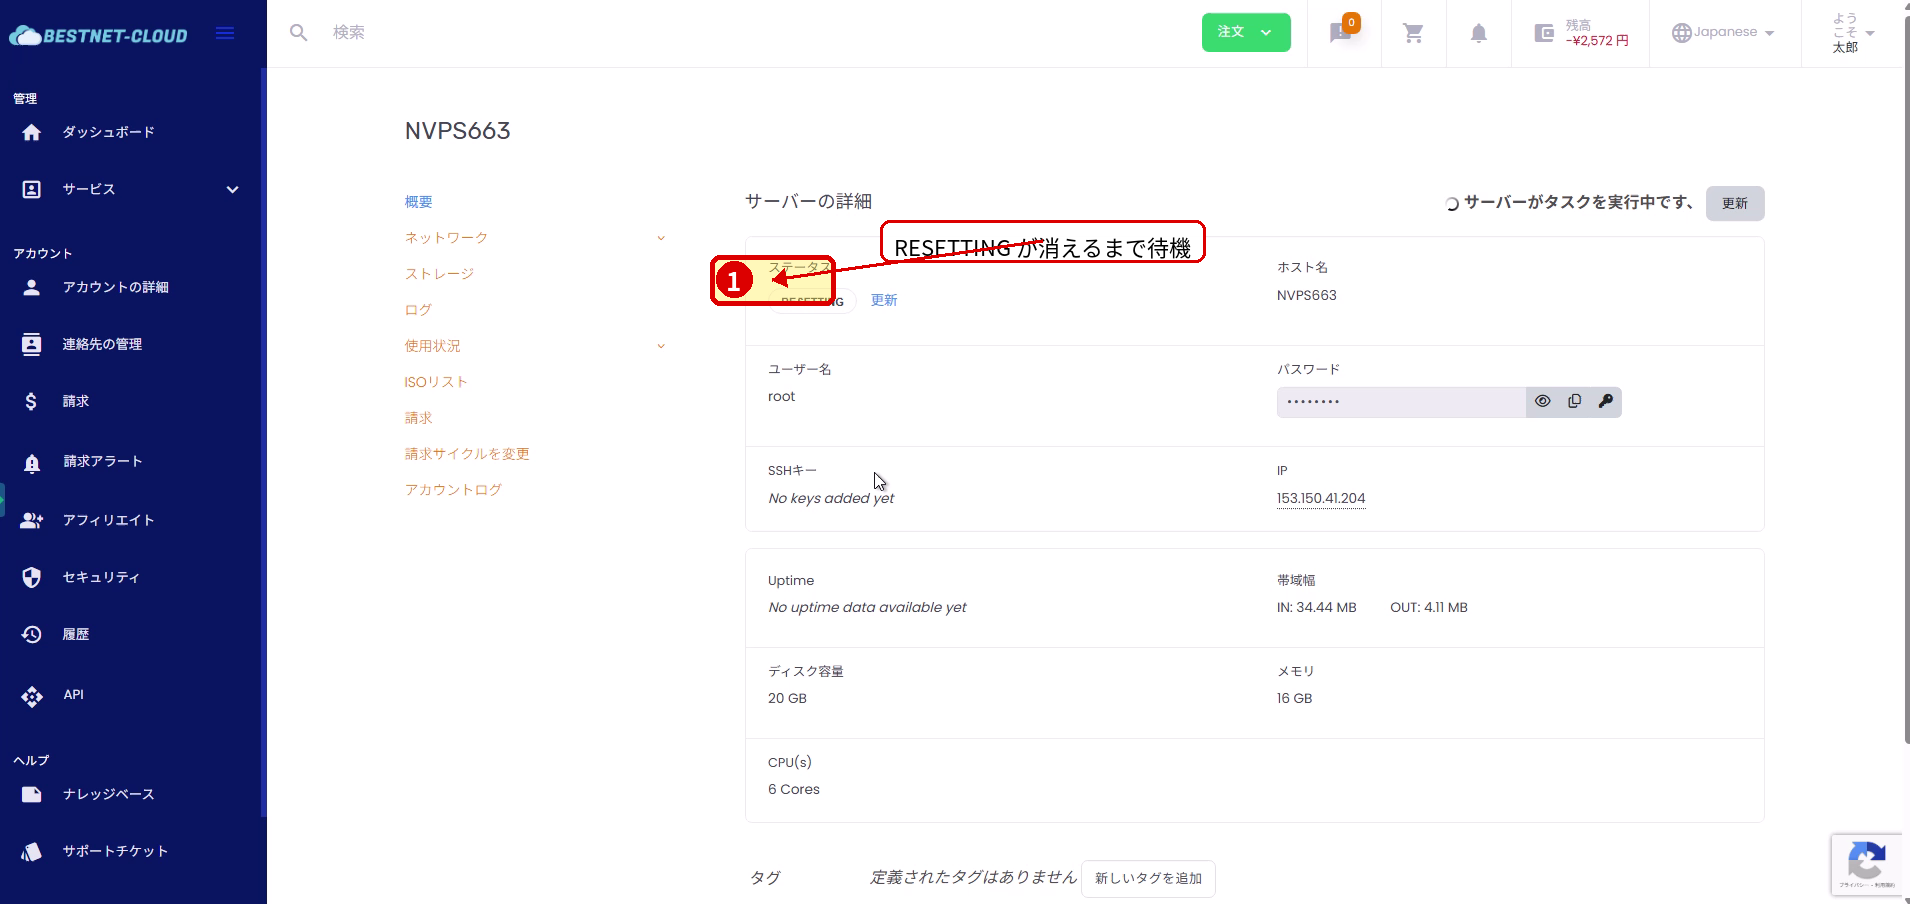
3. Wait for Server Restart to Complete #
- You will return to the service details (overview) and the status will show RESETTING or similar.
- Wait for the task to complete and the status to return to normal.
4. (Optional) Open Console to Verify ISO Boot #
- If you want to confirm that the server is booting from the ISO, open the console from “Console” at the top of the service details screen.
- Continue tasks such as OS installation from the console.
Unmount ISO (Detach) #
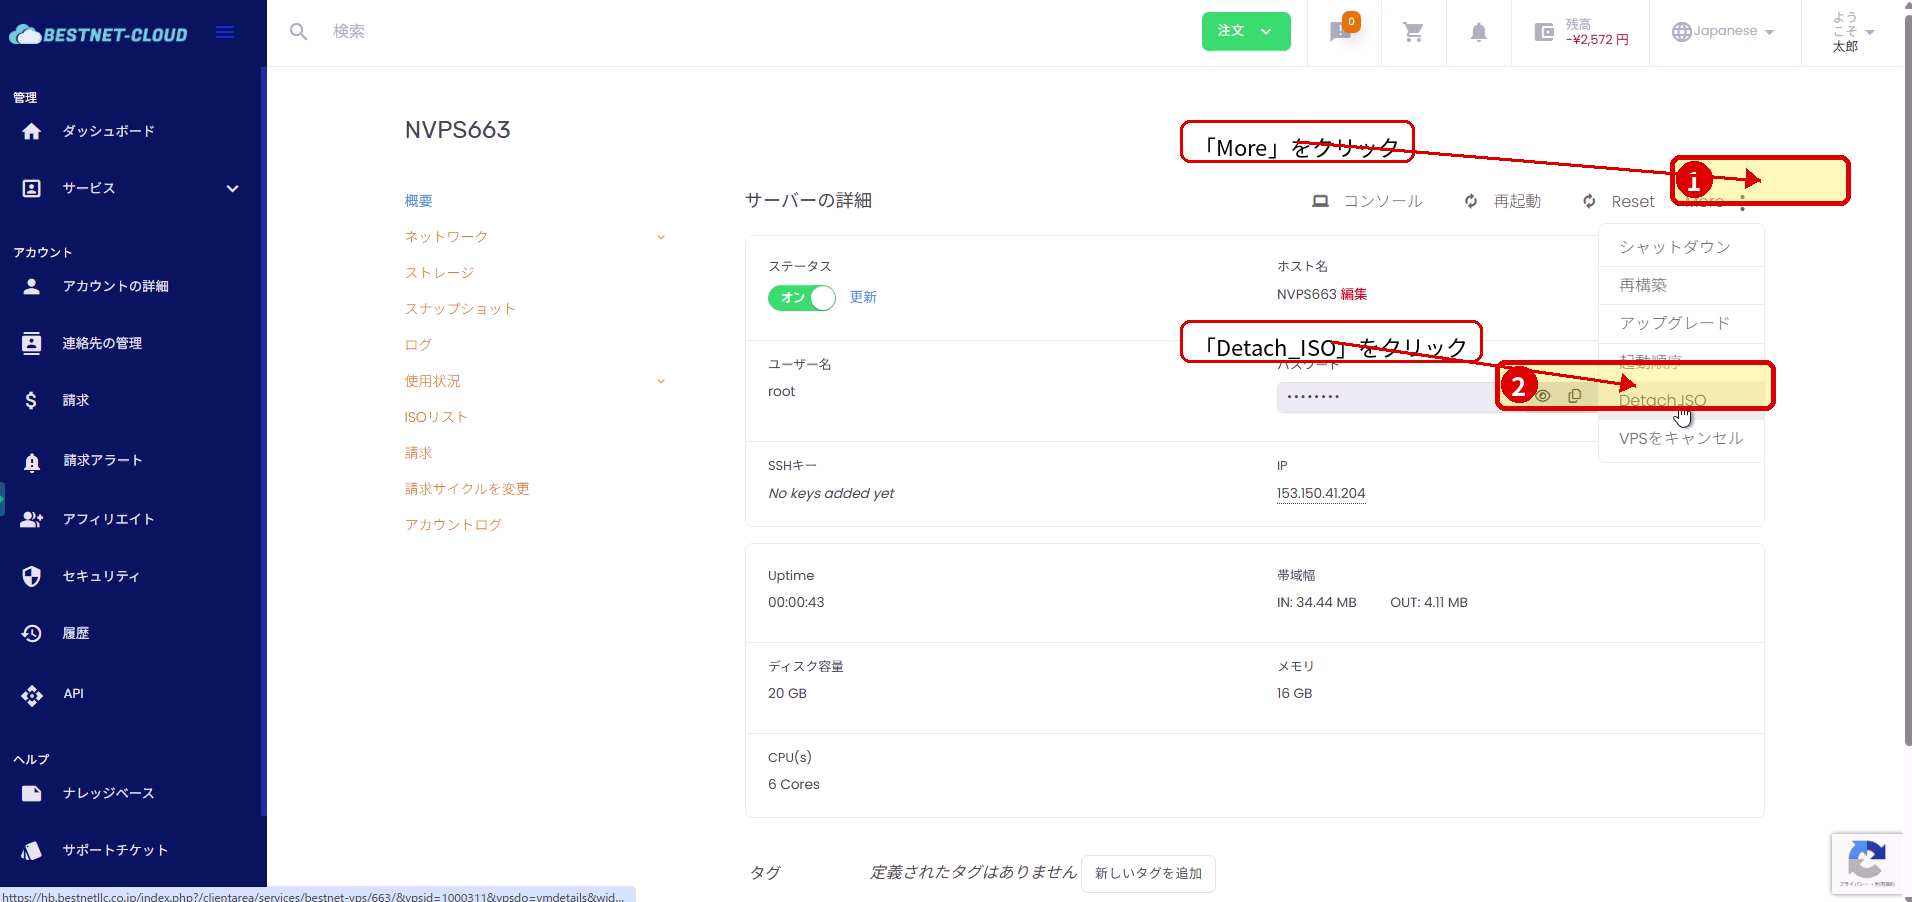
1. Execute Detach_ISO from the More Menu #
- After OS installation is complete or when the ISO is no longer needed, open More from the top right of the service details screen.
- Click Detach_ISO from the menu.
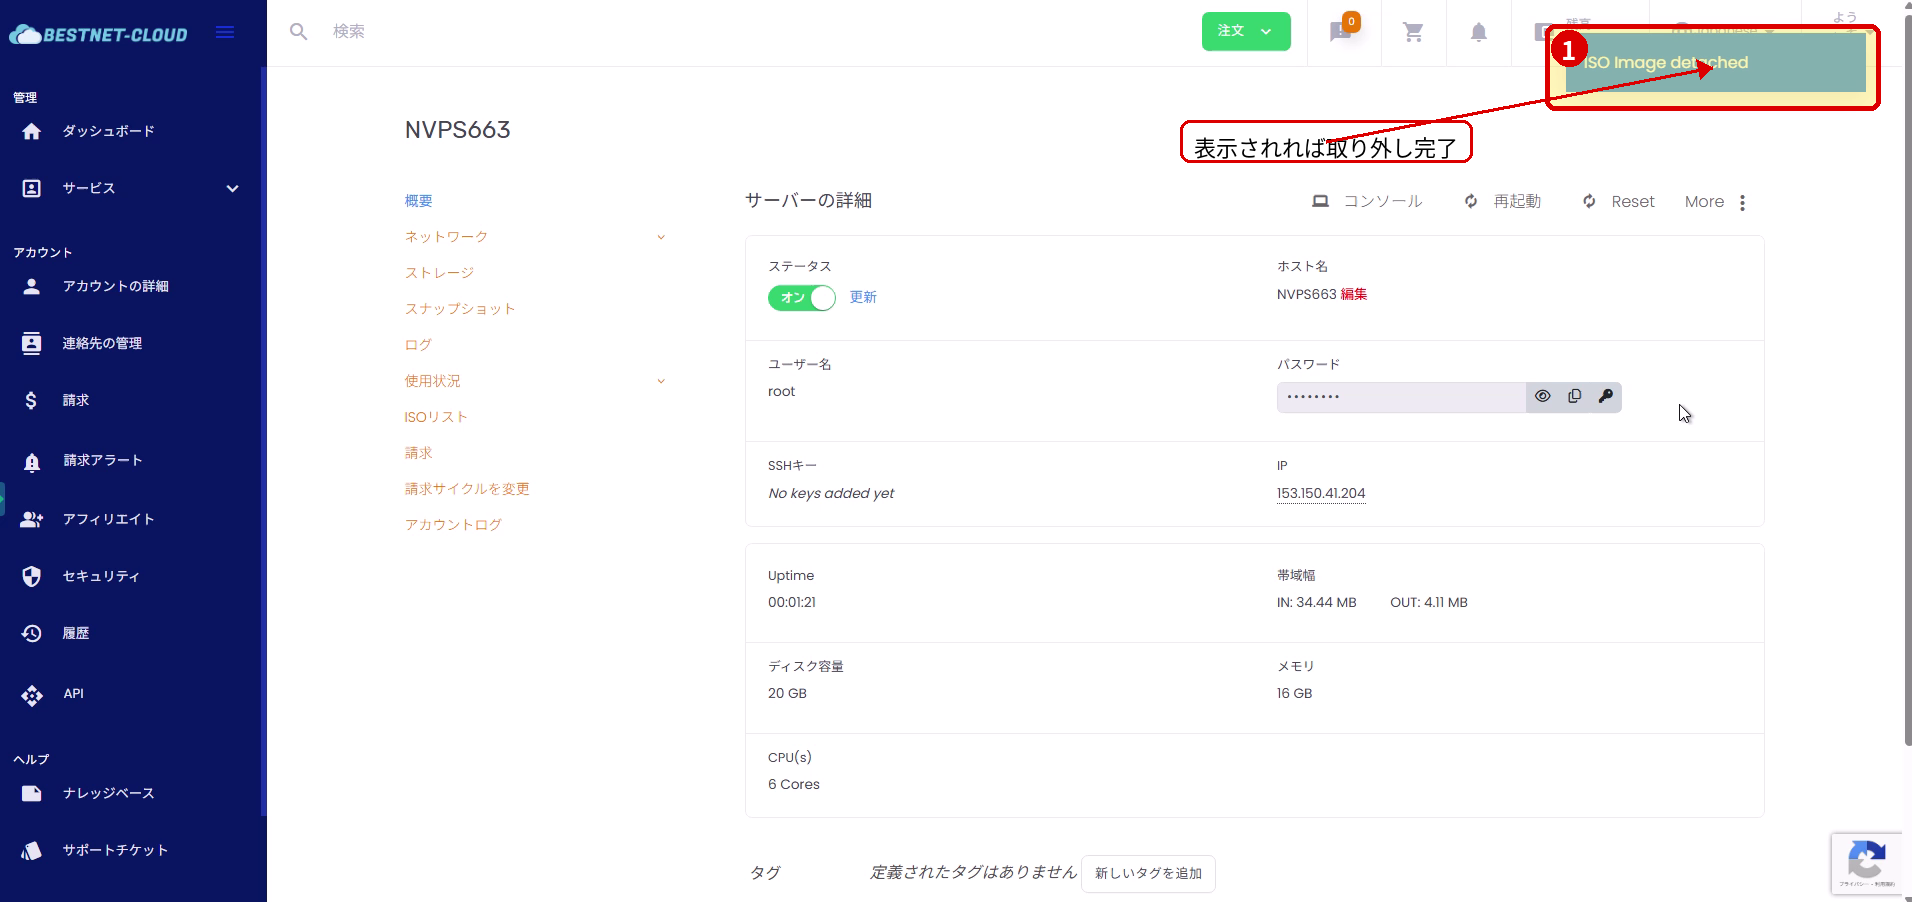
2. Confirm Detach Completion Message #
- A message such as ISO Image detached will appear in the top right corner, indicating the detach is complete.
Troubleshooting #
Upload does not progress or fails #
- Refresh your browser and try again.
- Check your connection status, ISO file size, and file extension.
- If the issue persists, try using a different browser.
Status does not become Ready #
- The import process may take time. Wait a moment and then refresh the display.
ISO does not boot #
- After executing Boot from ISO, check the boot screen from the console.
- If necessary, execute Boot from ISO again.
ISO remains after completing the task #
- Execute More → Detach_ISO and confirm the ISO Image detached message is displayed.


