
Overview #
This manual outlines how to manage DNS records for external domains not managed by us (domains registered with another registrar) from our Client Area (Client Portal).
The key point is to create a zone (domain for DNS management) in the Client Portal, migrate and create all necessary DNS records in advance, and then switch the nameservers (NS) to our DNS servers at the external registrar.
Create a zone for the target domain in DNS SERVICE in the Client Area.
Import current DNS settings or register them manually.
Replace the nameservers with our DNS servers at the external registrar.
Important (Read First: Preventing Incidents) #
- The moment you switch NS, the authoritative DNS switches to our DNS. If the new zone does not have all the necessary records at the time of the switch, Web / email / various authentication services will be immediately affected.
- In particular, email-related records (MX / SPF / DKIM / DMARC), authentication TXT records (Google / Microsoft / various SaaS / SSL auto-renewal, etc.), CAA, and SRV are often forgotten during migration.
- For domains with DNSSEC enabled, updating or deleting DS records may be necessary (see details below).
Disclaimer and Support Information #
- This manual outlines general operational examples. Required DNS records and migration procedures will vary depending on domain configuration and use of external services (email, various SaaS, SSL auto-renewal, etc.).
- We cannot be held responsible for indirect or consequential damages (lost opportunities, business interruptions, undelivered email, etc.) that result from following this procedure.
- If you have any questions / difficulty determining impact scope / DNSSEC is enabled / migrating email as well, please open a support ticket in our Client Portal for consultation before proceeding (we will provide guidance on items to verify based on your situation).
Prerequisites (Preparation) #
- Able to log into our Client Portal
- Your contract includes DNS SERVICE (DNS management service)
- You have authority to change nameservers at the domain registrar (e.g., Onamae.com / Cloudflare Registrar, etc.)
- Able to confirm current DNS settings (current DNS management panel, or zone file / record list)
- DNS record information you wish to add or modify (e.g., IP for A records, hostname for MX, TXT values, etc.)
Pre-Switch Checklist (Recommended: Always Perform Before NS Switch) #
- Record current DNS record list (A / AAAA / CNAME / MX / TXT / CAA / SRV / NS delegation, etc.)
- Verify email-related TXT records: SPF (
v=spf1), DKIM (selector._domainkey), DMARC (_dmarc) - Verify authentication/automation TXT records:
_acme-challenge, Google / Microsoft / various SaaS verification TXT, etc. - Check for DNSSEC (if enabled, refer to “DNSSEC Precautions”)
- If switch date is determined: Shorten TTL in advance if possible (e.g., 300-600 seconds)
※TTL reduction should be done first on the “current DNS side” and may take time to propagate.
Procedure #
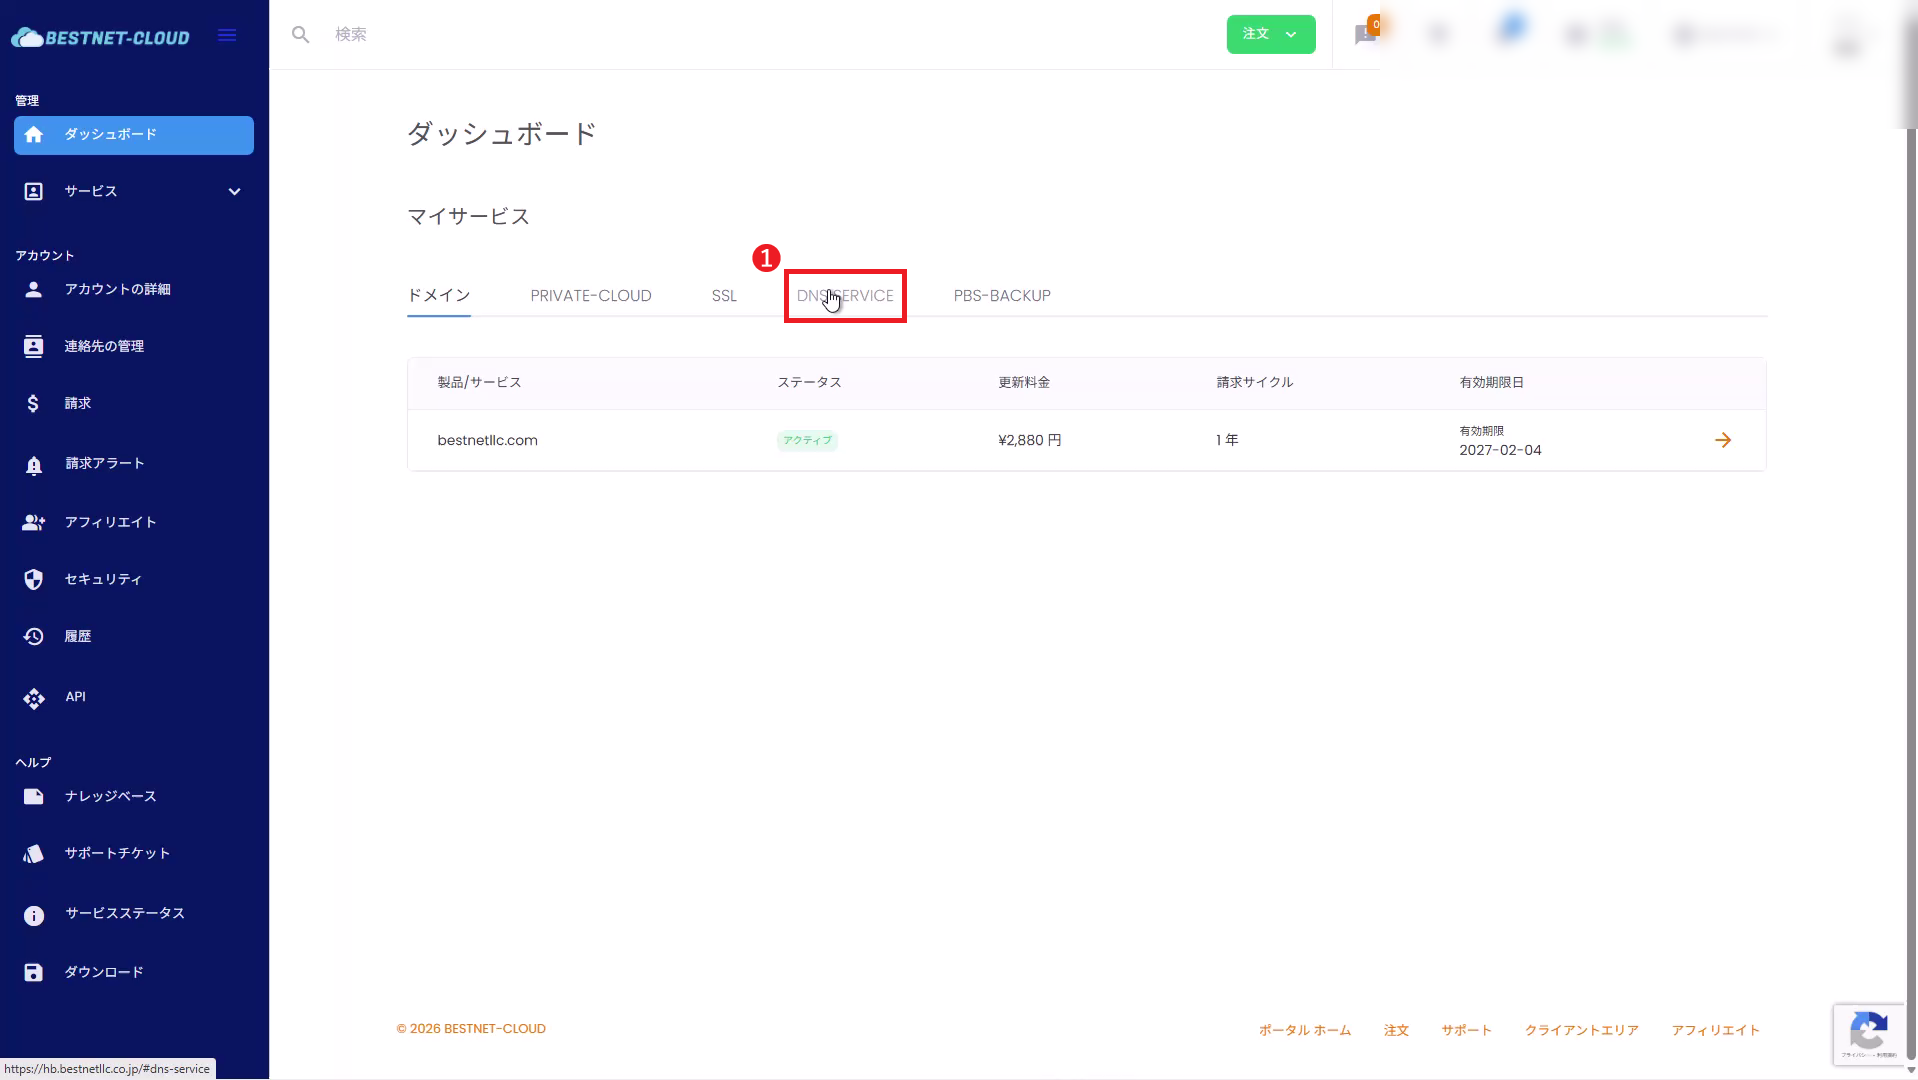
1Open DNS SERVICE #
Open DNS SERVICE from the left menu.
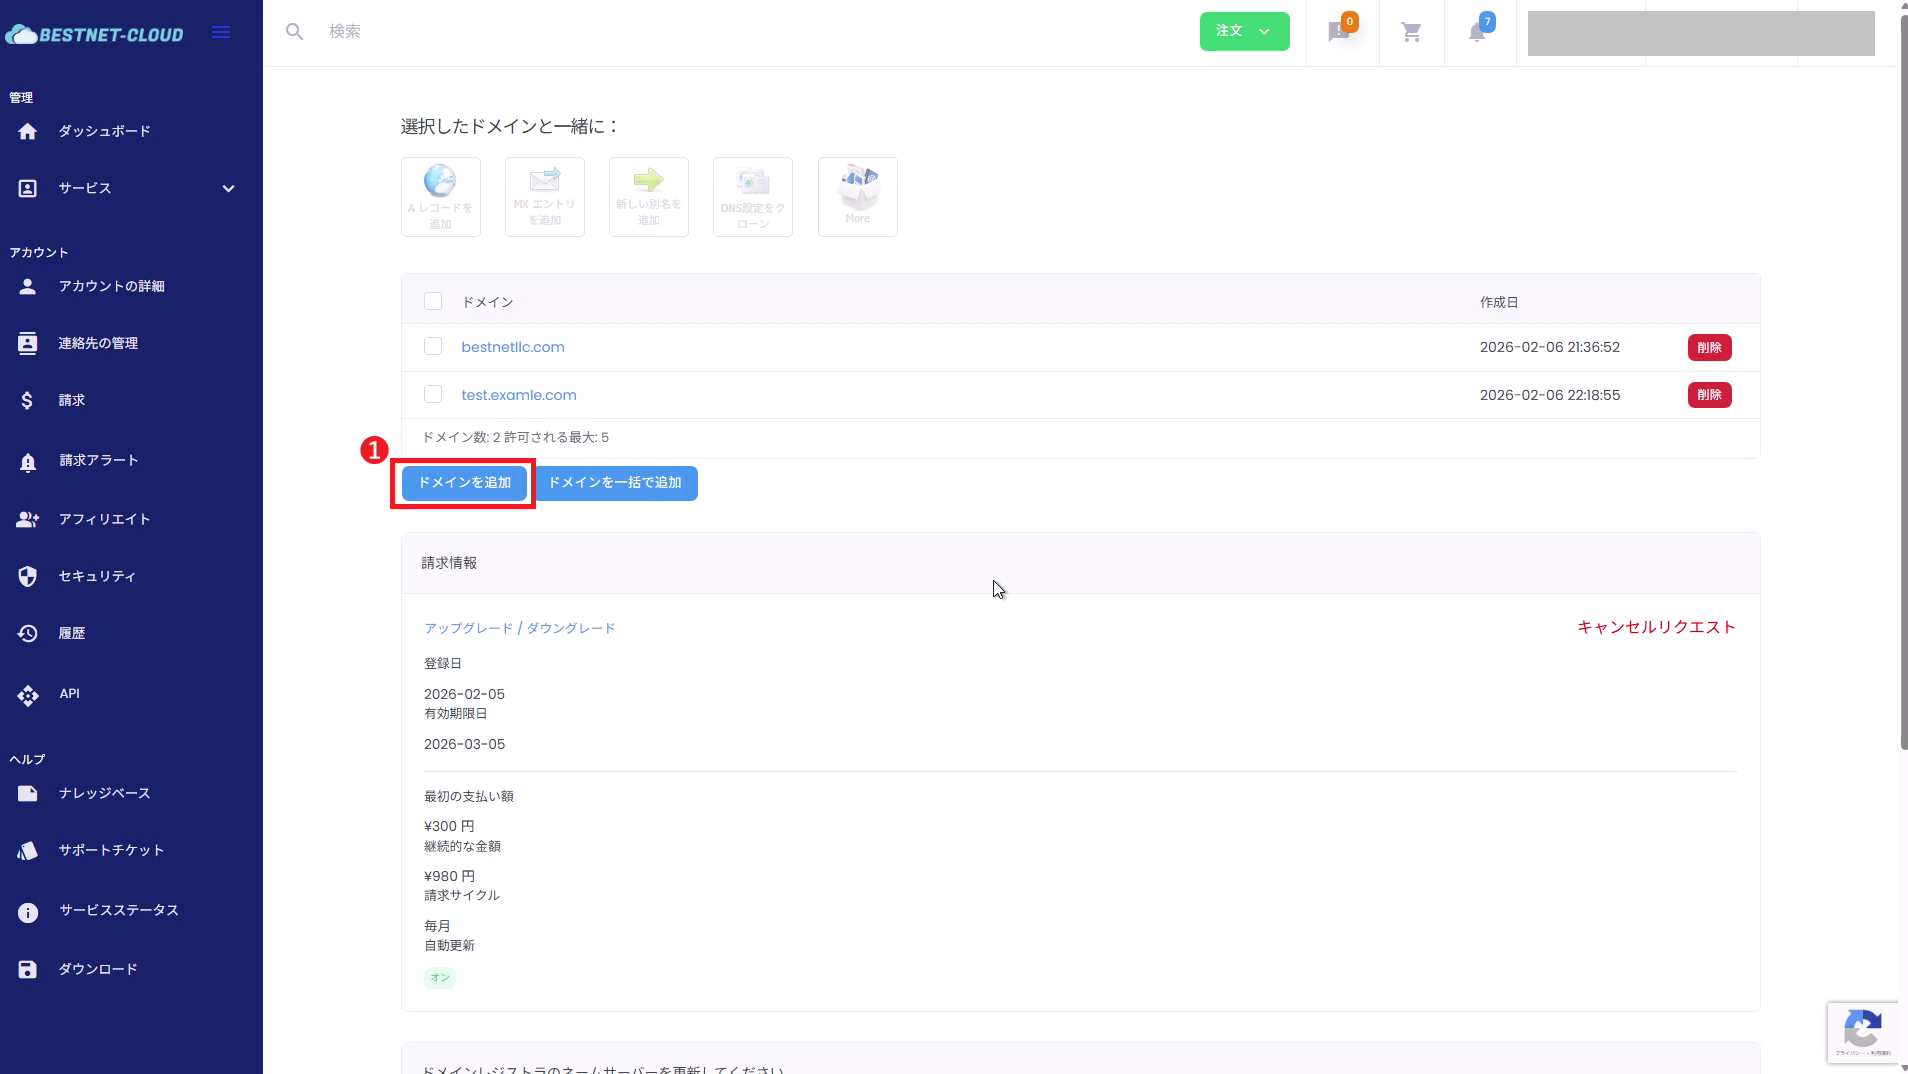
2Add DNS Zone (External Domain) #
2-1. Click “Add Domain”
In the DNS SERVICE management console, click Add Domain.
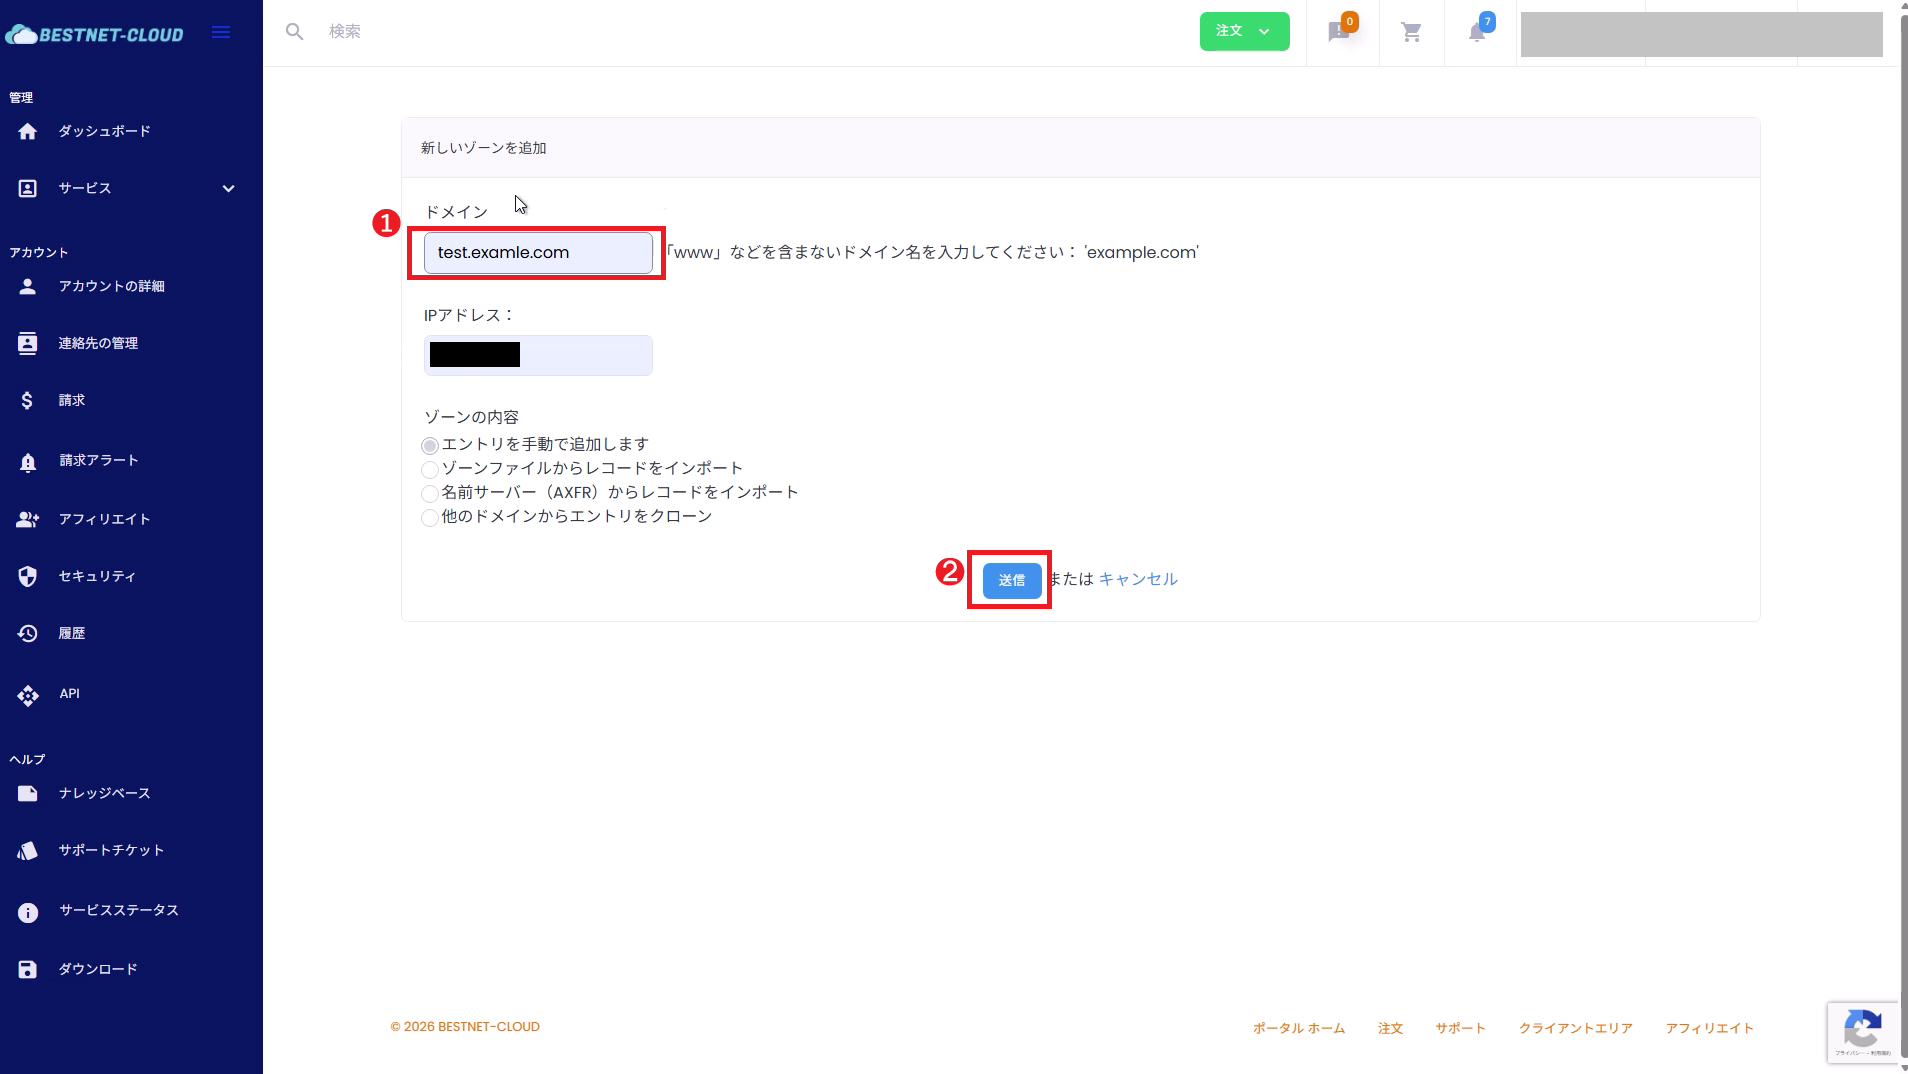
2-2. Enter Domain Name and Submit
On the “Add New Zone” screen, enter the target domain.
- Domain: Enter the root domain without www, such as
example.com - IP Address: Recommended to leave blank (it is safer to explicitly add necessary records later)
※If you do enter an IP here for operational reasons, follow the screen specifications regarding whether an A record is automatically created or not. - Zone Content: If existing DNS is present, it is safer to select Import (zone file / AXFR, etc.) if possible. If migrating manually, select “Add entries manually”.
After entering the information, click Submit.
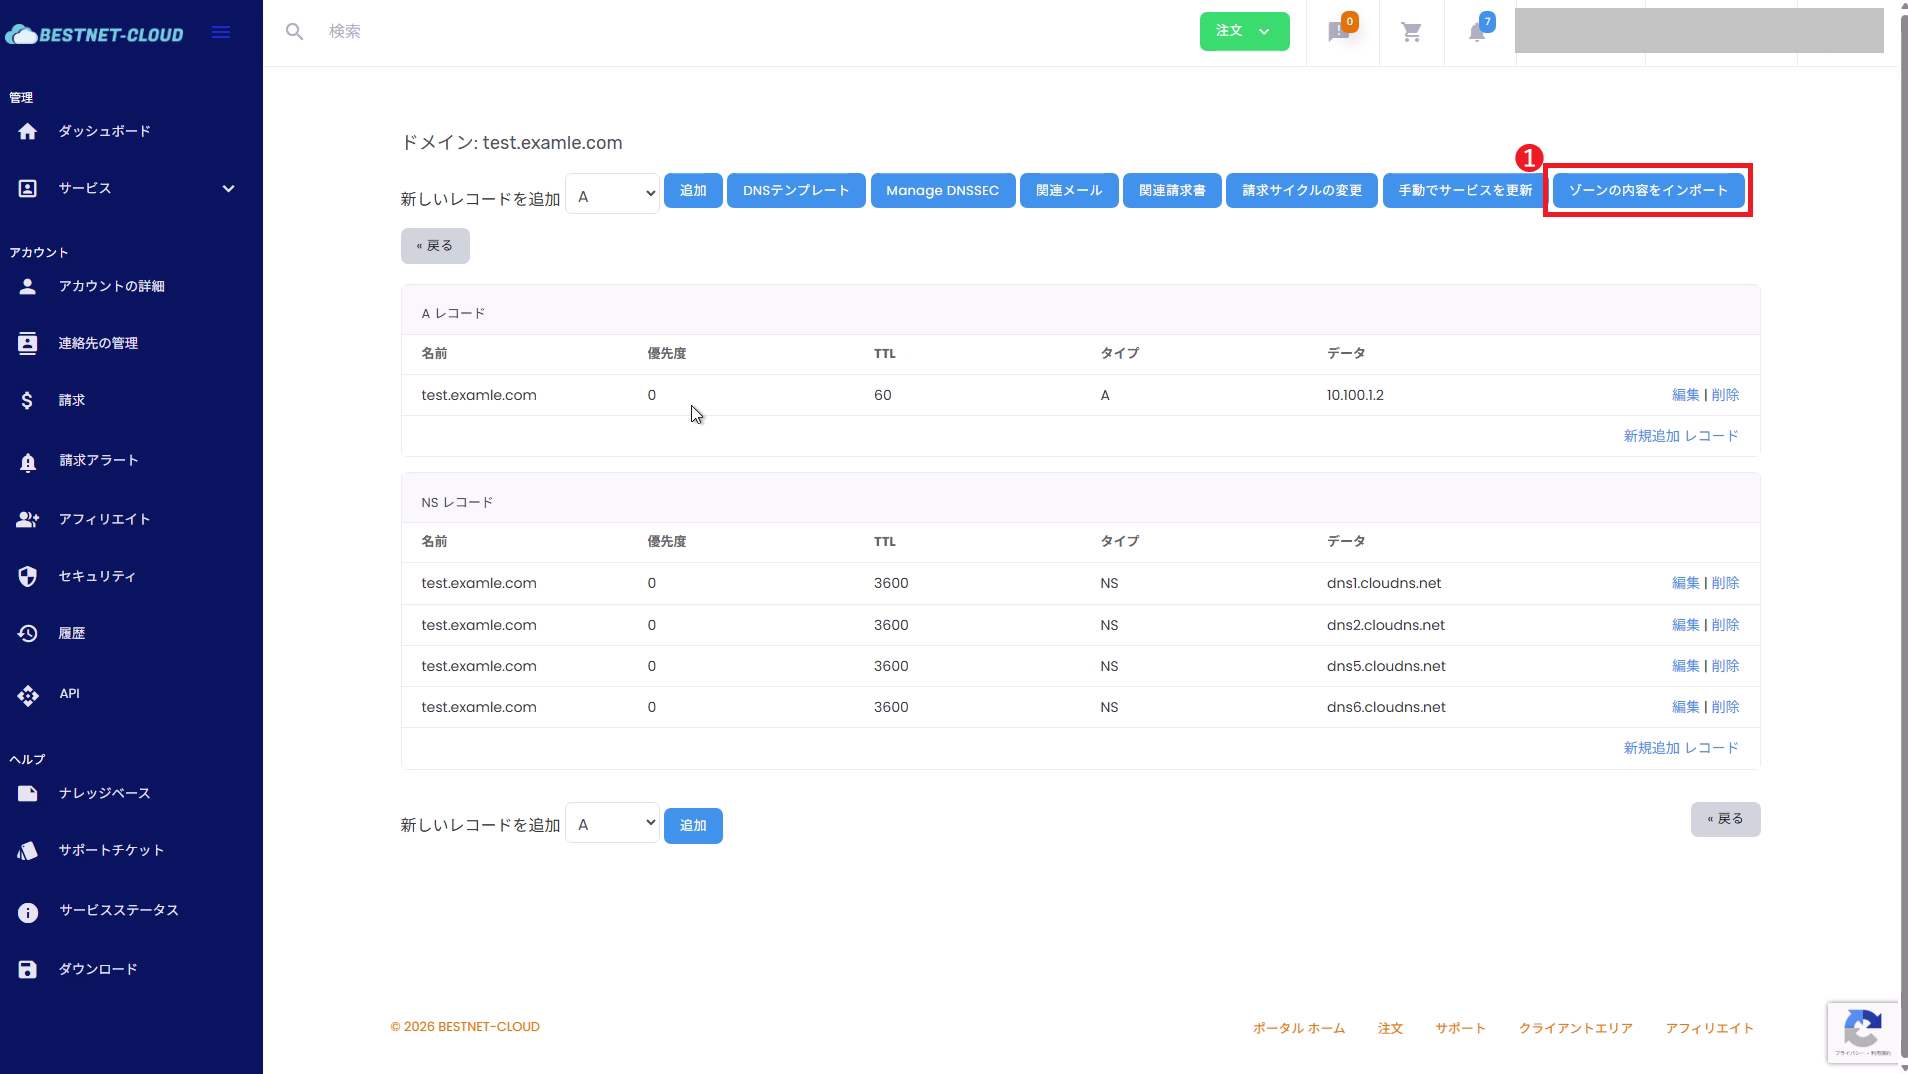
3(Recommended) Import / Manually Migrate Existing DNS Settings #
Before switching NS records, migrate the records existing in the current DNS to our DNS service.
This is the most critical step to prevent incidents.
- If possible, use “Import zone content” (zone file / AXFR, etc.).
- If import is not possible, manually create records while referencing the current DNS record list.
- MX, SPF (TXT), DKIM (TXT), DMARC (TXT)
- Verification TXT records (Google / Microsoft / various SaaS)
_acme-challenge(TXT) for SSL automatic renewal, etc.- CAA, SRV, subdomain delegation (NS)
4Add and Adjust DNS Records (Example: A Record) #
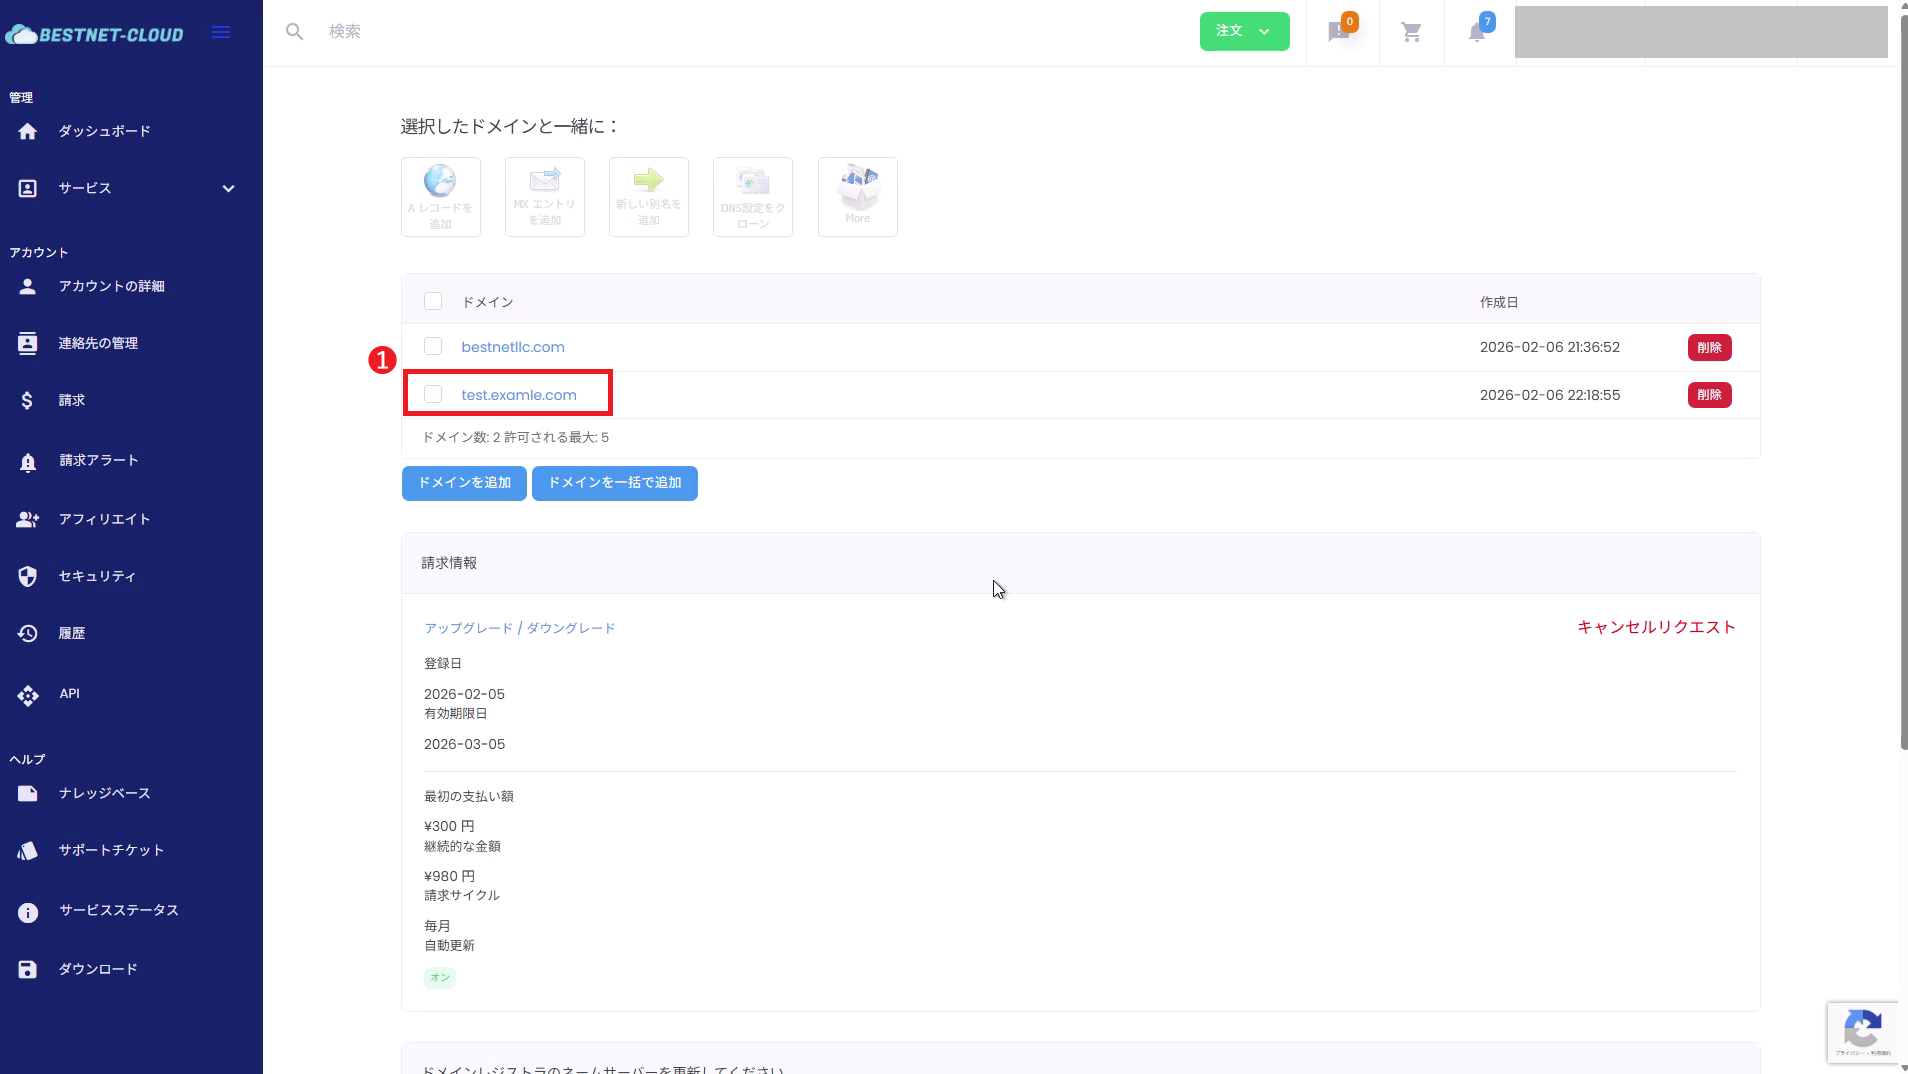
4-1. Open the Target Domain (Zone)
From the domain list, click the domain name you want to edit to open the zone details.
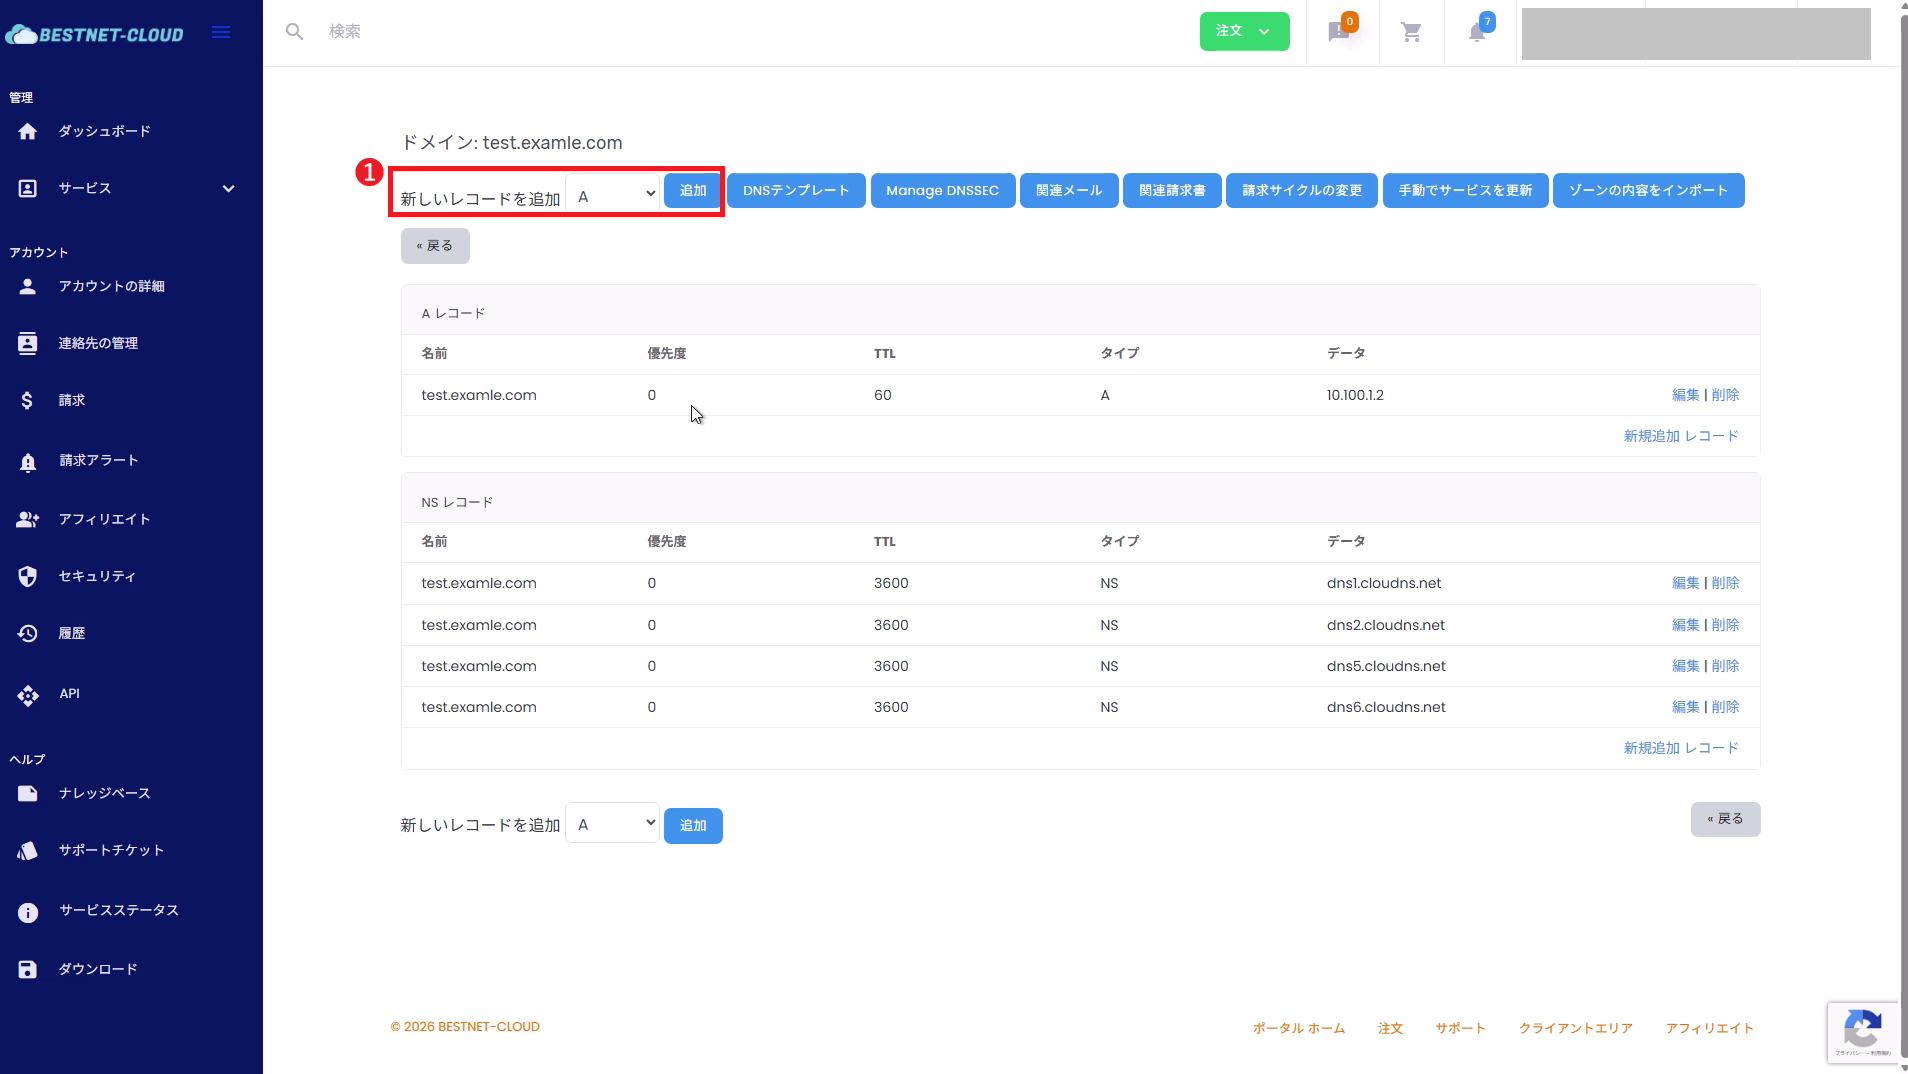
4-2. Select Record Type and Click “Add”
In the “Add new record” section at the top of the zone details, select the record type you want to add (A / CNAME / MX / TXT, etc.), and click Add.
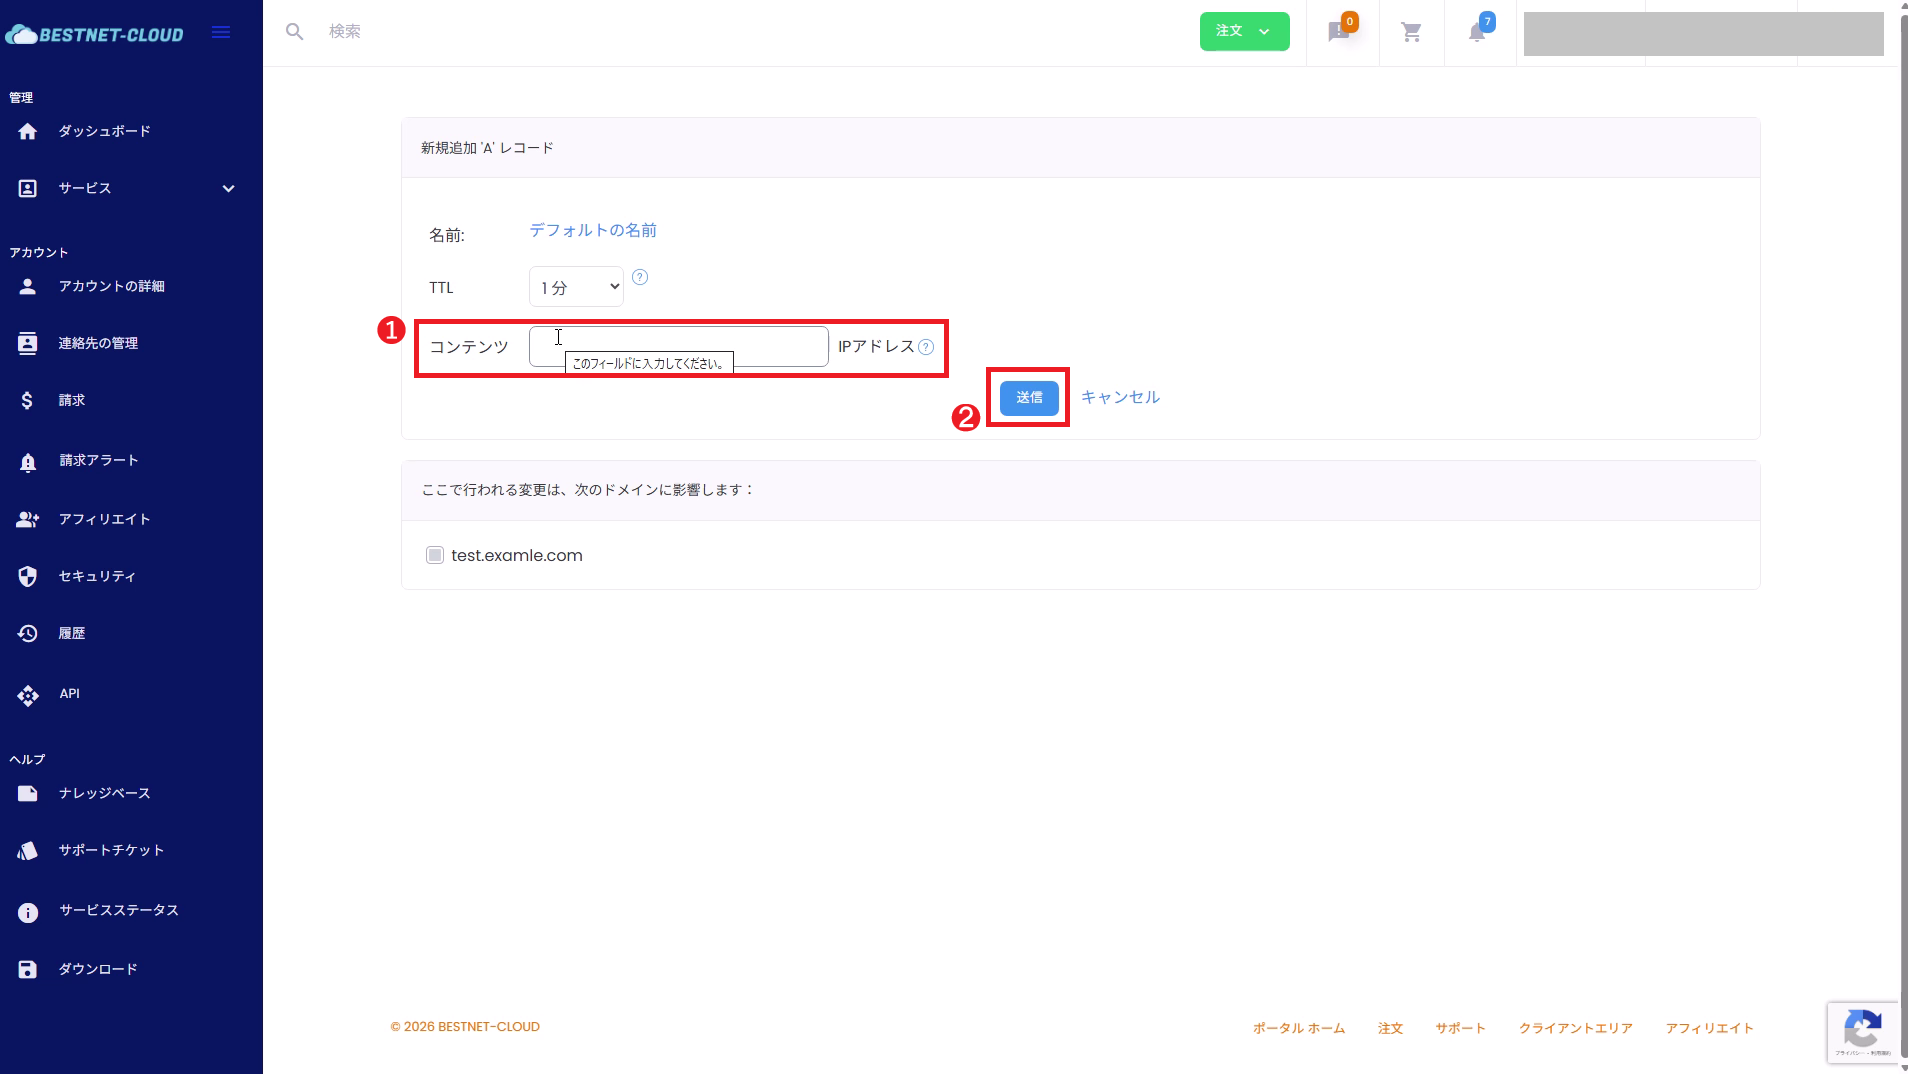
4-3. Enter Values and Submit
For an A record example, configure the following main settings:
- Name: For the root (@) equivalent, it is common to use the “default name” as is. For subdomains, specify
www, etc. (enter according to screen specifications). - TTL: The default is usually fine. You may adjust operationally, such as shortening it during the switchover period.
- Content (IP Address): Enter the IP address you want to assign.
After entering the information, click Submit.
5Switch the Nameservers at Your External Registrar (Important) #
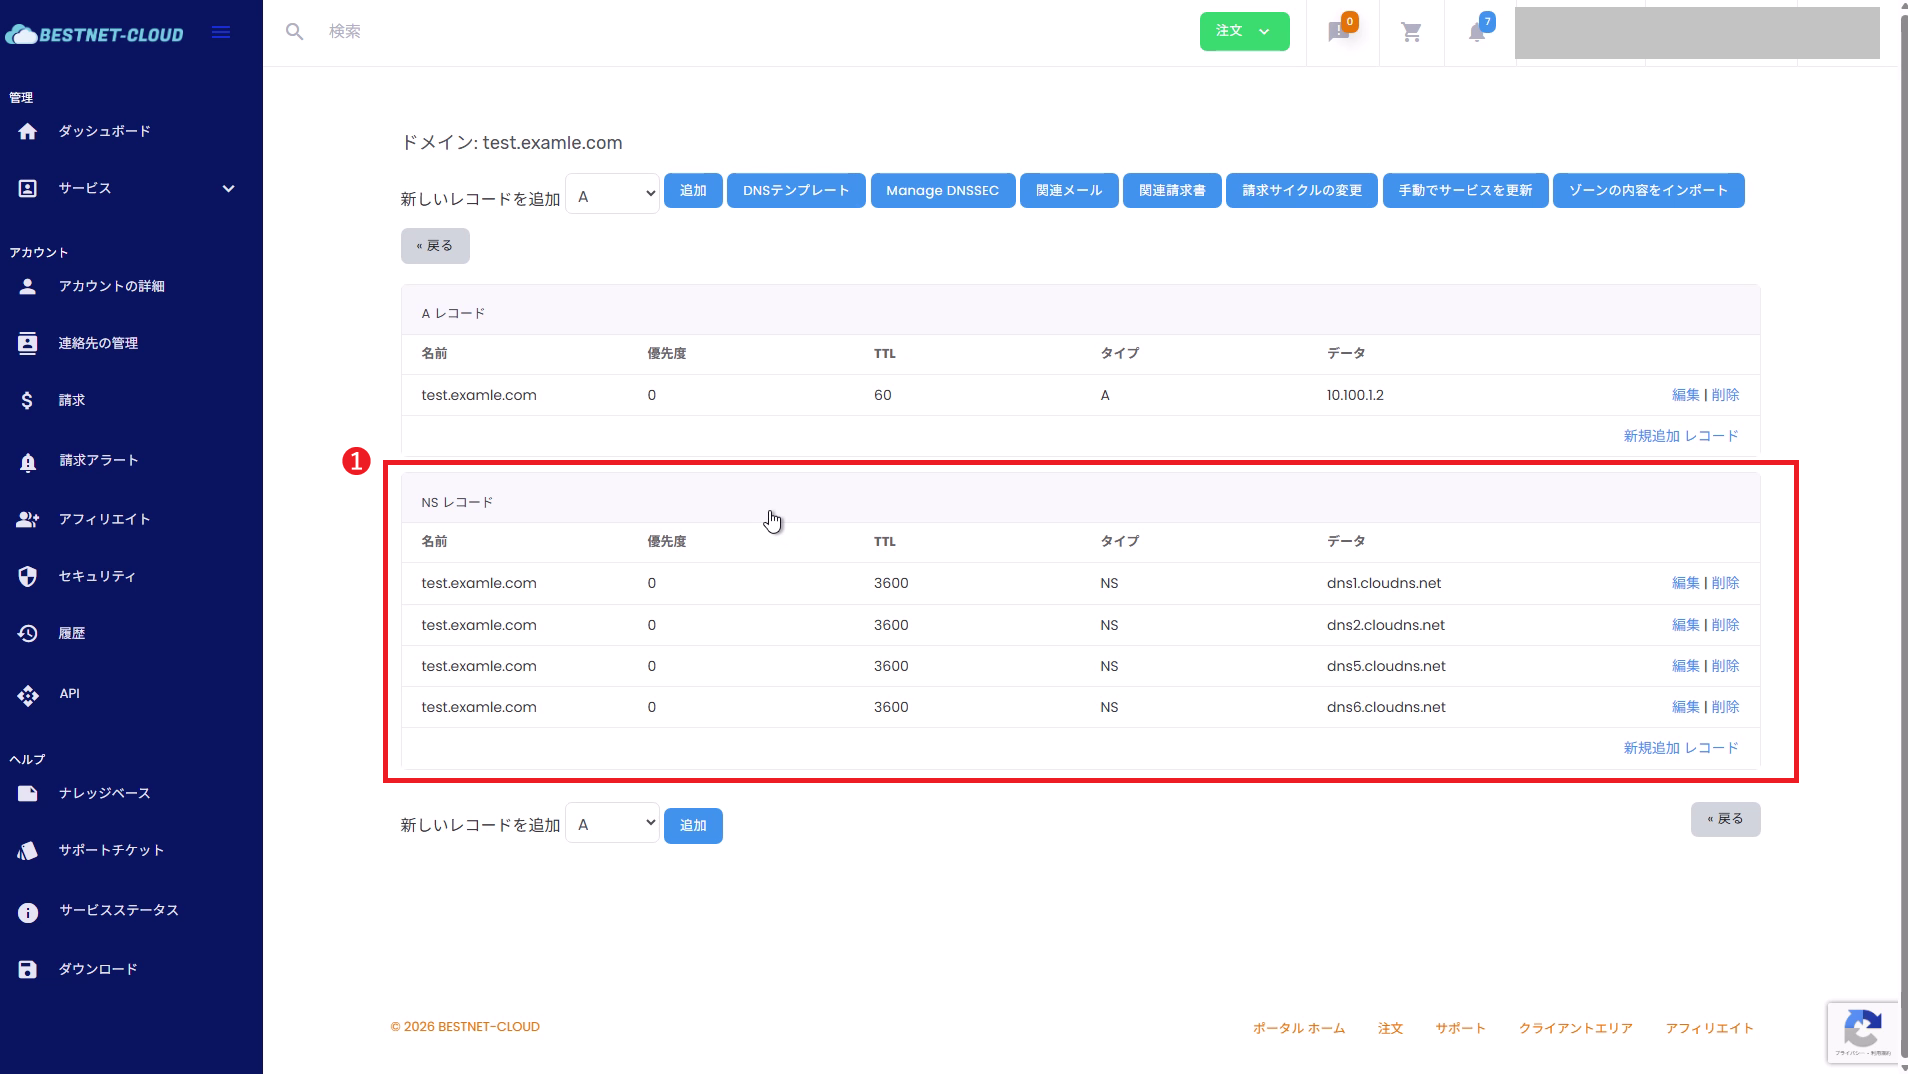
To manage an external domain with our DNS service, you must “replace” the nameservers (NS) at your domain registrar (management company) with the specified values of our DNS servers.
- In the zone details screen of the client portal, check the NS (nameserver list).
- In your external registrar’s management interface, replace all the domain’s nameservers with the above NS values.
※ Most registrars require “replacement,” not “addition.”
If you have not switched the nameservers, records added on our DNS service will not be referenced from external sources.
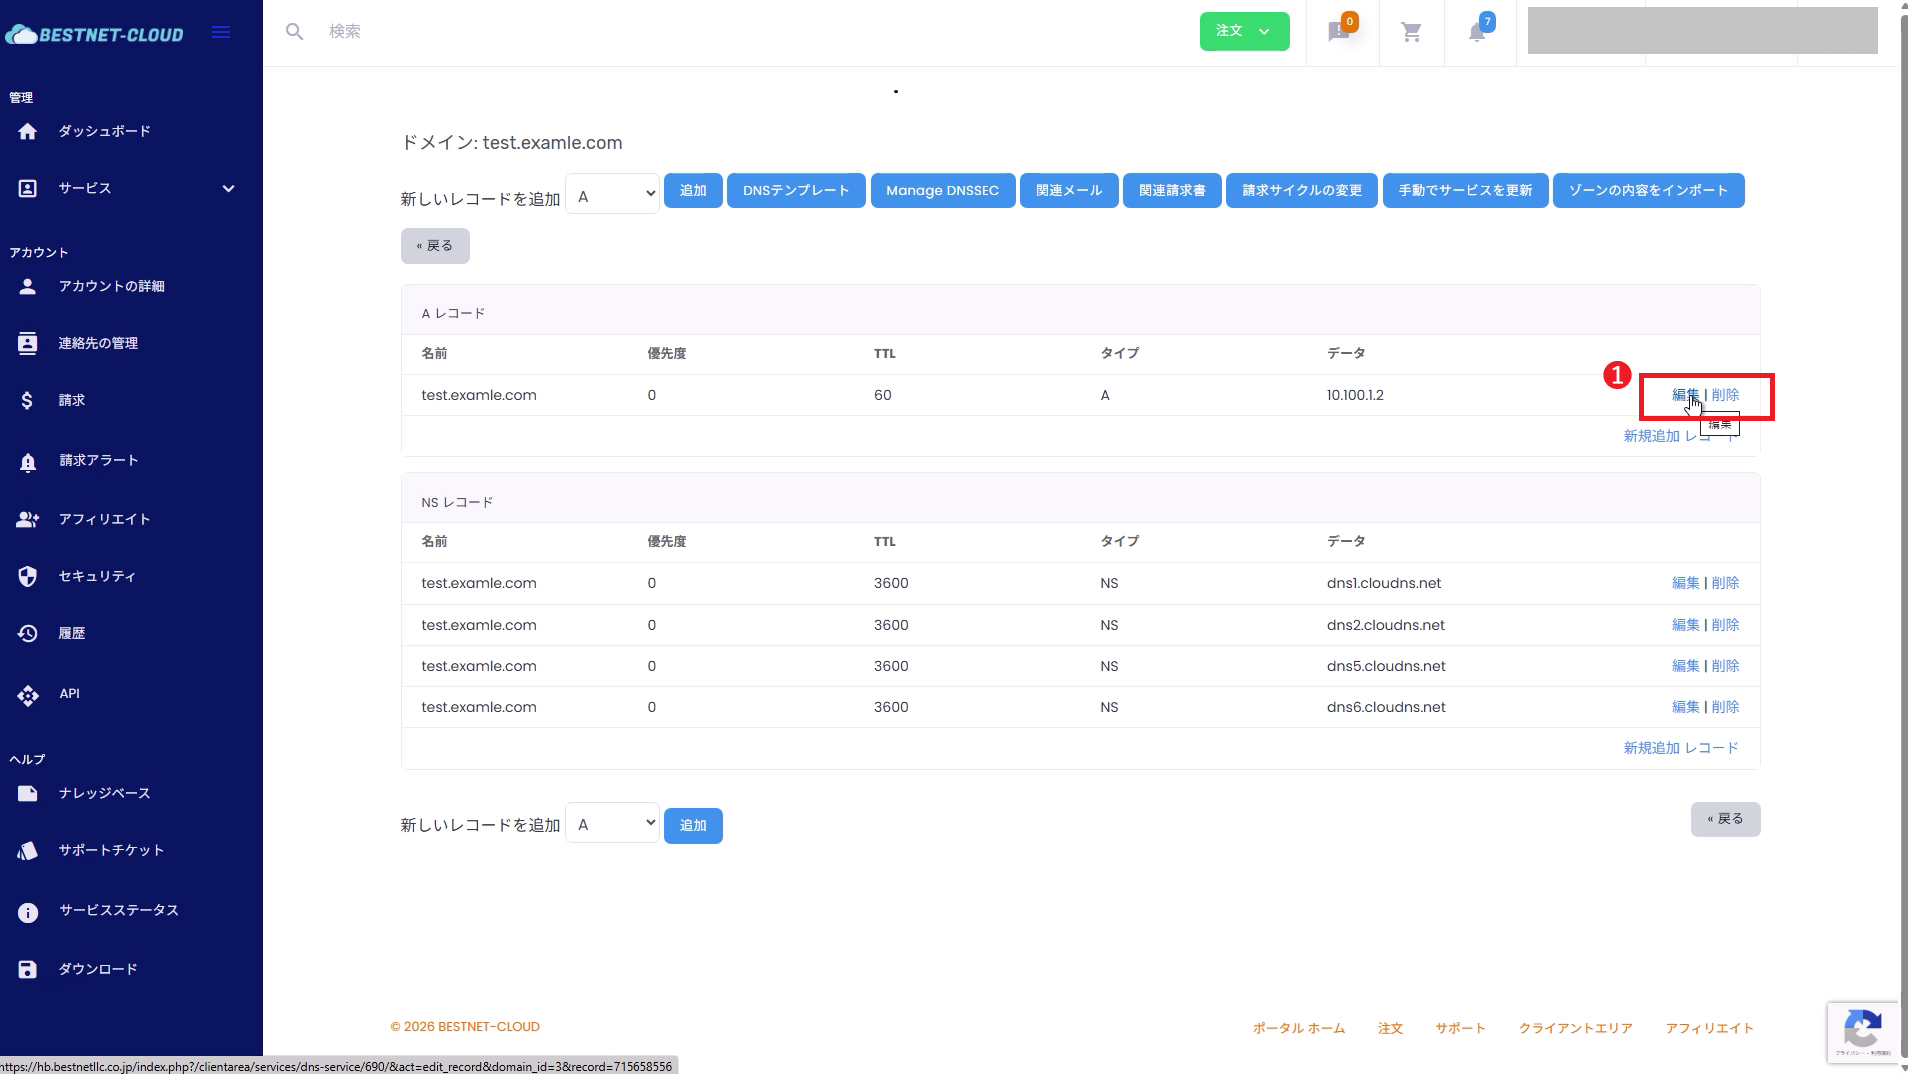
6Edit or Delete DNS Records #
From the record list in the zone details, click Edit / Delete for the target row.
DNSSEC Precautions (If Applicable) #
- If DNSSEC is enabled for the target domain, DS record mismatches during NS switching may cause name resolution to fail.
- If DS record settings exist at the registrar, you must delete / update the DS records according to the switching procedure.
- The response varies depending on your operational policy (continue DNSSEC / temporarily disable it). If you are unsure, please open a support ticket from our client portal before proceeding.
Verification (Functional Check) #
- In the client portal, verify that the added records appear in the zone details list
- After switching nameservers, verify that external name resolution works (authoritative NS is our NS)
External Verification Examples (Recommended)
dig NS example.comdig A example.comdig A www.example.comdig MX example.comdig +trace example.comNote: Nameserver changes and DNS propagation may take time. TTL, registrar reflection time, and cache status also affect this.
Troubleshooting #
- Verify that the NS at the registrar matches the NS values displayed in the zone details of the client portal.
- Check if DNSSEC is enabled and DS records remain (see DNSSEC Precautions).
- Multiple records with the same name may exist (e.g., multiple A records, multiple TXT records).
- Check for CNAME conflicts with other records (CNAME and A / MX / TXT, etc. cannot coexist with the same name in principle).
- Use
digor similar tools for external verification to see which values are being returned.
- The TTL may be long or cache may remain. Wait and recheck after some time.
- We recommend reducing the TTL during switching and restoring it to an appropriate value after completion.
- Check that MX / SPF / DKIM / DMARC (TXT) records were not missed during migration.
- DKIM in particular involves many subdomain TXT records such as
selector._domainkeyand is easily overlooked.
When You Need Help (Opening a Support Ticket) #
If you have any questions or encounter issues that persist after the switchover, please open a support ticket from our client portal.
Including the following information will help us investigate more smoothly:
- Target domain name
- Registrar name (e.g., Onamae.com, etc.)
- Screenshot of the zone page in the client portal (NS list and relevant record list)
- External verification results (e.g., output of
dig NS example.com/dig +trace example.com) - Description of the issue (e.g., website not loading, emails not being received, etc.) and the time it occurred


