
Client Portal Guide
Client Portal: Snapshot Operations Guide #
This document outlines the procedures for creating, deleting, and scheduling snapshots of your VPS through the client portal.
Prerequisites #
- You must be able to log in to the client portal
- You must have access rights to the target service (e.g., VPS)
- The number of snapshots you can create and retain depends on your service plan and limit settings
Creating a Manual Snapshot #
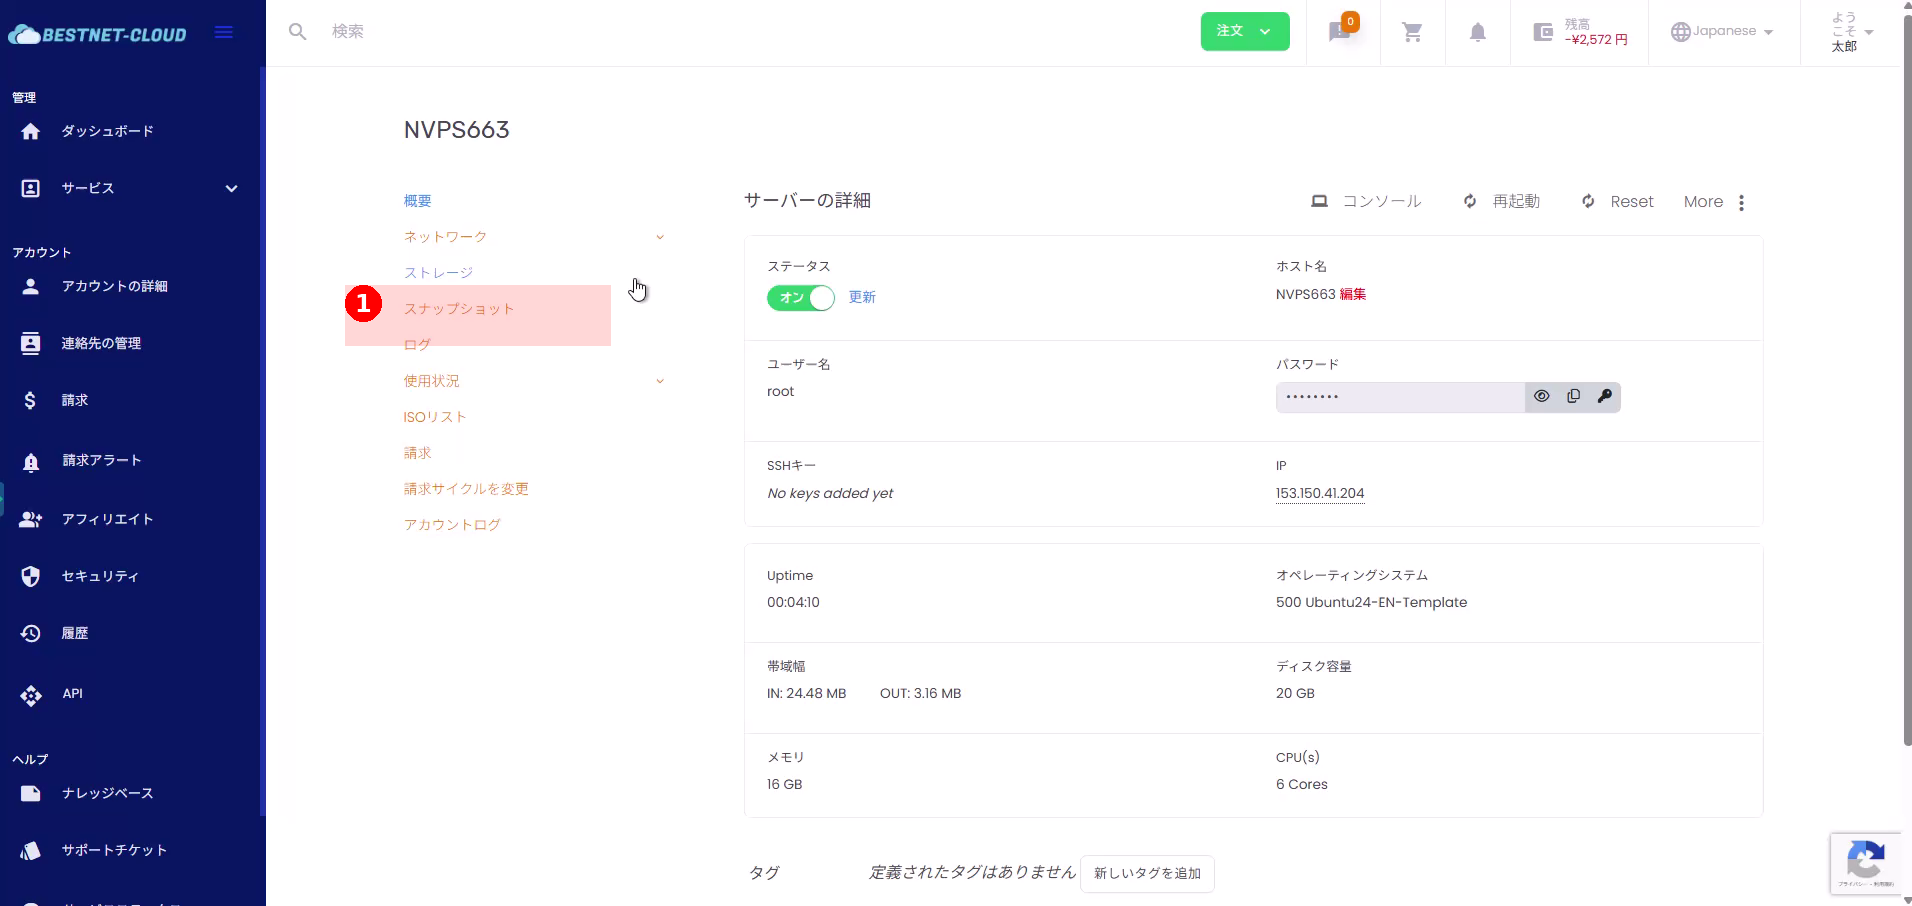
1. Open the Snapshot Screen #
- Open the details screen for your target VPS in the portal.
- Click Snapshot from the service menu on the left side of the screen.
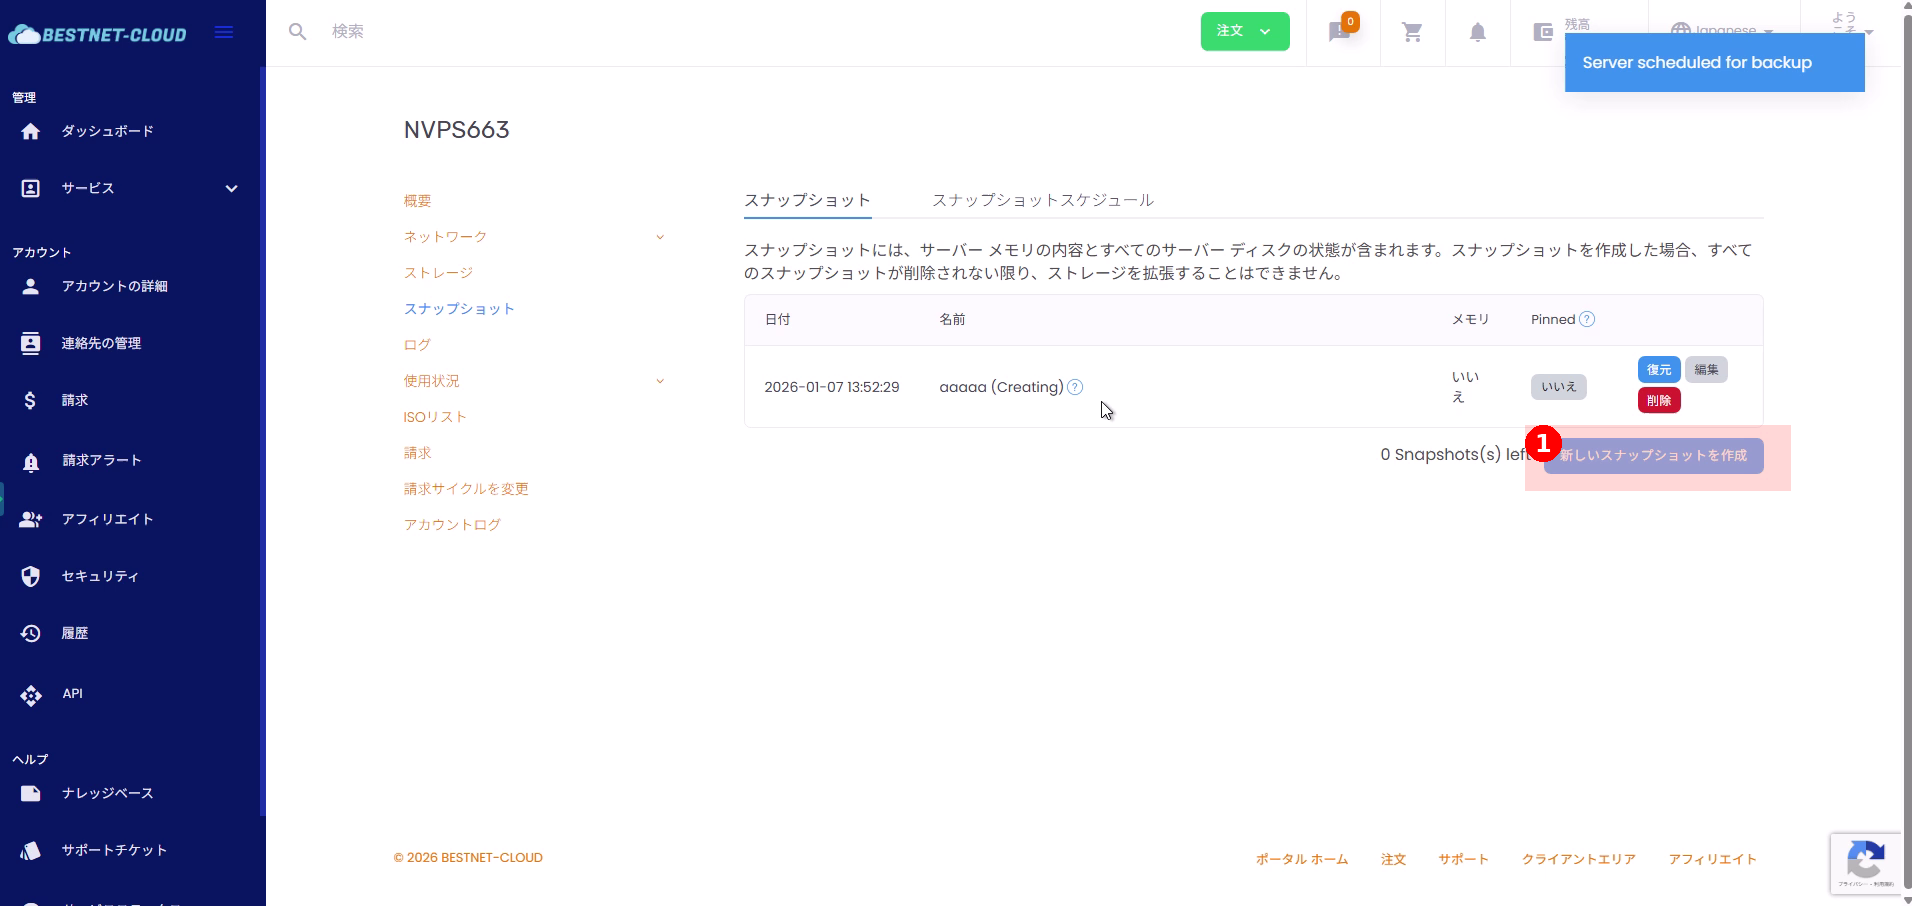
2. Click “Create New Snapshot” #
- Click Create New Snapshot on the right side of the snapshot list screen.
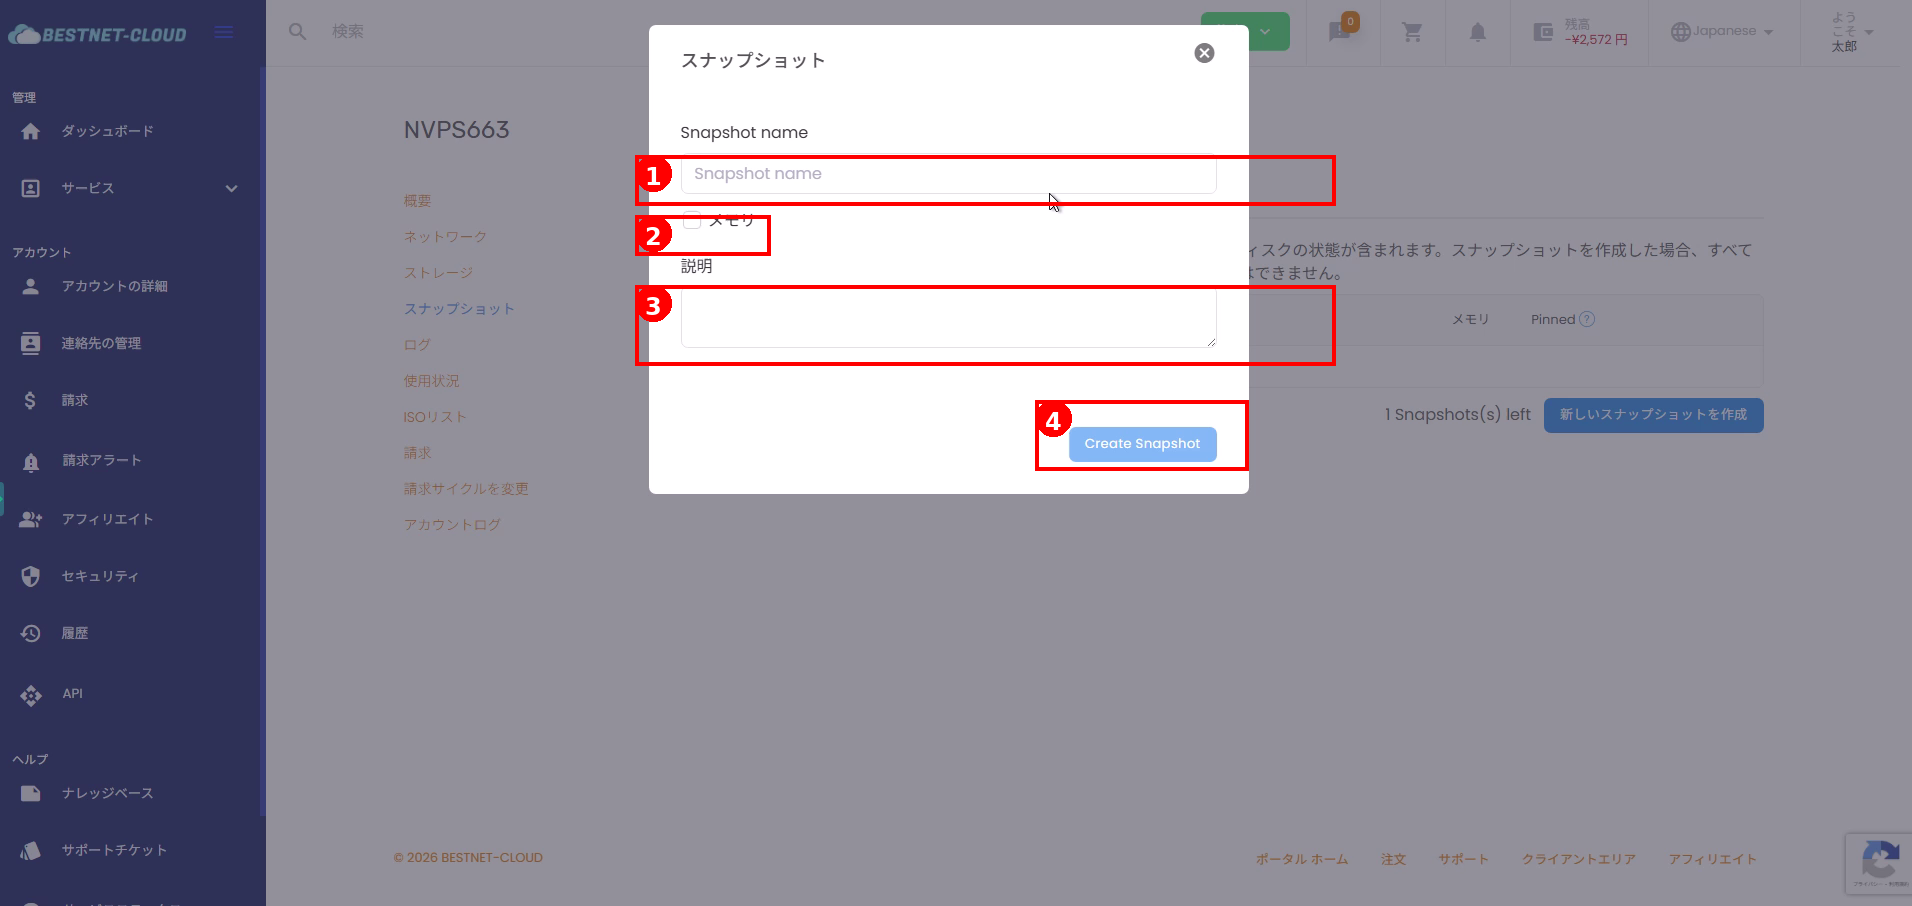
3. Enter Required Information and Create the Snapshot #
- Enter a snapshot name in the Snapshot name field.
- If needed, check the option to include memory (handling of stopped/running states varies by environment, so follow your operational guidelines).
- Optionally enter a description with usage details or creation purpose.
- Click Create Snapshot.
4. Check Creation Status #
- Right after creation, the snapshot appears in the list with a status like Creating.
- When complete, the status changes to Current or similar.
Managing Snapshots #
1. Set Pinned #
- Locate the target snapshot row in the snapshot list.
- Toggle the Pinned column (e.g., No/Yes) to enable or disable pinning.
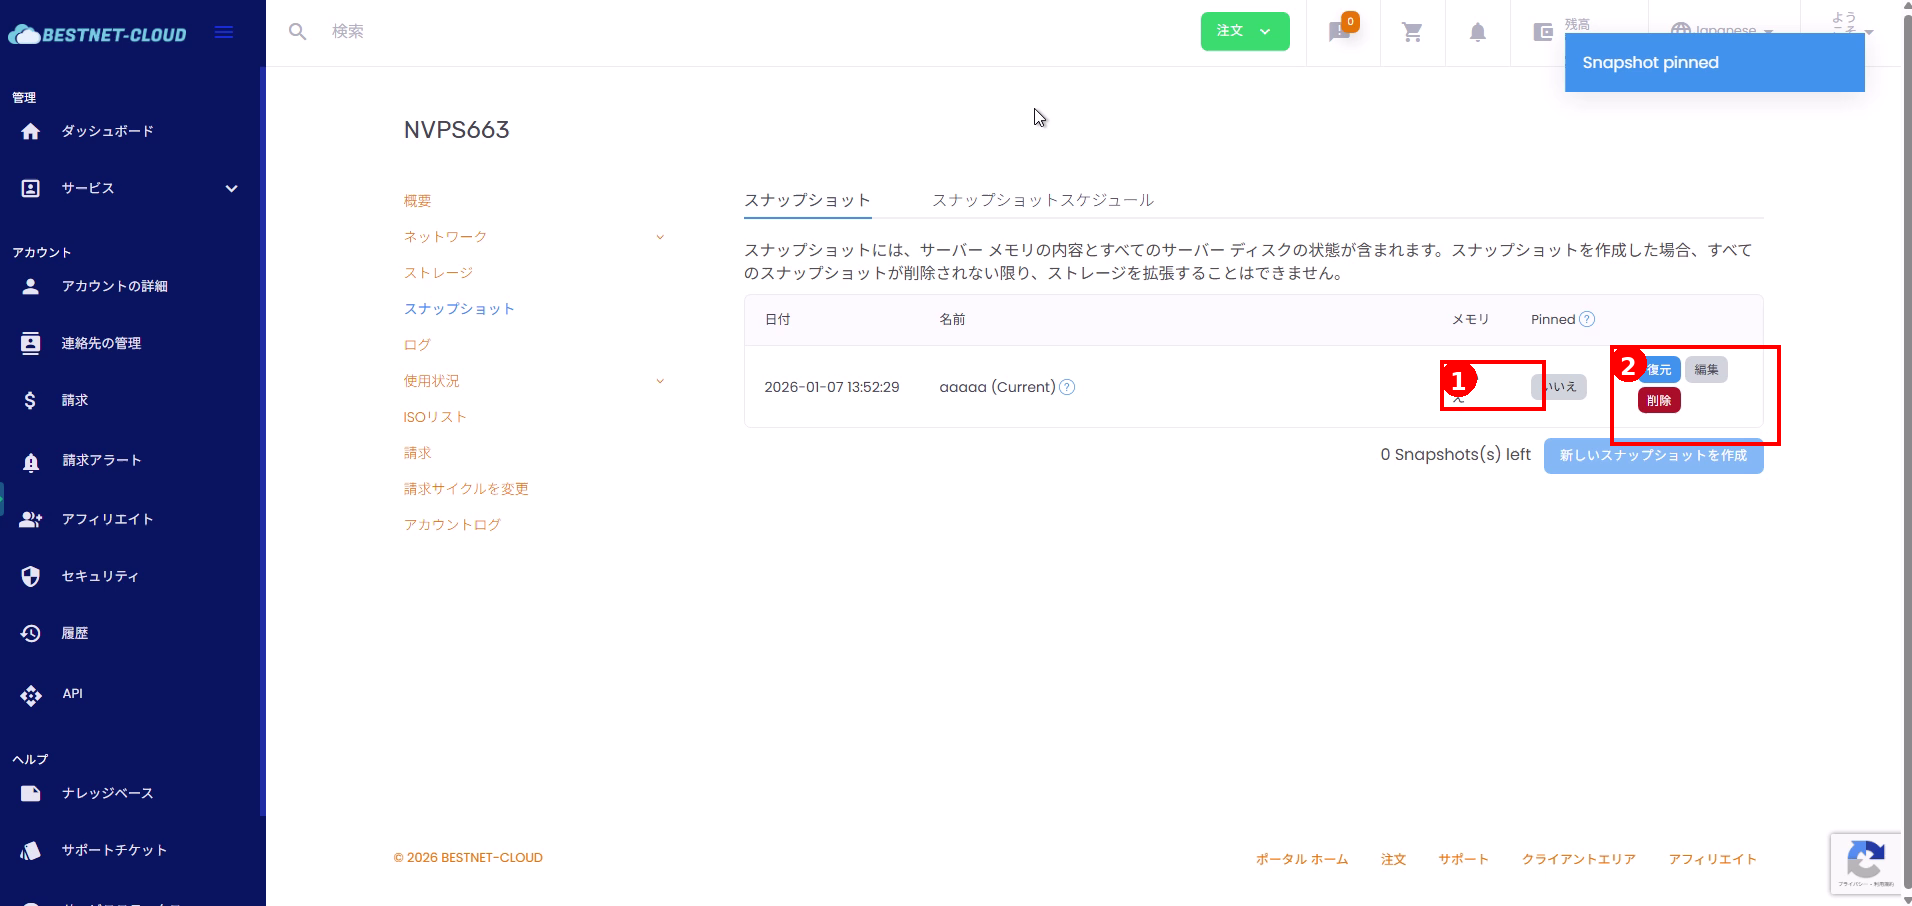
2. Restore from a Snapshot #
- Click Restore on the target snapshot row.
- If a confirmation dialog appears, verify the content and execute the restore.
3. Delete a Snapshot #
- Click Delete on the target snapshot row.
- When the deletion request is accepted, a message like “scheduled for removal” may appear.
- Deletion may take time to complete. Refresh the screen to check the status.
Configuring Snapshot Schedules #
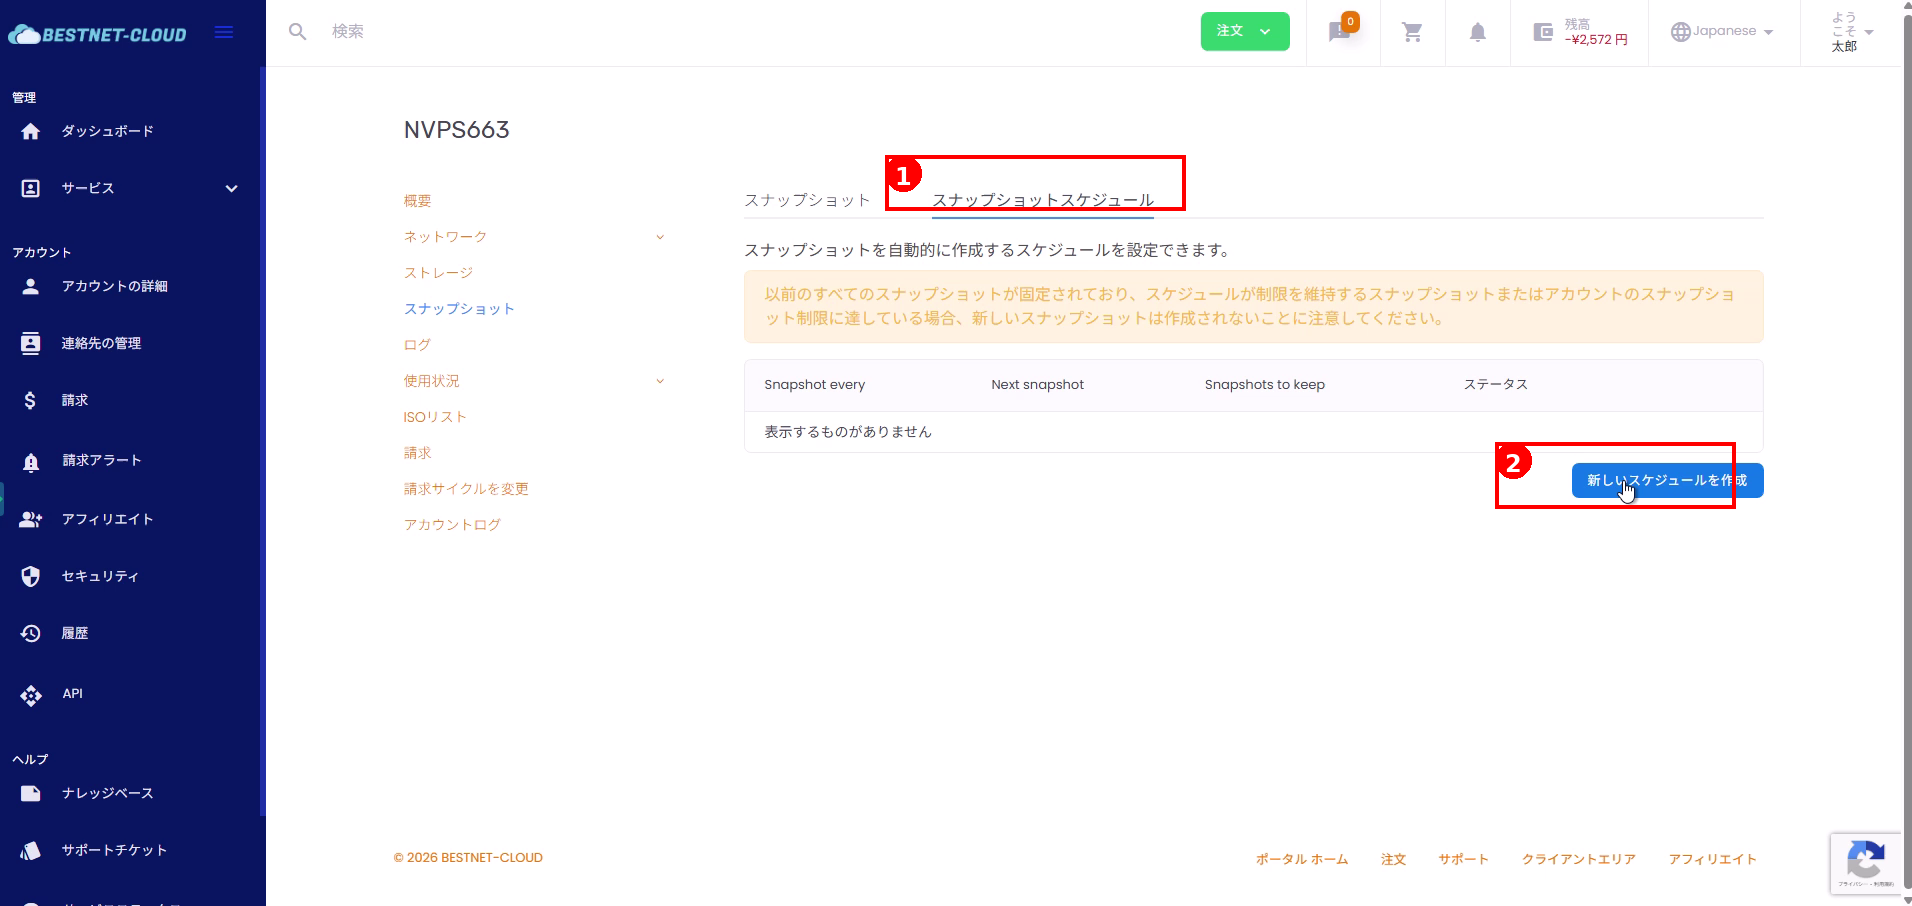
1. Open the “Snapshot Schedule” Tab #
- Click Snapshot Schedule at the top of the snapshot screen.
- Click Create New Schedule.
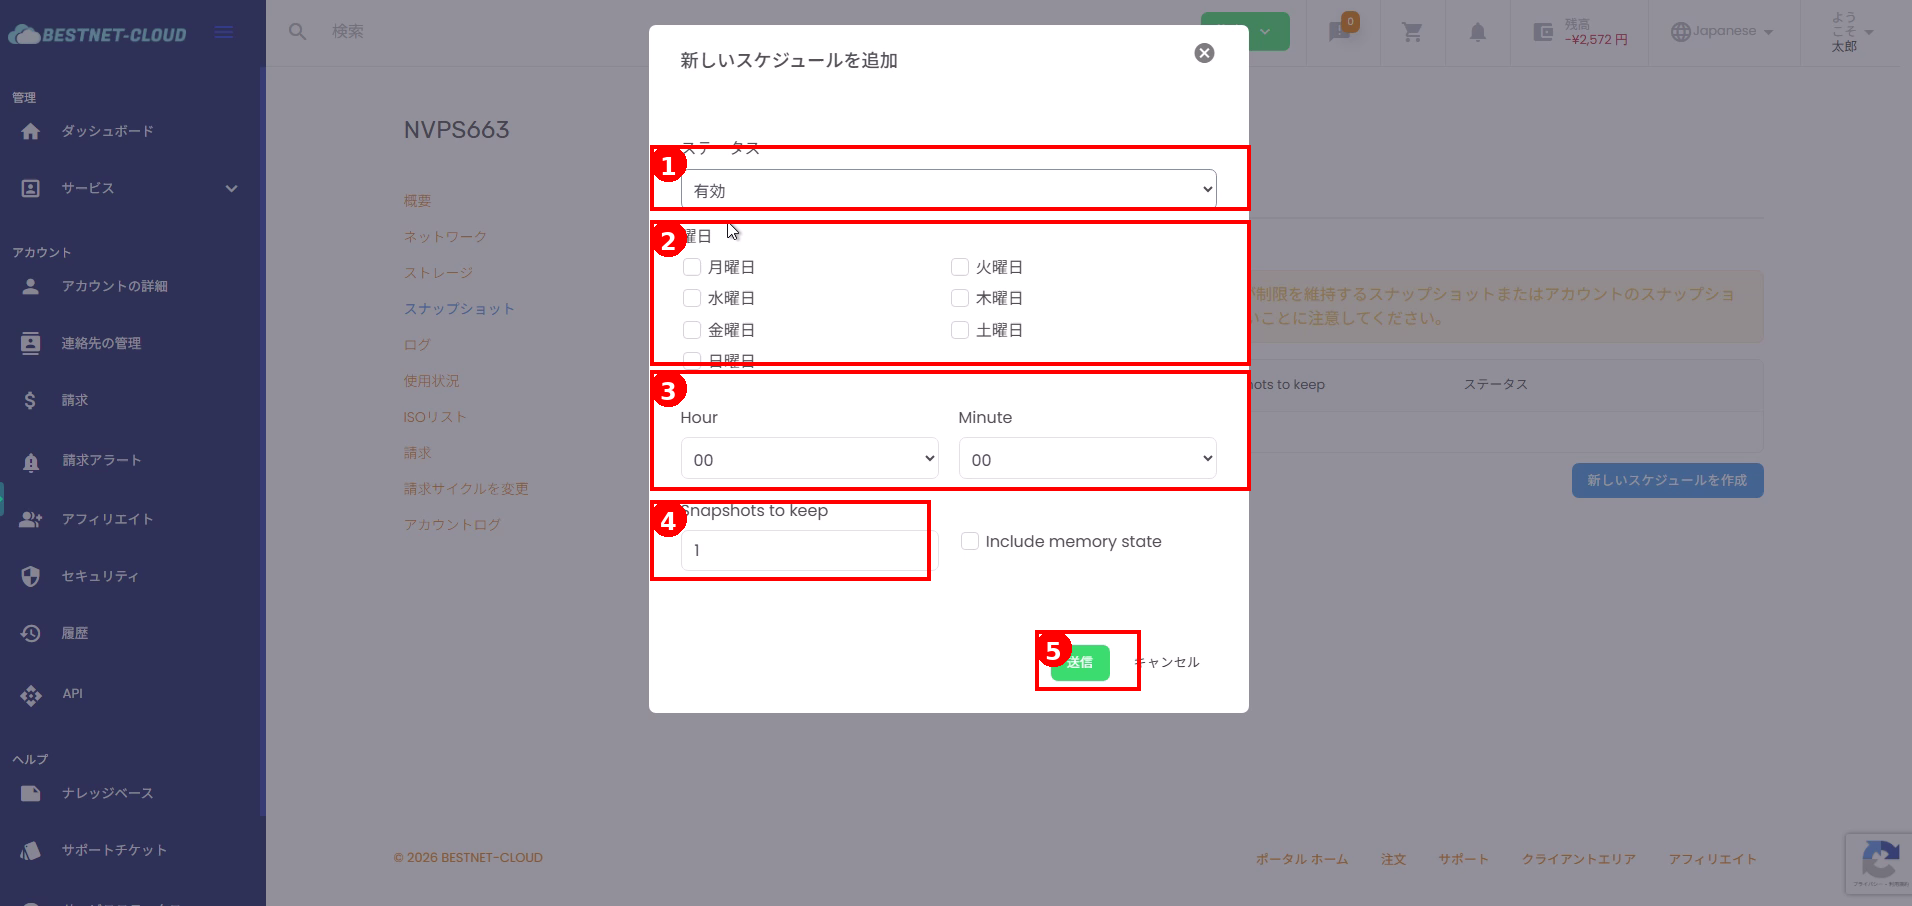
2. Enter Schedule Details and Submit #
- Select Status (Enabled/Disabled).
- Select the day of week when you want to automatically create snapshots.
- Specify the execution time with Hour / Minute.
- Specify Snapshots to keep (retention count).
- Configure Include memory state if needed.
- Click Submit.
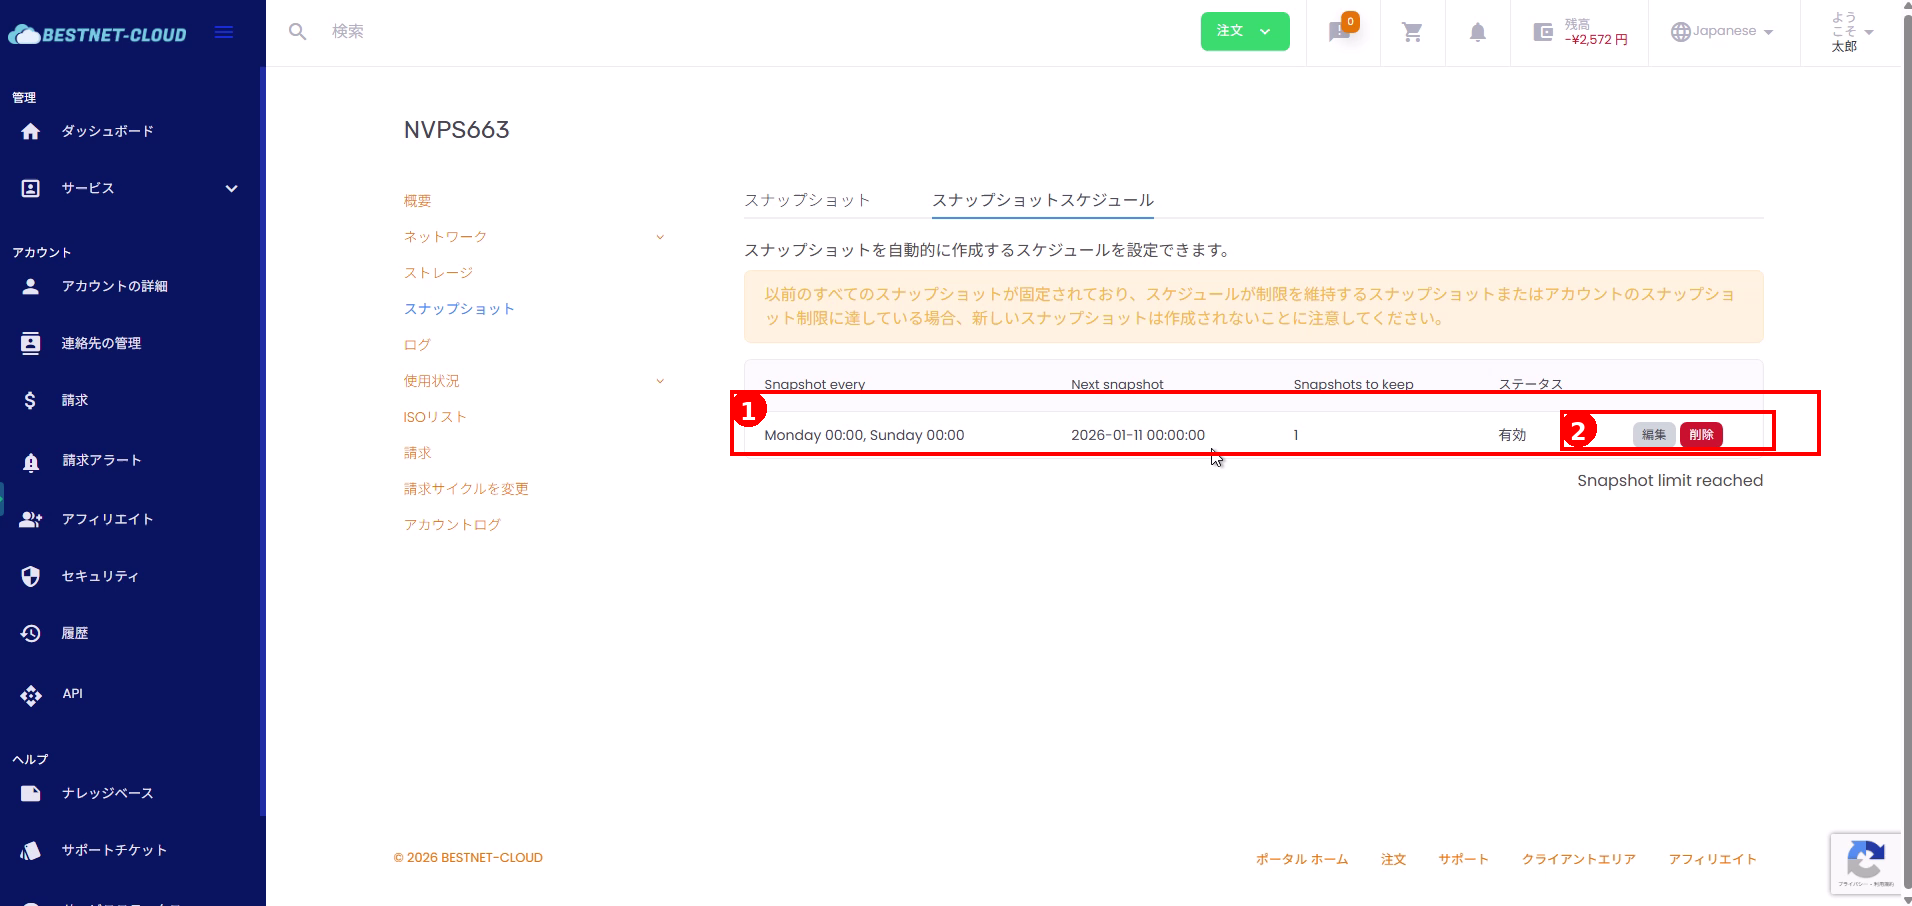
3. View, Edit, or Delete Your Created Schedule #
- Verify that your created schedule appears in the schedule list (day of week, next execution date/time, retention count, status).
- As needed, click Edit or Delete.
Important Notes #
Storage Expansion Restrictions
A notice may appear stating that storage cannot be expanded until all snapshots are deleted. If you need to perform an expansion, adjust your snapshot operations beforehand.
When Retention Limit is Reached
If you see Snapshot limit reached or similar messages, your retention limit may have been reached. Delete unnecessary snapshots or schedules, or review your plan and limit settings.
Relationship Between Retention Count and Pinned
When a retention count is specified in a schedule, new snapshots may not be created depending on pinned snapshots and retention conditions.
Troubleshooting #
Cannot Create Snapshots
Check whether you have reached your retention limit (Snapshots left = 0) or if there are pinned snapshots that cannot be deleted.
Schedule is Not Working
Verify that the status is set to “Enabled”, that the day of week and time are configured as intended, and that the retention count setting does not exceed the limit.
Snapshot Remains in List After Deletion
Deletion may be processed asynchronously. Wait a moment and refresh the page. If the issue persists, please contact support.


