
Overview #
Instructions for creating a new server (virtual machine) from the client portal.
In this procedure, you will select an ISO to create the server. When you select an ISO, you will need to install the operating system from the console after creation.
Note: If you select an OS template instead, a server with basic configuration completed will be ready to use in a few minutes. No manual installation like ISO is required.
Please note: This manual has been created using generative AI and other tools. The positions of annotations (arrows, frames, numbers, etc.) in the screenshots may be slightly offset from the actual screens. When operating, please prioritize confirming the screen display and content of the instructions.
Prerequisites #
- You can log in to the client portal
- The service is active
- (Recommended) SSH key is registered in advance
Steps to Create a New Server (Using ISO) #
1. Open the BESTNET-CLOUD service #
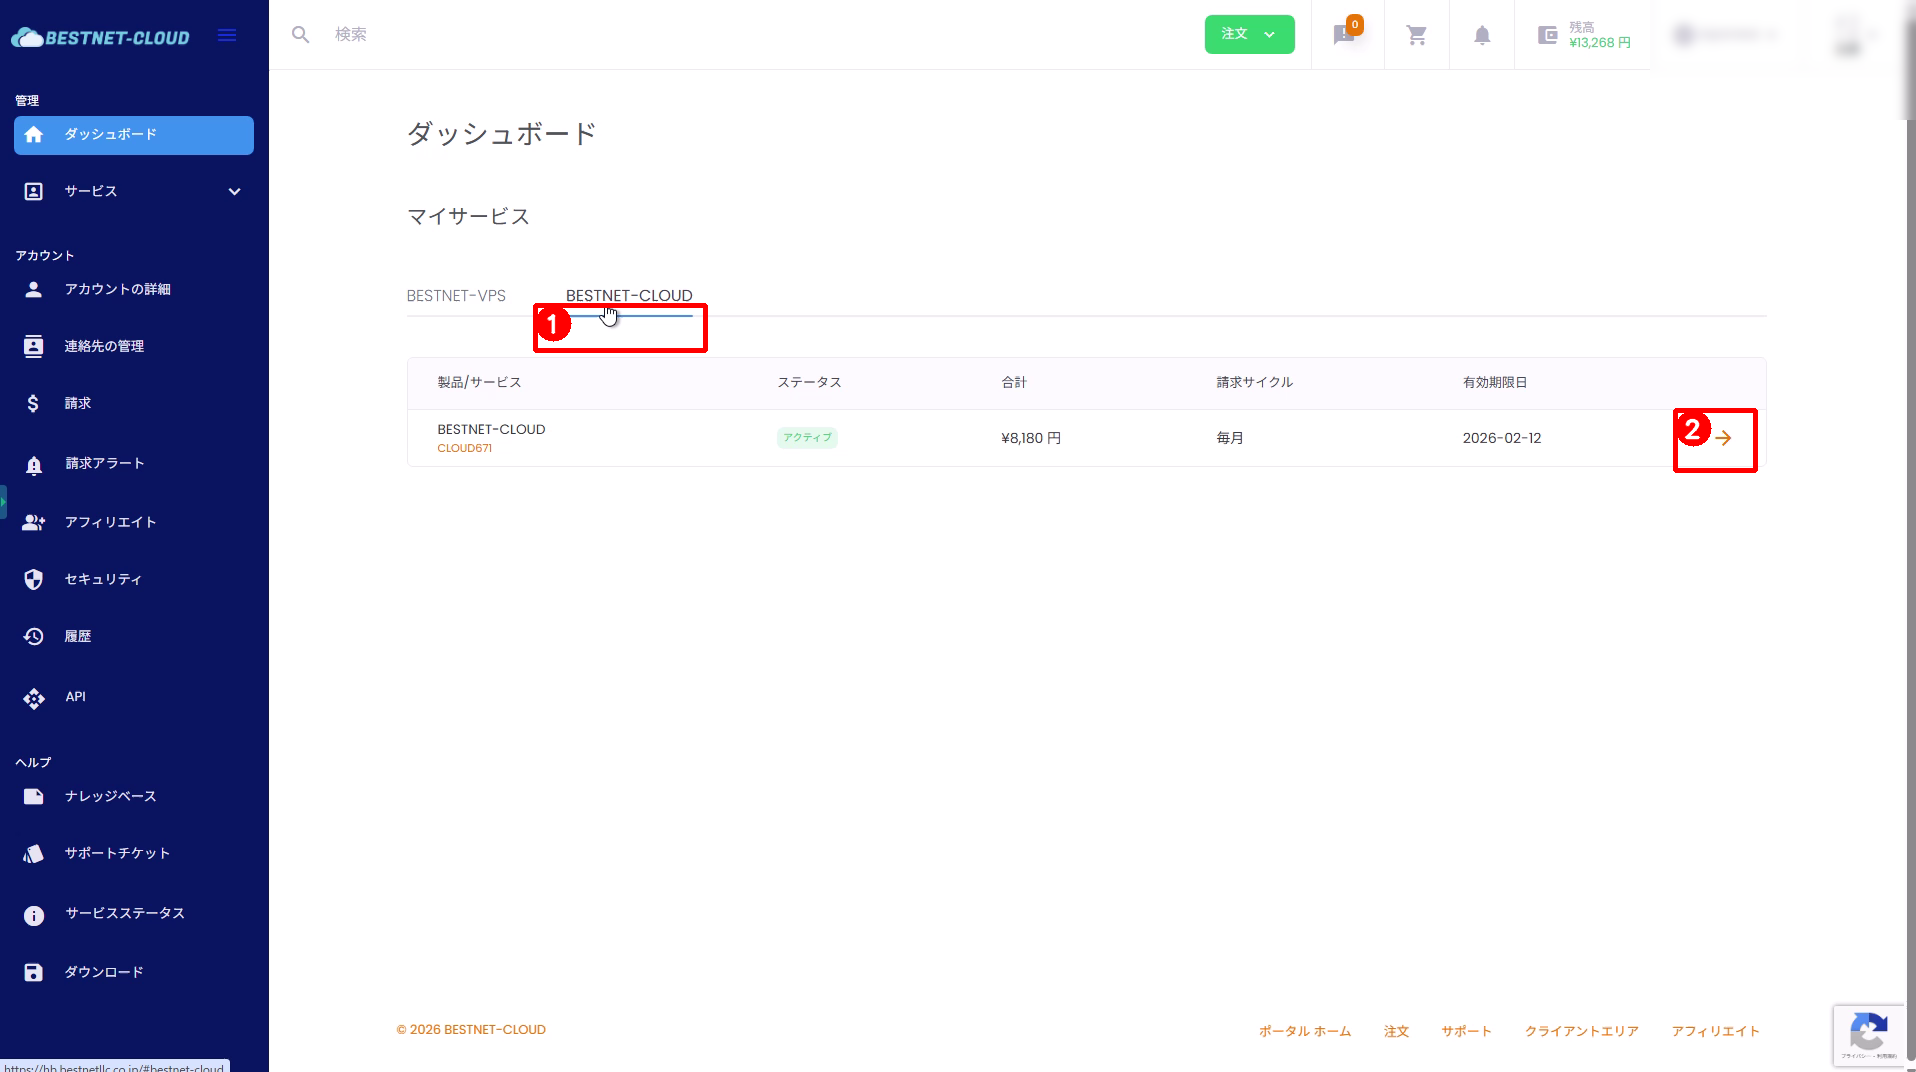
- Select the BESTNET-CLOUD tab under “Dashboard” > “My Services”.
- Click the arrow (→) at the right end of the target service row to go to the management screen.
2. Open “Add New Server” #
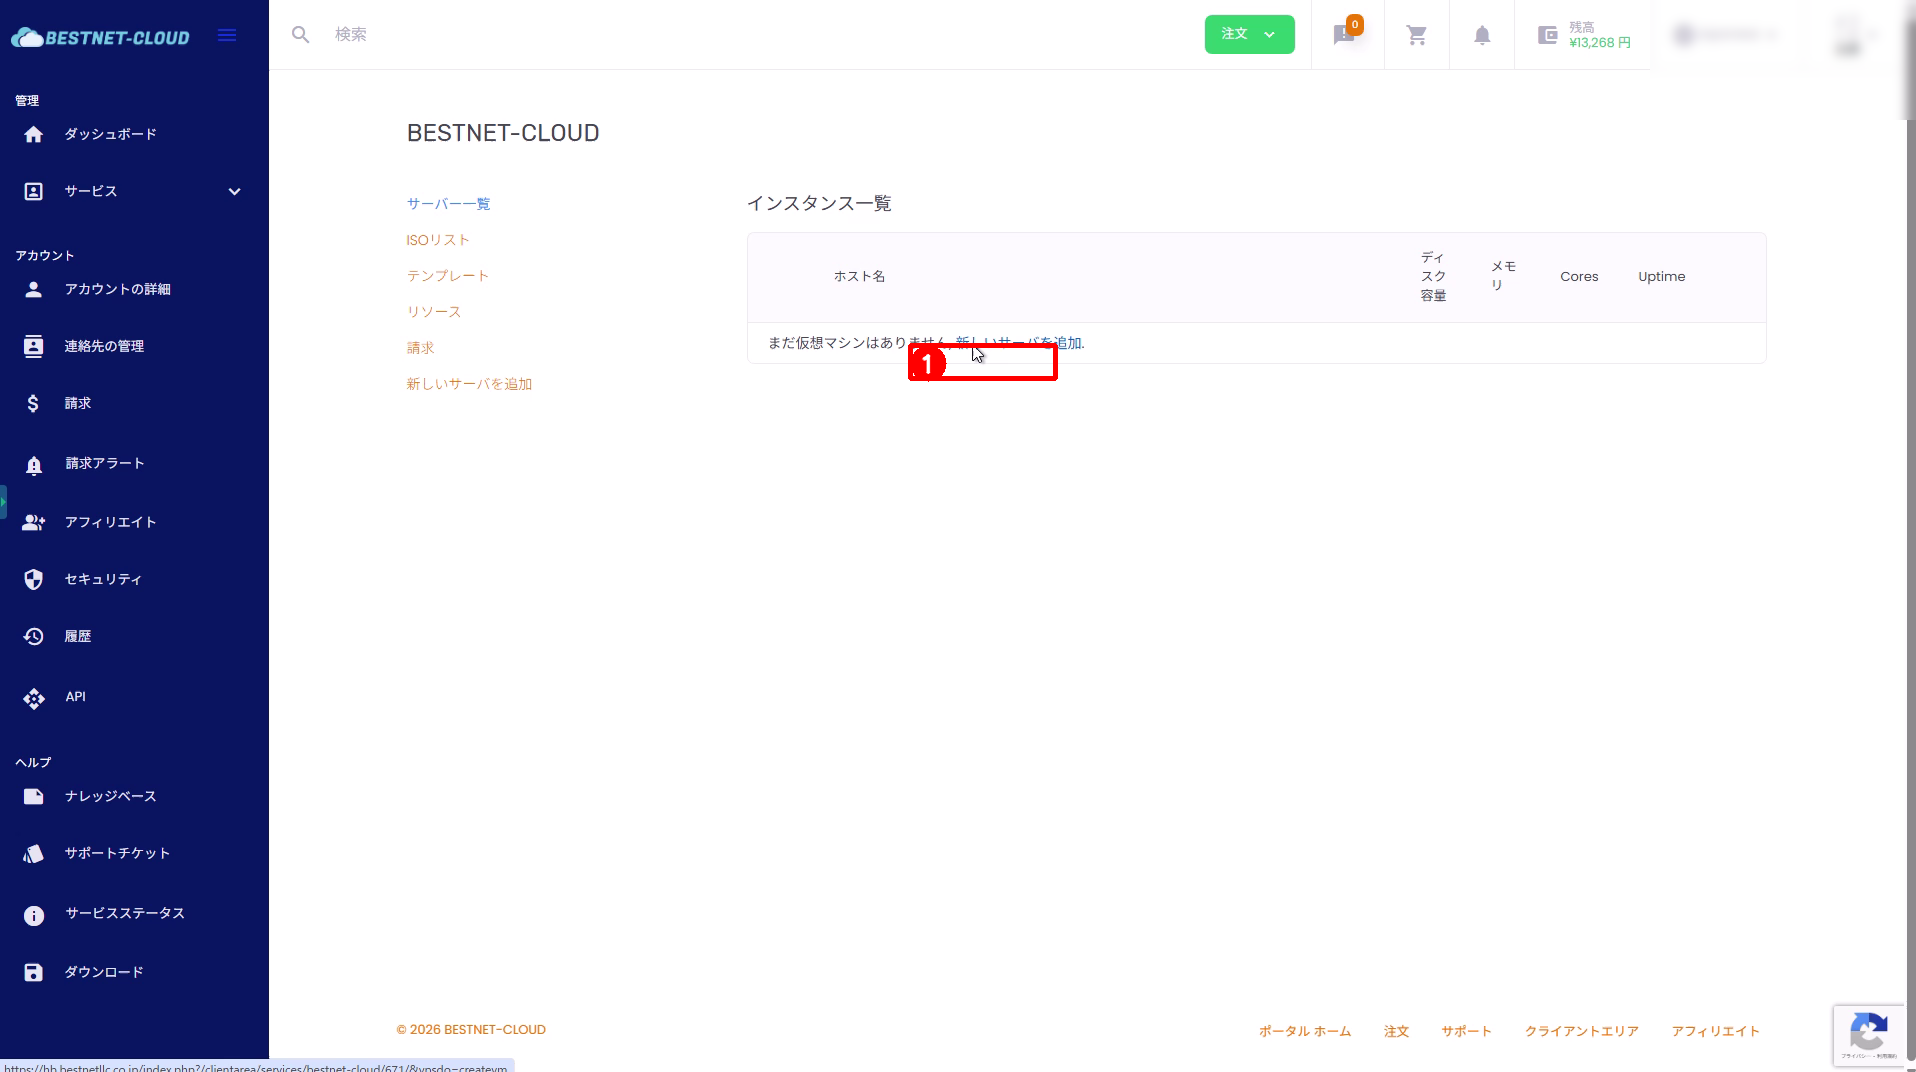
- Click “Add New Server” displayed in the instance list.
3. Enter hostname and password #
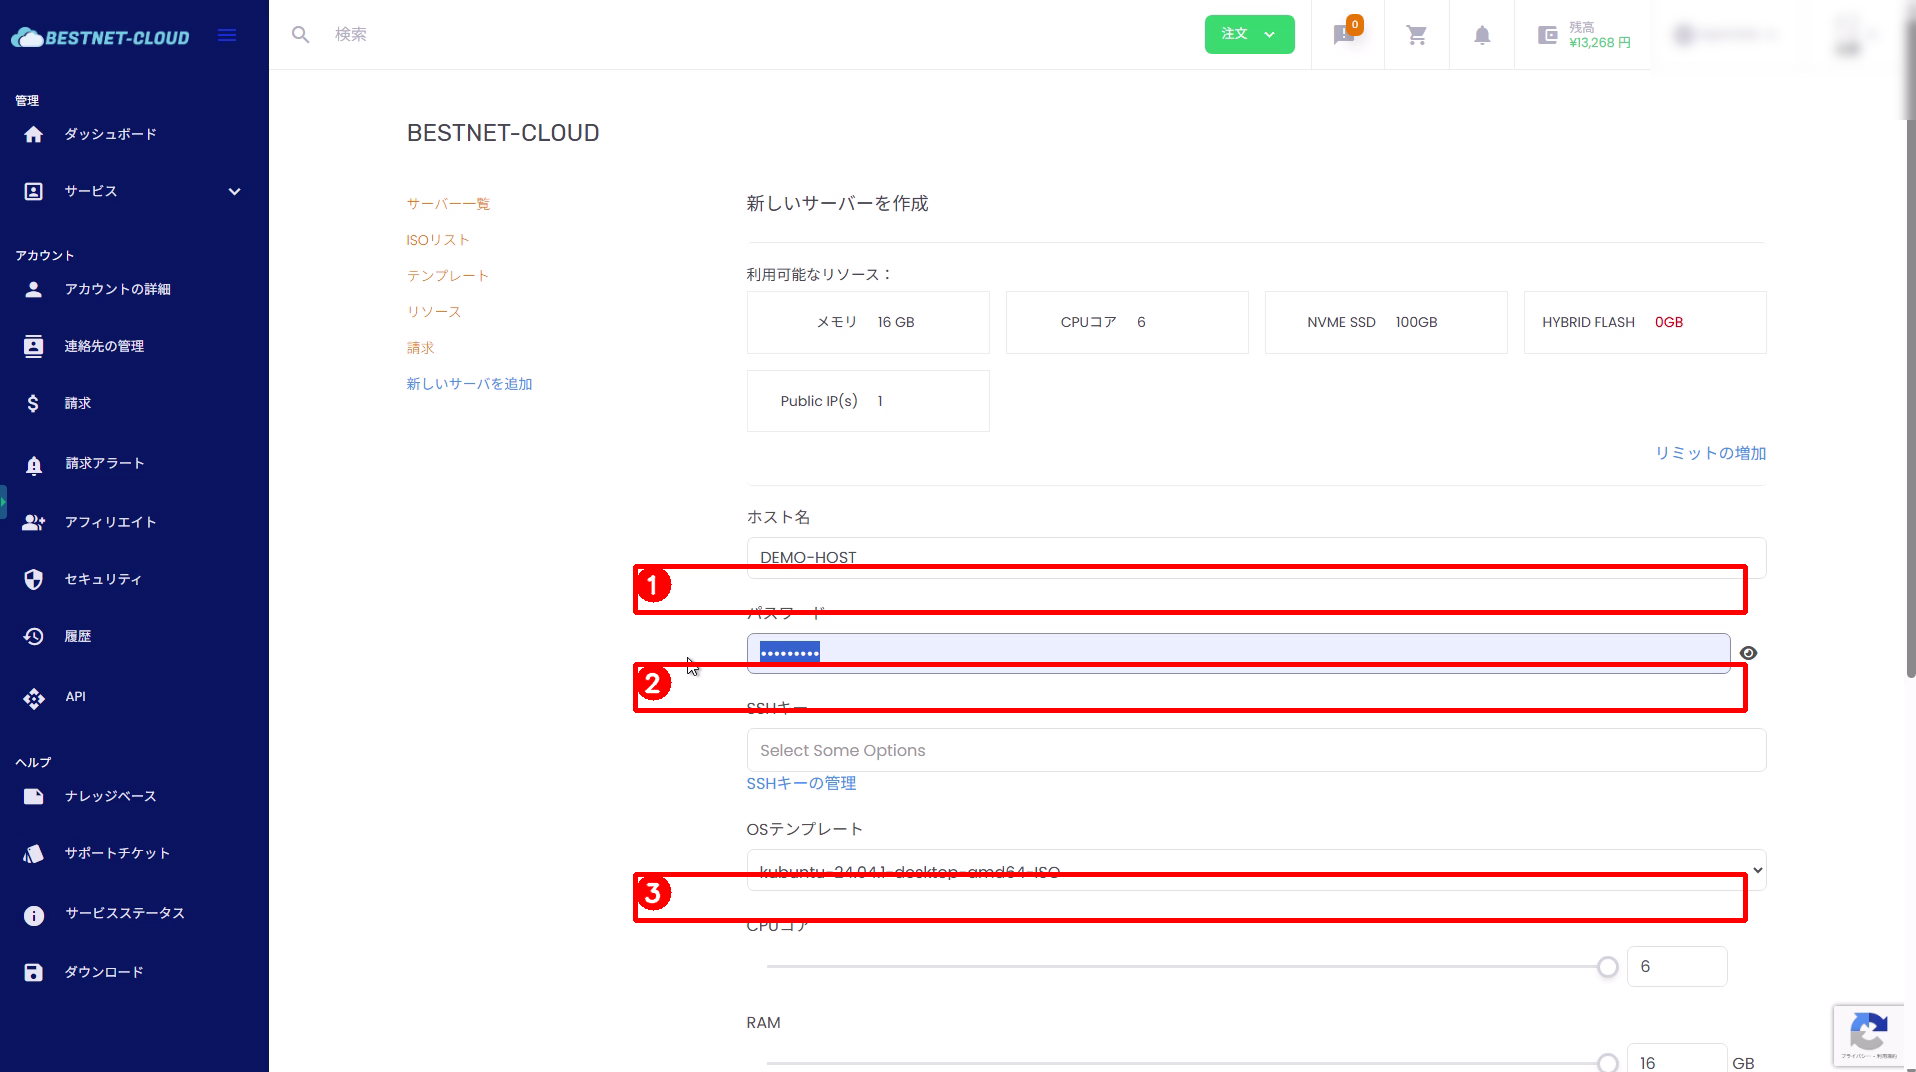
- Hostname: Enter an arbitrary server name (e.g., DEMO-HOST).
- Password: Set the password for the initial user (root).
For security, set a password that is long enough and difficult to guess.
4. Select SSH key and OS (ISO) #
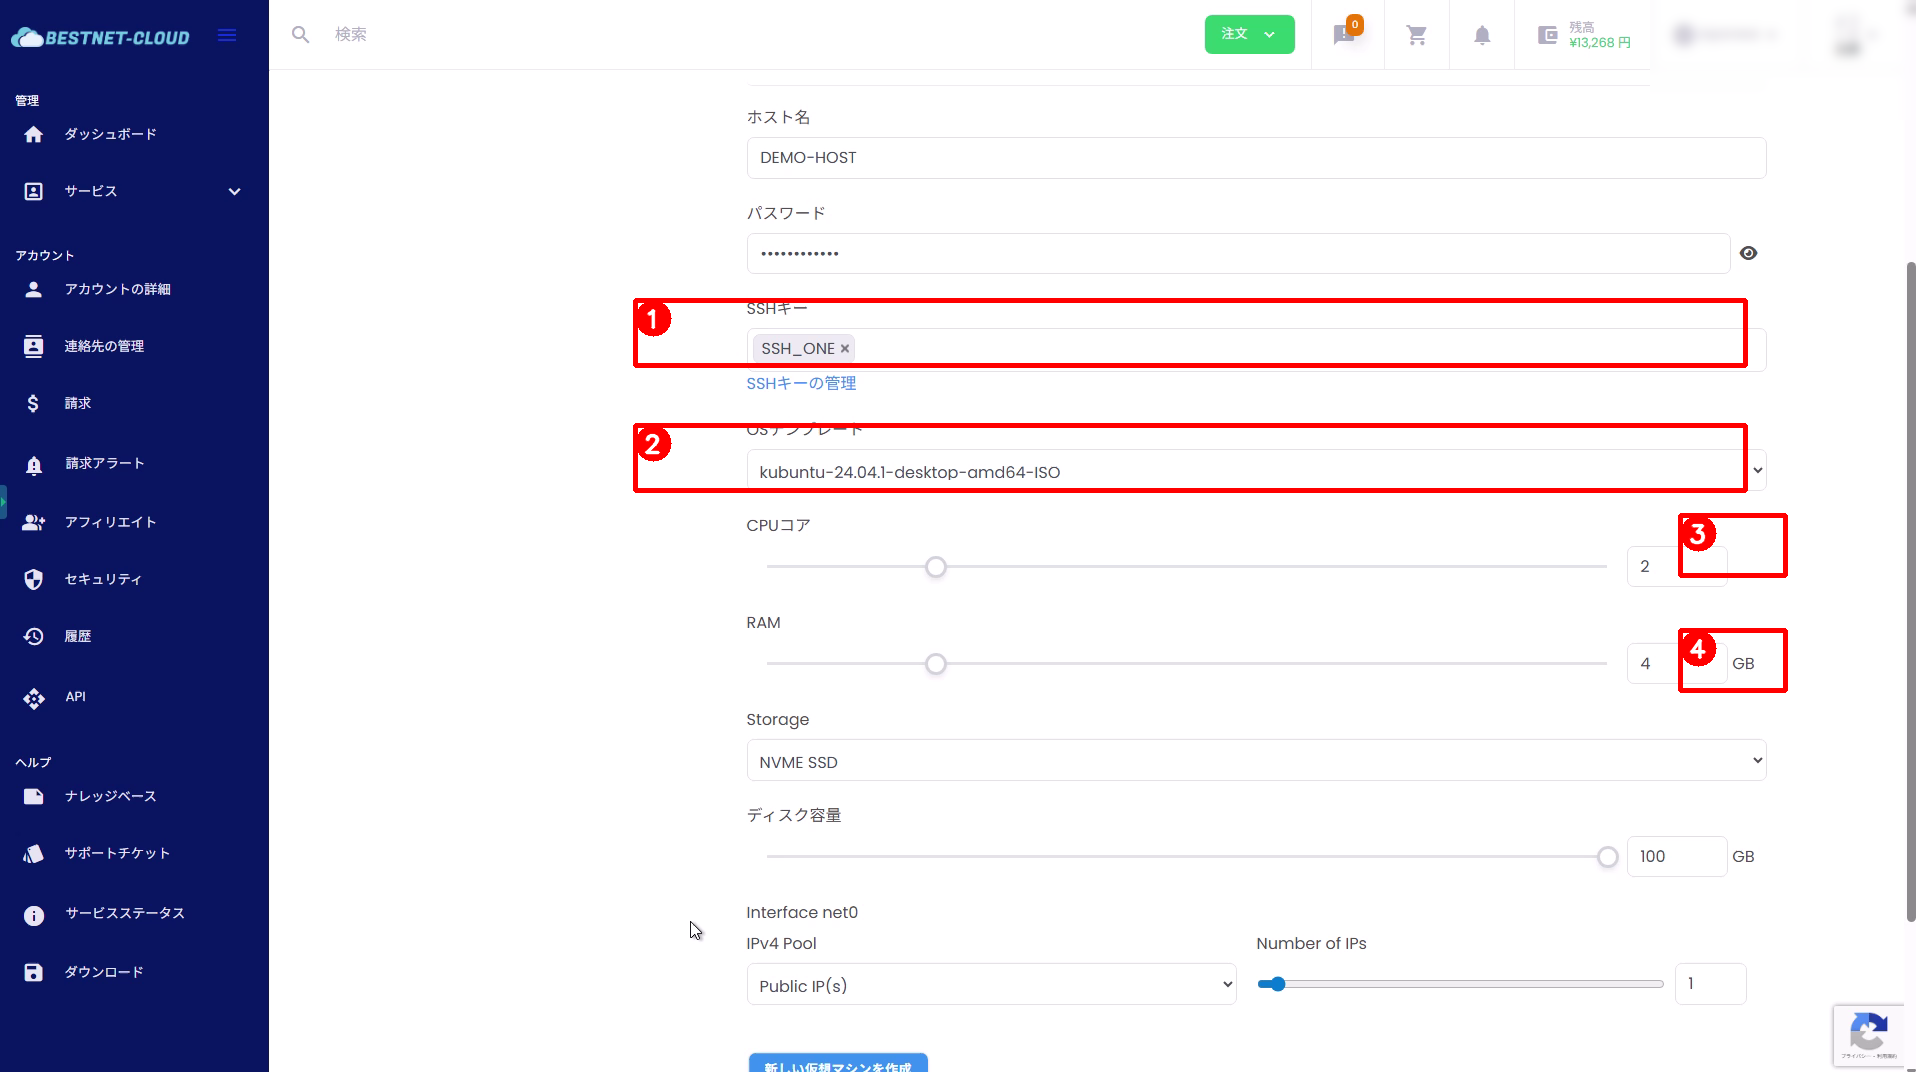
- SSH Key: If you have a registered SSH key, select it (recommended).
- OS Template: For this procedure, select an ISO (e.g., kubuntu-24.04.1-desktop-amd64-ISO).
Note: If you select an OS template, a server with basic configuration completed will be ready to use in a few minutes.
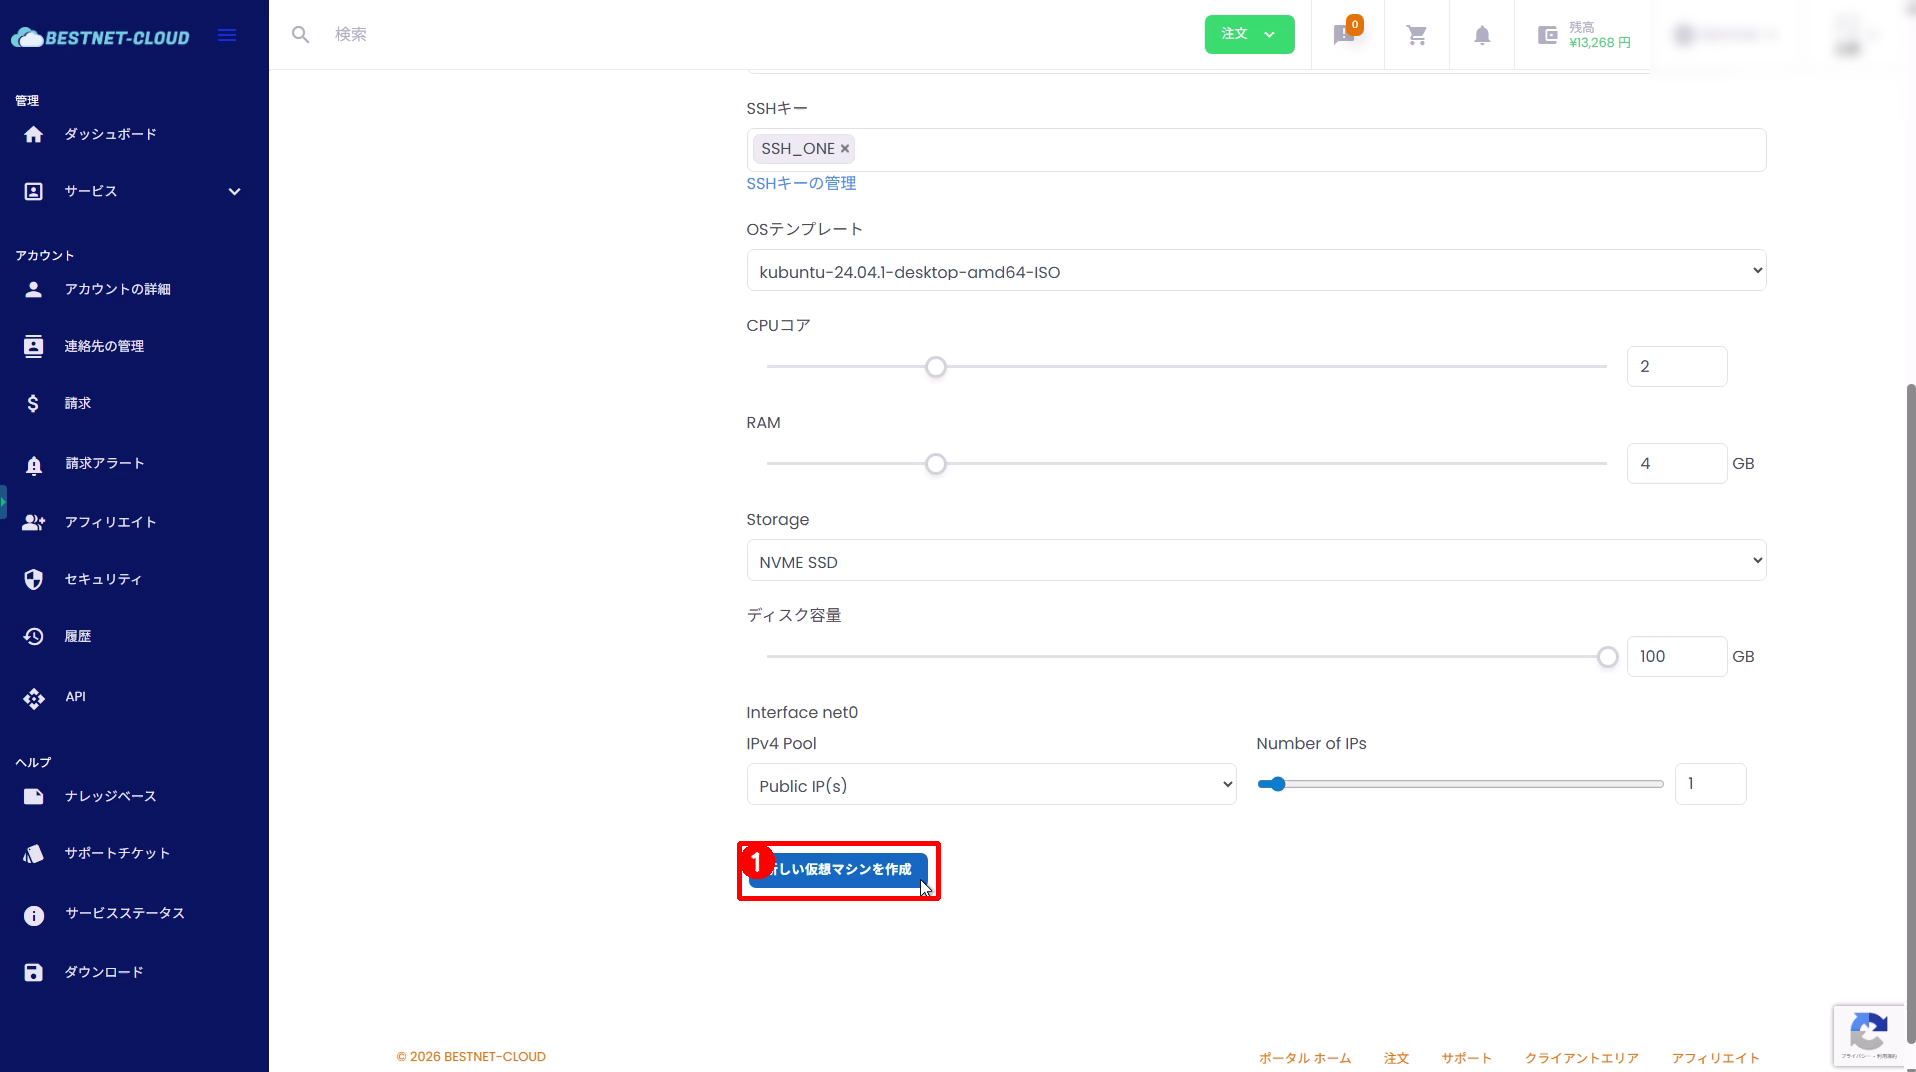
5. Configure resources (CPU, RAM, disk, IP) and create #
Adjust CPU / RAM / Storage / disk capacity / number of IPs according to your required specifications.
Once configuration is complete, click “Create New Virtual Machine” at the bottom of the screen.
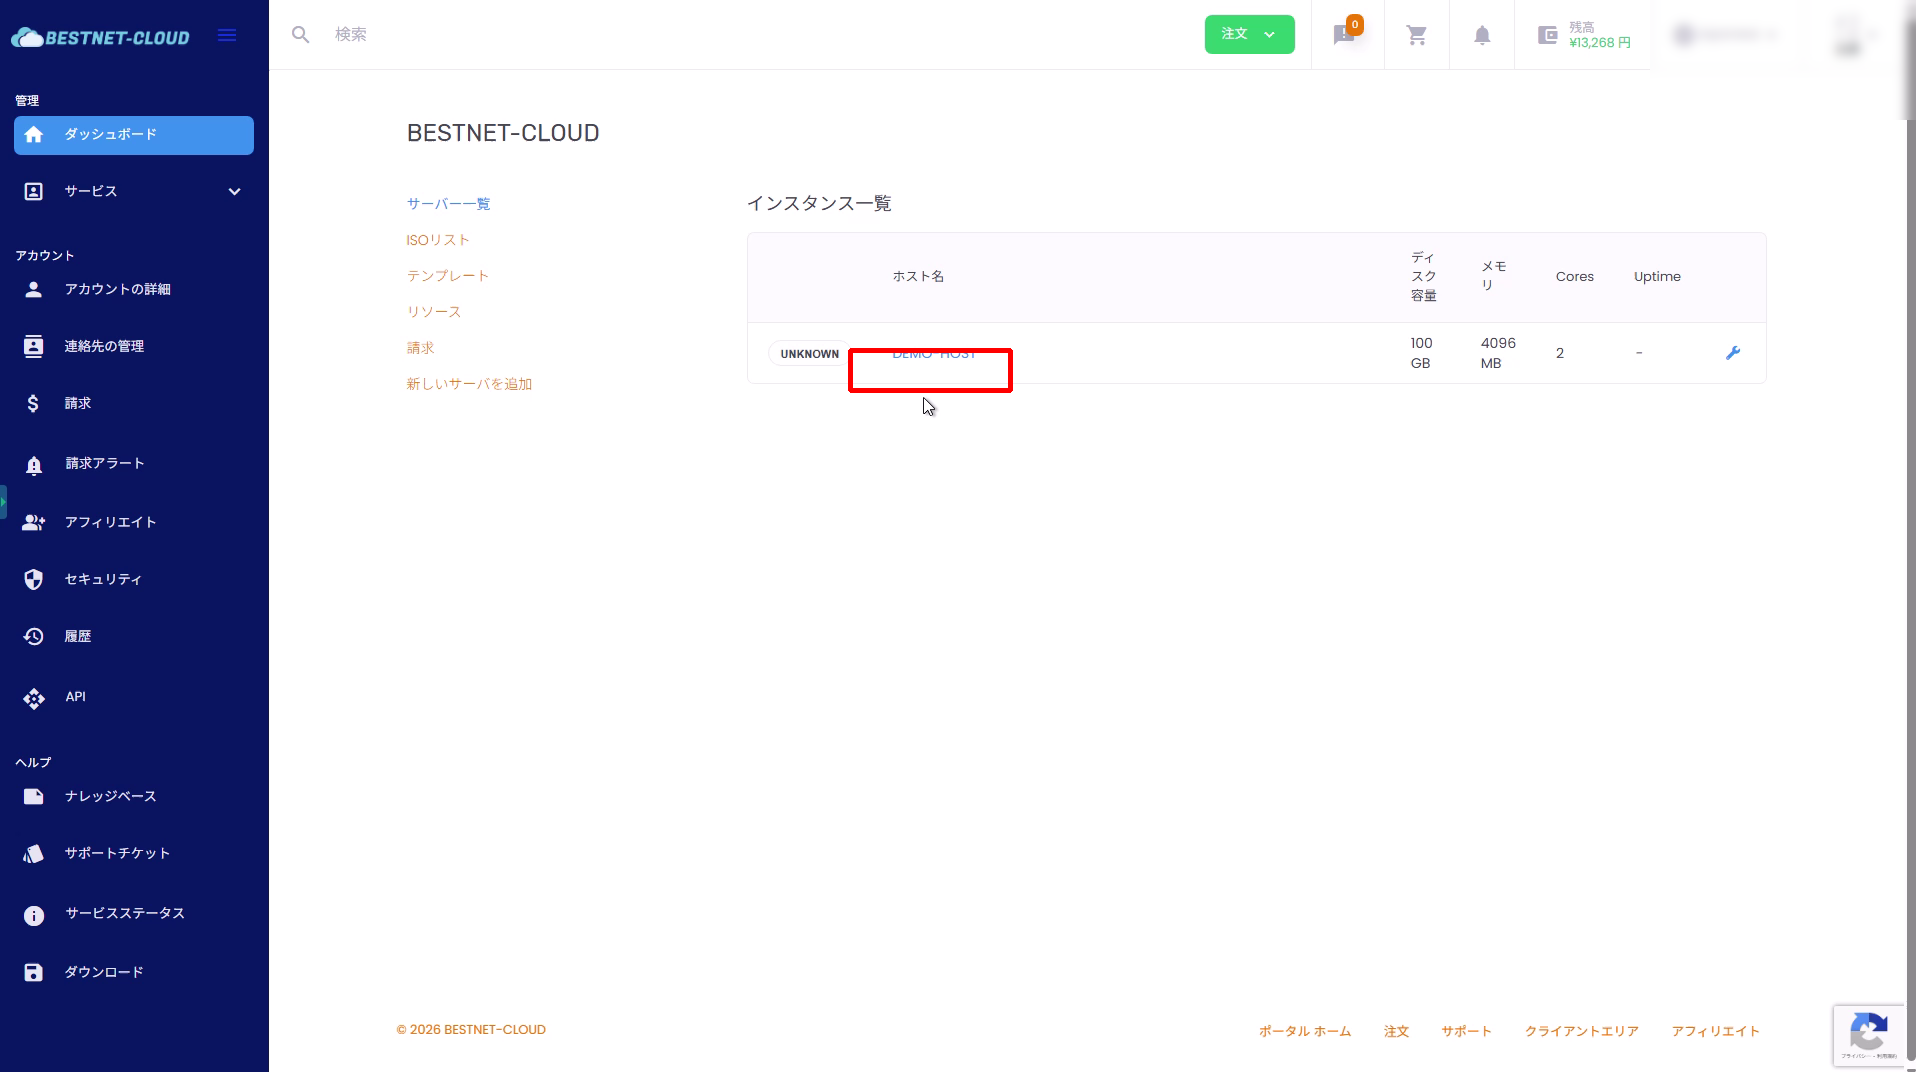
6. Confirm creation completion in the instance list #
- Confirm that the hostname you created is displayed in the instance list.
- Click the hostname to navigate to the details screen.
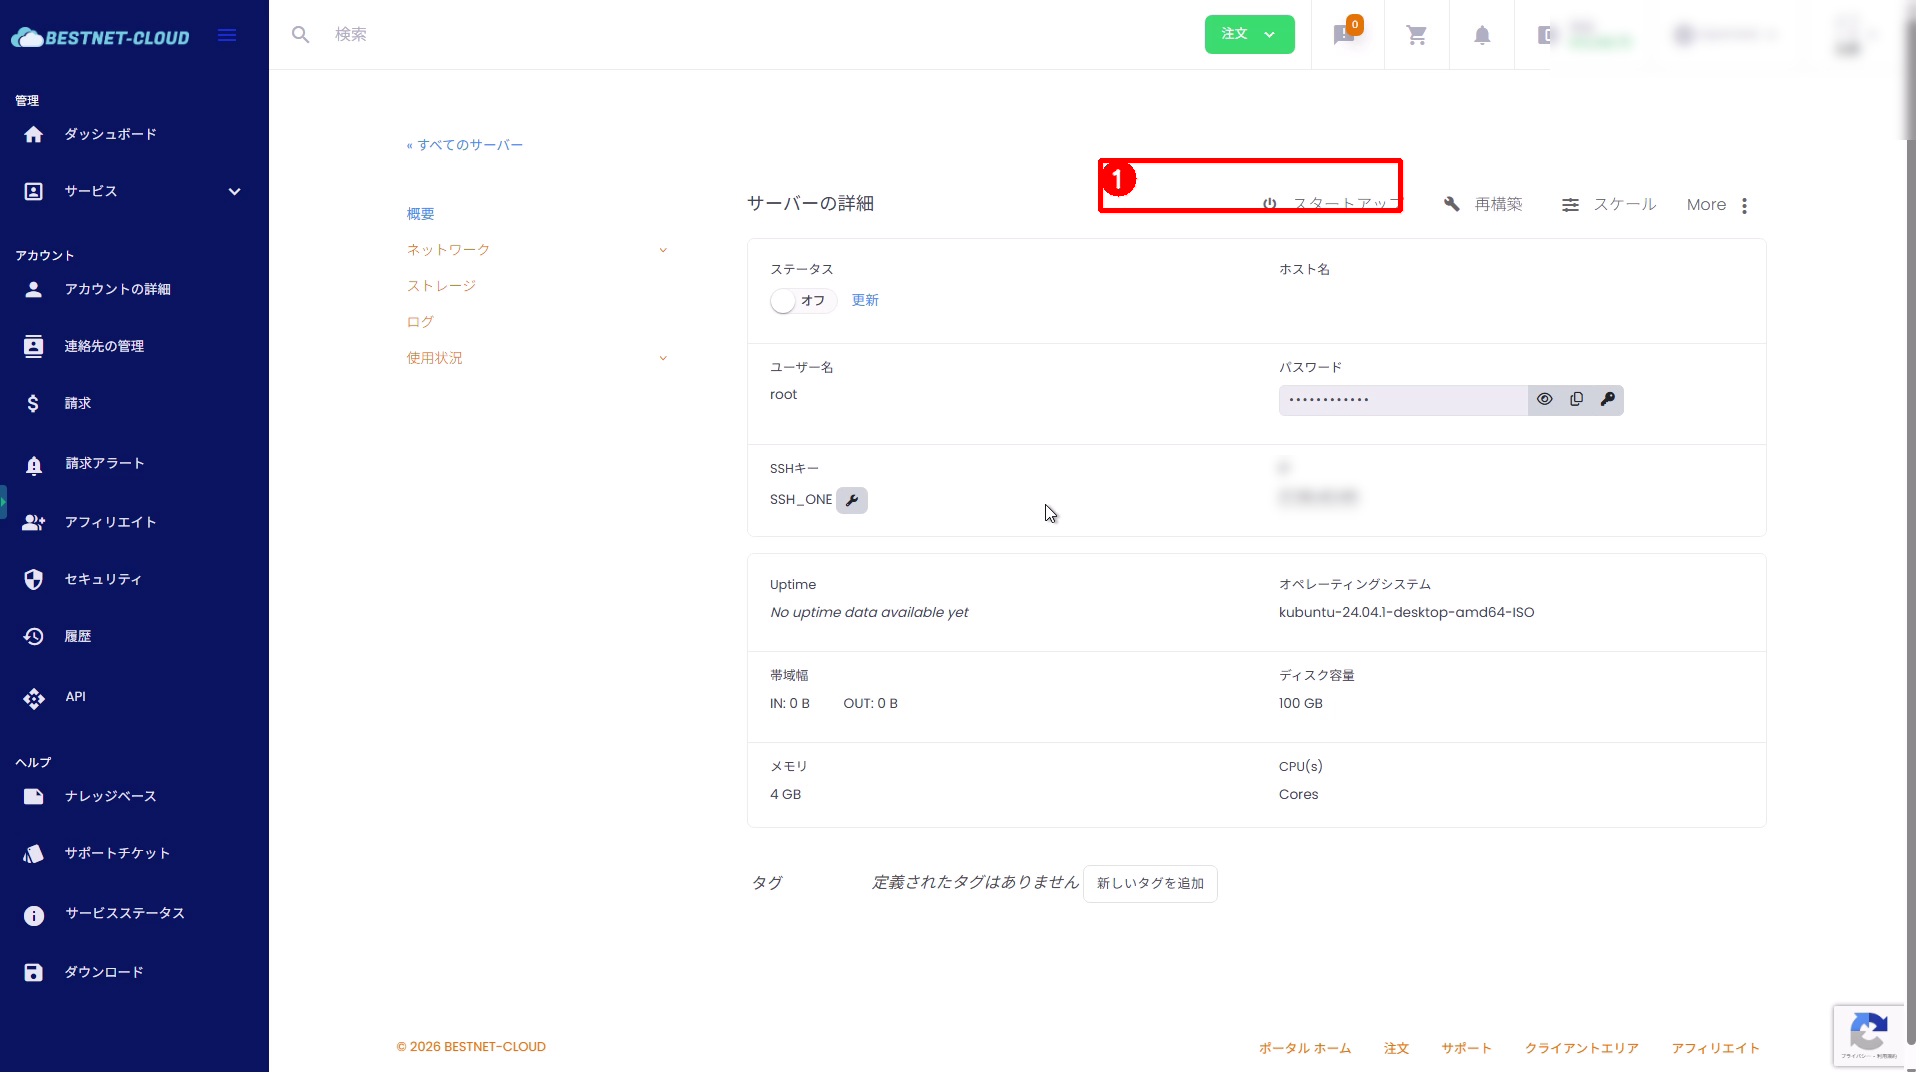
7. Start the server #
- Click “Startup” on the server details screen.
- Wait until the status becomes On.
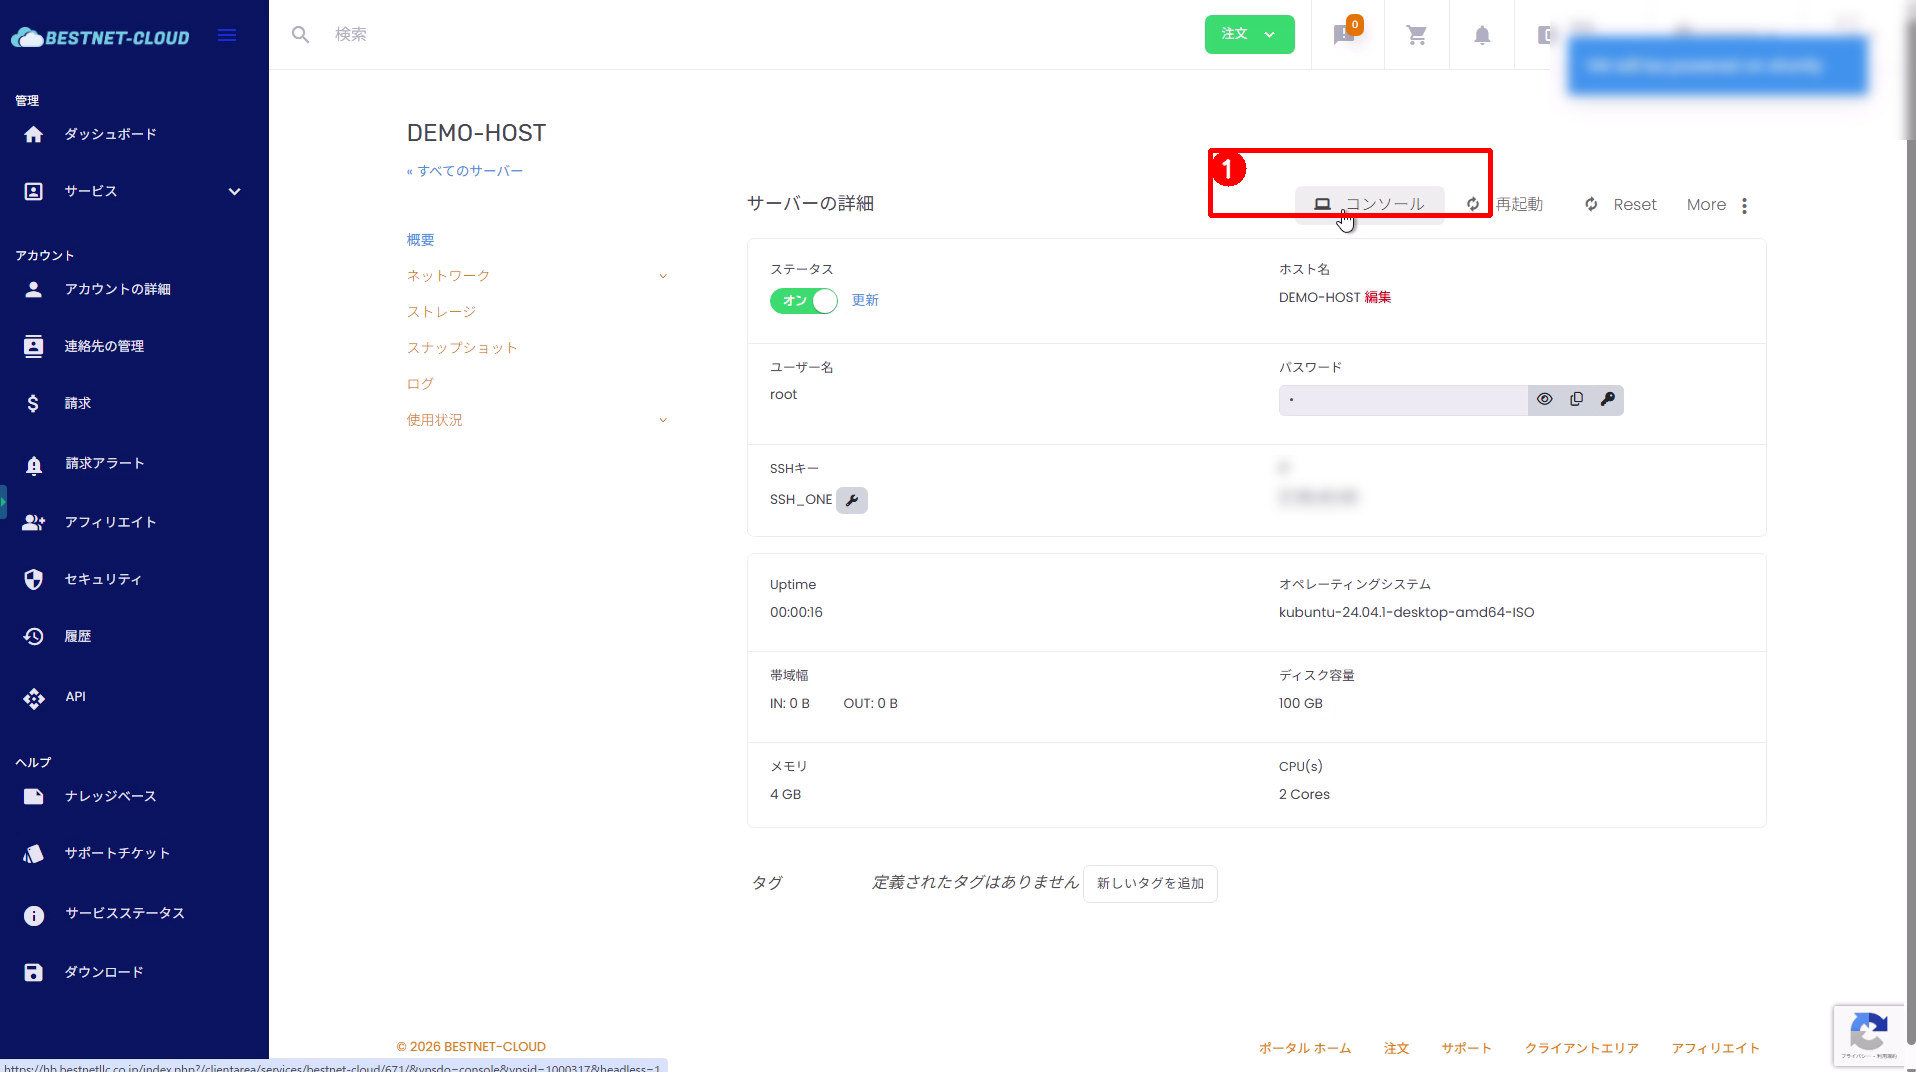
8. Open the console and install the OS from the ISO #
When an ISO is selected, the OS is not installed, so you must install the OS from the console.
- Click “Console” on the server details screen.
- The noVNC console will open in a separate tab. Follow the on-screen instructions to install the OS.
Additional Information #
When selecting an OS template #
When you select an OS template, it is deployed with the OS already installed, so you can start using it via SSH connection immediately (in a few minutes) after server creation. If you select an ISO, you must install the OS from the console.
Common points #
- If the instance does not appear in the list immediately after creation: Wait a few tens of seconds and then reload.
- If the server cannot start / does not turn on: Check your available resource limits, IP availability, billing status, etc.


