
Client Portal Guide
On the client portal, modify the resources of your contracted cloud service
(CPU cores, memory, NVMe SSD, backup retention generations, snapshot limits, etc.)
This guide explains the steps to upgrade (increase) or downgrade (reduce) your resources.
Notice: This procedure guide is created using generative AI and other tools, so annotations (arrows, boxes, numbers, etc.) in the screenshots may be slightly misaligned with the actual screen display.
Since the purpose is to understand the procedure intent, please prioritize the screen display and text content when performing operations.
Prerequisites #
- You are logged into the client portal
- The target service is “Active”
- If an upgrade incurs additional charges, a payment method (credit card / PayPal / bank transfer, etc.) must be available
Difference Between Upgrade and Downgrade #
UpgradeUpgrade (Resource Increase) Procedure #
1. Open the target service #
- From the left menu, click “Services” to display the service list.
- Click the target service name (e.g., BESTNET-CLOUD) to go to the management screen.
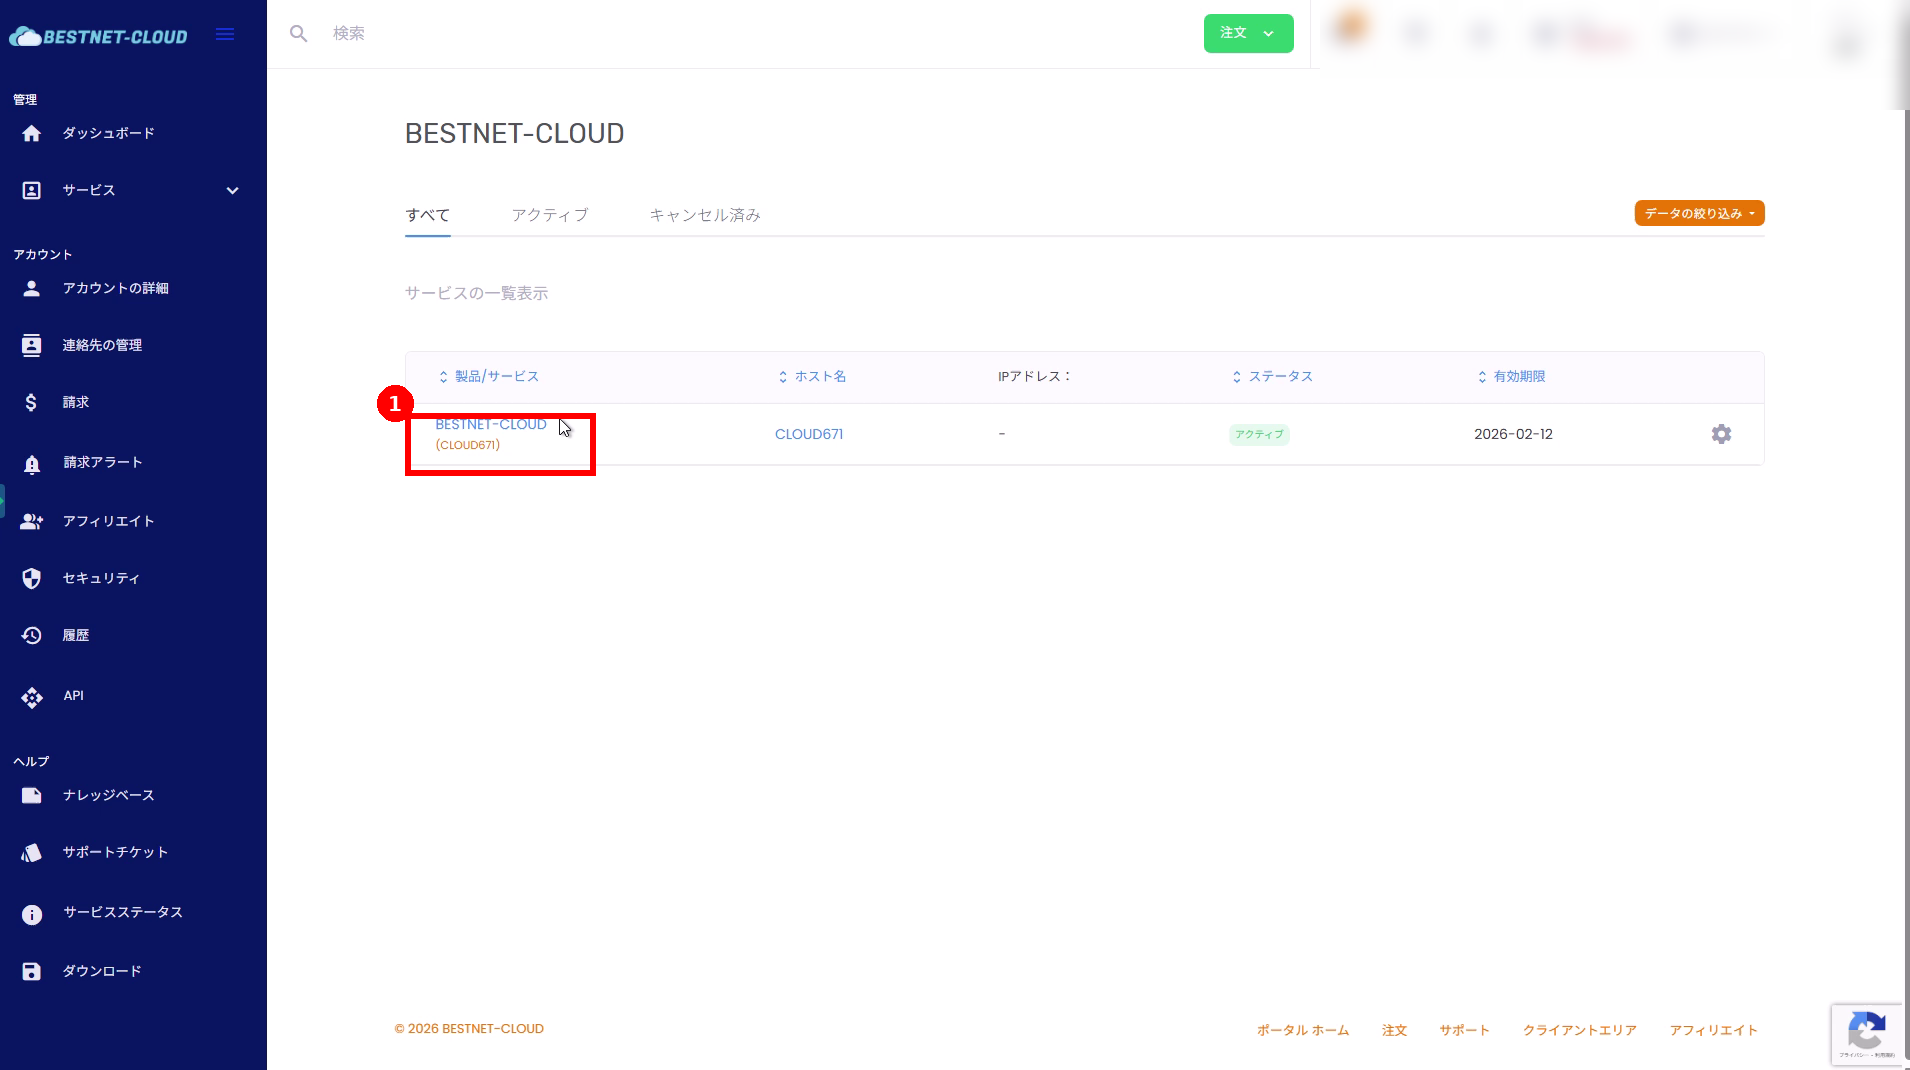 From the service list, click the target service name (red box (1)).
2. Open “Resources” and click “Upgrade / Downgrade” #
- Open the “Resources” page in the target service management screen.
- Click “Upgrade / Downgrade” in the lower right of the screen.
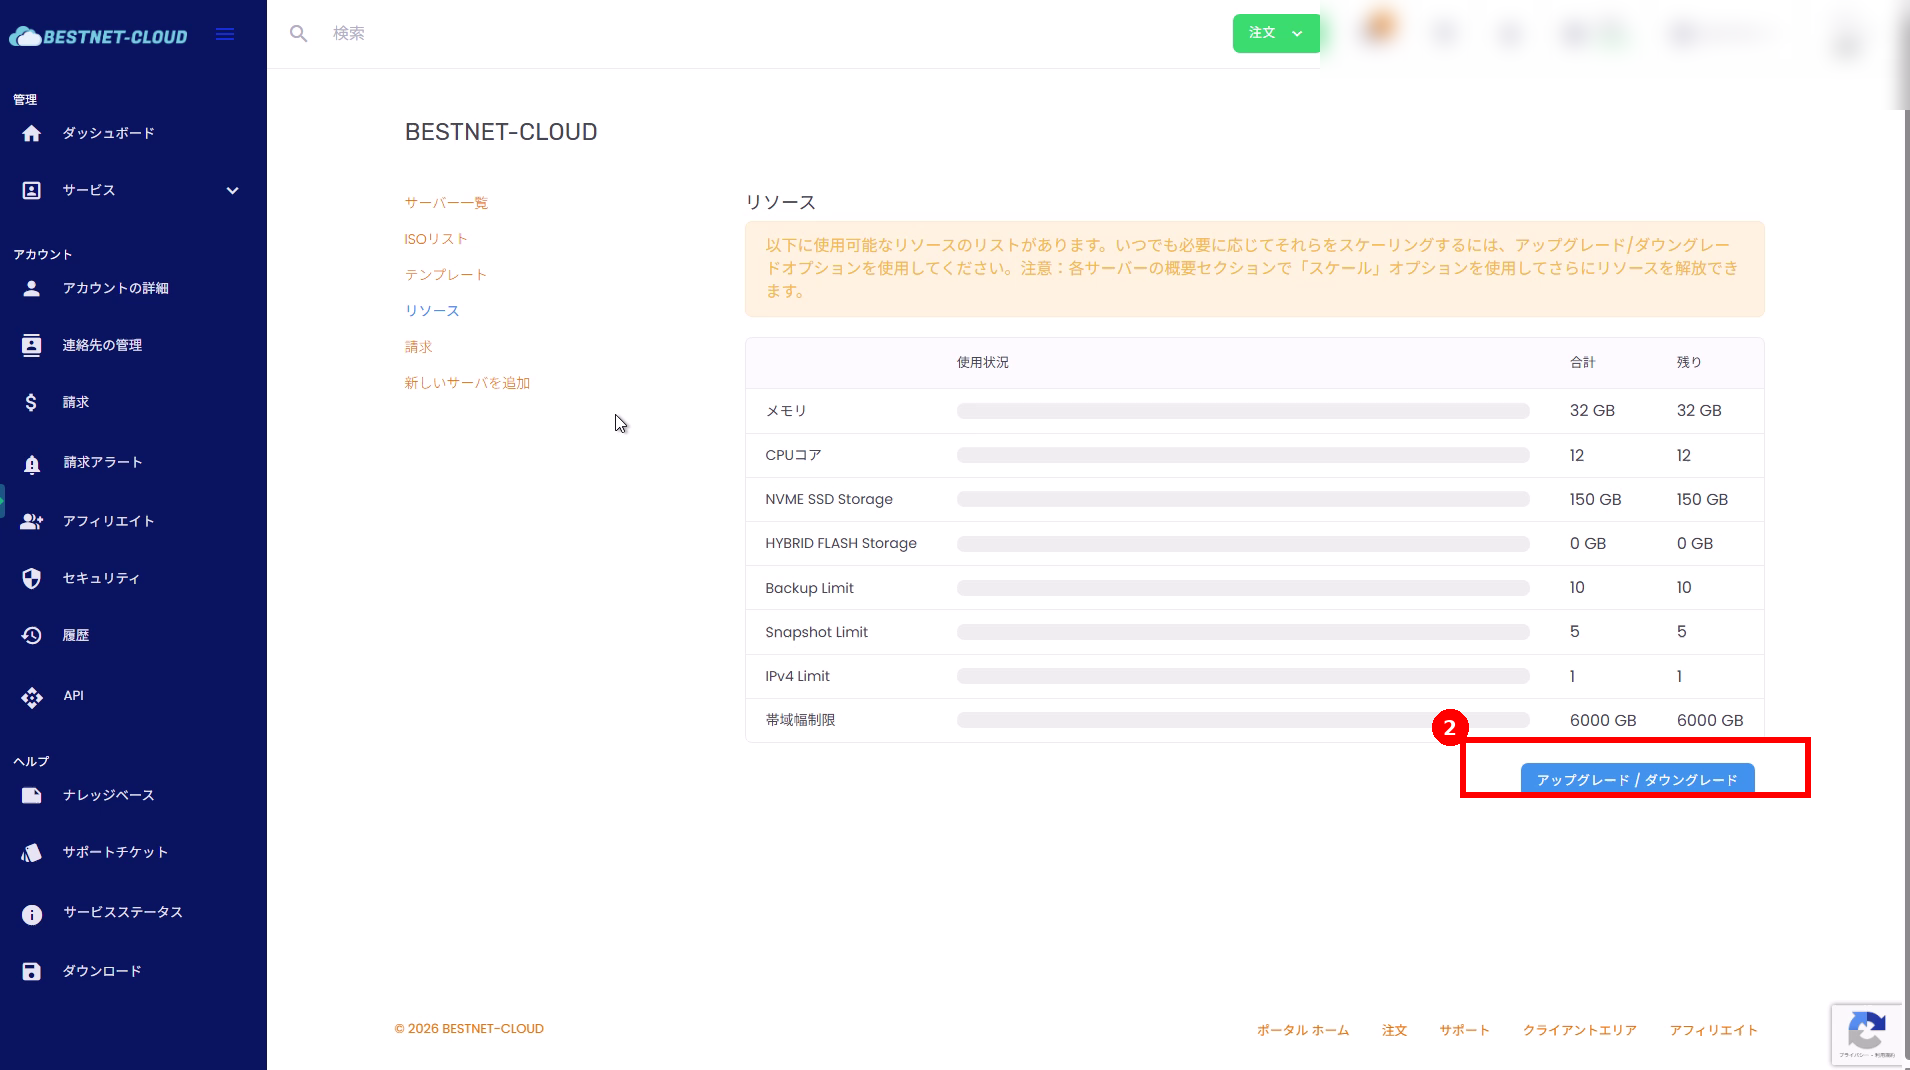 Click “Upgrade / Downgrade” (red box (2)).
3. Configure the resources to modify and click “Continue” #
Use the slider to change the item you want to upgrade (e.g., memory, NVMe SSD, etc.) to your desired value. Once configuration is complete, click “Continue” at the bottom of the page.
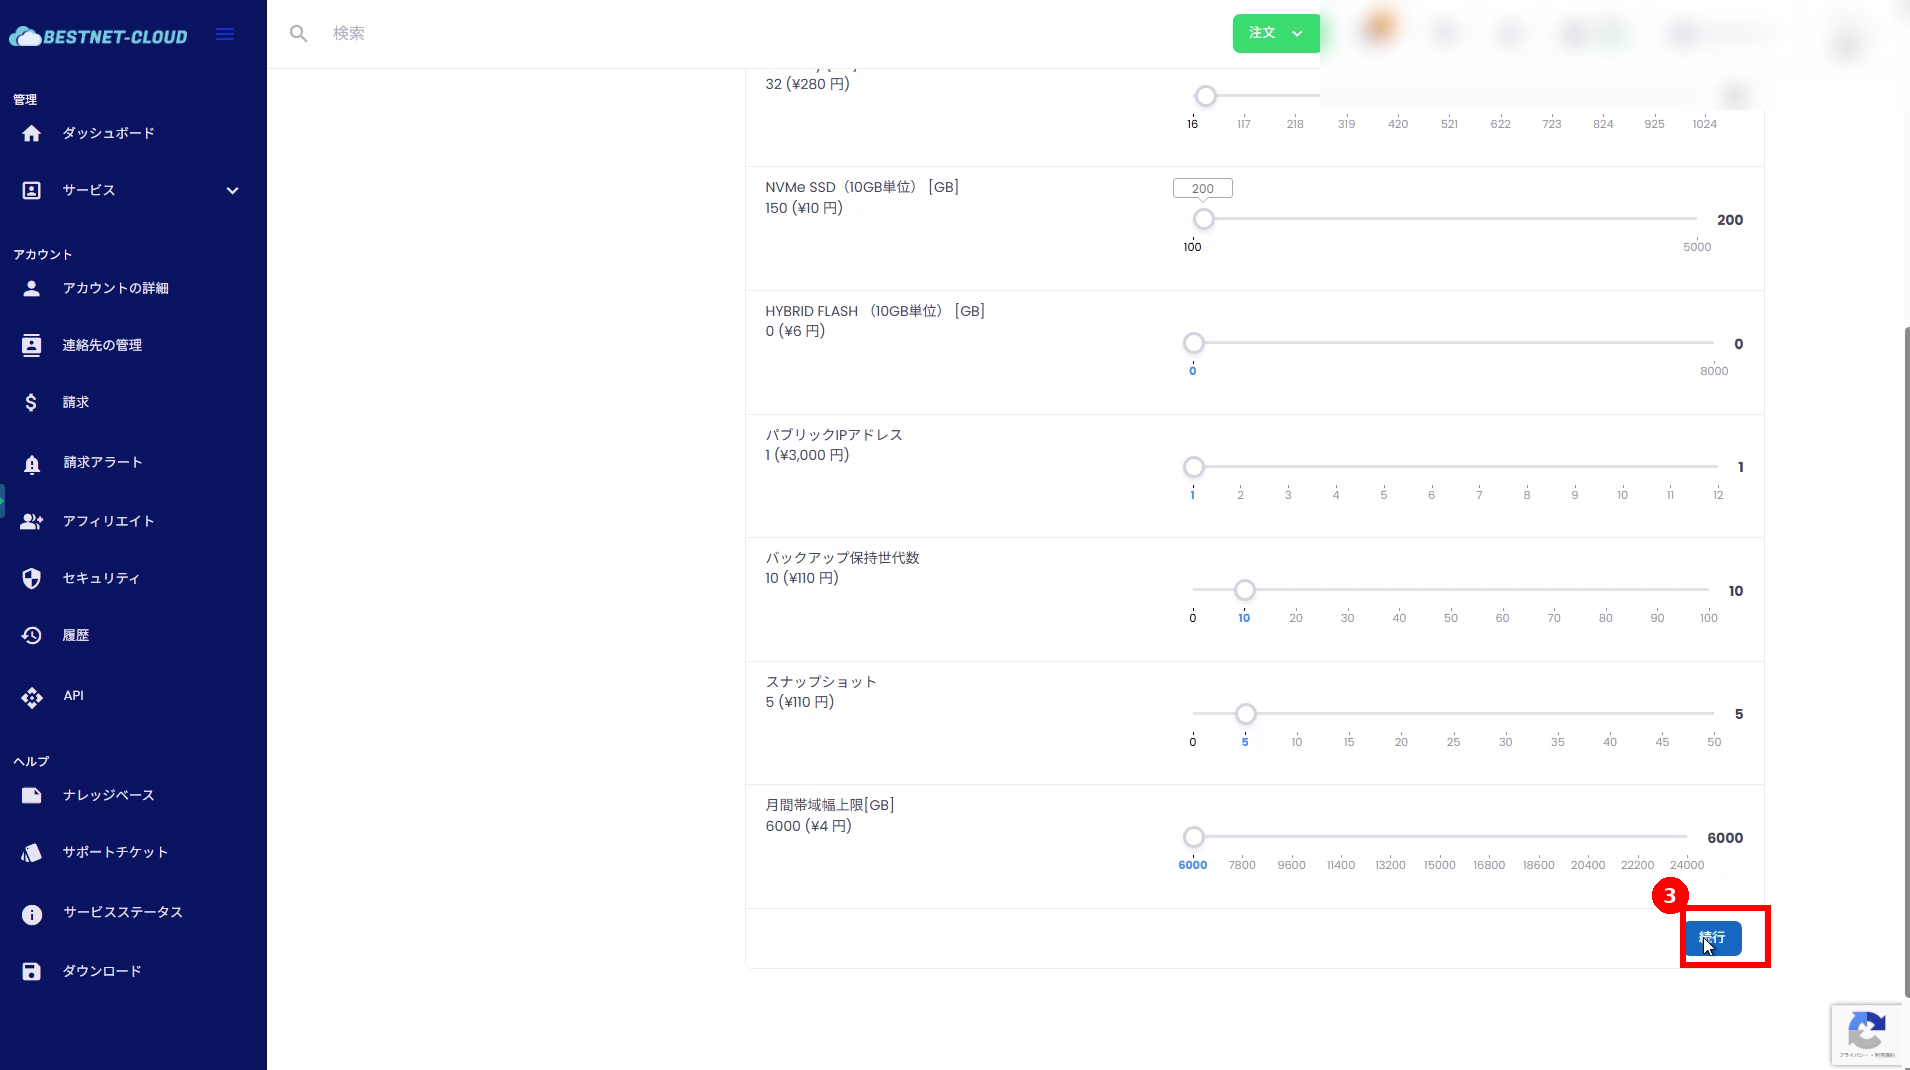 After increasing the necessary items, click “Continue” (red box (3)).
4. Confirm the estimate details, select a payment method, and click “Submit” #
Confirm the changes (items increased) and charges. Select a payment method and click “Submit” to confirm the upgrade.
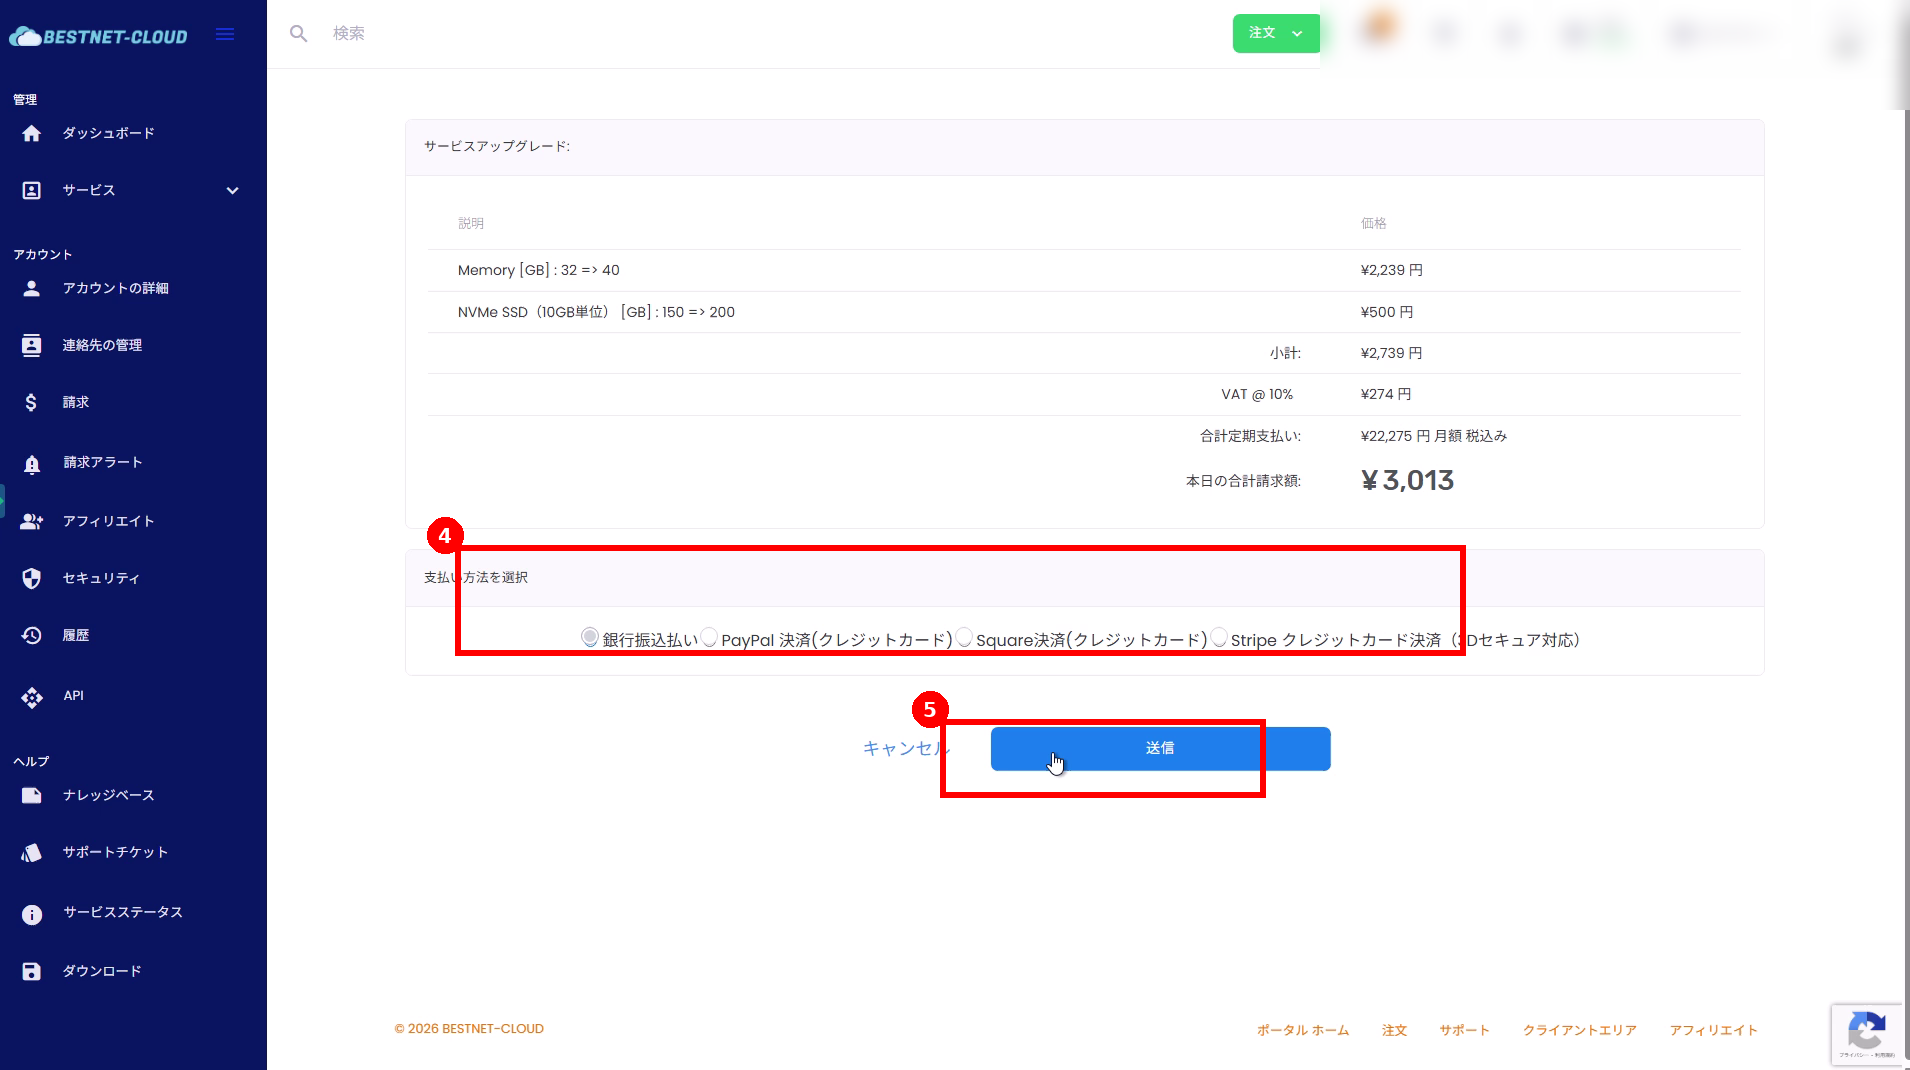 Select the payment method (red box (4)) and click “Submit” (red box (5)).
5. Pay the invoice #
After clicking “Submit”, an invoice is created. If the status is unpaid, complete the payment.
- On the invoice screen, click “Pay Now!”.
- Select a payment method and click “Checkout” to complete the transaction.
Click “Pay Now!” (red box (6)) on the invoice screen.
 Confirm the payment method and click “Checkout” (red box (7)).
6. Confirm the update #
After payment is complete, return to the “Resources” screen of the target service and confirm that the modified values have been updated.
 Example: Confirm that memory (red box (8)) and NVMe SSD (red box (9)) have increased.
DowngradeDowngrade (Resource Reduction) Procedure #
1. Open the Upgrade / Downgrade screen #
From the “Resources” page of the target service, open “Upgrade / Downgrade” (the steps are the same as “1-2” of the upgrade procedure).
2. Reduce resources and click “Continue” #
Change the item you want to reduce (e.g., CPU, memory, NVMe SSD, backup retention generations, snapshot limits, etc.) to your desired value. After configuration, click “Continue” at the bottom of the page.
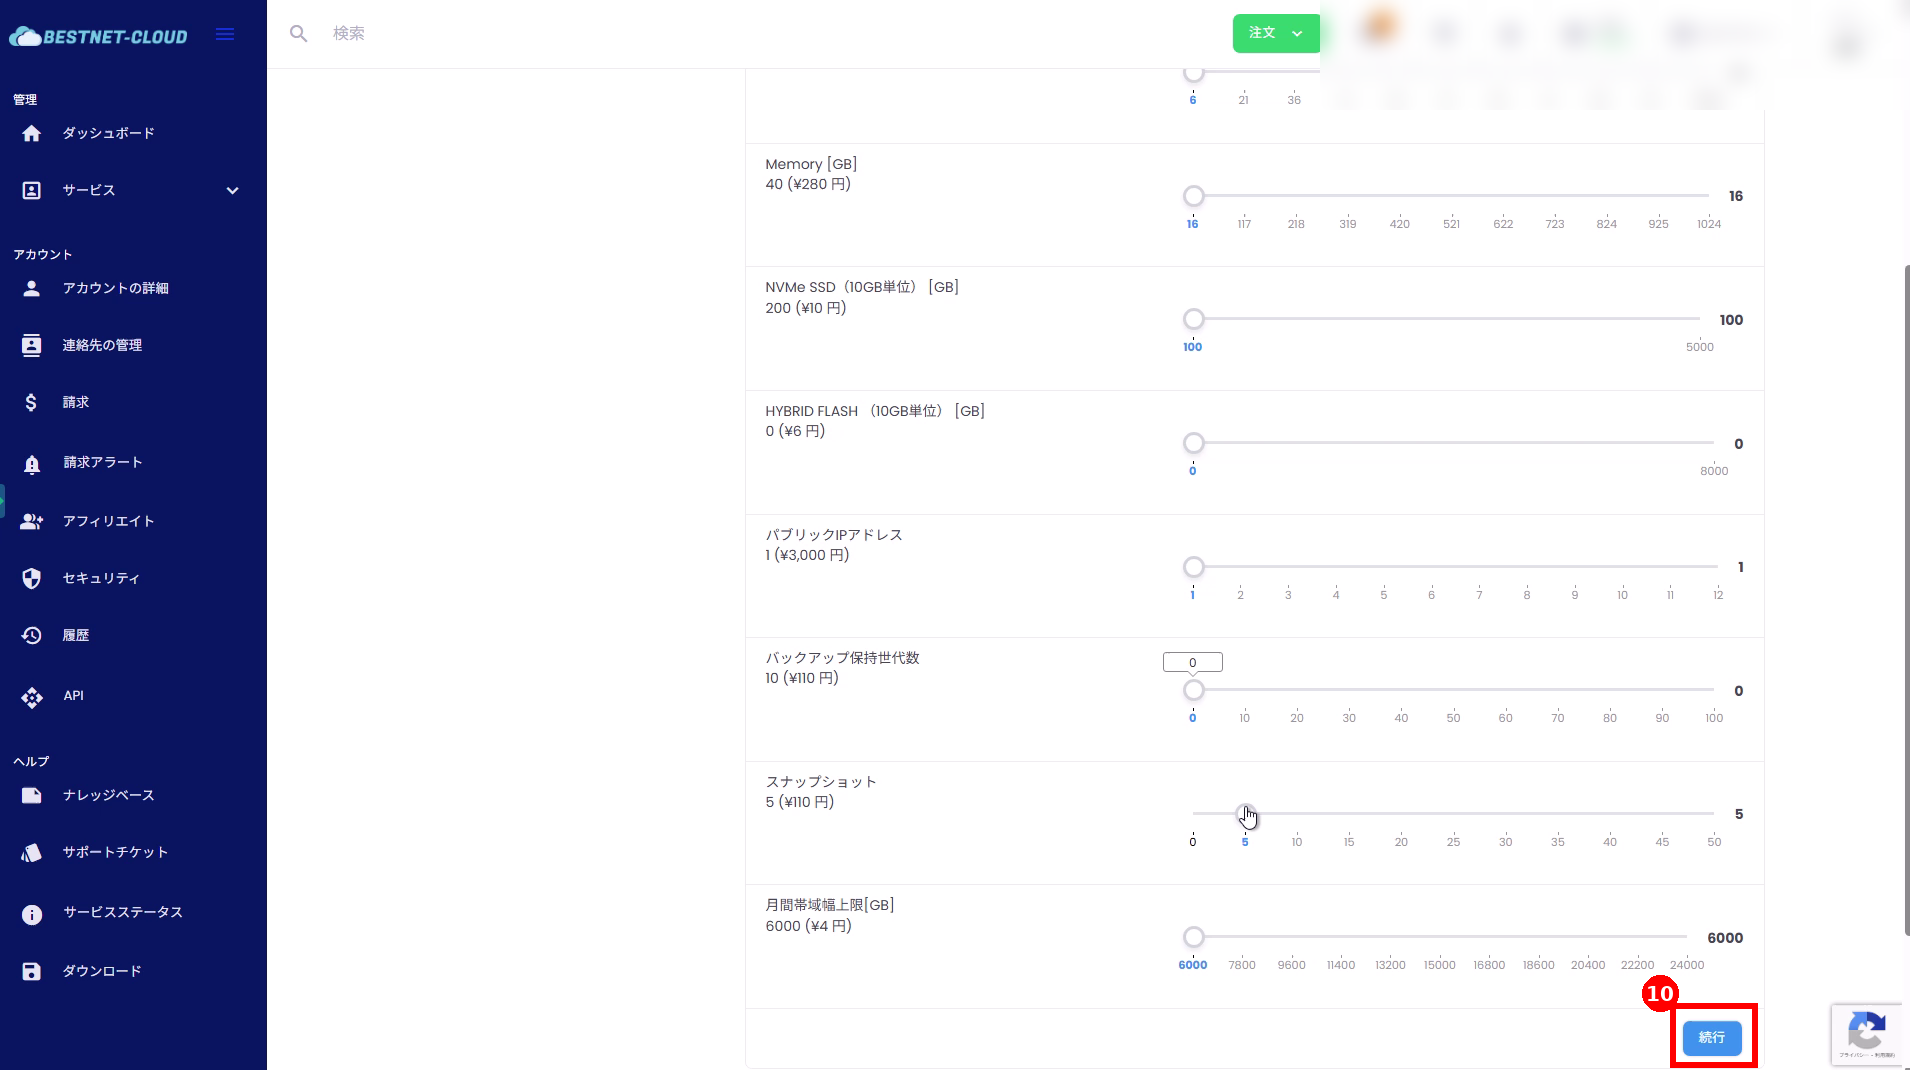 After reducing the necessary items, click “Continue” (red box (10)).
3. Confirm the credit refund amount and click “Submit” #
On the estimate screen, confirm that the amount shown is negative (refund). The downgrade difference is shown as a credit applied to your account.
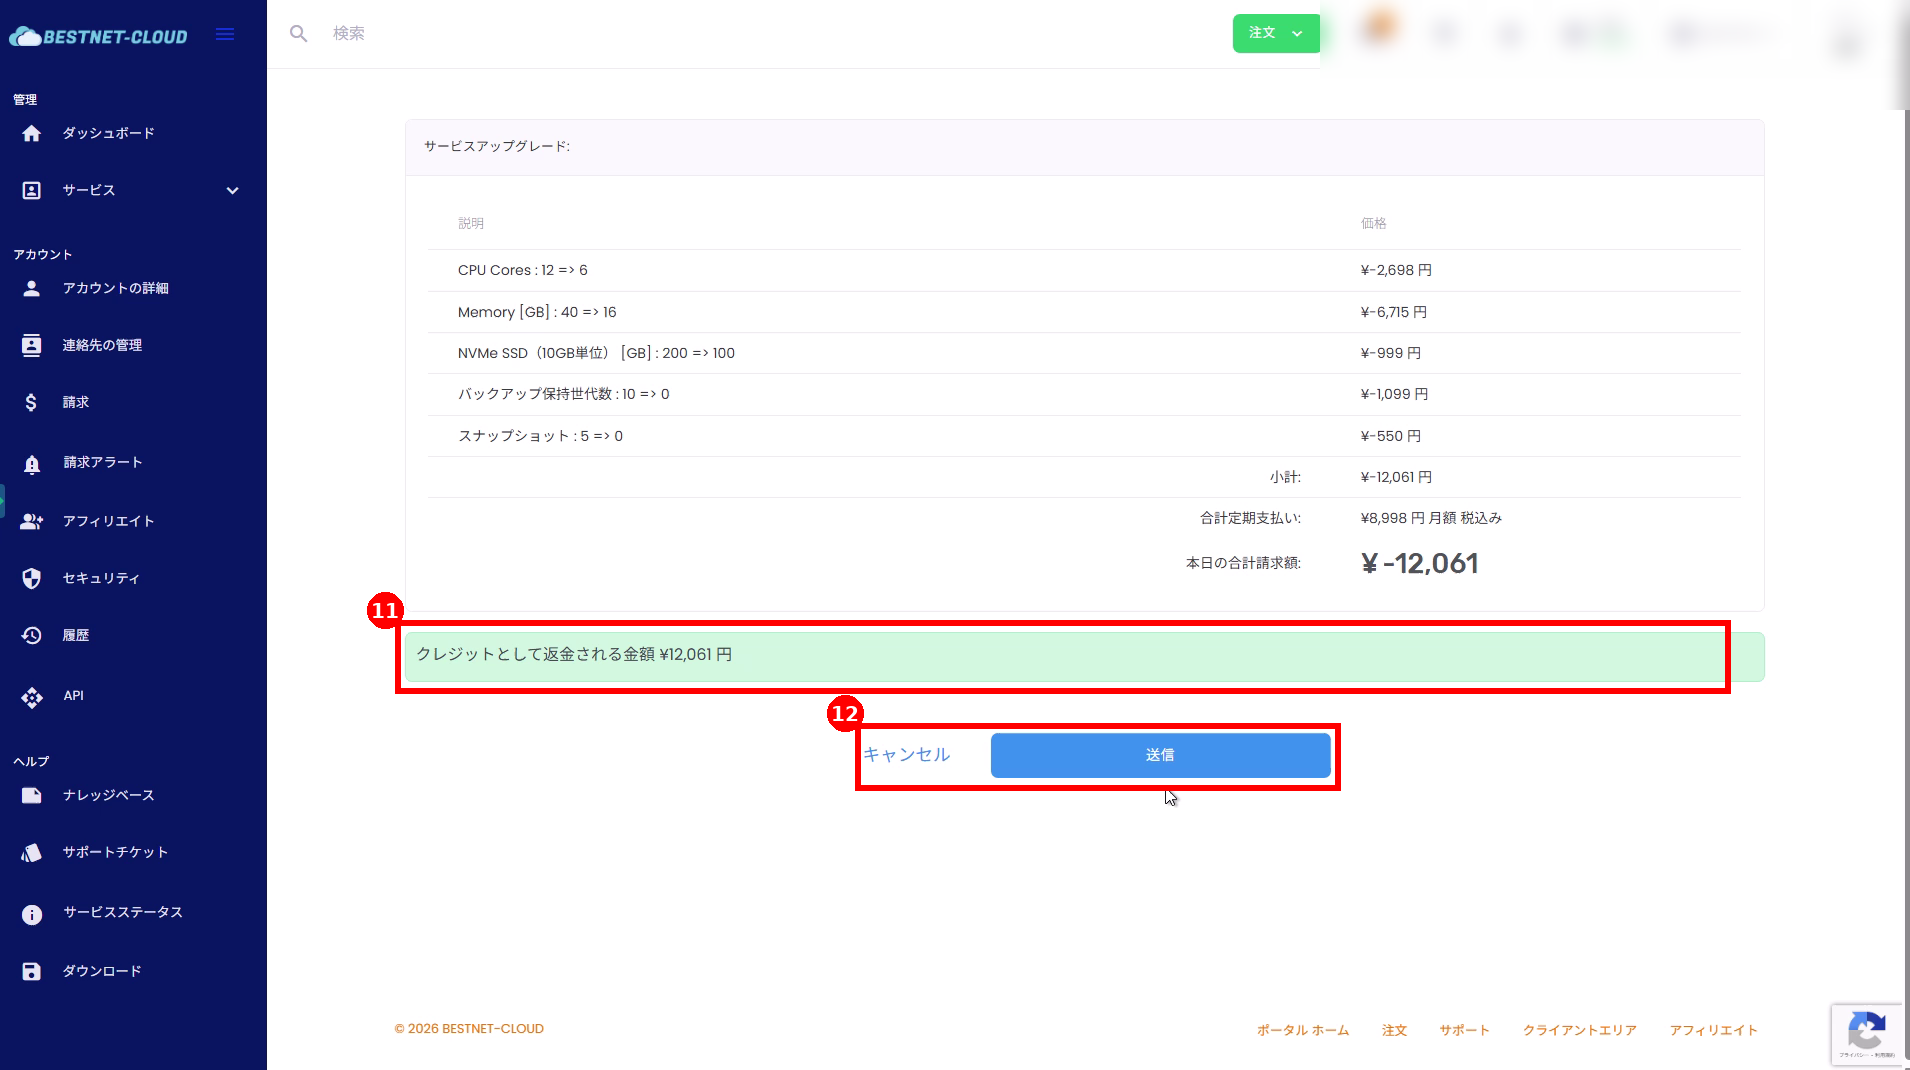 Confirm that the refund will be applied as a credit (red box (11)) and click “Submit” (red box (12)).
4. Confirm credit reflection #
After the downgrade is confirmed, check the increase in “Available Credit” displayed in the upper menu and the record in the credit log.
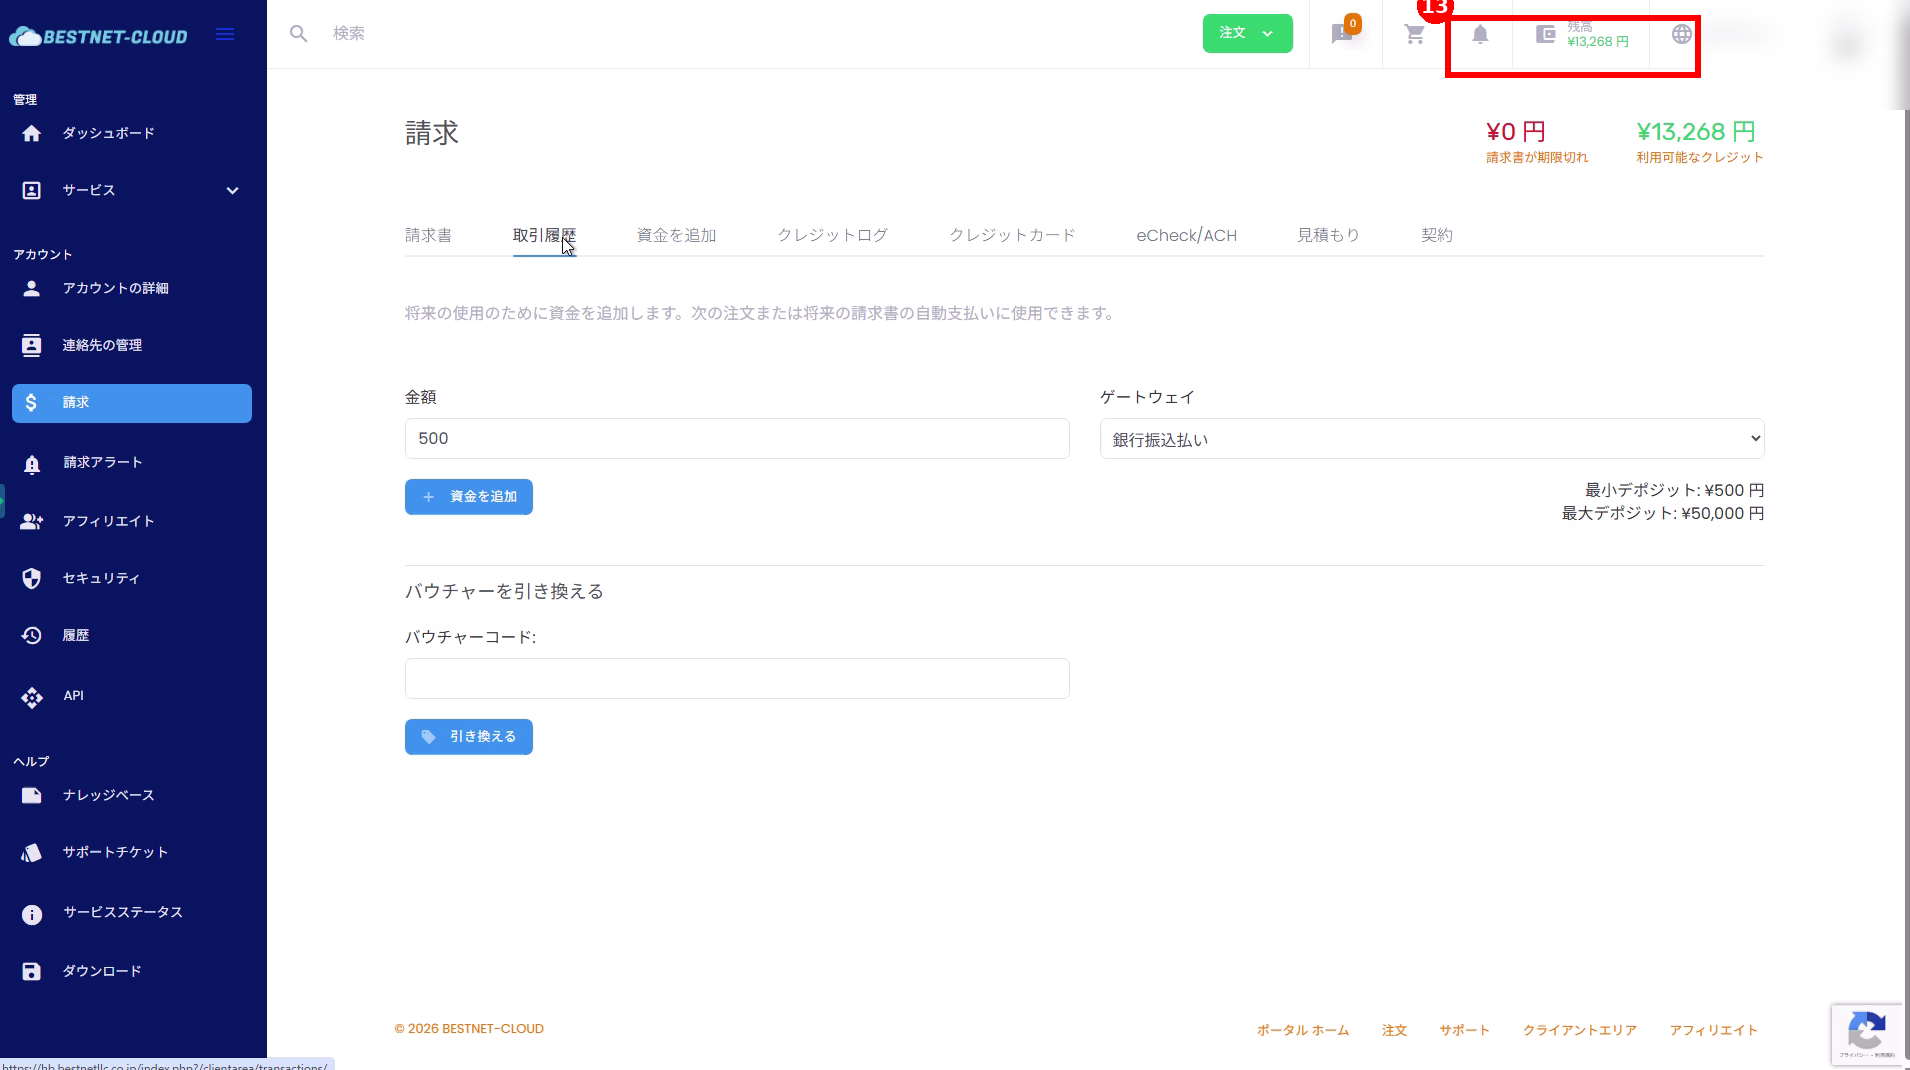 You can confirm the reflection in “Available Credit” (red box (13)) in the upper menu.
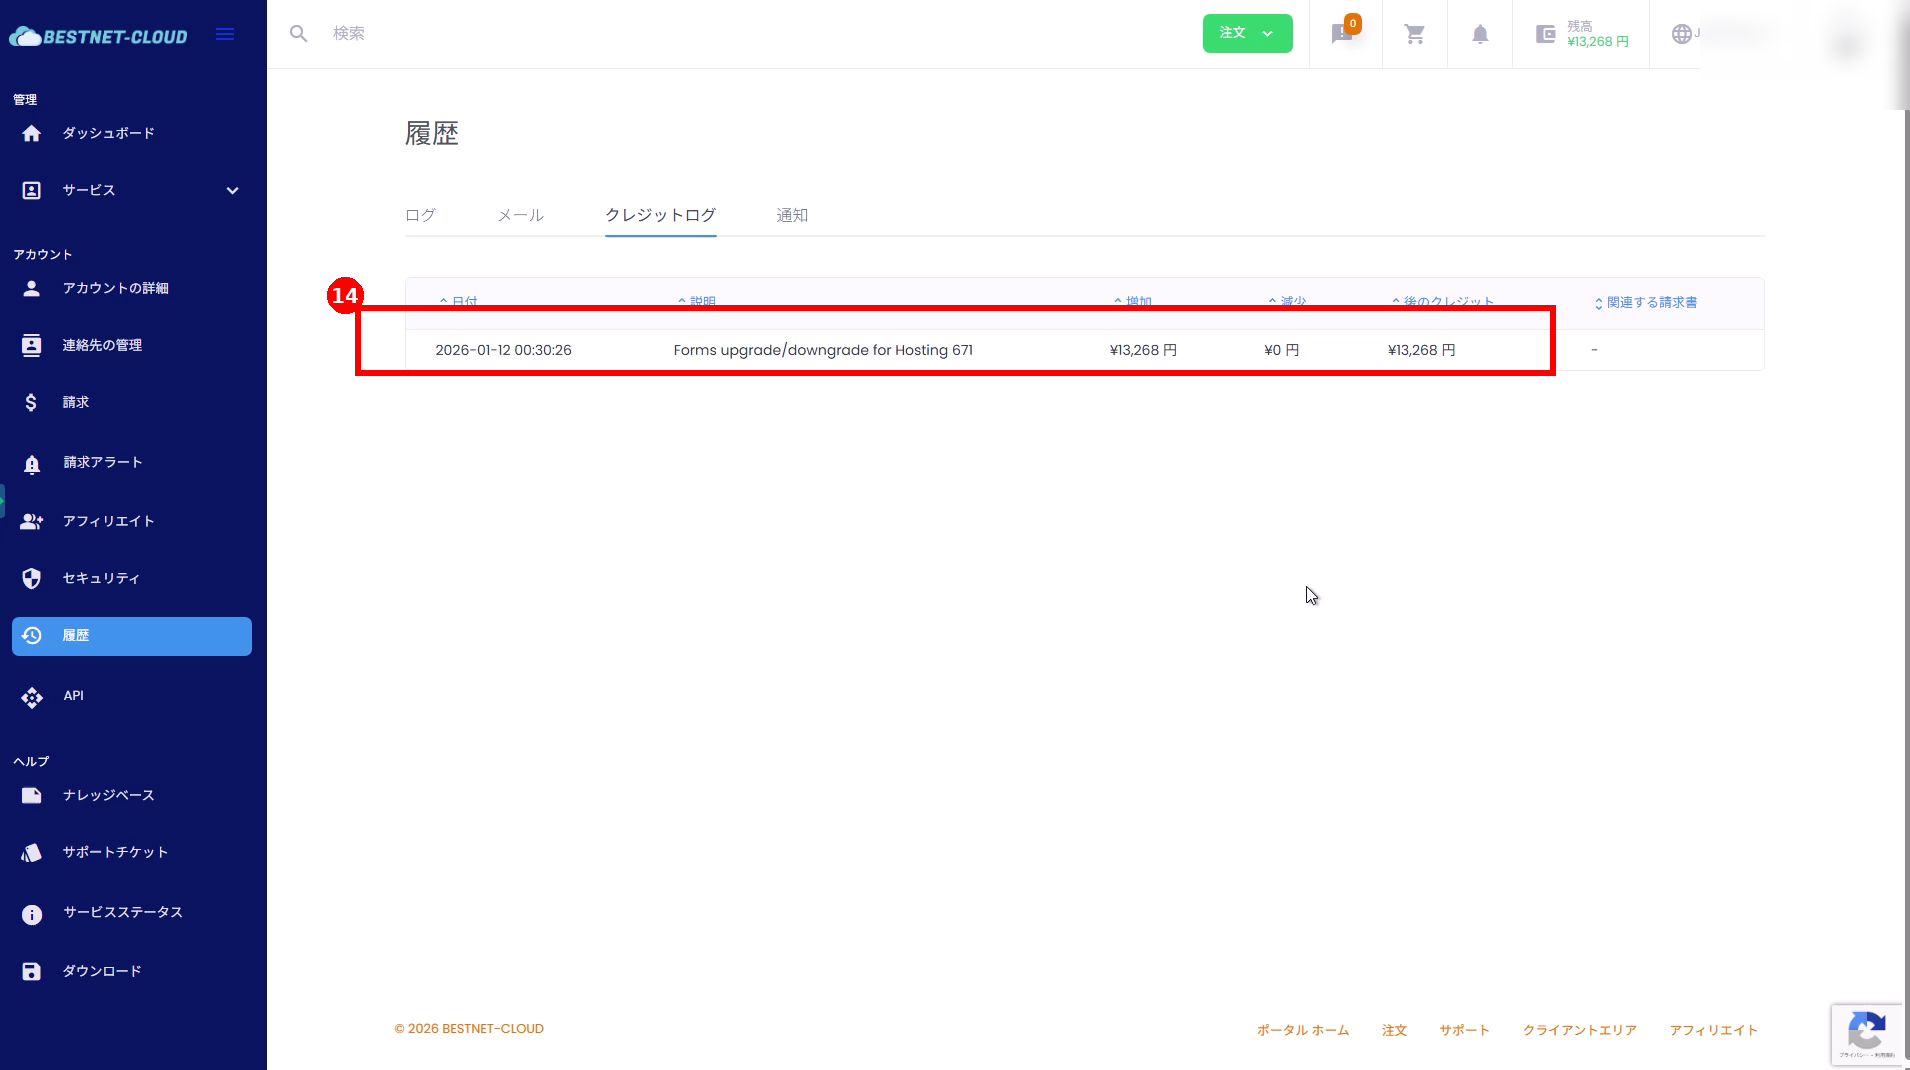 You can confirm the grant history (red box (14)) in “History” > “Credit Log”.
Notes and Supplements #
Cannot downgrade / cannot reduce to desired value #
- Storage (NVMe SSD), backups, snapshots, and other resources may have lower limits restricted by current usage
- Example: If existing snapshots remain, the limit cannot be set to 0, etc.
- Depending on the VM configuration and usage, you may need to delete unnecessary data, delete snapshots, adjust backup retention generations, etc. before reducing resources
Cannot confirm reflection #
- Try refreshing the browser or logging out and back in
- If the invoice is unpaid, it will be reflected after payment is completed
- If it is not reflected after some time, contact us via a support ticket


