
Overview #
This guide covers the basic operations for managing DNS zones (the domains under your control) and DNS records in the DNS service within our Client Area.
Our DNS service is authoritative DNS hosting that answers from name servers located around the
world (in the form dns1-4.cloudns.net). Using only the on-screen controls in the Client Area, you can
add, edit, and delete records such as A / CNAME / MX / TXT, and even configure DNSSEC and failover monitoring.
Log in to the Client Area and open your DNS service subscription.
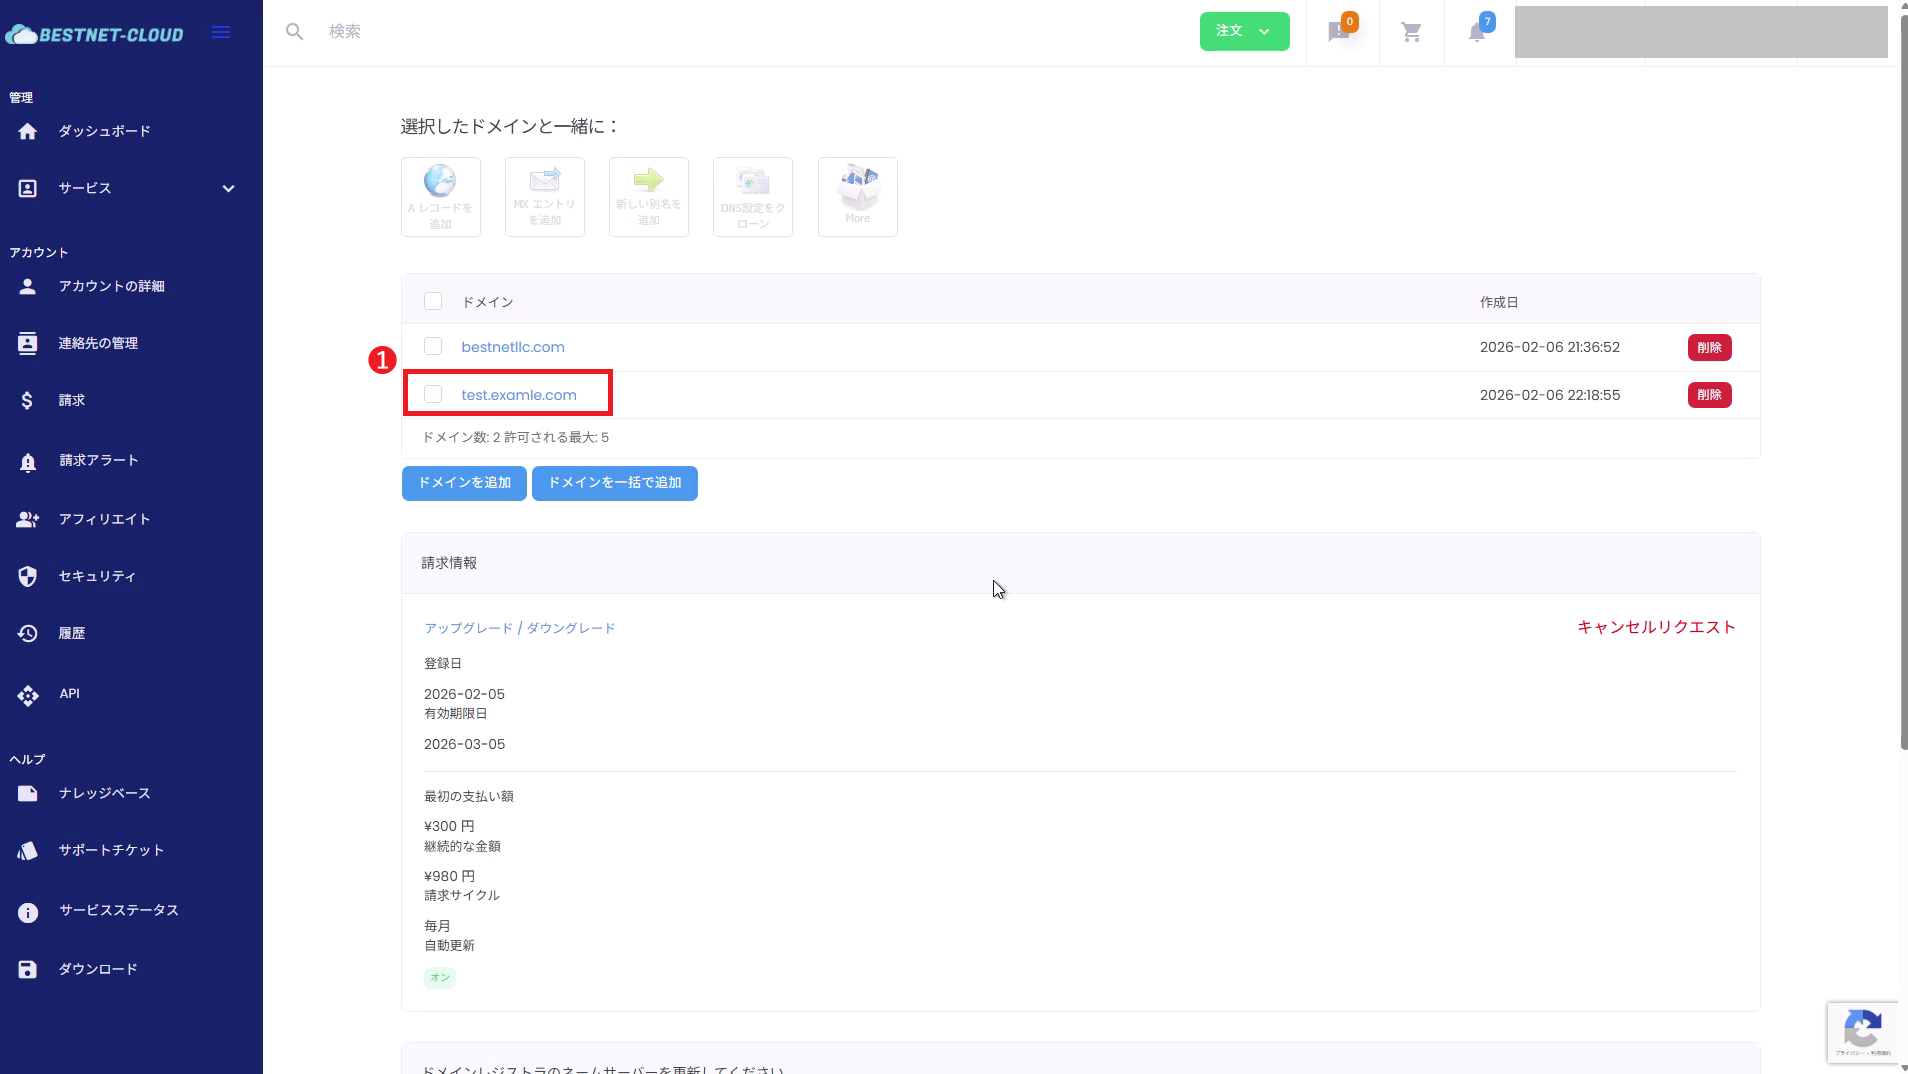
Register the domain you want to manage as a zone (up to 5 domains).
Open the zone and add or edit the DNS records you need.
What you can do with this service #
- Zone (domain) management: Manage DNS for multiple domains under a single subscription (each plan has a limit. For example, the Start plan allows up to 5 domains).
- Various DNS records: Supports 13 record types: A / AAAA / CNAME / MX / TXT / SPF / NS / SRV / PTR / CAA / SSHFP / NAPTR / RP.
- Zone import: Import the contents of your existing DNS from a zone file or via AXFR (zone transfer).
- Cloning settings: Copy the record configuration of an existing zone to another domain.
- DNSSEC: Enable DNSSEC per zone (register the DS record with your registrar).
- Failover / monitoring: Health-check A records and automatically switch over in the event of a failure.
- For instructions on migrating a domain registered with an external registrar (outside BESTNET’s management) to our DNS, please see the dedicated guide “Managing DNS records for external domains not under our management“.
- For upgrading or downgrading your plan, please see “DNS service – Upgrading / downgrading your plan“.
Prerequisites #
- You can log in to our Client Area.
- Your DNS service subscription is valid (active).
- The domain name you want to register, along with the record details you want to configure (the IP for A, the host name for MX, the value for TXT, and so on).
Procedure #
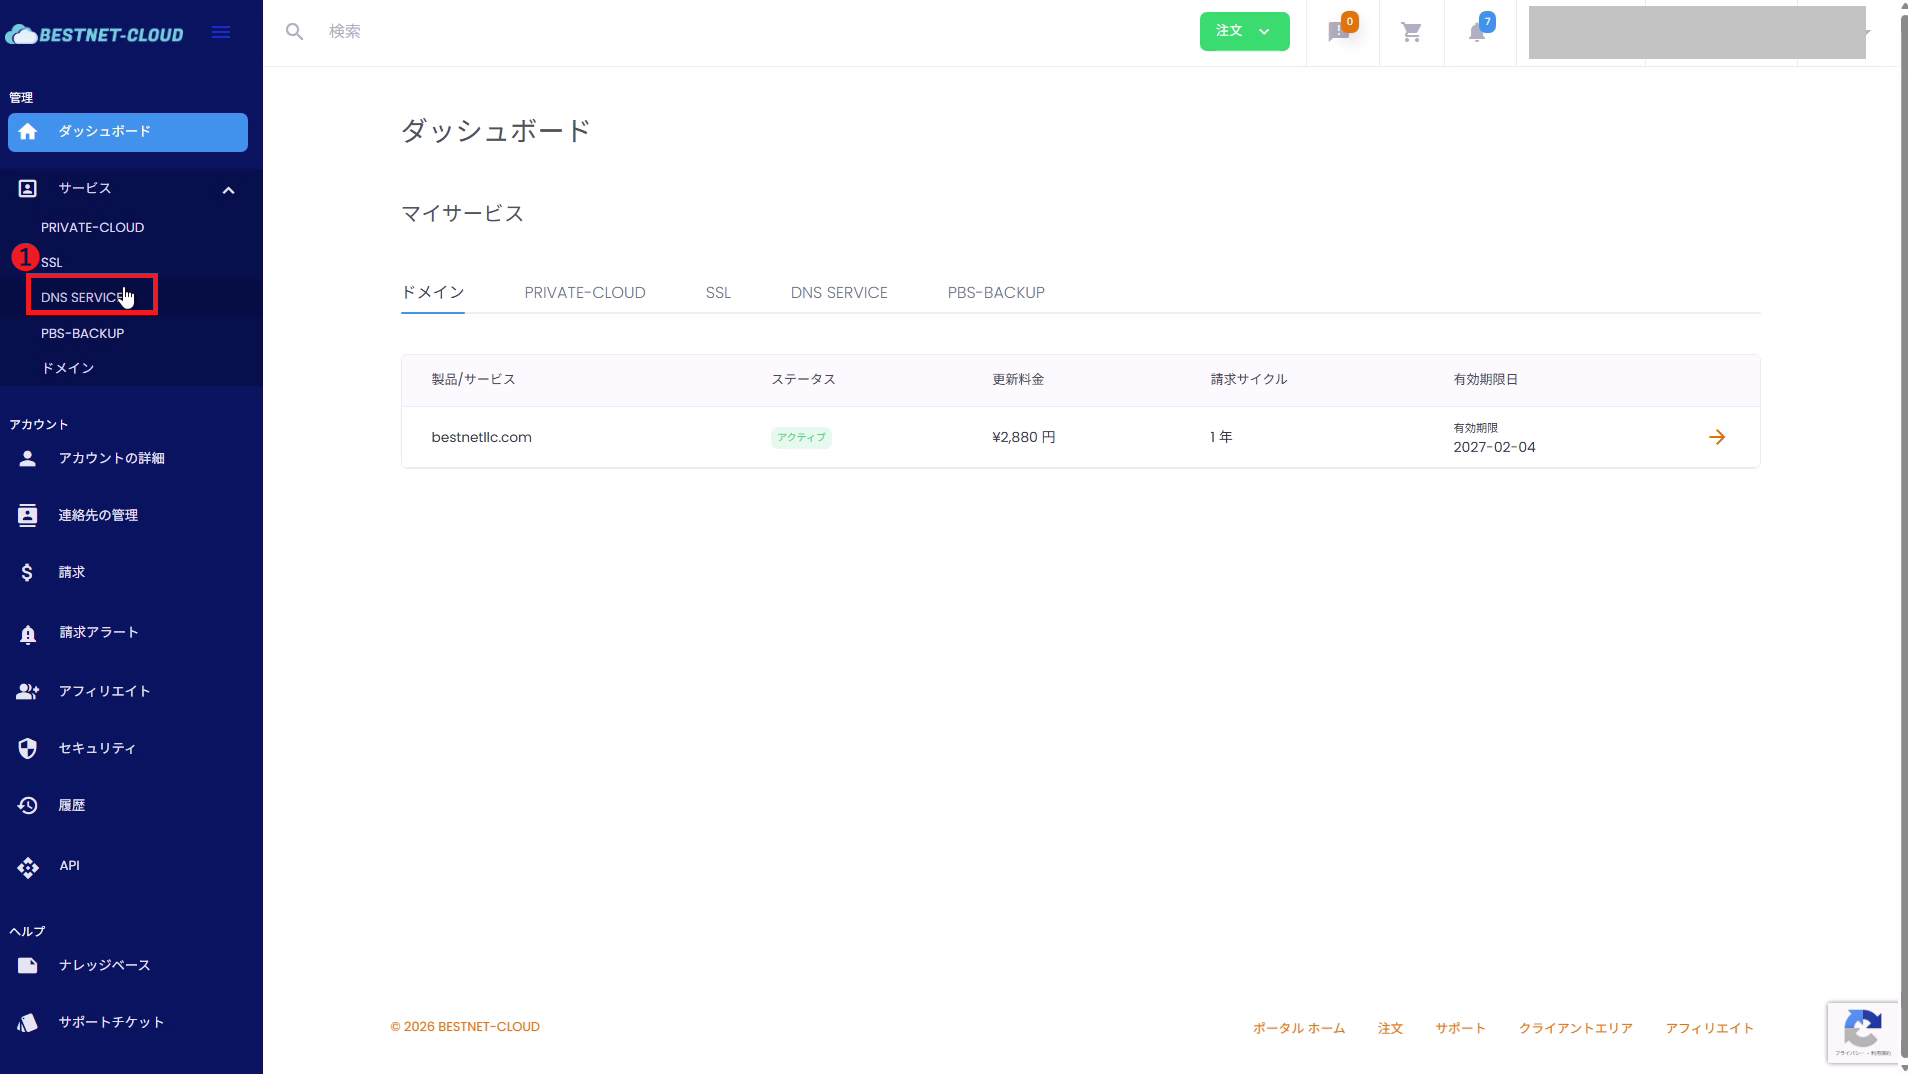
1Open the DNS service management screen #
Log in to the Client Area and, from Services in the left menu, open
DNS SERVICE. In the list of subscriptions, click the relevant plan name (for example, Start)
to display the service details and the list of domains.
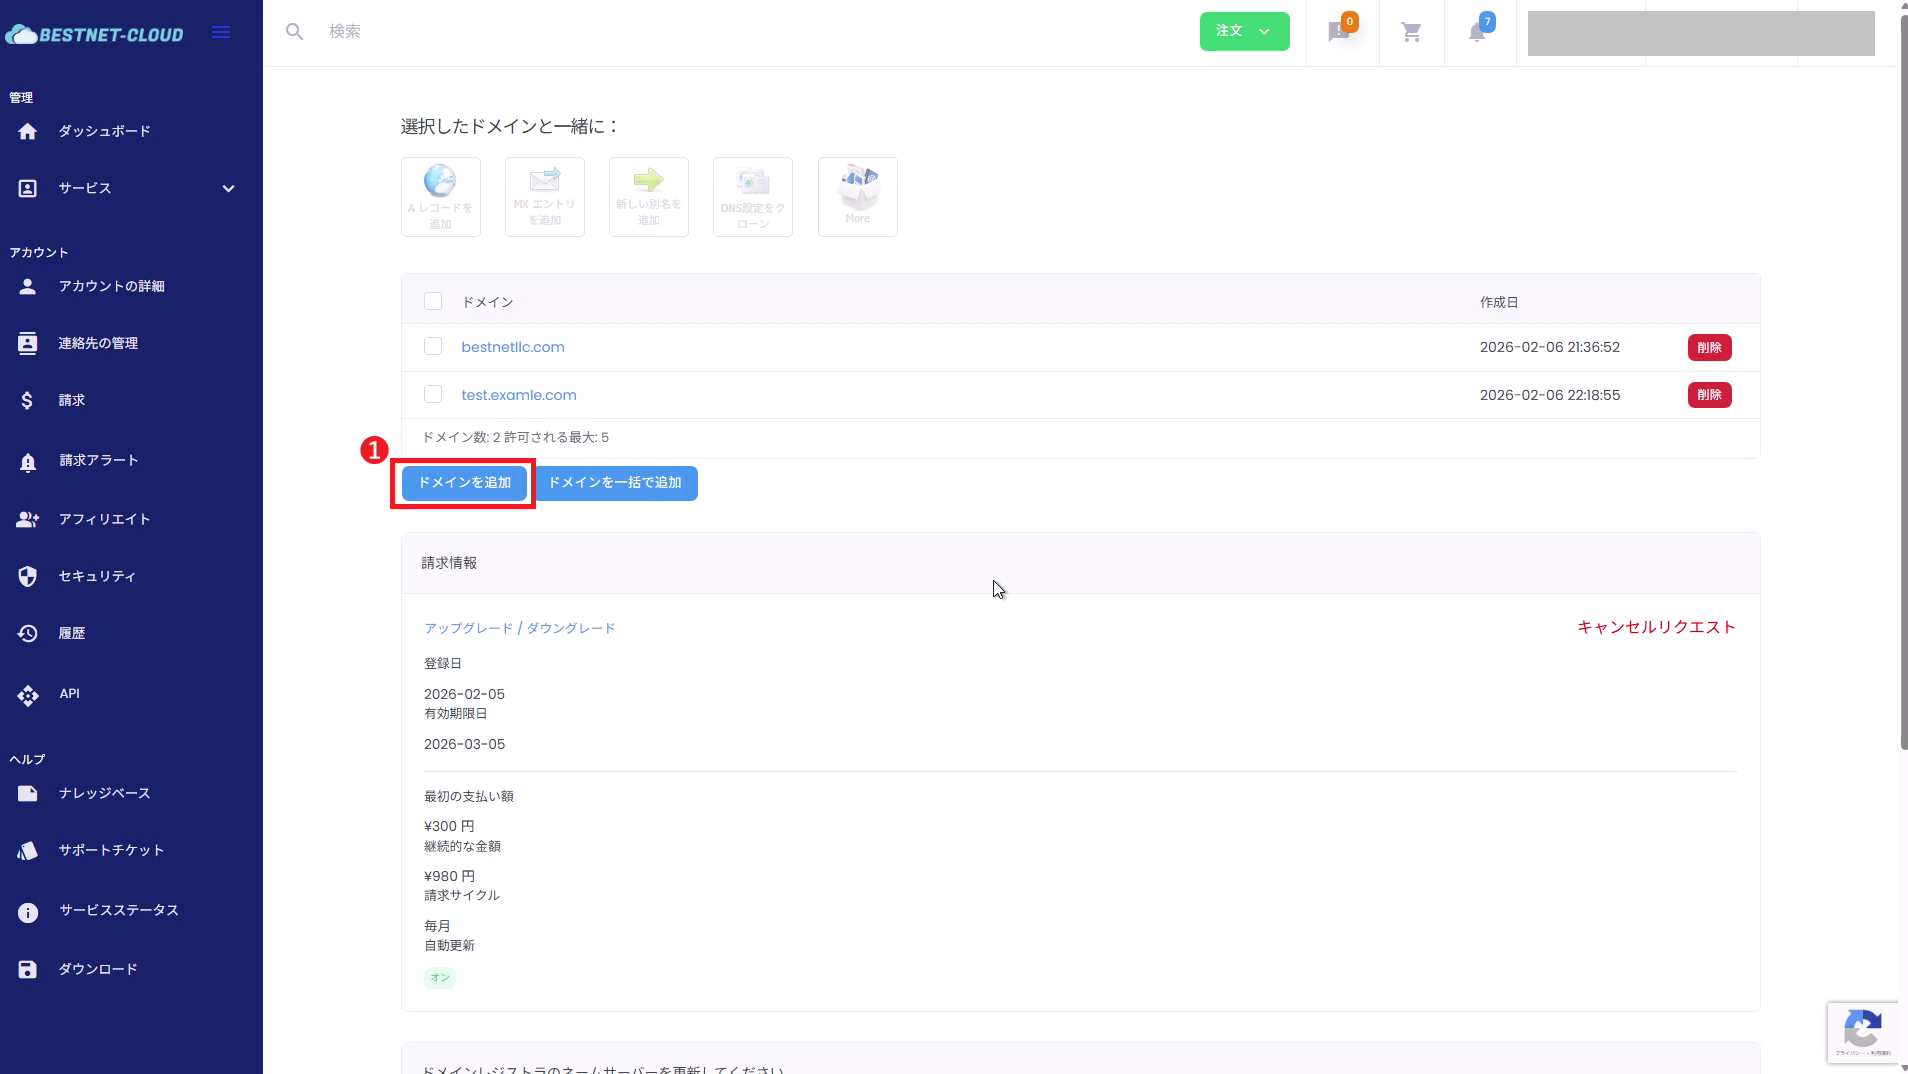
2Add a zone (domain) #
2-1. Click “Add domain”
In the domain list on the service details page, click Add domain (to register several at once, use “Add domains in bulk”).
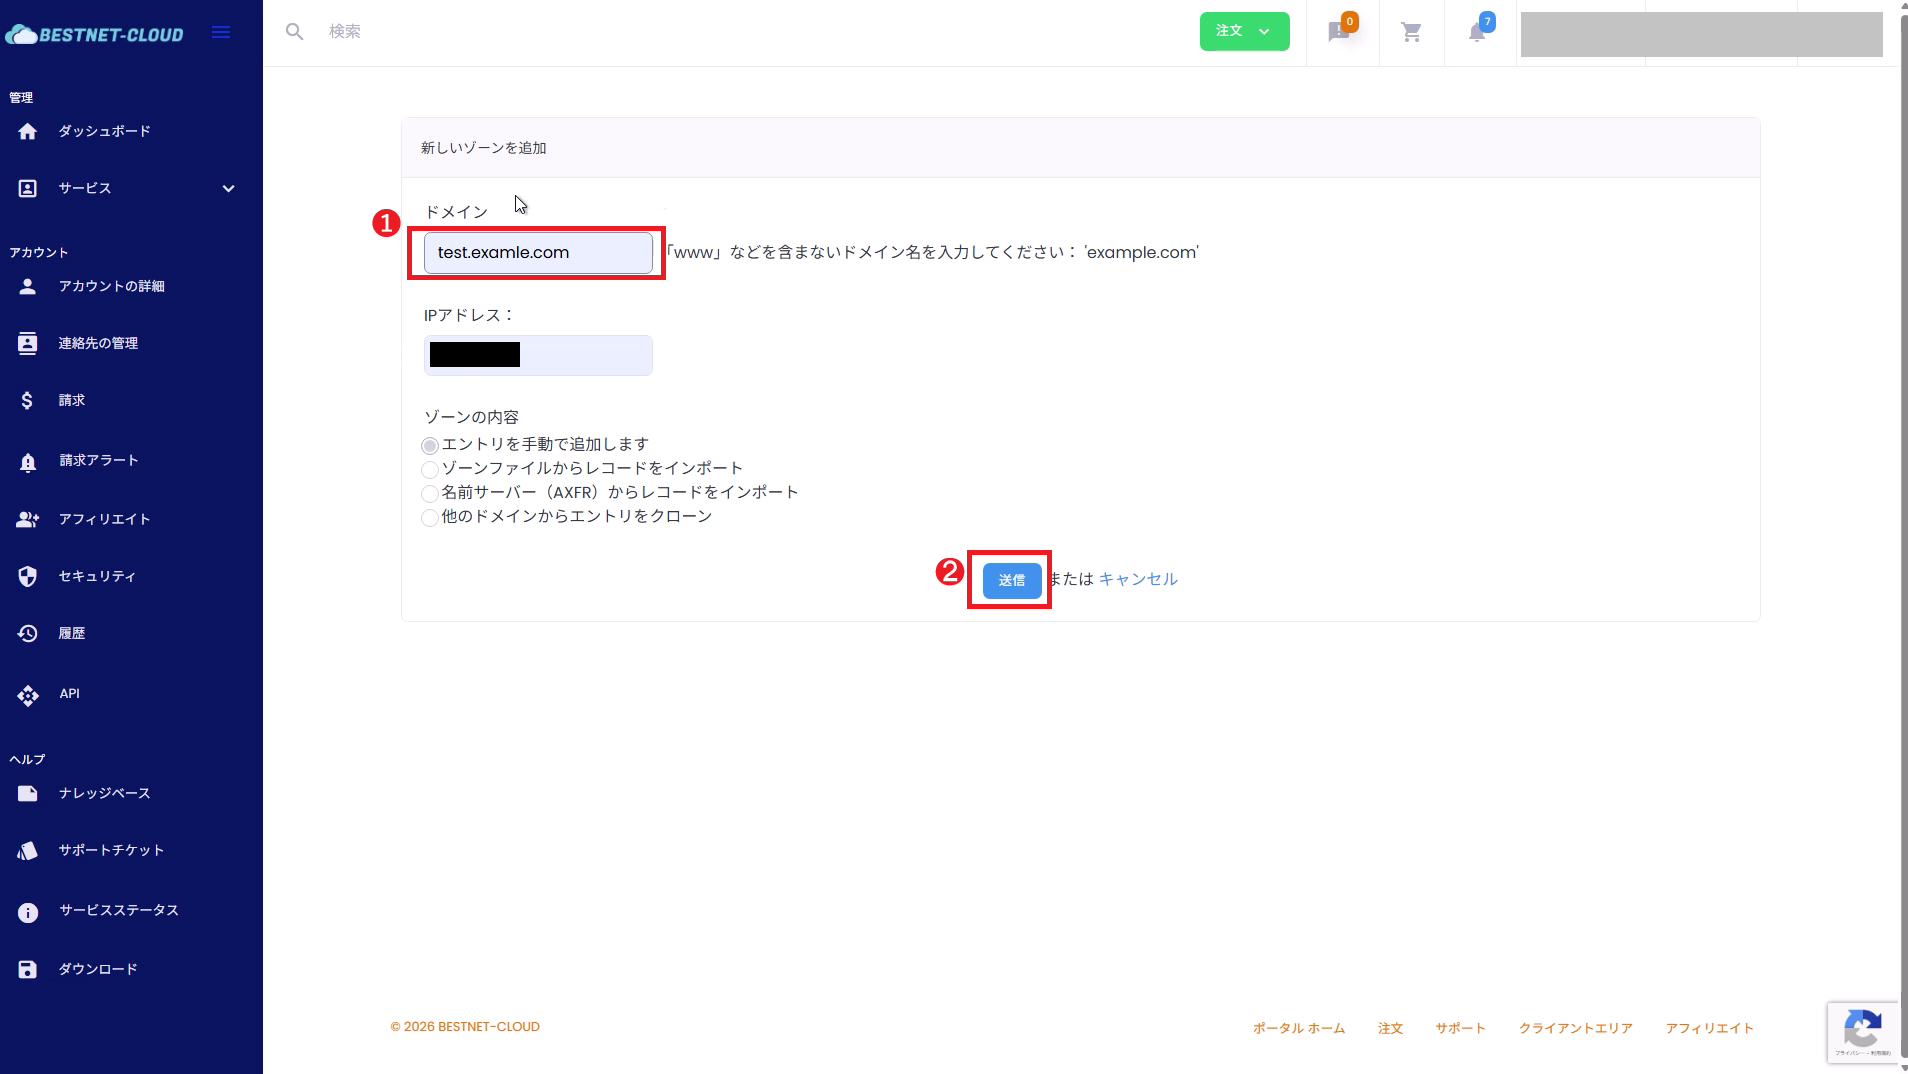
2-2. Specify the domain name and initial contents, then submit
On the “Add a new zone” screen, specify the following and click Submit.
- Domain: Enter the root domain without www, like
example.com. - IP address: Leaving this blank is generally recommended (it is safer to explicitly add the records you need afterward).
-
Zone contents: You can choose from four ways to populate the initial records.
- Add entries manually: Create an empty zone and enter records by hand later.
- Import records from a zone file: Paste and import a zone file, such as one in BIND format.
- Import records from a name server (AXFR): Pull them in from your current DNS via zone transfer.
- Clone entries from another domain: Copy the record configuration of an existing zone.
When moving over a domain that is already running on another DNS, importing it (via zone file / AXFR) rather than creating it empty helps prevent records from being missed during migration. Even after the zone has been created, you can import them from “Import zone contents” in the zone editor.
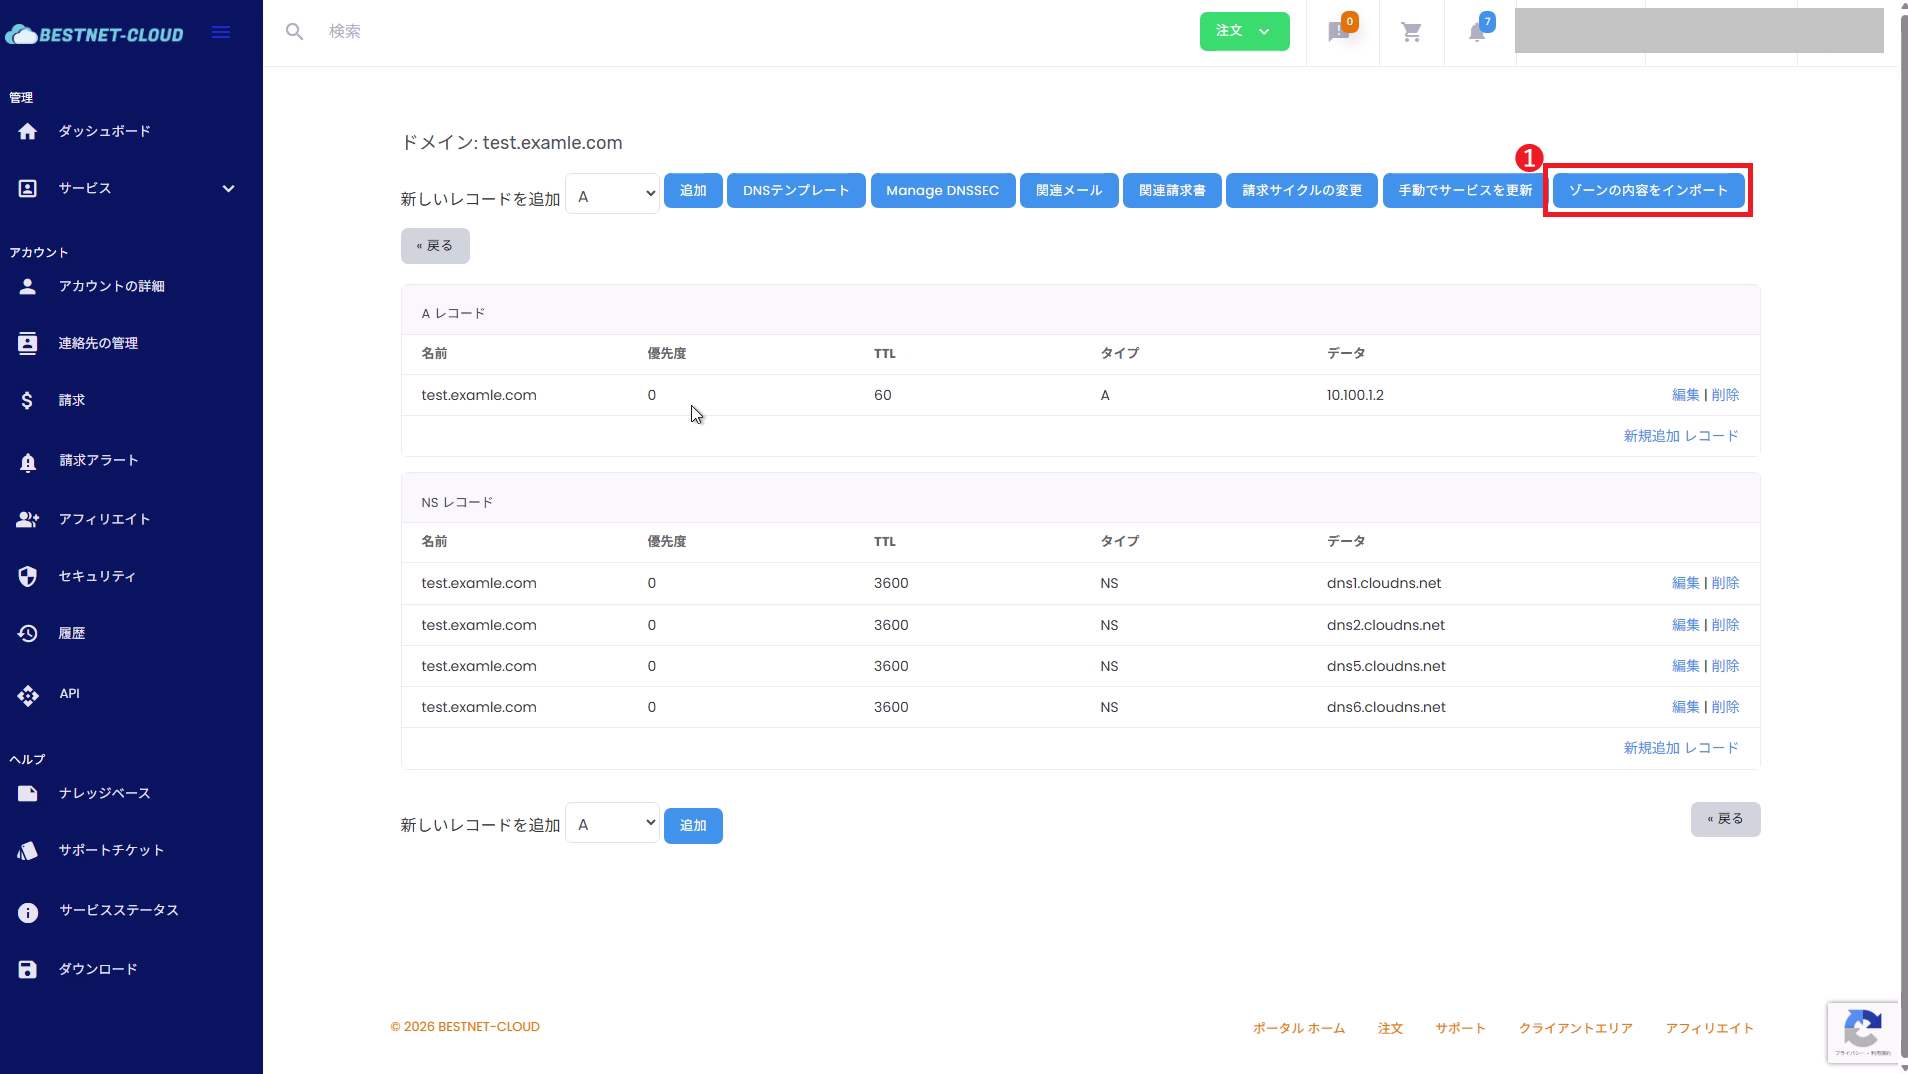
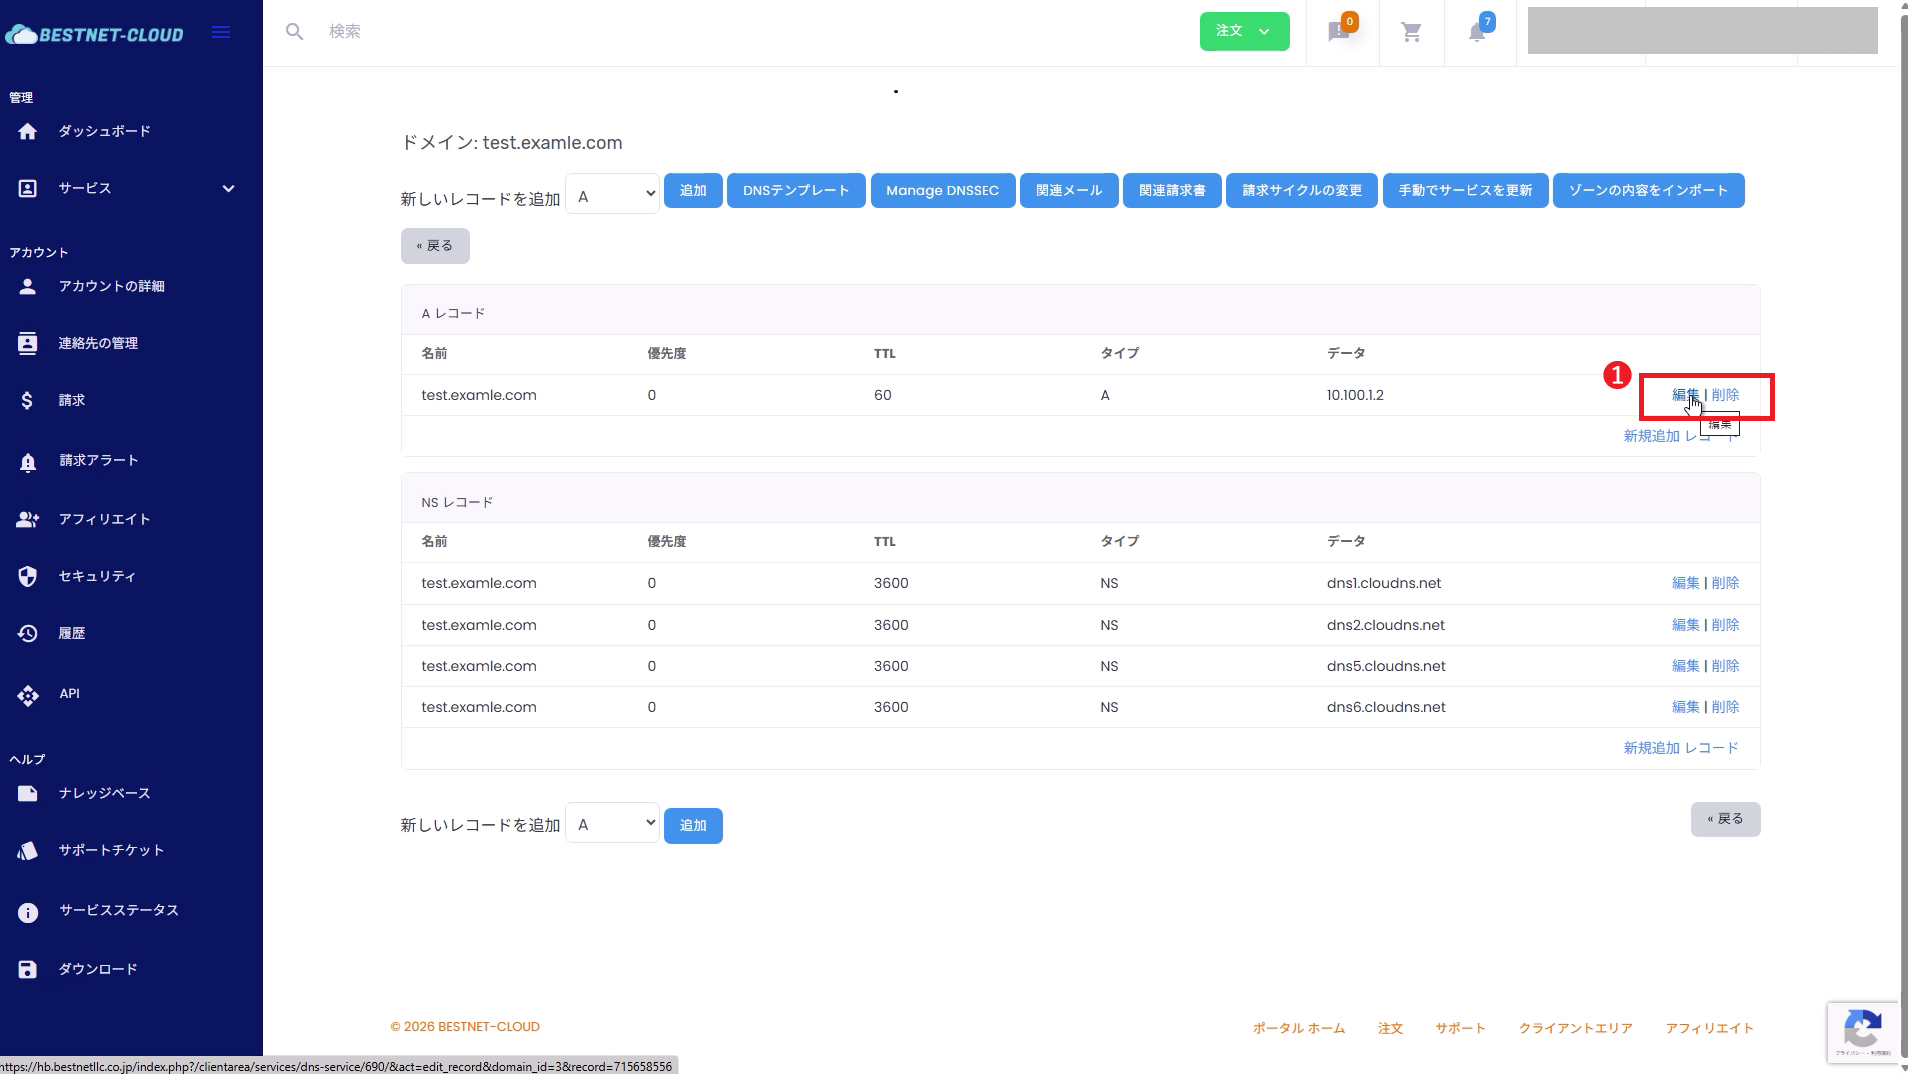
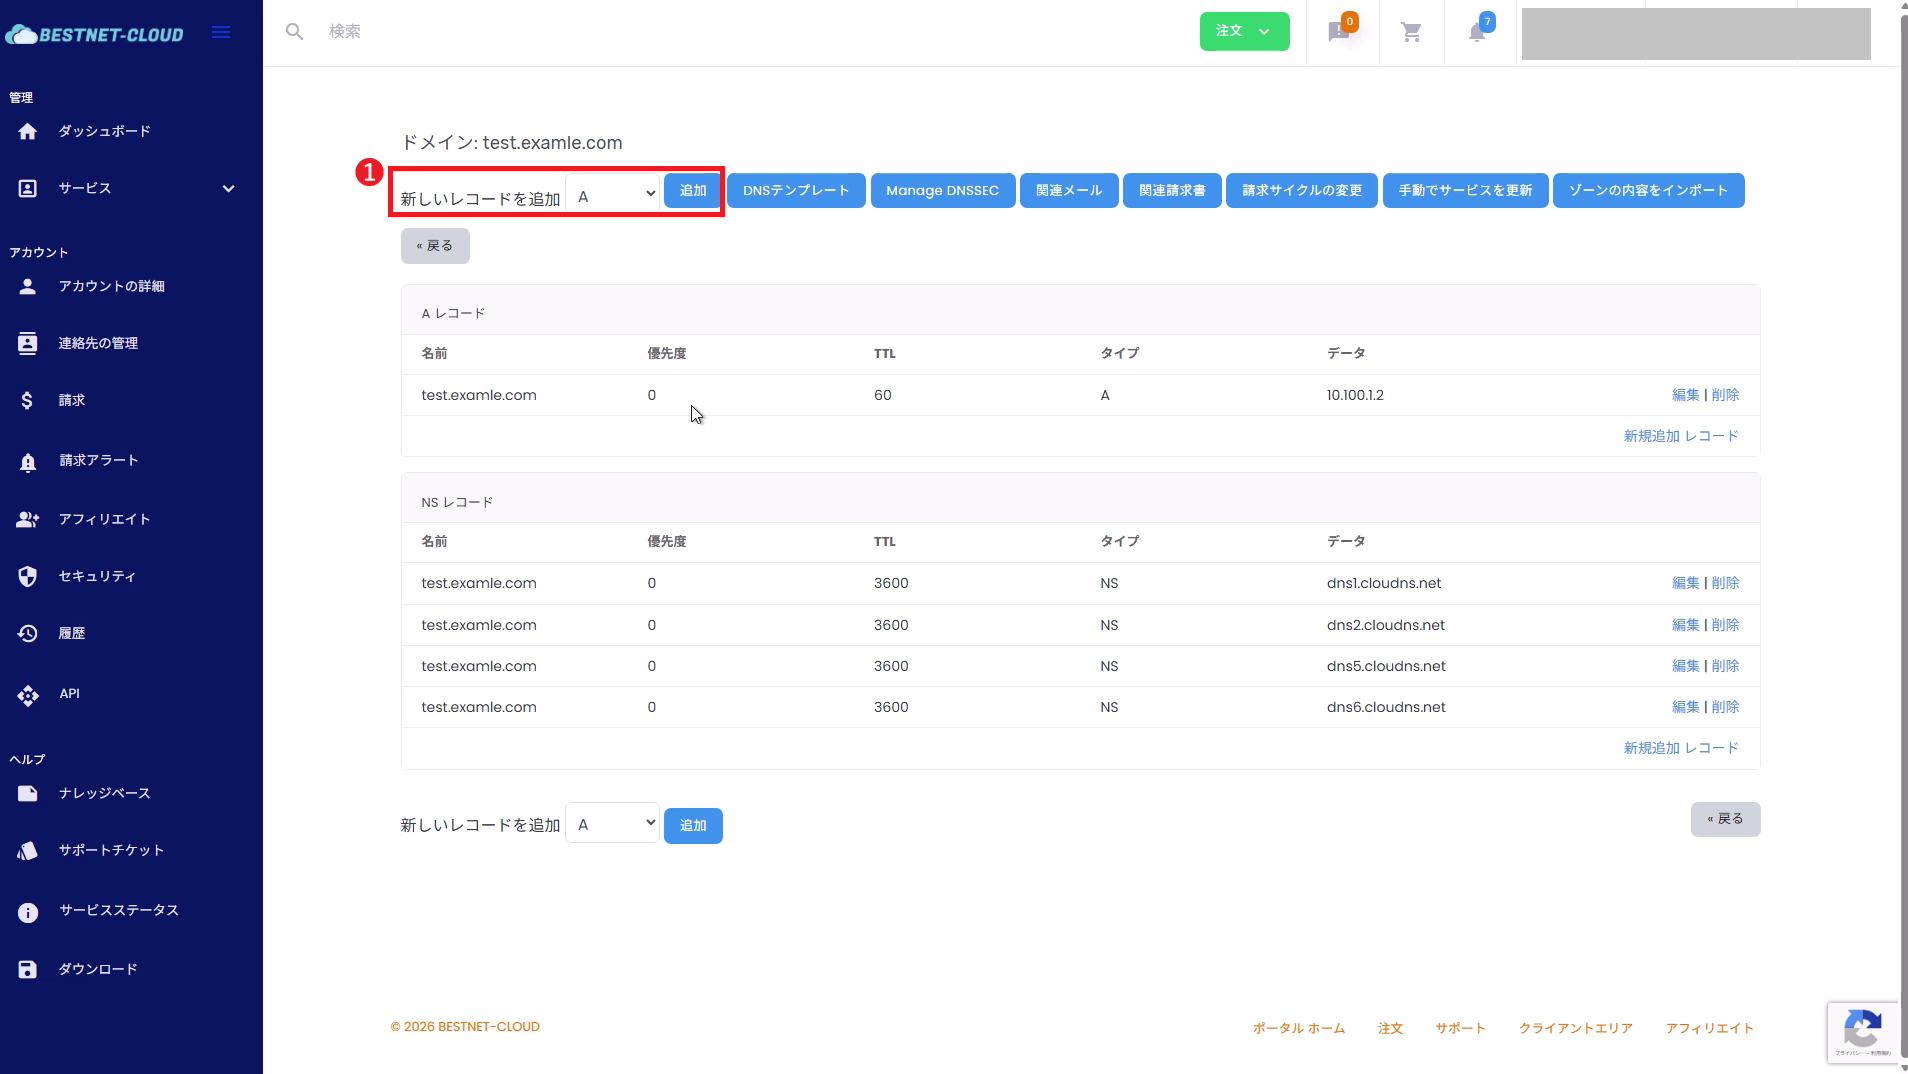
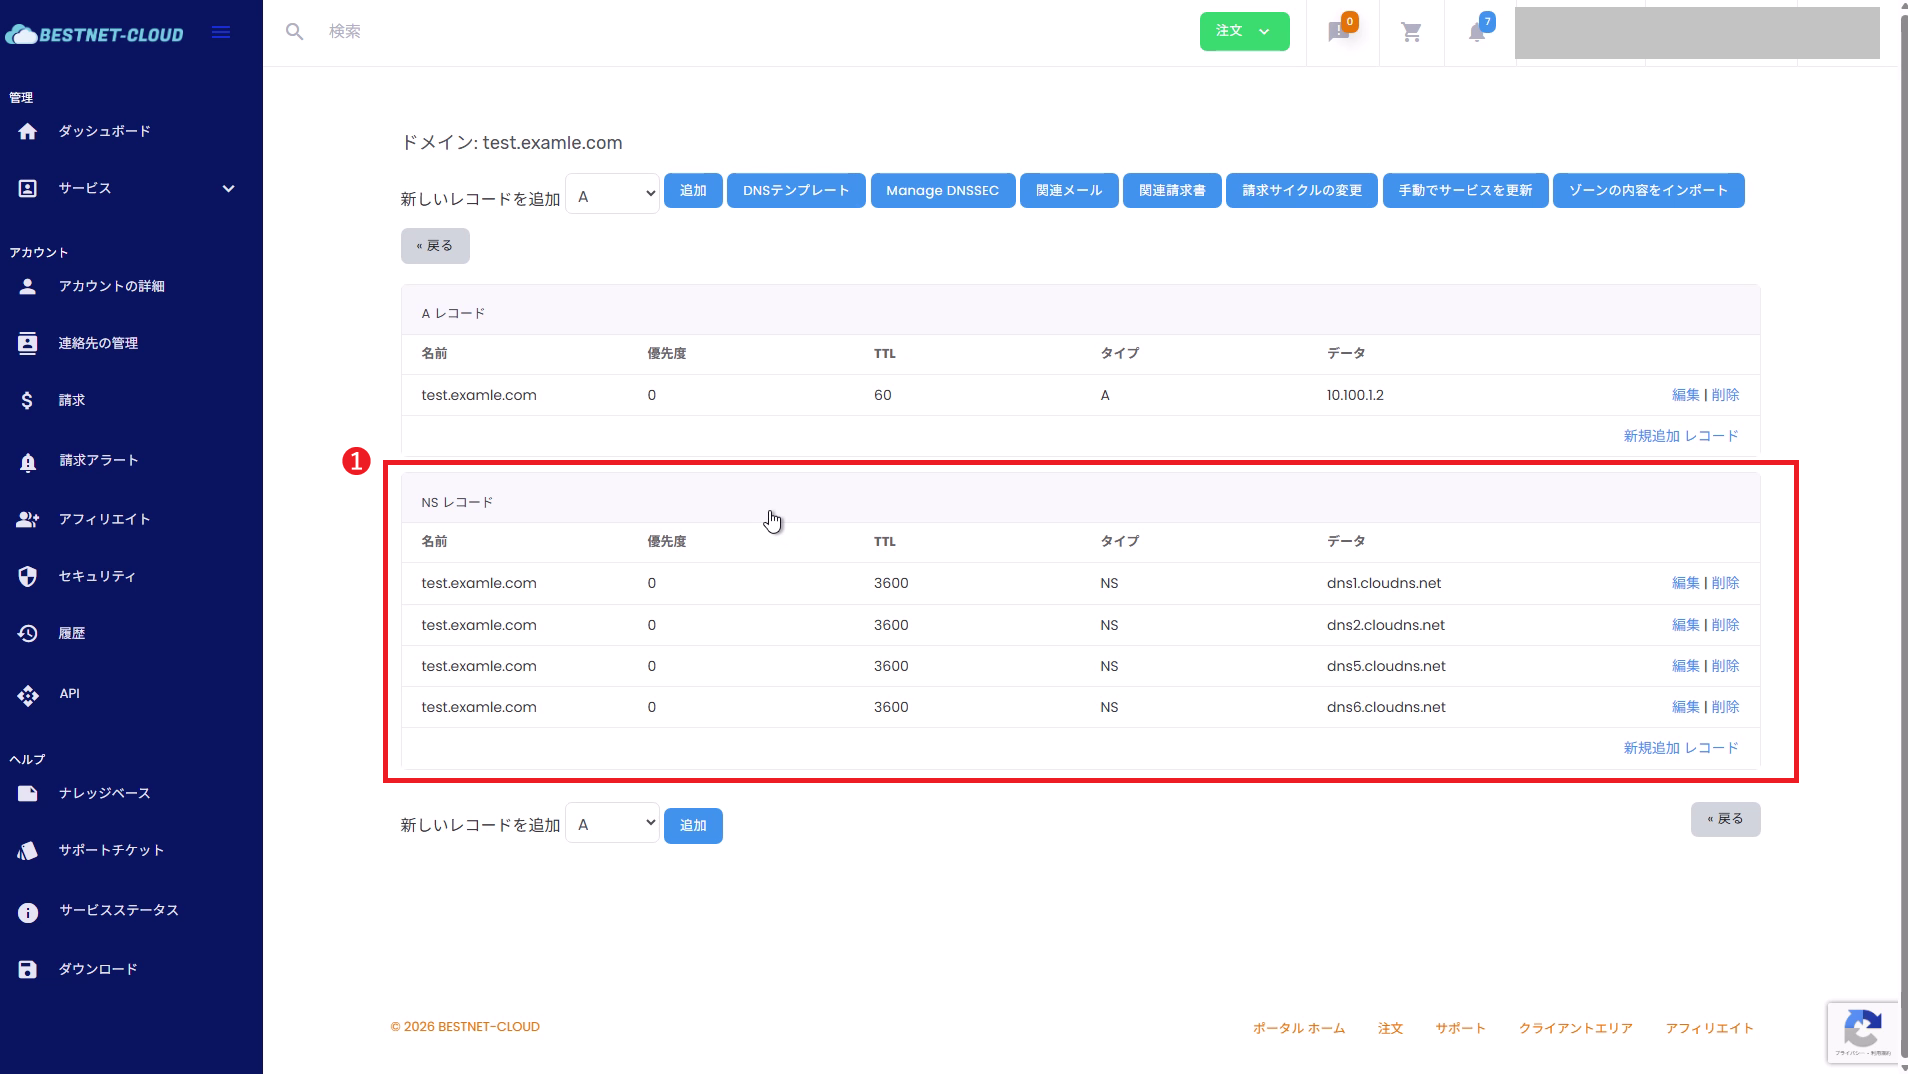
3Open the zone and review the record list #
From the domain list, click the name of the domain you want to edit to open the zone editor. Records are listed by type (NS / A / MX, etc.), with Edit / Delete on the right side of each row.
4Add a DNS record #
4-1. Select a record type and click “Add”
In “Add a new record” at the top of the zone editor, select the type you want to add (A / CNAME / MX / TXT, etc.) and click Add. The input form opens.
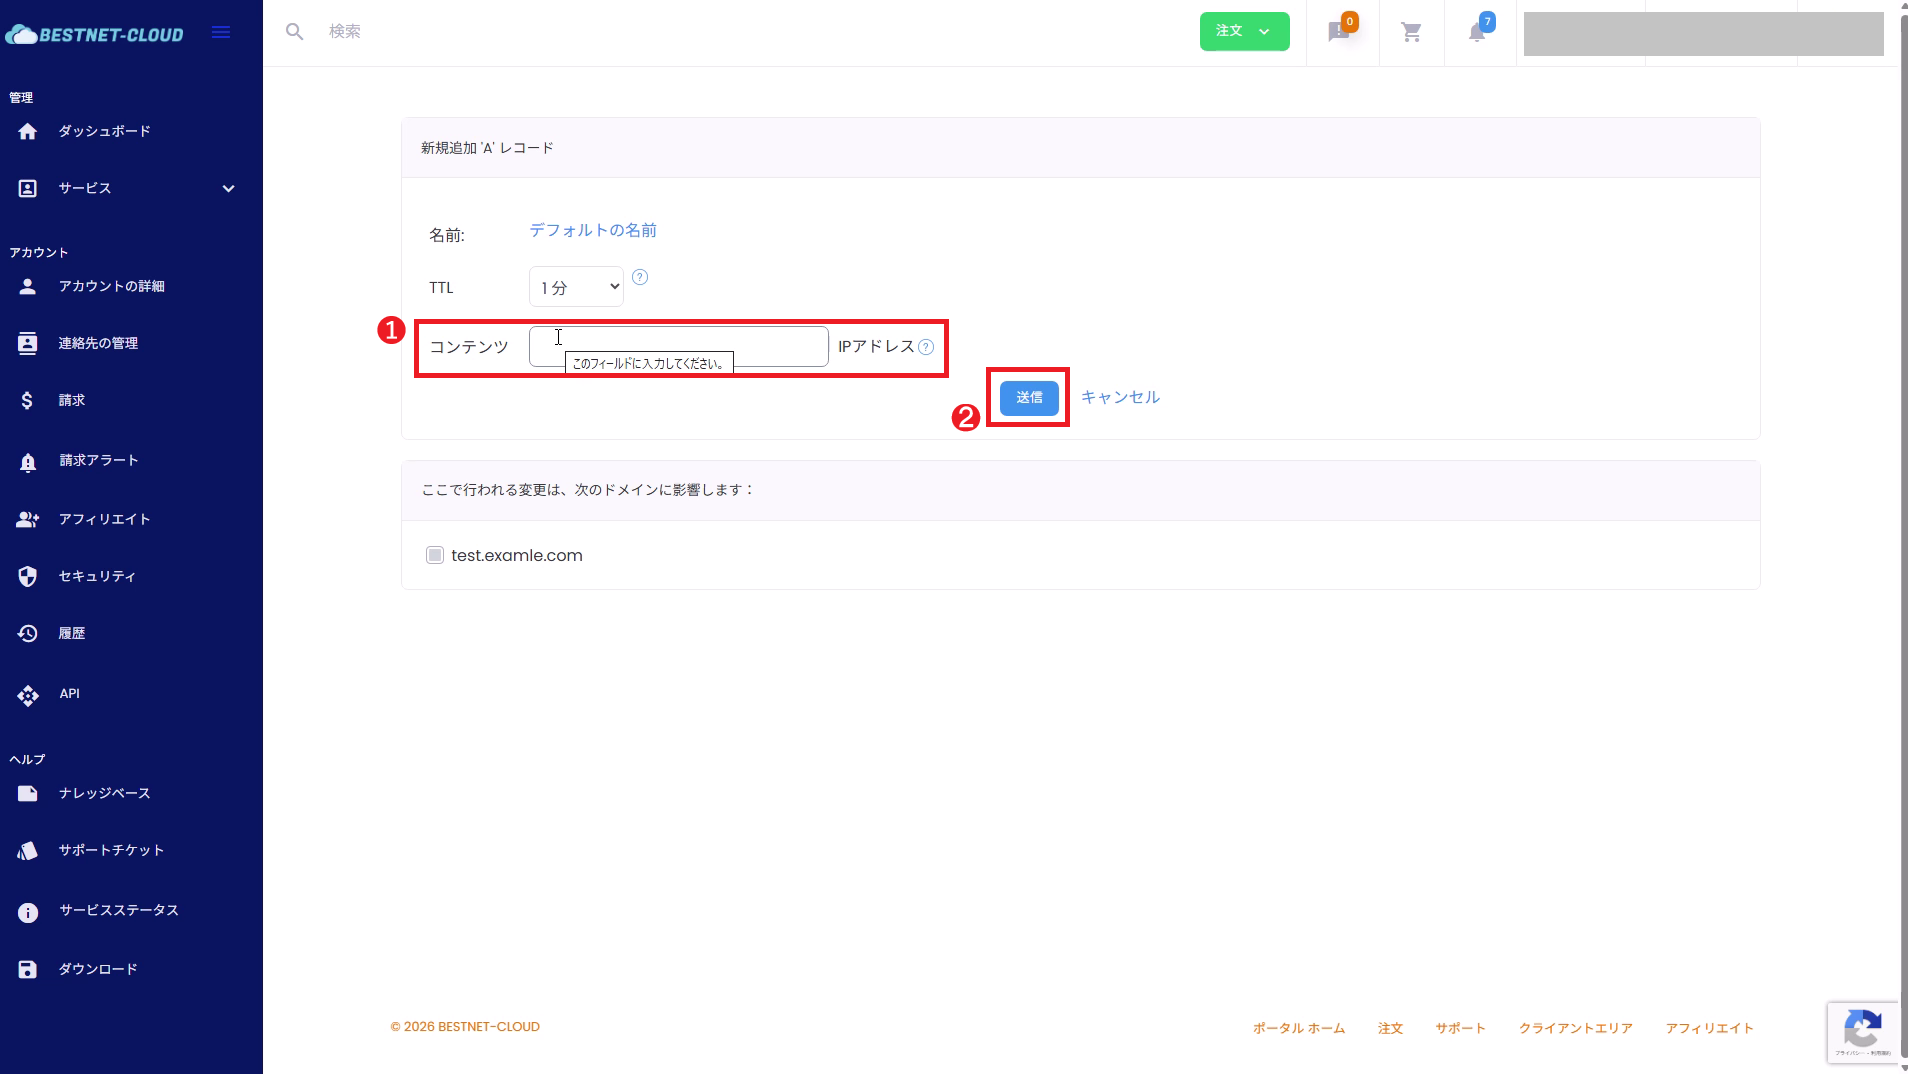
4-2. Enter the values and submit (example: an A record)
For an A record, you mainly enter the following fields.
- Name: Enter the subdomain portion (the domain name is shown to the right). To set it on the root (the domain itself), leave it blank; for the
wwwsubdomain, enterwww. - TTL: The cache retention time. The default is “1 minute,” and you can choose from 1 minute to 48 hours. A short to standard value is usually fine.
- Content: For A, enter the IPv4 address (for example,
192.0.2.10).
After entering the values, click Submit to reflect them in the list.
For MX and SRV, a priority field is added (the lower the number, the higher the priority). The input fields differ by type (see the “Record type quick reference” below).
5Edit and delete DNS records #
In the record list of the zone editor, click Edit on the target row to change its values, or Delete to remove that record. After editing, click Submit to save.
Deletions take effect immediately. In particular, removing MX / TXT (SPF, DKIM, DMARC, and various authentication records) / CAA and similar records can affect mail delivery or authentication. Before deleting, confirm that there are no other records with the same name and that the record is truly unnecessary.
Record type quick reference #
Here are the 13 record types you can add with this service, along with their main uses and a guide to the value to enter in “Content.”
| Type | Main use | Value to enter in Content | Notes |
|---|---|---|---|
A | Map a host name to an IPv4 address | IPv4 address (e.g. 192.0.2.10) | The most basic record |
AAAA | Map a host name to an IPv6 address | IPv6 address | Used when supporting IPv6 |
CNAME | Create an alias | The host name of the target | Cannot coexist with other records under the same name |
MX | Specify the mail delivery server | The host name of the mail server | Specify a priority (lower is higher priority) |
TXT | Arbitrary text information | A text string | Widely used for SPF / DKIM / DMARC / ownership verification |
SPF | Sender policy | v=spf1 ... | In practice, it is common to write this as a TXT record |
NS | Delegate a subdomain to another DNS | The host name of the name server | The zone’s own NS records are set automatically |
SRV | The location of a service (host / port) | Priority, weight, port, target | The name is in the form _service._proto |
PTR | Reverse lookup from an IP to a host name | Host name | Used in reverse-lookup zones |
CAA | Restrict which certificate authorities may issue certificates | Flag, tag, value (e.g. 0 issue "letsencrypt.org") | Guards against misissuance |
SSHFP | Publish the fingerprint of an SSH host key | Algorithm, type, fingerprint | Used to verify SSH connections |
NAPTR | Name rewriting rules | Order, flags, regular expression, etc. | Used with ENUM / SIP and similar |
RP | Information about the person responsible for the domain | Mail, referenced TXT | Operational contact notation |
- CNAME cannot coexist: You cannot set a CNAME together with A / MX / TXT or other records under the same name (you cannot use a CNAME on the root “@”).
- TTL and switching: Shortening the TTL (for example, to 300 seconds) before switching or making changes speeds up propagation. Return it to an appropriate value once you are done.
Name servers (NS) and delegation #
In the NS records of the zone editor, the four name servers we use to answer for that zone are shown (in the form dns1-4.cloudns.net).
To run a domain on our DNS, you must replace the name servers with these four on your domain registrar’s side.
If you have not switched the name servers, any records you add or edit on our DNS will not be seen from the outside. For detailed instructions and precautions on migrating a domain from an external registrar (including pre-checks to avoid interrupting mail), be sure to review the dedicated guide “Managing DNS records for external domains not under our management“.
Enabling DNSSEC #
DNSSEC is a mechanism that attaches a digital signature to DNS responses so that tampering can be detected. You can enable it per zone from Manage DNSSEC at the top of the zone editor.
- Open Manage DNSSEC in the zone editor. The current status (enabled / disabled) is displayed.
- Click Enable DNSSEC to generate the signing keys and the DS record (Delegation Signer).
- Register the displayed DS record with your domain registrar. This completes the chain of trust with the parent zone.
Simply enabling DNSSEC does not complete the protection. It only takes effect once you register the DS with your registrar. Conversely, when disabling DNSSEC or migrating to us, you need to remove / update the old DS on the registrar’s side (any inconsistency will cause name resolution to fail). If you are unsure how to proceed, please consult us via a support ticket before doing the work.
Failover / Monitoring #
From Failover/Monitoring at the top of the zone editor, you can set up health-checking of A records. Select the target record and configure the monitoring (health check) and the failover target, and the response IP can be switched automatically when the monitored target goes down.
- Open Failover/Monitoring and use Select record to choose the target A record.
- Configure the monitoring method (such as the check interval) and the backup IP to switch to in the event of a failure.
- Once you save, monitoring begins and failover occurs automatically when a failure is detected.
Failover is a feature for A records (IPv4). It is useful when you have a backup server in a redundant configuration.
DNS templates / cloning settings #
- DNS templates: Apply a prepared record template to selected domains all at once. This is handy when you use the same configuration across multiple domains.
- Clone DNS settings: Copy the record configuration of an existing zone to another domain. You can do the same thing with “Clone entries from another domain” when adding a new zone.
Verifying propagation #
After you add or change a record, check that it can be resolved correctly from the outside. Example commands (dig):
dig NS example.comdig A www.example.comdig MX example.comdig +trace example.comNote: Reflecting (propagating) name server changes or record changes can take time. It also depends on the TTL and cache conditions.
Troubleshooting #
- Check that the NS on your domain registrar’s side has been replaced with the zone’s NS records (
dnsX.cloudns.net). - The TTL / cache may still be in effect. Wait a while and check again.
- There may be multiple records with the same name (multiple A records, multiple TXT records, etc.).
- Check that a CNAME does not conflict with other records (it cannot coexist under the same name).
- Check that MX / SPF / DKIM / DMARC (TXT) are configured correctly.
- For DKIM, the TXT on the subdomain side, such as
selector._domainkey, is easy to miss.
- If you have enabled DNSSEC, check that there is no inconsistency with the DS record on the registrar’s side.
- You can use
dig +traceto see at which stage it is failing.
Related documentation and support #
- Managing DNS records for external domains not under our management (migration from an external registrar / NS delegation)
- DNS service – Upgrading / downgrading your plan
If you have any questions about the operations, please open a support ticket from the Client Area. Including the target domain name, the operation you performed, the issue you are experiencing, and the results of external checks (such as dig) will help us review it smoothly.


